HighPoint SSD7101A-1 Quick Installation Manual
4x m.2 port to pcie 3.0x16 nvme raid controller
Hide thumbs
Also See for SSD7101A-1:
- Quick installation manual (9 pages) ,
- Manual (32 pages) ,
- Installation manual (28 pages)
Advertisement
Quick Links
Advertisement

Subscribe to Our Youtube Channel
Related Manuals for HighPoint SSD7101A-1


Summary of Contents for HighPoint SSD7101A-1
- Page 1 SSD7101A-1 4x M.2 Port to PCIe 3.0x16 NVMe RAID Controller Quick Installation Guide V1.05...
- Page 2 Windows 11, 10 / Server 2022, 2019, 2016, 2012R2 / Microsoft • Hyper-V RHEL/Debian/Ubuntu/Fedora/Proxmox/Xenserver /Rocky Linux • (Linux kernel 3.10 and later) Arch Linux (Kernel 5.17.5 and above) • macOS 10.13.6 ~ macOS 13.x • SSD7101A-1 Kit Contents SSD7101A-1 Controller Card • Quick Installation Guide •...
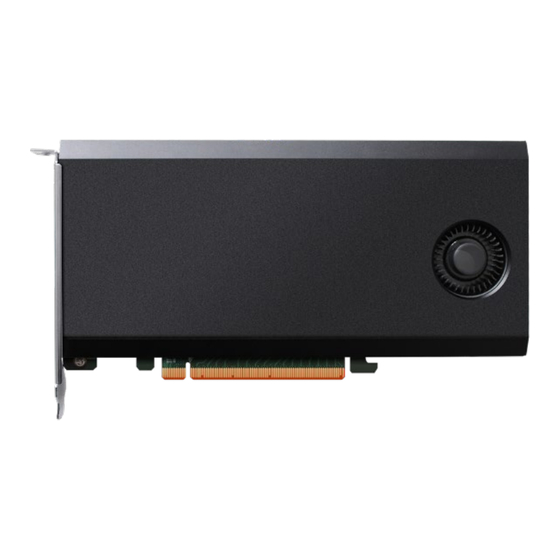
- Page 3 SSD7101A-1 Hardware Front View Aluminum casing with integrated thermal pad Intake for cooling fan Low-Noise cooling fan PCIe 3.0 x16 Host Interface...
-
Page 4: Hardware Installation
Hardware Installation: Step 1. On the rear of the SSD7101A-1, remove the six screws that secure the unit’s front panel to the PCB. After removing the screws, carefully remove the front panel from the SSD7101A-1. Step 2. After removing the casing, carefully turn it over to view the thermal pad. - Page 5 Step 3. These 4 screws are used to install the NVMe SSD’s. Step 4. The SSDs should be installed from top to bottom. Remove the top screw. Step 5. Gently insert the SSD into the slot.
- Page 6 Note: Please make sure all disks are clean before you insert them into the slot to avoid unexpected situations. Step 6. Refasten the screw to secure the SSD. Repeat Steps 4 to 6 to install the remaining SSDs. Note: Make sure the SSDs are carefully, but securely installed into each M.2 port.
- Page 7 Step 8. On the rear of the SSD7101A-1, refasten the 6 screws that were removed in step 1. Note Make sure the aluminum cover is properly aligned with the : controller board (PCB), and that it makes full contact with the thermal pad, before refastening it to the SSD7101A-1.
- Page 8 In addition, we recommend visiting the Software Downloads webpage for the latest drivers, management interfaces, and installation guides. For Software Downloads, Documentation and more information about this product, please visit the following website: https://www.highpoint-tech.com/gen3-nvme-m2-non-bootable FAQ & Troubleshooting: FAQ - HighPoint Technologies, Inc. (helpjuice.com)
-
Page 9: Customer Support
Customer Support If you encounter any problems while utilizing the SSD7101A-1, or have any questions about this or any other HighPoint Technologies, Inc. product, feel free to contact our Customer Support Department. Web Support: https://www.highpoint-tech.com/support-and-services HighPoint Technologies, Inc. websites: https://www.highpoint-tech.com...
Need help?
Do you have a question about the SSD7101A-1 and is the answer not in the manual?
Questions and answers