
Subscribe to Our Youtube Channel
Related Manuals for Federal Signal Corporation IS-I-IP15 Series


Summary of Contents for Federal Signal Corporation IS-I-IP15 Series
- Page 1 Informer15 Speaker Model IS-I-IP15 Series C Indoor/Outdoor Audible Speaker Signaling Standalone Manual 25500842 Rev. A0 0423 Printed in U.S.A. © Copyright 2023 Federal Signal Corporation...
- Page 2 A copy of this limited warranty can also be obtained by written request to Federal Signal Corporation, 2645 Federal Signal Drive, University Park, IL 60484, email to info@fedsig.com or call +1 708-534-3400.
-
Page 3: Table Of Contents
Contents Safety Messages..............................5 Safety Messages to Installers ..........................5 General Description ..............................7 Overview ................................7 Features ................................8 Ordering Information ............................9 Specifications ................................9 Installation ................................12 Flat Surface Mounting ............................12 Opening the Housing ............................13 Wiring the Network and Power Connections ....................14 PoE model (See Figure 2) ........................14 24 Vdc model (See Figure 3) ........................15 Wiring to the Controller Board ...........................15 Closing the Housing ............................17... - Page 4 9. Restoring Configuration to Factory Defaults ..................39 10. Logging Out of the Web Interface .......................41 Maintenance ................................42 Ordering Replacement Parts ..........................42 Getting Service ..............................42 Appendix A Standard DV Messages ........................43 Tables Table 1 Ordering Information ..........................9 Table 2 Electrical Requirements ..........................9 Table 3 Connectors and Jacks for the Controller Board ...................10 Table 4 Connectors and Jacks for the Amplifier Board ..................10 Table 5 Connectors and Jacks for the PoE Board (PoE models only) .............
-
Page 5: Safety Messages
Safety Messages Safety Messages It is important to follow all instructions shipped with this product. This device is to be installed by trained personnel who are thoroughly familiar with the country’s electric codes and will follow these guidelines as well as local codes and ordinances, including any state or local noise-control ordinances. - Page 6 Safety Messages • Never alter the unit in any manner. • The nameplate should NOT be obscured, as it contains cautionary and/or other information of importance to maintenance personnel. • After installation and completion of the initial system test, provide a copy of these instructions to all personnel responsible for the operation, periodic testing, and equipment maintenance.
-
Page 7: General Description
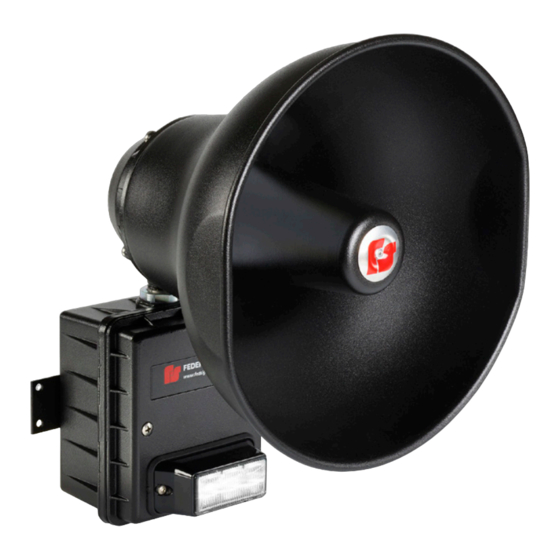
General Description General Description Overview The Informer15 Speaker is a 15-watt, IP-enabled indoor and outdoor speaker. Use the Informer15 as a warning and alert device with both audible and visual indicators. The audible capabilities include locally stored, high-quality, high-powered tones and voice messages. -
Page 8: Features
General Description Features The Informer15 has the following features; some features require using the Commander ® software system: • Outdoor or indoor IP-enabled speaker for audible and visual alerts • Out-of-the-box standard programming. Changes to the configuration can be made using our web interface found on www.fedsig.com. -
Page 9: Ordering Information
Specifications Ordering Information Table 1 Ordering Information Part Number Description IS-I-IP15-W 15 W PoE Speaker with white high-output LED IS-I-IP15-R 15 W PoE Speaker with red high-output LED IS-I-IP15-A 15 W PoE Speaker with amber high-output LED IS-I-IP15-B 15 W PoE Speaker with blue high-output LED IS-I-IP15-G 15 W PoE Speaker with green high-output LED IS-I-IP15-024W 15 W, 24 Vdc, Speaker with white high-output LED... -
Page 10: Table 3 Connectors And Jacks For The Controller Board
Specifications Table 3 Connectors and Jacks for the Controller Board LED Lamp Test Short pins 1 and 2 to turn on LED lamp Inputs 1 – ISO-GND 2 – Input #1 3 – ISO-GND 4 – Input #2 5 – ISO-GND 6 –... -
Page 11: Table 5 Connectors And Jacks For The Poe Board (Poe Models Only)
Specifications Table 5 Connectors and Jacks for the PoE Board (PoE models only) LAN/PoE communications interface LAN to Controller Board interface Power to Amplifier Table 6 Connectors for the 24 Vdc Power Board Power to Amplifier 24 Vdc Field wiring power input 24 Vdc Field wiring power output (in parallel with JP2) The following indicators are for troubleshooting purposes only. -
Page 12: Installation
Installation Installation Read and adhere to all safety warnings in this manual before installing the Informer15 Speaker. ELECTROCUTION HAZARD: Electrocution or severe personal injury can occur when making electrical connections, drilling holes, or lifting equipment. Therefore, experienced electricians per national and local electrical codes, acting under the direction of the installation crew safety foreman, should perform the installation. -
Page 13: Opening The Housing
Installation Route wires through the 1/2-inch threaded openings into the Informer15 Speaker unit per National and Local Electrical codes. 5. Reposition the speaker projector if necessary to obtain the desired sound coverage. Loosen the collar nut and move the projector to the desired position. See Figure 1. Figure 1 Depth and Height of Informer15 Speaker 10.0"... -
Page 14: Wiring The Network And Power Connections
Installation Wiring the Network and Power Connections PoE model (See Figure 2) To wire the PoE model, connect the Ethernet field wiring to J1 on the PoE board to provide both the IP communications and the PoE from the switch. The Informer15 Speaker has an eight-pin Ethernet port for connecting to the network. -
Page 15: Vdc Model (See Figure 3)
Installation 24 Vdc model (See Figure 3) To wire the 24 Vdc model: Connect the Ethernet field wiring to M1 on the Controller board. Connect the 24 Vdc power input to the JP2 on the 24 Vdc Power Input board. An additional 24 Vdc Informer15 speaker can be connected to JP3 if required. - Page 16 Installation 5 – ISO-GND 6 – Input #3 7 – ISO-GND 8 – Input #4 The visual indicator is wired to JP3 for activation and powering. If controlling an external device, use JP6 to control an external relay to control the device.
-
Page 17: Closing The Housing
Testing Closing the Housing To close the housing: Verify that the cover gasket is in the groove around the perimeter of the rear cover. If the front of the unit was removed, install the visual indicator cable and attach the cover to the Informer15 Speaker. -
Page 18: Programming
Programming Programming Automatic Volume Level Control The Informer speakers can be configured to automatically adjust the speaker’s output level when the local ambient noise level changes. Configure the maximum level and ambient attenuation settings on the Informer’s web page. Digital Inputs The Informers have digital inputs that can be activated using a dry contact closure. -
Page 19: Function Control Commands
Programming NOTE: There are over 160 standard messages included on the SD card. See “Appendix A Standard DV Messages” on page 43 for a complete list. Invalid WAV File Control Commands Examples of illegal WAV file Control Commands. Table 11 Examples of Illegal WAV Files Invalid WAV Files Control Commands... -
Page 20: Configuring The Network Interface
Programming 1. Configuring the Network Interface Before using an Informer on your network, a System Administrator must perform configurations. The System Administrator must be familiar with IP network equipment, this manual, and optionally the Commander Software Reference Manual. Proper configuration settings are required for the network to be able to reliably communicate with the device and create a redundant, fail-safe network architecture for your system. - Page 21 Programming The Login window displays. Enter the Username: admin (or preconfigured Username) 5. Enter the Password: fedsig (or preconfigured Password) NOTE: The password is case sensitive. 6. Click OK. The Home page displays. The Home page displays a summary of the current configuration settings for the RTU. The Navigation Menu (blue hyperlinks on the left) is used to access other System Management web pages.
- Page 22 Programming NOTE: It may take up to 1 minute to update all the fields on the Home page after applying power or resetting the RTU. Click the Home menu to refresh and update the page. Fields Description Model The RTU model of the device. This field will be blank for a few minutes following power up or master reset.
- Page 23 Programming To change the network settings: Click Network. The Network Settings page displays. Fields Description Obtain an When the device is rebooted, it obtains new network settings IP address automatically from the network DHCP server. automatically Use the Supplies static settings. You must enter an IP Address, Subnet Mask, following IP and Gateway.
-
Page 24: Configuring The Rtu Settings
Programming 5. Reboot the device for the IP address change to take effect. NOTE: If the Informer will be used autonomously without residing on an IP network, use the default settings network to configure the Informer. If the Informer is connected to a network, the factory default IP settings must be changed to work with the IP network that the product will be connected to. - Page 25 Programming To change the configure the RTU Settings of the Informer: Click RTU Settings. The RTU Settings page displays. Signaling Standalone Manual Federal Signal www.fedsig.com...
- Page 26 Programming Fields Description General RTU Number The RTU’s assigned identity. All devices in the system must have a unique RTU Number. The number must be a positive integer. Description Use this 48-character text field to describe the RTU. This can be the physical address of the site or any other text string.
- Page 27 Programming Fields Description Ambient Use to set the default Ambient Attenuation Threshold. The selected Attenuation level applies to SIP audio and all other functions unless overridden by Commander . The sound level will start attenuating when the ambient ® SPL drops below this threshold. SmartMsg Enable Check to enable the SmartMsg interface.
- Page 28 Programming Fields Description Private Key The RTU’s assigned private key passphrase. Leave this field blank Passphrase if a private key certificate is not provided or does not require a passphrase. SSL Common The Common Name associated with the SIP Server’s SSL certificate. Name This field must be left blank if a CA certificate is not provided or if it is desired to not validate the server certificate.
- Page 29 Programming Fields Description Priority The Priority assigned to the digital input. For Momentary mode, an input of equal or higher priority interrupts an active Continuous mode input and stops and overrides currently active Momentary mode input. When multiple Continuous mode inputs area active with different priorities, the lower priority inputs are skipped until the higher priority inputs become inactive.
-
Page 30: Configuring The Multicast Zones
Programming 3. Configuring the Multicast Zones The Multicast Transmit Zone (siren audio) streams siren audio to a multicast IP Address. To configure it, enter a valid multicast IP Address and Port Number, and check the Enable box. The Multicast Transmit Zone (microphone audio) streams microphone audio to the multicast IP address when the speaker is not receiving a page, playing a WAV file or a tone. - Page 31 Programming Fields Description Priority Settings Lower numbered zones preempt Allows pages in a lower numbered zone to interrupt higher numbered zones a higher numbered zone. Individual calls preempt Allows individual calls to interrupt multicast pages. multicast zones Multicast Transmit Zone (siren All audio sources except incoming Multicast audio) Receive Zones are routed to the Multicast TX Zone.
- Page 32 Programming Fields Description Multicast Transmit Zone The Multicast Transmit Zone (microphone audio) (microphone audio) streams microphone audio to the multicast IP address when the speaker is not receiving a page, playing a WAV file, or playing a tone. This feature allows phones and other VoIP devices to listen to the background audio.
-
Page 33: Configuring Security
Programming 4. Configuring Security Configure up to four IP address filters to limit access to incoming SIP calls. If one or more filters are enabled, the source IP address of the caller must be within one of the enabled filter ranges, or the call is rejected. When using a SIP server, the source IP address is the SIP server or proxy server. -
Page 34: Configuring The User Setup
Programming 5. Configuring the User Setup User Setup allows Full Admin privileged users to create users, create passwords, and assign security privileges. You cannot delete the Admin user or change the security privilege for the Admin user. You can change the Admin user’s username and password. To create users and enable the factory support user: 1. - Page 35 Programming Fields Description Username Enter the name of the user (case sensitive). Password Enter the user's password (case sensitive). Password Enter the user's password again. The Password Confirm must match Confirm the Password. Privileges In the Privilege list, select one of the following: •...
-
Page 36: Uploading Certificates
Programming 6. Uploading Certificates Use the Certificates page to upload certificate files to support secure SIP TLS communication. Certificate files are optional, and if provided, allow for CA certificate validation. File type Filename CA certificate ca-cert.pem Device SSL certificate cert.pem Device private key key.pem To upload a certificate file:... -
Page 37: Uploading Firmware
Programming 7. Uploading Firmware Use the Upload Firmware page to load a new operating system into the Digi Ethernet ® module. The Home page displays the current version of the firmware. To upload new firmware: Click Upload Firmware. The Upload Firmware page displays. Fields Description Choose File... -
Page 38: Rebooting Device And Loading Configuration Settings
Programming 8. Rebooting Device and Loading Configuration Settings Use the Reboot page to reboot the device and load new configuration settings. To reboot the device and load new configuration settings: Click Reboot. The Reboot page displays. Click the Reboot button to reboot the device and load new configuration settings. The login prompt displays within 20 seconds after the reboot. -
Page 39: Restoring Configuration To Factory Defaults
Programming 9. Restoring Configuration to Factory Defaults You can restore the factory default settings with or without restoring the network parameters. Default Settings RTU Number: 1 Description: my description SmartMsg disabled Modbus disabled Smartmsg Server: 10.10.10.10 IP Address: 10.10.10.1 Subnet Mask: 255.255.0.0 Default Gateway: 10.10.10.10 Primary/Secondary DNS: 0.0.0.0/0.0.0.0 Admin user name: admin... - Page 40 Programming Click Apply to restore your settings to the factory defaults. Reboot the device for the changes to take effect. If the configuration details are lost or changed incorrectly and it becomes necessary to restore the Informer to factory default settings, perform a Power-On Factory Default procedure.
-
Page 41: Logging Out Of The Web Interface
Programming Using Factory Default Jumper To restore the configuration to the factory default using the factory default jumper: Apply power to the Informer for at least 60 seconds to allow it to boot. Short JP11 on the control board for 10 seconds, and then remove the short. Wait 60 seconds for the Informer to reboot with the factory default settings. -
Page 42: Maintenance
Maintenance Maintenance Failure to follow all safety precautions and instructions may result in property damage, serious injury, or death to you or others. • Read and understand all instructions before performing maintenance on this unit. • To reduce electrical shock risk, do not perform maintenance or service on this unit when circuits are energized. -
Page 43: Appendix A Standard Dv Messages
Appendix A Standard DV Messages Appendix A Standard DV Messages Table 13 Standard DV Messages FWS Name Customer Name for Description Notes FWS-13955 TM1 (5 sec) Wail-Conventional Siren 560-1055 Hz FWS-13956 TM2 (5 sec) Yelp-Rapid Siren 560-1055 Hz FWS-13957 TM3 (5 sec) High-Low-Alternating High and Low 561 Hz and 760 Hz FWS-13958 TM4... - Page 44 Appendix A Standard DV Messages FWS Name Customer Name for Description Notes FWS-13984 TM30 (5 sec) Attention-Extremely Rapid Siren-Multiple Frequency FWS-13985 TM31 (5 sec) Multi-Tone-Extremely Rapid Siren- Multiple Frequency FWS-13986 TM32 (5 sec) Caution-Extremely Rapid Siren-Multiple Frequency FWS-13987 Three 1 kHz tones Three 1 kHz tones Pre-Announcement Pre-Announcement FWS-13988 Wobbulator-3 times...
- Page 45 Appendix A Standard DV Messages FWS Name Customer Name for Description Notes FWS-14010 Severe Weather- “Attention. A severe weather warning has been Stay away from issued; proceed immediately to the interior of the Windows building, away from windows and entrances.” Tornado FWS-14011 Tornado Warning- “This is a tornado warning.
- Page 46 Appendix A Standard DV Messages FWS Name Customer Name for Description Notes FWS-14024 Armed Intruder on “Attention: An armed intruder has been seen on Campus campus. Shelter in place immediately.” FWS-14025 Gunshots Reported “Attention: Gunshots reported on campus. on Campus Shelter in place until further notice.
- Page 47 Appendix A Standard DV Messages FWS Name Customer Name for Description Notes FWS-14040 Evacuate-Higher “Attention: Evacuate, Evacuate, Evacuate, Move Ground to high ground immediately. Tune to your local radio station for details.” FWS-14041 Mandatory “Warning. A mandatory evacuation has Evacuation been issued effective immediately.
- Page 48 Appendix A Standard DV Messages FWS Name Customer Name for Description Notes FWS-14057 Test “This is a test of the public warning system. This is only a test. If this had been an actual emergency, additional instructions would be broadcast. This is only a test.” FWS-14058 Test “Your attention please: This is a test.
- Page 49 Appendix A Standard DV Messages FWS Name Customer Name for Description Notes FWS-14089 Reveille “Reveille” FWS-14090 Slow Retreat Bugle “Slow Retreat Bugle Call” Call FWS-14091 Tatoo “Tatoo” FWS-14092 To the Colors “To the Colors” FWS-14093 Evening Slow Colors “Evening Slow Colors” PAGASYS GEN II FILES FWS-14094 800Hz 1 sec on 1 800 Hz 1 sec on 1 sec off...
-
Page 50: Table 14 Utm Tones
Appendix A Standard DV Messages FWS Name Customer Name for Description Notes FWS-14117 Process Classified Process Classified Additions FWS-2599 Test End “This has been a test of the emergency warning system. This was only a test.” Table 14 UTM Tones Additions FWS Name Customers name... - Page 51 Appendix A Standard DV Messages FWS Name Customers name Description Notes for DV FWS-19267 TM27 (180 sec) Euro-Sweep-Sweep Tone 1163 - 397Hz FWS-19268 TM28 (180 sec) Ringer-Continuous Ringing Tone 560Hz and 326Hz FWS-19269 TM29 (180 sec) Buzzer-Buzzer Tone 1318Hz and 760Hz FWS-19270 TM30...
- Page 52 2645 Federal Signal Drive University Park, Illinois 60484 www.fedsig.com Customer Support 1-800-344-4634 • +1-708-534-4756 Technical Support 1-800-755-7621 • +1-708-587-3587...
Need help?
Do you have a question about the IS-I-IP15 Series and is the answer not in the manual?
Questions and answers