Advertisement
Quick Links
Advertisement

Subscribe to Our Youtube Channel
Related Manuals for NATHAN JAMES Jacklyn 67201


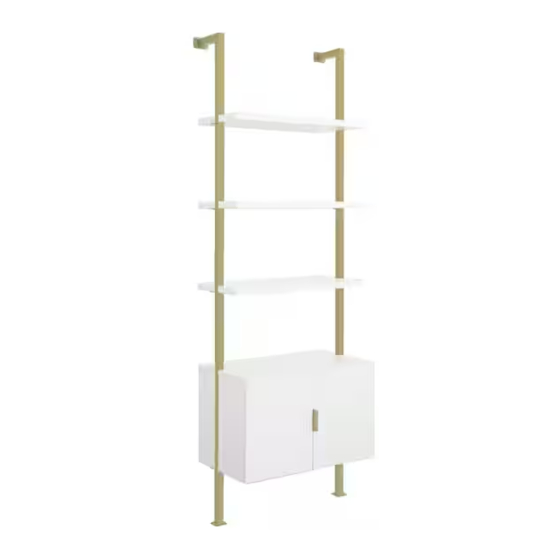
Summary of Contents for NATHAN JAMES Jacklyn 67201
- Page 1 Let’s build the Jacklyn Bookcase SKU 67201 Scan me! Free Lifetime Warranty 23-0217...
- Page 2 Ok, let’s What’s included get rolling Description Top Frame Support (with wall mount plate) This should be easy, just follow Bottom Frame Support our instructions and you will be back to Netflix in no time. Open Shelf Estimated time for assembly Left Back Side Panel 75:00 Left Front Side Panel...
- Page 3 The goods IMPORTANT 1. Do not tighten bolts / screws completely until all bolts / screws are lined up and inserted into holes. 2. Do not over tighten screws and bolts to avoid stripping.
- Page 4 What’s included Description M6*15mm Bolt Handle M6*30mm Cam Bolt 15*9.5mm Cam Lock M4*40mm Screw M4*12mm Screw M4.2*32mm Screw M6*30mm Non-Drywall Anchors 8*30mm Wooden Dowel M4*14mm Screw Hinge Allen Key Shelf Pin Drywall Anchor M4.2*50mm Screw...
- Page 5 Step 1 It’s as easy as it looks! Screw four M6*30mm Cam Bolts (3) into the allotted slots on the Top Panel (I). Step 2 Next, insert the 8*30mm Wooden Dowels (9) into the edges of the Left Back Side Panel (D), Left Front Side Panel (E), Right Back Side Panel (F), and Right Front Side Panel (G).
- Page 6 Step 3 Next, slide the Left Back Side Panel (D), Left Front Side Panel (E), Right Back Side Panel (F), and Right Front Side Panel (G) into place on the Top Panel (I) so the cam bolts align with the holes.. Once in place, insert the 15*9.5mm Cam Locks (4) into the holes and twist to lock into place.
- Page 7 Step 5 Now assemble the Top Frame Supports (A) to the Bottom Frame Supports (B) by sliding them together and using the M6*15mm Bolts (1) to secure in place. Step 6 You’re over halfway there! And doing beautifully, we might add. Now it’s time to slide the assembled Frame Supports (A)(B) into the notches in the cabinet and Open Shelves (C).
- Page 8 Step 7 Next, grab a friend and gently place the bookcase into an upright position.
- Page 9 Step 8 Now it’s time to secure to secure this puppy to the wall! If your walls are drywall, use the Drywall Anchors (14) and the M4.2*50mm Screws (15) to secure the bookcase to the wall. If your walls aren’t drywall, use the Non- Drywall Anchors (8) and the M4.2*32mm Screws (7) to secure the bookcase to the wall.
- Page 10 Step 8 (cont.) Non-drywall application Mark it Choose your desired location on the wall, have a friend hold the bookcase in place, and use a pencil to mark where the anchors will go. 1/4” Drill bit Move the bookcase to the side and, following the marks you just made, use a 1/4”...
- Page 11 Step 8 (cont.) Drywall application Mark it Choose your desired location on the wall, have a friend hold the bookcase in place, and use a pencil to mark where the anchors will go. 5/16” Drill bit Move the bookcase to the side and, following the marks you just made, use a 5/16”...
- Page 12 Step 8 (cont.) How to use drywall anchors...
- Page 13 Step 9 You’re almost done! We made this step easy, don’t worry. Insert the Shelf Pins (13) into the desired holes in the cabinet. Once inserted, slide the Shelf (K) into place. In order to fit the shelf inside the cabinet, you will need to tilt the shelf to angle it in properly.
- Page 14 Step 10 Now it’s time to assemble the doors. Place the Hinges (11) into the Door Panels (L). Secure in place using the M4*14mm Screws (10). Repeat this same process on the inside of the cabinet where the doors attach. Then, secure the Handles (2) in place using the M4*12mm Screws (6).
- Page 15 Is your cabinet door looking crooked or unevenly spaced? Then you’ve come to the right place. Follow the illustrations below to get your cabinet door aligned and ready for action. If your door is too low or too high… Loosen the height screws, then move the door up or down to make it level. If the space between your doors is off…...
- Page 16 Step 11 To adjust the height of the cabinet shelf position, simply remove all of the metal pins on either side, move the pins to the desired hole height, and replace the shelf. And that’s it, your new bookcase is complete!
- Page 17 No heartburn, when we handle the return Give us a call 1-866-619-1004 or shoot us a message at help@nathanjames.com we will issue you a free replacement with zero hassle. Our way Their way Give us a call Re-package item Replacement Schedule pick up Track package Replacement...
-
Page 18: Proper Use
Any modifications will Nathan James and its parent companies cannot present the risk of creating significant safety issues which NJ will not be responsible for. be held legally responsible for any injuries or death resulted from failure to follow instructions or improper use of this product. - Page 19 If you are happy with your product, tell your friends and family about us or even better leave us a review online. Spreading the word gives us the opportunity to make more people happy and keep our prices low for your next purchase. Brooklyn Burdon Founder, Nathan James...
Need help?
Do you have a question about the Jacklyn 67201 and is the answer not in the manual?
Questions and answers