Advertisement
Quick Links
Advertisement

Related Manuals for NATHAN JAMES Theo 66501


Summary of Contents for NATHAN JAMES Theo 66501
- Page 1 Let’s build the Theo Bookcase SKU 66501 Scan me! Free Lifetime Warranty 23-0310...
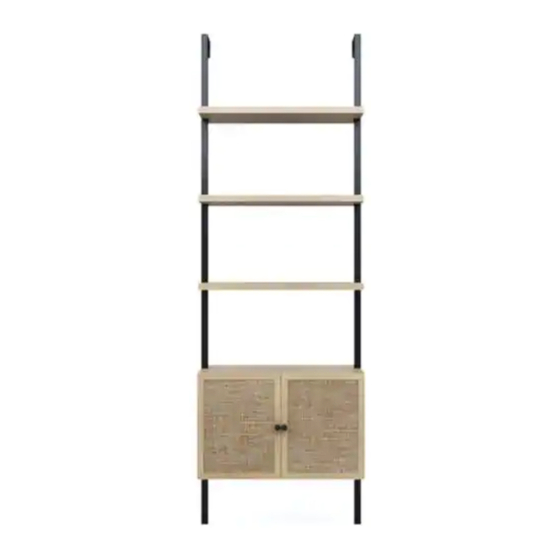
- Page 2 Ok, let’s What’s included get rolling Description Bookcase Frame Support (Top with Wall Mount) This should be easy, just follow our instructions and you will be Side Frame Base Support back to Netflix in no time. Open Shelf Estimated time for assembly 60:00 D Left Back Side Panel Left Front Side Panel...
- Page 3 The goods...
- Page 4 What’s included Description M6*15 mm Bolt Knob M6*30 mm Cam Bolt 15*9.5 mm Cam Lock M4*40 mm Screw M4*20 mm Bolt M4.2*32 mm Screw (for Non-drywall Anchor) M6*30 mm Non-drywall Anchor M8*30 mm Wooden Dowel M4*14 mm Screw Hinge Allen Key Metal Shelf Pin Drywall Anchor M4.2*50 mm Screw...
- Page 5 The goods IMPORTANT 1. Do not tighten bolts / screws completely until all bolts / screws are lined up and inserted into holes. 2. Do not over tighten screws and bolts to avoid stripping. 3. Please use hand tools to assemble this product. Do not use power tools.
- Page 6 Step 1 Let’s get this thing fired up! Screw the Cam Bolts (3) into the Top Panel (I). Step 2 Now insert the Wooden Dowels (9) into the sides of the Left Back Side Panel (D), Left Front Side Panel (E), Right Back Side Panel (F), and Right Front Side Panel (G).
- Page 7 Step 3 Now let’s put those pieces together! Align the Left Side Panels (D)(E) and the Right Side Panels (F)(G) on top of the Top Panel (I). The Cam Bolts you inserted in the last step should align with the holes in the side panels.
- Page 8 Step 5 You’re halfway there! Screw both Bookcase Frame Supports (A) and Side Frame Base Supports (B) together using M6*15 mm Bolts (1). Step 6 Line up the bookcase Shelves (C) and the Side Supports (A)(B) and screw together using M6*15 mm Bolts (1).
- Page 9 Step 7 Grab a friend and have them help you lift the bookcase right side up! IMPORTANT TIP To prevent parts from breaking while placing the bookcase unit upright be sure to: 1) Have at least 2 people grab the bookcase on each side prior to lifting to an upright position.
- Page 10 Step 8 Ok, we will admit this is our least favorite step also. At one point, you may find this step tricky but it’s worth the 20 second meltdown—because everything will look SO clean at the end…you’ll forget all about the assembly! With that being said, it’s time to attach this baby to the wall! We’ll be using screws and anchors to secure it.
- Page 11 Step 8 (cont.) Non-drywall application Mark it Chose your desired location on the wall, have your friend hold the bookcase in place and use a pencil to mark where the anchors will go. 1/4” Drill bit Move bookcase to the side and following the marks you just made, with a 1/4”...
- Page 12 Step 8 (cont.) Drywall application Mark it Chose your desired location on the wall, have your friend hold the bookcase in place and use a pencil to mark where the anchors will go. 5/16” Drill bit Move bookcase to the side and following the marks you just made, with a 5/16”...
- Page 13 Step 8 (cont.) How to use drywall anchors 1. Drill hole with 5/16” bit 2. Pinch and insert 3. Begin tightening 4. Tighten to 100%...
- Page 14 Step 9 If you’re feeling faint, now’s the perfect time to grab a La Croix or drink of choice to get you through these last two steps. Attach the Hinges (11) to the Doors (L) with M4*14 mm Screws (10). Do this for both Doors (L).
- Page 15 Step 10 Attach the Doors (L) to the base of the cabinet by securing the Hinges (11) with M4*14 mm Screws (10). Finally, attach the Knobs (2) to the doors using M4*20 mm Bolts (6). This calls for pizza! You deserve it.
- Page 16 Is your cabinet door looking crooked or unevenly spaced? Then you’ve come to the right place. Follow the illustrations below to get your cabinet door aligned and ready for action. If your door is too low or too high… Loosen the height screws, then move the door up or down to make it level. If the space between your doors is off…...
- Page 17 Tip from one friend to another: If you want to adjust the height of the shelf position, remove all metal pins on either side and then install the metal pins after you adjust the height of the shelf.
- Page 18 No heartburn, when we handle the return Give us a call 1-866-619-1004 or shoot us a message at help@nathanjames.com we will issue you a free replacement with zero hassle. Our way Their way Give us a call Re-package item Replacement Schedule pick up Track package Replacement...
-
Page 19: Proper Use
Any modifications will Nathan James and its parent companies cannot present the risk of creating significant safety issues which NJ will not be responsible for. be held legally responsible for any injuries or death resulted from failure to follow instructions or improper use of this product. - Page 20 If you are happy with your product, tell your friends and family about us or even better leave us a review online. Spreading the word gives us the opportunity to make more people happy and keep our prices low for your next purchase. Brooklyn Burdon Founder, Nathan James...
Need help?
Do you have a question about the Theo 66501 and is the answer not in the manual?
Questions and answers