Renishaw LP2 Installation Manual
Probe system
Hide thumbs
Also See for LP2:
- Installation and user manual (39 pages) ,
- Installation and user manual (44 pages)
Table of Contents
Advertisement
Quick Links
Advertisement
Table of Contents

Subscribe to Our Youtube Channel
Related Manuals for Renishaw LP2


Summary of Contents for Renishaw LP2
- Page 1 Installation guide LP2 probe system www.renishaw.com/lp2 #renishaw...
- Page 2 Compliance information for this product is available by scanning the QR code or visiting www.renishaw.com/mtpdoc...
-
Page 3: Table Of Contents
Lathes (radio transmission) . . . . . . . . . . . . . . . . . . . . . . . . . . . . . . . . . . . . . . . . . . . . . . . . . . . . . . .3-6 www.renishaw.com/lp2... - Page 4 Recommended connection diagram for LP2 with MI 8-4 interface . . . . . . . . . . . . . . . . .
-
Page 5: Before You Begin
Renishaw office. Renishaw warrants its equipment and software for a limited period (as set out in the Standard Terms and Conditions), provided that they are installed and used exactly as defined in associated Renishaw documentation. -
Page 6: Patents
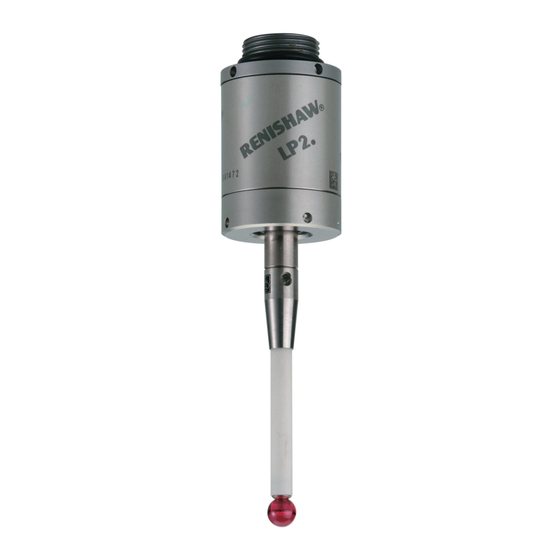
Intended use LP2 is a hard-wired probe that enables automated workpiece inspection and part set-up on CNC machine tools and grinding machines . LP2 is also used on some of the Renishaw modular probes such as RMP60M . LP2 probe system: Before you begin... -
Page 7: Safety
In all applications involving the use of machine tools, eye protection is recommended . The LP2 system must be installed by a competent person, observing relevant safety precautions . Before starting work, ensure that the machine tool is in a safe condition with the power switched OFF and the power supply to the HSI-C / HSI / MI 8-4 is disconnected . - Page 8 This page is intentionally left blank LP2 probe system: Before you begin...
-
Page 9: Lp2 Probe System Basics
LP2 probe system basics Introduction The LP2 is a compact and versatile probe for applications on CNC lathes and machining centres . A wide range of styli and accessories is available to provide custom installations . Principal applications Horizontal lathes Small enough to fit on a turret for part measuring, tool setting and broken tool detection when mounted in a suitable position . -
Page 10: Lp2 Probe Types
LP2HDD with LP2HDD Swarf Deflector There are four versions of the LP2 probe . Each version is best suited to particular applications: LP2 – For normal setting/inspection . The metal eyelid protects the diaphragm in a hot chip and •... -
Page 11: Lp2 Modular System
LP2 modular system Shank Hard-wired transmission FS3 probe socket FS2 probe FS1 probe Radio or Shank adaptor socket socket optical MA2 probe receiver holder M4 styli LP2H Stylus weak link LPE extension bar Transmission LP2DD modules MA 4 adaptor LP2HDD... -
Page 12: Lp2 Probe Moves
With a double touch sequence, the first move finds the surface quickly, then the probe is reversed to a position clear of the surface before making the second touch at a slower feedrate, thereby recording the surface position at a higher resolution . Start position LP2 probe system: LP2 basics... -
Page 13: System Delays
System delays are repeatable to less than 2 μs and are constant in each direction in which measurement is taken . Delays are automatically compensated for provided a calibration move is made in the same direction and at the same velocity as each measurement move . www.renishaw.com/lp2... -
Page 14: Specification
The maximum force applied will occur after the trigger point (overtravel) . The force value depends on related variables including measuring speed, machine deceleration and latency . These are the factory settings, manual adjustment of the LP2/LP2DD is possible, but not possible on LP2H/LP2HDD . NOTE: For stylus recommendations, refer to the Styli and accessories technical specifications (Renishaw part no . -
Page 15: Dimensions
Dimensions 20 (0 .79) LP2/LP2H 7 .5 (0 .30) 12 .5° 12 .5° M4 stylus 6 .5 (0 .26) 40 .8 (1 .61) 20 (0 .79) 4 .8 (0 .19) LP2DD/LP2HDD 15° 15° M4 stylus 6 .5 (0 .26) 40 .8 (1 .61) Dimensions in mm (in) www.renishaw.com/lp2... - Page 16 This page is intentionally left blank LP2 probe system: LP2 basics...
-
Page 17: System Installation
System installation Typical LP2 probe systems Machining centres (radio transmission) CNC machine spindle Mounting bracket RMI-Q or RMI-QE receiver Typical radio module CNC machine controller LP2 probe Cable Stylus Workpiece www.renishaw.com/lp2... - Page 18 Machining centres (optical transmission) when using an OMI-2/ OMI-2T/OMI-2H or an OMM-2 with an OSI/OSI-D interface CNC machine spindle Mounting bracket Typical optical module OMI-2/OMI-2T/ OMI-2H OMM-2 LP2 probe Stylus OSI / OSI-D Interface unit Workpiece CNC machine CNC machine controller controller LP2 probe system: System installation...
-
Page 19: Machining Centres (Optical Transmission) When Using An Omm-2C
Machining centres (optical transmission) when using an OMM-2C with an OSI/OSI-D interface Cable CNC machine spindle OSI / OSI-D Interface unit OMM-2C CNC machine controller Typical optical module LP2 probe Stylus Workpiece www.renishaw.com/lp2... -
Page 20: Machining Centres (Hard-Wired Transmission)
WARNING: The probe should not be rotated spun) by the machine when the curly cable is connected . If this is allowed to occur, then persons may be injured by flying cable or entanglement. LP2 probe system: System installation... -
Page 21: Machining Centres (Hard-Wired Transmission - Tool Setting)
Machining centres (hard-wired transmission - tool setting) CNC machine controller Square tip stylus HSI (shown), HSI-C or MI 8-4 Workpiece Cable interface unit LP2 probe Cable www.renishaw.com/lp2... -
Page 22: Lathes (Radio Transmission)
Lathes (radio transmission) CNC machine controller RMI-Q or RMI-QE receiver Cable Typical radio module Workpiece Stylus probe LP2 probe system: System installation... -
Page 23: Lathes (Optical Transmission)
Lathes (optical transmission) CNC machine OSI or OSI-D controller interface unit Mounting bracket Cable OMM-2 Cable OMI-2/OMI-2T/OMI-2H Typical optical module Workpiece Stylus probe www.renishaw.com/lp2... -
Page 24: Lathes (Hard-Wired Transmission)
Lathes (hard-wired transmission) CNC machine controller HSI (shown), HSI-C or MI 8-4 interface unit Cable Workpiece Cable Stylus probe LP2 probe system: System installation... -
Page 25: Recommended Connection Diagram For Lp2 With Hsi-C Interface
Closed NOTE: When the SSR output is connected as normally open (NO), the LP2 probe will remain in the non-triggered (seated) state if the power supply is interrupted or if the probe is damaged . When connecting the LP2 probe to the HSI-C interface, use the connection labelled STANDARD PROBE . -
Page 26: Recommended Connection Diagram For Lp2 With Hsi Interface
Closed NOTE: When the SSR output is connected as normally open (NO), the LP2 probe will remain in the non-triggered (seated) state if the power supply is interrupted or if the probe is damaged . When connecting the LP2 probe to the HSI interface, use the connection labelled STANDARD PROBE . -
Page 27: Recommended Connection Diagram For Lp2 With Mi 8-4 Interface
Controller protective earth Can also be referred to as ‘PE starpoint’ or ‘earthplate’ NOTE: For more information regarding these connections, see the MI 8-4 interface unit installation and user’s guide (Renishaw part no . H-2000-5008) . www.renishaw.com/lp2 3-11... -
Page 28: Stylus Spring Force Adjustment
NOTE: LP2 and LP2DD are adjustable, LP2H and LP2HDD are not adjustable . Stylus trigger force is determined by the internal spring force set by Renishaw . The user should only adjust the spring force in special circumstances, for example, when excessive machine vibration causes faulty readings or there is insufficient force to support the stylus weight. -
Page 29: Stylus On-Centre Adjustment With Probe Holders And Sockets
X axis (lathes) . Coarse alignment is obtained by adjusting the stylus tip . The optional FS1 socket provides ±4° fine rotational adjustment. 4° 4° FS3 holder Extension 4° probe 4° Stylus Coarse adjustment socket 4° 4° Fine adjustment www.renishaw.com/lp2 3-13... -
Page 30: Stylus On-Centre Adjustment With Shank Adaptor Or Shank
MA2 holding screws and four on-centre adjusting screws . 2 .0 mm A/F × 4 0 .8 Nm – 1 .1 Nm (0 .6 lbf .ft – 0 .8 lbf .ft) MA2 probe holder probe MA2 probe holder probe 3-14 LP2 probe system: System installation... -
Page 31: Screw Torque Values Nm (Lbf. Ft)
(1 .3 lbf .ft – 1 .6 lbf .ft) LP2 probe M16 thread 10 Nm–12 Nm Extension (7.4 lbf.ft–8.9 lbf.ft) maximum 20 Nm (14 .8lbf .ft) MA2 probe holder NOTE: For stylus recommendations, see the Styli and accessories technical specifications (Renishaw part no . H-1000-3200) . www.renishaw.com/lp2 3-15... -
Page 32: Calibrating The Lp2
• when a probe system is to be used for the first time; • when the LP2 operating configuration is changed; • when a new stylus is fitted to the probe; •... -
Page 33: Calibrating The Probe Length
If a rotary axis on the machine rotates the workpiece into the stylus then different diameter workpieces will touch the stylus at different linear speeds . The measurement speed is therefore likely to be different from the calibration speed and compensation will have to be carried out to account for the different speeds . www.renishaw.com/lp2 3-17... -
Page 34: Software Requirements
. Does your software compensate for probe triggering characteristics in all measuring directions? Does the software automatically adjust the program co-ordinate system to the relevant set-up feature on the component, for job set-up purposes? 3-18 LP2 probe system: System installation... -
Page 35: Maintenance
Service You may undertake the maintenance routines described in these instructions . Further dismantling and repair of Renishaw equipment is a highly specialised operation, which must be carried out at an authorised Renishaw Service Centre . Equipment requiring repair, overhaul or attention under warranty should be returned to your supplier . -
Page 36: Cleaning The Probe Front Seal
Dirt may accumulate in the cavity underneath the outer diaphragm . (Outer diaphragm replacement kits are available .) LP2 – LP2H – LP2DD – LP2HDD Once a month, remove the stylus front cap (the C spanner is provided for easy cap removal) then remove all the residue with a low-pressure jet of coolant . -
Page 37: Fault-Finding
Poor re-arming (the Spring force too low. Adjust spring force. probe is armed Inner diaphragm pierced or Return to supplier for repair. when the stylus damaged. mounting is seated, the electrical circuit is complete and the interface LED is lit). www.renishaw.com/lp2... - Page 38 This page is intentionally left blank LP2 probe system: Fault-finding...
-
Page 39: Parts List
Parts list Item Part number Description A-2063-6098 LP2 probe complete with two C spanners and TK1 tools . LP2H A-2064-0002 LP2H probe complete with two C spanners and TK1 tools . MA2 probe holder A-2063-7868 MA2 probe holder, complete with holding screws . - Page 40 . Styli H-1000-3200 Technical specifications: Styli and accessories – or visit our Online store at www.renishaw.com/shop . Probe software H-2000-2298 Data sheet: Probe software for machine tools – programs and features . LP2 probe system: Parts list...
- Page 41 © 1989 –2023 Renishaw plc . All rights reserved . This document may not be copied or reproduced in whole or in part, or transferred to any other media or language by any means, without the prior written permission of Renishaw .
Need help?
Do you have a question about the LP2 and is the answer not in the manual?
Questions and answers