Table of Contents
Advertisement
Quick Links
Advertisement
Table of Contents

Subscribe to Our Youtube Channel
Related Manuals for dynasonics 901 Series


Summary of Contents for dynasonics 901 Series
- Page 2 QUICK-START OPERATING INSTRUCTIONS This manual contains detailed operating instructions for all as- pects of the D901/M instrument. The following condensed in- structions are provided to assist the operator in getting the in- strument started up and running as quickly as possible. This pertains to basic operation only.
- Page 3 QUICK-START OPERATING INSTRUCTIONS are facing the same direction. See Figure 2. Figure 2 Transducer Direction E. Route the transducer cable back to the transmitter, avoiding locations near high voltage supply wires. Connections 3. TRANSDUCER CONNECTION A. Do not attempt to add additional cable to the transduc- ers.
-
Page 4: Instrument Startup And Configuration
TABLE OF CONTENTS Pages Quick-Start Operating Instructions Part 1 - Introduction Introduction General Applications Model Matrix Product Specifications Part 2 - Installation Bench Test Procedure Installation 10-12 Transducer Mounting Locations Pipe Preparation 13-15 Transducer Mounting 16-17 Transmitter Mounting 17-19 Electrical Connections Part 3 - Startup and Instrument Startup and Configuration Configuration... -
Page 5: Table Of Contents
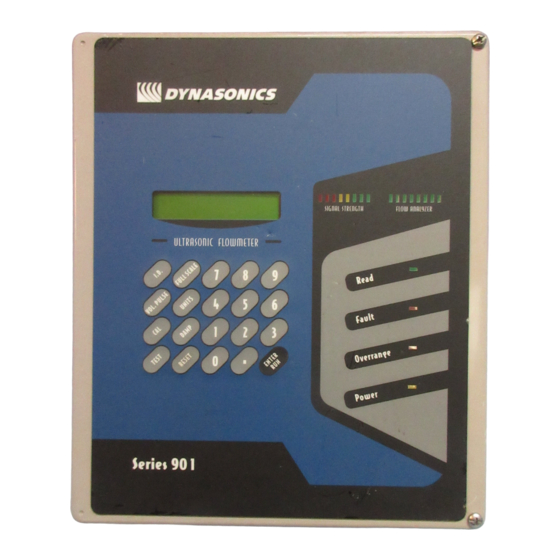
TABLE OF CONTENTS Pages Instrument Startup and Configuration CAL. Constant Input Display Damping System Damping TEST Diagnostic Key System and Totalizer RESET Totalizer Reset Part 4 - Troubleshooting 29-30 Trouble Shooting Guide Appendices Face Plate Drawing Intrinsically Safe Installation High-Temperature Transducers Clean Liquid Installation Guide Multiple Unit Cross-talk Pipe Dimension Chart: Cast Iron... - Page 6 PART 1 - INTRODUCTION The D901/M ultrasonic flow meter is designed to measure General the fluid velocity of liquid within closed conduit. The trans- ducers are a non-contacting, clamp-on type, which will provide benefits of non-fouling operation and ease of in- stallation.
- Page 7 PART 1 - INTRODUCTION User Safety The D901/M employs modular construction and provides electrical safety for the operator. The display face con- tains voltages no greater than 9 Vdc and the metal work is electrically connected to Earth Ground. The display face swings open to allow access to user connections.
- Page 8 PART 1 - SPECIFICATIONS Transmitter - -22 to 122°F [ - 30 to 50 °C], Ambient Conditions 0-95% relative humidity, non-condensing. Transducers - - 40° to 180°F [ -40° to 82°C] Standard. Optional: - 40° to 400°F [ - 40° to 204°C] 2 line x 20 character alphanumeric LCD, Display...
- Page 9 NEMA 4X, [IP-65] Fiberglass w/SS hardware. 12H x 10W x 4D inches Size [305H x 254W x 127D mm] Mounting Wall mount Optional weather visor; Dynasonics P.N. Weather Shield D003-899-001 15 lbs. [ 6.8 Kg ] Net Weight Rev. 03/98 D901/M...
- Page 10 PART 2 - PRE-INSTALLATION CHECKOUT After unpacking, it is recommended to save the shipping Unpacking carton and packing materials in case the instrument is stored or re-shipped. Inspect the equipment and carton for damage. If there is evidence of shipping damage, notify the carrier immediately.
- Page 11 PART 2 - TRANSDUCER INSTALLATION piezo electric crystals for transmitting and receiving ultra- Transducer Mounting sonic sound energy through the pipe wall. Considerations The transducers can be mounted in three different con- figurations. The selection of the proper configuration is dependent on the liquid to be measured characteristics.
- Page 12 PART 2 - TRANSDUCER INSTALLATION Table 1 The D901/M system will provide repeatable measurements on piping systems that do not meet these requirements, but the accuracy of these Liquid readings may be influenced to various degrees. t h a t contains greater than 10,000 PPM [1%] of 30 micron or Figure 4 Rev.
- Page 13 PART 2 - TRANSDUCER INSTALLATION greater suspended solids or aeration. CASE 2: The mounting location and straight pipe requirements for CASE 2 liquid characteristics are the same as those de- scribe in CASE 1. The difference will be in the location of the transducers on the pipe.
- Page 14 If the installation is temporary (less than a few days), Dynasonics recommends utilizing a silicone- based grease such as Dow Corning 111. The grease chosen must be rated to not flow at the temperature of the pipe.
- Page 15 PART 2 - TRANSDUCER INSTALLATION PROCEDURE: 1. Select the proper number of transducer straps to allow a complete strap to go around the circumference of the pipe. See Table 2 - The straps can be connected together to make a continuous length. 2.
- Page 16 PART 2 - TRANSDUCER INSTALLATION the same direction for proper operation. See Figure 7. NOTE: Large pipes may require two people for this procedure. 6. Tighten the strap tight enough to hold the transducers in place, but not so tight that all of the couplant squeezes out of the gap between the transducer face and pipe.
- Page 17 D901/M system. If this is not possible, do not attempt to add additional cable to the transducer. Contact the Dynasonics fac- tory to coordinate an exchange for the proper cable length. Transducer cables that are up to 300 feet [90 meters] are available.
- Page 18 ♦ Within ambient temperature limits - 22 to 122°F [30 to 50°C] ♦ Out of direct sunlight. A sun and weather shield is available from Dynasonics. P.N. D003-899-001. Direct sunlight may increase temperatures within the trans- mitter to above maximum limit.
- Page 19 Do not attempt to add additional cable to the factory sup- plied transducer cable. If additional cable is required, contact the Dynasonics factory to arrange for an ex- change transducer with the appropriate length of cable. Cables to 300 feet [ 90 meters ] are available.
- Page 20 PART 2 - ELECTRICAL INSTALLATION put. If the 0-1mA output has been installed on the D901/M, the connections are available on the screw terminal block in the transmitter. Connect a load of not more than 4 K ohms to the terminals. Adjust control R20 [1 mA] to fine tune the output to match the load impedance.
- Page 21 PART 3 - STARTUP AND CONFIGURATION Note: The D901/M flow meter system requires a full pipe Before Starting the of liquid before a successful startup can be completed. Instrument Do not attempt to make adjustments or change configura- tions until a full pipe is verified. Instrument Startup Note: If Dow 732 RTV was utilized to couple the trans- ducers to the pipe, the adhesive must fully cure before...
- Page 22 ENTRY Mode: This mode is used to view or change the configuration of the flow meter. When the D901/M ships from the Dynasonics factory, it contains the following De- fault configuration: Each of these parameters may be viewed and/or modified...
- Page 23 Min * Pipe sizes less than 1 inch [ 25 mm ] require a Small Pipe Transducer. Dynasonics model T-900-SP. Note: If a decimal value of less than 1 is to be entered, enter 0 . X X X. The zero must precede the decimal Rev.
- Page 24 PART 3 - STARTUP AND CONFIGURATION value. Note: If an entered value is out of the acceptable range of the instrument, an UNDER! or OVER! indication will be displayed. The meter will not allow any other entries to be made until a legitimate value is entered. The FULL SCALE key allows the entry of the highest an- ticipated fluid velocity.
- Page 25 PART 3 - STARTUP AND CONFIGURATION Volume to Velocity FPS = U.S. GPM X 0.409 Conversion (inches) MPS = LPM X 21.23 (mm) The VOL. PULSE key allows the entry of a totalizer expo- nent. This feature is useful for accommodating a very large accumulated flow.
- Page 26 PART 3 - STARTUP AND CONFIGURATION Table 6 VOL. PULSE ENG. NOTATION DISPLAY MAXIMUM CODE 10E0 999,999 10E1 999,999 10E2 999,999 10E3 999,999 10E4 429,299 10E5 42,929 10E6 4,295 When utilizing the MGD engineering UNITS, the totalizer Important Note for defaults to a VOL.
- Page 27 PART 3 - STARTUP AND CONFIGURATION A few factors can influence the readings of the D901/M flow meter. The CAL entry allows the user to compensate Altering the for flow discrepancies without affecting the factory calibra- CALibration of the tion. Examples of situations that can cause reading dis- D901/M crepancies are: •...
-
Page 28: Display Damping
PART 3 - STARTUP AND CONFIGURATION Values outside of this range will result in an OVER! or UNDER! Display. Non-whole number entries will result in a RANGE! Display. Enter an appropriate value. The DAMP key allows the selection of time duration be- Display Damping tween display updates. -
Page 29: System And Totalizer Reset
PART 3 - STARTUP AND CONFIGURATION to reset the accumulated (totalized) flow. Press the RE- System and Totalizer SET button from the ENTER Mode. A choice is then RESET made to : RESET Reset the system VOL. MULT Press VOL PULSE to re-set the totalizer to zero. -
Page 30: Part 4 - Troubleshooting
PART 4 - TROUBLE SHOOTING CONDITION POSSIBLE CAUSE • Check AC connections. Unit does not turn “ON” when power is • Test the fuse applied • Ensure the terminal block located in the upper left corner of the main PCB is secure •... - Page 31 • If Variable Frequency Drives are being utilized, verify that the D901/M obtains a READ light when the pump turn OFF. If it does, contact the Dynasonics factory. • Increase the DAMP constant from keypad. Stability of flow readings are •...
-
Page 32: Appendices
PART 5 - APPENDICES Appendices Face Plate Drawing Intrinsically Safe Installation High-Temperature Transducers Clean Liquid Installation Guide Multiple Unit Cross-talk Pipe Dimension Chart: Cast Iron Pipe Dimension Chart: Steel, SS, PVC Velocity to Volumetric Conversion Chart Statement of Warranty Customer Service Rev. - Page 33 Ductile Iron Pipe Standard Classes Cement Lining Pipe Outside Std./Double Class 50 Class 51 Class 52 Class 53 Class 54 Class 55 Class 56 Size Diameter Thickness (inches) (inches) Wall Wall Wall Wall Wall Wall Wall 3.96 3.46 0.25 3.40 0.28 3.34 0.31 3.28 0.34 3.22 0.37 3.14 0.41 4.80 4.28 0.26 4.22 0.29 4.16 0.32 4.10 0.35 4.04 0.38 3.93 0.44 6.90...
- Page 34 Cast Iron Pipe Standard Classes CLASS A CLASS B CLASS C CLASS D CLASS E CLASS F CLASS G CLASS H Size O.D. I.D. O.D. I.D. O.D. I.D. O.D. I.D. O.D. I.D. O.D. I.D. O.D. I.D. O.D. I.D. Wall Wall Wall Wall Wall...
- Page 35 Steel, Stainless Steel, P.V.C. Standard Schedules SCH. SCH. 10 SCH. 20 SCH. 30 STD. SCH. 40 SCH. 60 X STG. SCH. 80 SCH. 100 SCH. 120 SCH. 140 SCH. 180 Nominal (LTWALL) OUTSIDE Pipe Size DIAMETER Inches Wall Wall Wall Wall Wall Wall...
- Page 36 FPS TO GPM CROSS - REFERENCE (Schedule 40) Nominal I.D. Pipe INCH (Inches) 1.05 2.6989 4.0484 5.3978 6.7473 8.097 9.4462 10.796 12.145 13.490 14.844 16.190 17.540 18.890 20.240 21.590 22.941 24.290 1.25 1.38 4.6620 6.9929 9.3239 11.655 13.99 16.317 18.648 20.979 23.310 25.641 27.970 30.300 32.630 34.960 37.300 39.627 41.958 1.61 6.3454 9.5182 12.691 15.864 19.04 22.209 25.382 28.555 31.730 34.900 38.070 41.250 44.420 47.590 50.760 53.936 57.109...
- Page 37 FPS TO GPM CROSS - REFERENCE (Schedule 40) Nominal I.D. Pipe INCH (Inches) 16.88 697.52 1046.3 1395.0 1743.8 2093.0 2441.3 2790.1 3138.8 3488.0 3836.3 4185.0 4534.0 4883.0 5231.0 5580.0 5928.9 6277.7 18.81 866.14 1299.0 1732.0 2165.3 2598.4 3031.5 3464.6 3897.6 4330.7 4763.8 5196.8 5629.9 6063.0 6496.0 6929.1 7362.2 7795.3 22.63 1253.7 1880.0 2507.0 3134.1 3761.0 4387.8 5014.6 5641.5 6268.3 6895.1 7522.0 8148.8 8775.6 9402.4 10029 10656...
- Page 38 Fluid Sound Speeds Original Date: 10/19/99 Revision: none Revision Date: none File: I:/dynasonics/dyna_code/tables/doppler ss conversions.xls 120.0176921 Doppler Fluid Specific Gravity Sound Speed Calibration Entry 20 degrees C ft/s relative to 25C water Acetate, Butyl (n) 1270 4163.9 Acetate, Ethyl 0.901 1085 3559.7...
- Page 39 Linseed Oil .925-.939 1770 5803.3 Methanol (40,41) 0.79 1076 3530.2 Methyl alcohol (40,44) 0.79 1076 3530.2 Methylene chloride (3) 1.33 1070 3510.5 Methylethyl Ketone 1210 3967.2 Motor Oil (SAE 20/30) .88-.935 1487 4875.4 Octane (23) 0.70 1172 3845.1 Oil, Castor 0.97 1477 4845.8...
Need help?
Do you have a question about the 901 Series and is the answer not in the manual?
Questions and answers