
Subscribe to Our Youtube Channel
Related Manuals for dynasonics TFX Ultra


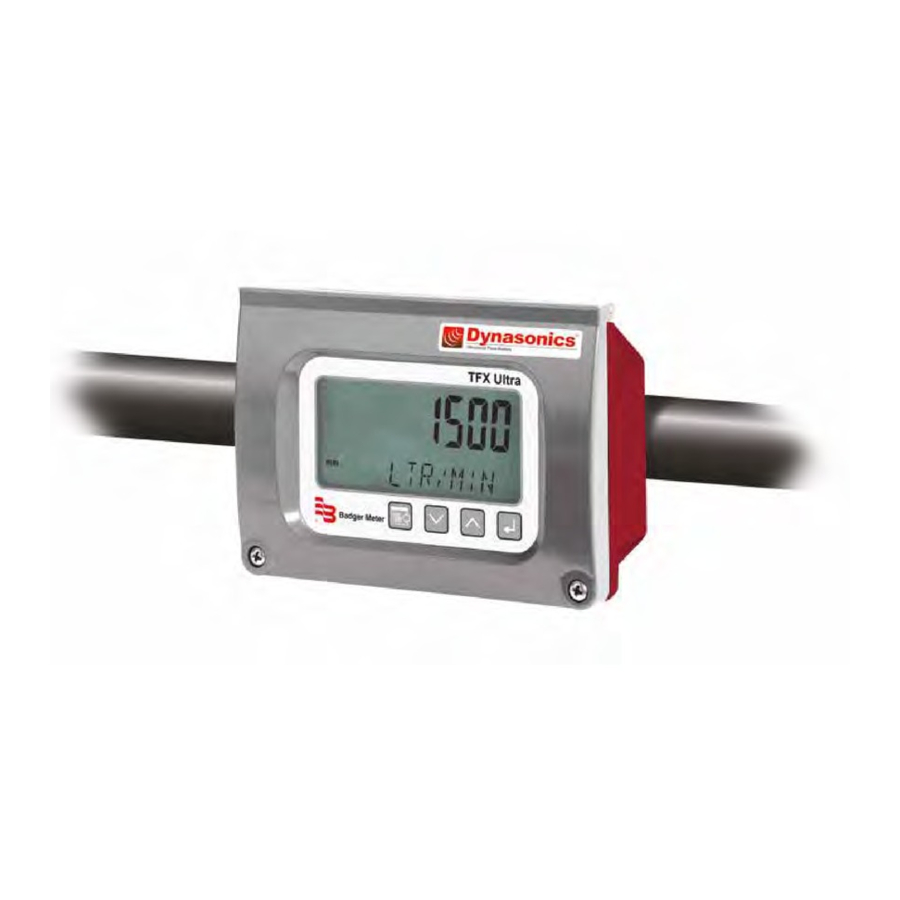
Summary of Contents for dynasonics TFX Ultra
- Page 1 Transit Time Ultrasonic Flow Meters TFX Ultra User Manual TTM-UM-00136-EN-06 (May 2016)
- Page 2 Transit Time Meter, TFX Ultra Page ii TTM-UM-00136-EN-06 May 2016...
-
Page 3: Table Of Contents
User Manual CONTENTS Scope of This Manual Unpacking and Inspection Safety Terminology and Symbols Considerations Quick-Start Operating Overview Transducer Location Electrical Connections Pipe Preparation and Transducer Mounting Initial Settings and Powerup Introduction Application Versatility CE Compliance User Safety Data Integrity Product Identification Transmitter Installation Transmitter Location... - Page 4 Transit Time Meter, TFX Ultra Ethernet Port USB Programming Port Heat Flow for Energy Model Only Installing Surface-Mounted RTDs Installing Insertion (Wetted) RTDs Wiring RTDs to the Transmitter Replacing RTDs Parameter Configuration Using the Keypad Startup Configuration Menu Structure Basic Menu (BSC)
- Page 5 User Manual Set Multiple Flow Rates UltraLink Error Codes Target Dbg Data Screen Definitions Saving the Configuration on a PC Printing a Configuration Report Menu Maps Basic Menu Channel 1 Menu Channel 2 Menu Sensor Menu Security Menu Service Menu Display Menu Communications Protocols Non-Ethernet Module Models...
- Page 6 Transit Time Meter, TFX Ultra Control Drawings CE Compliance Drawings K Factors Description Calculating K Factors Specifications System Transmitter Transducers Software Utilities North American Pipe Schedules Fluid Properties Page vi TTM-UM-00136-EN-06 May 2016...
-
Page 7: Scope Of This Manual
Considerations The installation of the TFX Ultra must comply with all applicable federal, state, and local rules, regulations, and codes EXPLOSION HAZARD - SUBSTITUTION OF COMPONENTS MAY IMPAIR SUITABILITY FOR CLASS I, DIVISION 2. -
Page 8: Quick-Start Operating Overview
Quick-Start Operating Overview QUICK-STAOT OPEOATING OVEOVIEW If you are familiar with installing TFX Ultra meters, follow these instructions to get the system up and running quickly Refer to the detailed instructions if you require additional information OTEE: The following steps require information supplied by the transmitter itself so it will be necessary to supply power to... -
Page 9: Pipe Preparation And Transducer Mounting
Quick-Start Operating Overview 4 Connect power to the transmitter 5 Enter the following data into the transmitter via the integral keypad or the UltraLink software utility: Transducer mounting method Pipe liner thickness Pipe O D (Outside Diameter) Pipe liner material Pipe wall thickness Fluid type Pipe material... -
Page 10: Introduction
Application Versatility The TFX Ultra transmitter can be successfully applied on a wide range of metering applications The simple-to-program transmitter allows the standard product to be used on pipe sizes ranging from 1/2 …100 inches (12…2540 mm)* A variety of... -
Page 11: Transmitter Installation
Transmitter Installation TOANSMITTEO INSTALLATION Transmitter Location Mount the enclosure in an area that is convenient for servicing and calibration or for observing the LCD readout 1 Locate the transmitter within the length of the transducer cables supplied or exchange the cable for one that is of proper length 2 Mount the transmitter in a location: •... -
Page 12: Power Connections
Transmitter Installation Power Connections Electrical Symbols Function Direct Current Alternating Current Earth (Ground) Protective Ground Chassis Ground Symbol Table 1: Electrical symbols Transducer Connections 1 To access terminal strips for wiring, loosen the two screws in the enclosure door and open 2 Guide the transducer terminations through the transmitter conduit hole in the bottom-left of the enclosure 3 Secure the transducer cable with the supplied conduit nut (if flexible conduit was ordered with the transducer) 4 The terminals within transmitter are screw-down barrier terminals Connect the wires at the corresponding screw... - Page 13 Transmitter Installation Line Voltage AC Power Connections Connect 95…264V AC, AC neutral and chassis ground to the terminals shown in Figure 5 Do not operate without an earth (chassis) ground connection strodyne www.astrodyne.com PWC-15E MPOOTANT 0.15A AC IN : 100-240VAC,50/60Hz +15V / 0.3A DC OUT : R2807...
- Page 14 Transmitter Installation DC Power Connections The transmitter may be operated from a 10…28V DC source, as long as the source is capable of supplying a minimum of 5 Watts of power Connect the DC power to 10…28V DC In, power ground, and chassis ground, as in Figure 7 10 - 28 VDC...
-
Page 15: Transducer Installation
Transducer Installation TOANSDUCEO INSTALLATION The transducers for the TFX Ultra transmitter contain piezoelectric crystals that transmit and receive ultrasonic signals through the walls of liquid piping systems DTTR, DTTN, DTTL and DTTH transducers are relatively simple and straightforward to install, but spacing and alignment of the transducers is critical to the system’s accuracy and performance CAREFULLY EXECUTE THESE INSTRUCTIONS... - Page 16 Flow Flow Table 1: Piping configuration and transducer positioning The TFX Ultra system will provide repeatable measurements on piping systems that do not meet these pipe diameter requirements, but the accuracy of the readings may be influenced Page 16 TTM-UM-00136-EN-06...
-
Page 17: Select A Mounting Configuration
Transducer Installation Select a Mounting Configuration The transmitter can be used with six different transducer types: DTTR, DTTN, DTTL, DTTH DTTS and DTTC Meters that use the DTTR, DTTN, DTTL or DTTH, transducer sets consist of two separate sensors that function as both ultrasonic transmitters and receivers These transducers are clamped on the outside of a closed pipe at a specific distance from each other DTTS and DTTC transducers integrate both the transmitter and receiver into one assembly that fixes the separation of the piezoelectric crystals... - Page 18 Transducer Installation Top of Top of Pipe Pipe 45° 45° 45° Z-Mount 45° 45° 45° Flow Meter W and V Mount Mounting Orientation DTTR, DTTN, DTTL and DTTH Transducers Top of Top of Pipe Pipe 45° 45° 45° 45° 45° 45°...
-
Page 19: Enter The Pipe And Liquid Parameters
Transducer Installation Enter the Pipe and Liquid Parameters The TFX Ultra metering system calculates proper transducer spacing based on the piping and liquid information you enter into the transmitter via the integral keypad or the UltraLink software utility The most accuracy is achieved when the transducer spacing is exactly what the transmitter calculates, so use the calculated... -
Page 20: Transducer Mounting Configurations
Transducer Installation Transducer Mounting Configurations V-Mount and W-Mount Configurations Apply the Couplant For DTTR, DTTN, DTTL and DTTH transducers, place a single bead of couplant, approximately 1/2 inch (12 mm) thick, on the flat face of the transducer See Figure 12 Couplant is provided with the transducers Generally, a silicone-based grease is used as an acoustic couplant, but any good quality grease-like substance that is rated to not flow at the operating temperature of the pipe is acceptable For pipe surface temperature over 130°... - Page 21 Transducer Installation OTEE: Mounting the high temperature transducers is similar to mounting the DTTR/DTTN/DTTL transducers High temperature installations require acoustic couplant that is rated not to flow at the operating temperature of the pipe surface OTEE: Use the DTTL on pipes 24 inches and larger and not on pipes smaller than 4 inches You can consider using the DTTL transducers on pipes smaller than 24 inches if there are less quantifiable aspects—such...
- Page 22 Transducer Installation DTTS/DTTC Small Pipe Transducer Calibration Procedure 1 Establish communications with the transit time transmitter Calibration (Page 3 of 3) - Linearization 2 From the tool bar, select Calibration See Figure 17 1) Please establish a 3 On the pop-up screen, click Next twice to get to 28.2 reference flow rate.
- Page 23 Transducer Installation 4 The two marks on the pipe are now properly aligned and measured If access to the bottom of the pipe prohibits the wrapping of the paper around the circumference, cut a piece of paper 1/2 the circumference of the pipe and lay it over the top of the pipe The equation for the length of 1/2 the circumference is: 1/2 Circumference = Pipe O D ×...
- Page 24 Transducer Installation Mounting Oail System Installation for DTTO For remote flow DTTR transducers with outside diameters between 2…10 inches (50…250 mm) , the rail mounting kit aids in installation and positioning of the transducers Transducers slide on the rails, which have measurement markings that are viewable through the sight opening 1 Install the single mounting rail on the side of the pipe with the stainless steel bands provided Do not mount it on the top or bottom of the pipe On vertical pipe, orientation is not critical Check that the track is parallel to the pipe and that all...
-
Page 25: Inputs/Outputs
Inputs/Outputs INPUTS/OUTPUTS General The transmitting system is available in two configurations: The Flow-Only model is equipped with a 4-20 mA output, two open collector outputs, a rate frequency output, and • RS485 communications using the Modbus RTU command set • The Energy (BTU) model has inputs for two 1000 Ohm RTD sensors in place of the rate frequency and alarm outputs This model allows the measurement of pipe input and output temperatures so energy usage calculations can be performed 4-20 mA Output... -
Page 26: Reset Total Input
Inputs/Outputs Oeset Total Input The Reset Total Input can be used with a push-button to reset the flow totals When the Reset Total Input is connected to signal ground, the total displayed on the meter is reset to zero Figure 25: Reset total input Control Outputs (Flow-Only Model) Two independent open collector transistor outputs are included with the Flow-Only model Each output can be configured for one of the following functions:... -
Page 27: Rate Alarm Outputs
Inputs/Outputs Oate Alarm Outputs The flow rate output permits output changeover at two separate flow rates, allowing operation with an adjustable switch deadband Figure 29 illustrates how the setting of the two setpoints influences rate alarm operation A single-point flow rate alarm would place the ON setting slightly higher than the OFF setting, allowing a switch deadband to be established If a deadband is not established, switch chatter (rapid switching) may result if the flow rate is very close to the switch point Minimum... -
Page 28: Frequency Output (Flow-Only Model)
Inputs/Outputs Frequency Output (Flow-Only Model) The frequency output is an open-collector transistor circuit that outputs a pulse waveform that varies proportionally with flow rate This type of frequency output is also know as a Rate Pulse output The output spans from 0 Hz, normally at zero flow rate to 1000 Hz at full flow rate (configuration of the MAX RATE parameter is described in “Startup”... -
Page 29: Totalizer Output Option (Energy Model)
Inputs/Outputs There are two frequency output options available: The Turbine Meter Simulation option is used when a receiving instrument is capable of interfacing directly with a • turbine transmitter’s magnetic pickup The output is a relatively low voltage AC signal whose amplitude swings above and below the signal ground reference The minimum AC amplitude is approximately 500 mV peak-to-peak To activate the turbine output circuit, turn SW4 OFF 500 mV... -
Page 30: Rs485 Port
Inputs/Outputs Totalizing Pulse Output 2.8k…10k Option Pullup 100 mA Resistor Maximum Isolated Output Total Pulse Internal Figure 32: Energy model auxiliary totalizer output option Wiring and configuration of the Energy model is similar to the totalizing pulse output for the Flow-Only model This option must use an external current limiting resistor OS485 Port The RS485 feature allows up to 126 transmitters to be placed on a single three-wire cable bus All transmitters are assigned a... -
Page 31: Ethernet Port
Heat Flow for Energy Model Only Ethernet Port The Ethernet port is 10/100 Base T with an RJ connector and supports BACnet IP, Modbus TCP/IP and EtherNet/IP protocols The Ethernet option must be ordered with the transmitter For Energy models, the Ethernet option is not available with the Totalizing Pulse option See”Communications Protocols”... -
Page 32: Installing Insertion (Wetted) Rtds
Heat Flow for Energy Model Only BACK OF CONNECTOR Heat Tape 1000 Ω RETURN LINE RTD #2 1000 Ω Heat Sink Compound Clean RTD Mounting SUPPLY LINE Area to Bare Metal Surface RTD #1 Figure 35: Surface mount RTD installation Figure 34: RTD schematic Installing Insertion (Wetted) OTDs Insertion RTDs are typically installed through 1/4 inch (6 mm) compression... -
Page 33: Replacing Rtds
Heat Flow for Energy Model Only strodyne www.astrodyne.com PWC-15E 0.15A AC IN : 100-240VAC,50/60Hz +15V / 0.3A DC OUT : R2807 RoHS PRODUCT SERVICE E167432 95 - 264 VAC AC Neutral Exc. Exc. SUPPLY LINE RTD #1 Sig. Sig. Gnd. Gnd. -
Page 34: Parameter Configuration Using The Keypad
Heat Flow for Energy Model Only PAOAMETEO CONFIGUOATION USING THE KEYPAD A transmitter with a keypad can be configured through the keypad interface or by using the Windows-compatible UltraLink software utility When a USB programming cable is connected, the RS485 and frequency outputs are disabled Transmitters without a keypad can only be configured using the UltraLink software utility See “Parameter Configuration Using UltraLink Software”... -
Page 35: Startup
Startup STAOTUP The TFX Ultra system requires a full pipe of liquid for a successful startup Do not attempt to make adjustments or change configurations until a full pipe is verified OTEE: If you used Dow 732 RTV to couple the transducers to the pipe, make sure the adhesive is fully cured before you try... -
Page 36: Basic Menu (Bsc)
Configuration Basic Menu (BSC) The basic menu contains all of the configuration parameters necessary to make the transmitter operational Parameter Meaning Options Description The English/metric selection will also configure the transmitter to display sound speeds in pipe materials and liquids as either feet per second (fps) or meters per second (mps), respectively ENGLSH (Inches) IMPOOTANT: If the UNITS entry has been changed from ENGLSH to METRIC or from... - Page 37 Configuration Basic Menu (BSC) continued Parameter Meaning Options Description Specifies the speed of sound value, shear or transverse wave, for the pipe wall If the UNITS value was set to ENGLSH, the entry is in fps (feet per second) METRIC entries are made in mps (meters per second) ENGLSH (fps) If a pipe material was chosen from the PIPE MAT list, a nominal value for speed of sound...
- Page 38 Configuration Basic Menu (BSC) continued Parameter Meaning Options Description Allows adjustments to be made to the speed of sound entry for the liquid If the UNITS value was set to ENGLSH, the entry is in fps (feet per second) METRIC entries are made in mps (meters per second) If a fluid was chosen from the FL TYPE list, a nominal value for speed of sound in that media will be automatically loaded If the actual sound speed is known for the application fluid...
- Page 39 Configuration Basic Menu (BSC) continued Parameter Meaning Options Description Allows adjustments to be made to the specific heat capacity of the liquid If a fluid was chosen from the FL TYPE list, a default specific heat will be automatically loaded This default value is displayed as SP HEAT in the BSC MENU If the actual specific heat of the liquid is known or it differs from the default value, the value can be revised See Table Table 6...
- Page 40 Configuration Basic Menu (BSC) continued Parameter Meaning Options Description Select an engineering unit for flow totalizer measurements US Gallons US Gallons Pounds Liters Liters Kilograms Millions of US Gallons MGal British Thermal Units Cubic Feet Cubic Ft Thousands of BTUs MBTU TOTL UNT Totalizer units...
-
Page 41: Channel 1 Menu (Ch1)
Configuration Channel 1 Menu (CH1) The CH1 menu controls how the 4-20 mA output is spanned for all transmitter models and how the frequency output is spanned for the flow-only model Parameter Meaning Description FL 4MA Flow at 4 mA The FL 4MA and FL 20MA settings are used to set the span for both the 4-20 mA output and the 0…1000 Hz frequency output on the Flow-Only models FL 20MA... - Page 42 Configuration 20 mA Calibration Procedure 1 Disconnect one side of the current loop and connect the ammeter in series (disconnect either wire at the terminals labeled 4-20 mA Out or Signal Gnd) 2 Using the arrow keys, increase the numerical value to increase the current in the loop to 20 mA Decrease the value to decrease the current in the loop to 20 mA Typical values range between 3700…3900 counts 3 Reconnect the 4-20 mA output circuitry as required Page 42...
-
Page 43: Channel 2 Menu (Ch2)
Configuration Channel 2 Menu (CH2) The CH2 menu is used to configure model specific I/O options The Flow-Only model presents a different set of parameters than the Energy model Options Menu IT IS POSSIBLE TO CHOOSE OPTIONS PERTAINING ONLY TO THE FLOW-ONLY MODEL WHEN AN ENERGY MODEL IS PRESENT. -
Page 44: Sensor Menu (Sen)
Configuration Sensor Menu (SEN) The SEN MENU allows access to the various types of transducers the transmitter can work with Selecting the proper transducers in conjunction with the transducer mount XDCR MNT and transducer frequency XDCR HZ is critical to accurate operation of the transmitter Parameter Meaning... -
Page 45: Service Menu (Ser)
Configuration Service Menu (SEO) The SER MENU menu allows access to transmitter setup values that may need revision due to application-specific conditions and information valuable in troubleshooting Parameter Meaning Description Liquid sound The transmitter performs an actual speed-of-sound calculation for the liquid it is measuring The calculation varies with speed in meters temperature, pressure and fluid composition SSPD MPS... -
Page 46: Service Menu (Ser) Continued
Configuration Service Menu (SEO) continued Parameter Meaning Options Description Substitute Flow SUB FLOW is a value that the analog outputs and the flow rate display will indicate when an error condition in the transmitter occurs The typical setting for this entry is a value that will make the instrument display zero flow during an error condition Substitute flow is set as a percentage between MIN RATE and MAX RATE In a unidirectional system, this value is typically set to zero to indicate zero flow while in an error condition In a bidirectional system,... -
Page 47: Display Menu (Dsp)
Parameter Configuration Using UltraLink Software Display Menu (DSP) The DISPLAY menu parameters control what is shown on the display and the rate at which displayed items alternate (dwell time) Parameter Meaning Options Description The transmitter will only display the flow rate with the DISPLAY set to FLOW - it will not FLOW display the total flow The transmitter will only display the total flow with the DISPLAY set DISPLAY... -
Page 48: Parameter Configuration Using Ultralink Software
Parameter Configuration Using UltraLink Software PAOAMETEO CONFIGUOATION USING ULTOALINK SOFTWAOE The UltraLink software utility is used for configuring, calibrating and communicating with transit time flow meters It has numerous troubleshooting tools to make diagnosing and correcting installation problems easier A PC can be hard-wired to the transmitter through a standard USB connection System Oequirements The software requires a PC-type computer, running Windows 98, Windows ME, Windows 2000, Windows NT, Windows XP, Windows Vista or Windows 7 operating systems and a USB communications port... - Page 49 Parameter Configuration Using UltraLink Software The first screen is the RUN mode screen, which contains real-time information regarding flow rate, totals, signal strength, communications status, and the transmitter’s serial number The COMM indicator in the lower right corner indicates that the serial connection is active If the COMM box contains a red ERROR indication, select Communications on the Menu bar and select Initialize Choose the appropriate COM port and the RS232 / USB Com Port Type Proper communication is verified when a green OK is indicated in the lower right corner of the PC display and the Last Update indicator in the text area on the...
-
Page 50: Configuration Menu
Configuration Menu CONFIGUOATION MENU The Configuration menu has six tabs used to control how the transmitter is set up and responds to varying flow conditions The first screen that appears after clicking the Configuration button is the Basic tab Configuration Figure 42: Basic tab Basic Tab Use the General options to select the measurement system—English (inches) or Metric (millimeters)—for transmitter setup,... - Page 51 Configuration Menu Transducer Type selects the transducer that will be connected to the transmitter Select the appropriate transducer type from the drop-down list This selection influences transducer spacing and transmitter performance, so it must be correct If you are unsure about the type of transducer to which the transmitter will be connected, consult the shipment packing list or call the manufacturer for assistance OTEE: A change of transducer type will cause a system configuration error 1002: Sys Config Changed to occur This error will...
-
Page 52: Flow Tab
Configuration Menu Flow Tab Flow Rate Units are selected from the drop-down lists Select an appropriate rate unit and time from the two lists This entry also includes the selection of Flow Rate Interval after the virgule ( / ) sign Totalizer Units are selected from dropdown lists Select an appropriate totalizer unit and totalizer exponent The totalizer exponents are in scientific notation and permit the eight digit totalizer to accumulate very large values before the totalizer “rolls over”... -
Page 53: Filtering Tab
Configuration Menu Entry of data in the Basic and Flow tabs is all that is required to provide flow measurement functions to the transmitter If you are not going to use input/output functions, click Download to transfer the configuration to the transmitter When the configuration has been completely downloaded, turn the power to the transmitter off and then on again to guarantee the changes take effect Filtering Tab... -
Page 54: Output Tab
Configuration Menu Bad Data Rejection is a value related to the number of successive readings that must be measured outside of the Flow Filter Hysteresis or Flow Filter MinHysteresis windows before the transmitter will use that flow value Larger values are entered into Bad Data Rejection when measuring liquids that contain gas bubbles, as the gas bubbles tend to disturb the ultrasonic signals and cause more extraneous flow readings to occur Larger Bad Data Rejection values tend to make the transmitter more sluggish to rapid changes in actual flow rate... - Page 55 Configuration Menu If the transmitter is a Flow-Only model, this setting would also set the span for the frequency output At –100 gpm, the output frequency would be 0 Hz At the maximum flow of 100 gpm, the output frequency would be 1000 Hz, and in this instance a flow of zero would be represented by an output frequency of 500 Hz Example 2 –...
- Page 56 Configuration Menu Channel 2, OTD Configuration for Energy Model Only OTEE: The Channel 2 Menu is used to configure model specific I/O options The Flow-Only model presents a different set of parameters than the Energy model IT IS POSSIBLE TO CHOOSE OPTIONS PERTAINING ONLY TO THE FLOW-ONLY MODEL WHEN AN ENERGY MODEL IS PRESENT.
- Page 57 Configuration Menu Channel 2, Control Output Configuration for Flow-Only Model Two independent open-collector transistor outputs are included with the Flow-Only model Each output can be configured independently Figure 47: Channel 2 output choices None All alarm outputs are disabled Batch / Total Multiplier value to which the totalizer will accumulate before resetting to zero and repeating the accumulation This value includes any exponents that were entered in the BASIC menu as TOTAL E...
-
Page 58: Security Tab
Configuration Menu Security Tab Use the Security tab to enter your system password Figure 48: Security tab Display Tab Use the Display tab to Figure 49: Display tab Page 58 TTM-UM-00136-EN-06 May 2016... -
Page 59: Strategy Menu
Strategy Menu STOATEGY MENU The Strategy menu parameters are factory-set To change these parameters, call Technical Support Figure 50: Strategy menu May 2016 TTM-UM-00136-EN-06 Page 59... -
Page 60: Calibration Menu
Calibration Menu CALIBOATION MENU The Calibration menu contains a powerful multi-point routine for calibrating the transmitter to a primary measuring standard in a particular installation To initialize the three-step calibration routine, click Calibration Calibration Figure 51: Calibration Page 1 of 3 The first screen, Page 1 of 3 establishes a baseline zero flow rate measurement for the transmitter Oemove the Zero Offset Because every transmitter installation is slightly different and sound waves can travel in slightly different ways through these... -
Page 61: Set Multiple Flow Rates
Calibration Menu Set Multiple Flow Oates Use Page 3 of 3 to set multiple actual flow rates to be recorded by the transmitter To calibrate a point: 1 Establish a stable, known flow rate (verified by a real-time primary flow instrument) 2 Enter the actual flow rate in the Flow window and click Set 3 Repeat for as many points as desired 4 Click Finish when you have entered all points... -
Page 62: Ultralink Error Codes
Calibration Menu UltraLink Error Codes Revised 9-19-2014 Code Description Correction Hardware serial number has become inoperative – system 0001 Serial number not present performance will not be influenced Low signal strength is typically caused by one of the following: » Empty pipe »... -
Page 63: Target Dbg Data Screen Definitions
Calibration Menu Target Dbg Data Screen Definitions Field Description Device Type [IS THIS AUTO FILLED?] Calc Count The number of flow calculations performed by the transmitter beginning at the time the power to the transmitter was last turned off and then on again Sample Count The number of samples currently being taken in one second Raw Delta T (ηs) -
Page 64: Menu Maps
Menu Maps MENU MAPS Basic Menu UNITS PIPE WT LINER MA FLUID SS MIN RATE RATE INT Programming Units Pipe Wall Thickness Pipe Liner Material Fluid Sound Speed Rate Interval Minimum Flow Rate English (FPS) English Ebonite Numeric Entry English (Inches) Metric (MPS) Metric Mortar... -
Page 65: Channel 2 Menu
Menu Maps Channel 2 Menu • The Channel 2 menu allows the configuration of meter-specific I/O parameters • RTD values are specific to a particular RTD • The menu structure and programming are identical for both Control 1 and Control 2, but the choice of function for a specific control output is independent of the other OPTIONS Channel 2 Options... -
Page 66: Communications Protocols
Communications Protocols COMMUNICATIONS POOTOCOLS Non-Ethernet Module Models The following three parameters can be set through the TFX menu or the UltraLink software utility: • Modbus RTU • Address: = Meter Address / Modbus Address • Baud Rate: = Baud Rate Selection (9600, 14400, 19200, 38400, 56000, 57600, 76800) •... -
Page 67: Ethernet/Ip
Communications Protocols EtherNet/IP Overview EtherNet/IP is an open industrial Ethernet network with Common Industrial Protocol (CIP™) at its upper layers ODVA manages the development of CIP network technologies and standards (www odva org) EtherNet/IP Addressing The following table describes all of the data types used USINT Unsigned Short Integer (8-bit) UINT... - Page 68 Communications Protocols Common Services Implemented for Service Code Service Name Class Level Instance Level Reset Get_Attribute_Single Set_Attribute_Single Message Oouter Object (02 – 1 Instance) ***No supported services or attributes*** Assembly Object (04HEX – 2 Instances) Class Attributes (Instance 0) Attribute ID Name Data Type Data Value...
- Page 69 Communications Protocols Input Instance 101 – 200 Bytes (Double Precision Floating Point) Bytes Description 0 - 7 Signal Strength 8 - 15 Flow Rate 16 - 23 Net Totalizer 24 - 31 Positive Totalizer 32 - 39 Negative Totalizer 40 - 47 Temp1 degC 48 - 55 Temp2 degC...
-
Page 70: Tcp Object
Communications Protocols TCP Object (F5 – 1 Instance) The following tables contain the attribute and common services information for the TCP Object Class Attributes Attribute ID Name Data Type Data Value Access Oule Revision UINT Instance Attributes Attribute ID Name Data Type Default Data Value Access Oule... -
Page 71: Ethernet Link Object
Communications Protocols Ethernet Link Object (F6 – 1 Instance) The following tables contain the attribute and common services information for the Ethernet Link Object Class Attributes Attribute ID Name Data Type Data Value Access Oule Revision UINT Instance Attributes Attribute ID Name Data Type Default Data Value... -
Page 72: Modbus
Communications Protocols Modbus Data Formats Bits Bytes Modbus Oegisters Long Integer Single Precision IEEE754 Double Precision IEEE754 Table 11: Available data formats Modbus Oegister / Word Ordering Each Modbus Holding Register represents a 16-bit integer value (2 bytes) The official Modbus standard defines Modbus as a ‘big-endian’... - Page 73 Communications Protocols Modbus Oegister Mappings for Modbus OTU and Modbus TCP/IP MODBUS Oegisters Data Component Units Single Precision Double Precision Name Long Integer Floating Point Floating Point Format Format Format Signal Strength 40100 - 40101 40200 - 40201 40300 - 40303 —...
- Page 74 Communications Protocols MODBUS Oegisters Data Component Units Single Precision Double Precision Name Floating Point Floating Point Long Integer Format Format Format Signal Strength 40600 - 40601 40700 - 40701 40800 - 40803 — Flow Rate 40602 - 40603 40702 - 40703 40804 - 40807 Gallons, Liters, MGallons, Cubic Feet, Cubic Meters, Acre Feet, Oil Barrel, Liquid Barrel, Feet, Meters, Lb,...
-
Page 75: Bacnet
Communications Protocols BACnet BACnet is a communication protocol for building automation and control networks, including BACnet/IP with Ethernet cabling and BACnet MS/TP with EIA-485 wiring The protocol is supported and maintained by ASHRAE Standing Standard Project Committee 135 BACnet IP Object Mappings BACnet Object Object Description Notes... - Page 76 Communications Protocols BACnet MSTP Object Mappings BACnet Object Object Description Notes Available Units (Access Point) Signal Strength Analog Input 1 — Flow Rate (Flow model) Analog Input 2 Energy Rate (BTU model) Gallons, Liters, MGallons, Cubic Feet, Cubic Meters, Acre Feet, Oil Barrel, Liquid Barrel, Feet, Meters, Lb, Kg, BTU, Net Totalizer Analog Input 3...
-
Page 77: Bacnet Configuration
Communications Protocols BACnet Configuration To change settings, click Edit to access a category Figure 56: BACnet configuration screen May 2016 TTM-UM-00136-EN-06 Page 77... -
Page 78: Bacnet Object Support
Communications Protocols BACnet Object Support Nine BACnet standard objects are supported, a Device object (DEx), a Binary Output object (BO1), and seven Analog Input objects (AI1 through AI7) The BACnet/IP UDP port defaults to 0xBAC0 The Object Identifier (BACnet Device ID) and Location can both be modified through the web page interface Defaults to DEx Object_Identifier... -
Page 79: Annex A-Protocol Implementation Conformance Statement (Normative)
Annex A—Protocol Implementation Conformance Statement (Normative) BACnet Protocol Implementation Conformance Statement DateE: 05/30/2014 Vendor NameE: Badger Meter, Inc Product NameE: TFX Ultra Flow meter Product Model NumberE: Application Software VersionE: 2 03 Firmware OevisionE: BACnet Protocol OevisionE: Product DescriptionE: Clamp-on ultrasonic flow and energy meters for liquids BACnet Standardized Device Profile (Annex L)E: ... - Page 80 Communications Protocols Data Link Layer OptionsE: BACnet IP, (Annex J) BACnet IP, (Annex J), Foreign Device ISO 8802-3, Ethernet (Clause 7) ANSI/ATA 878 1, 2 5 Mb ARCNET (Clause 8) ANSI/ATA 878 1, RS-485 ARCNET (Clause 8), baud rate(s): ____________ MS/TP master (Clause 9), baud rate(s): 9600, 19200, 38400, 76800 ...
-
Page 81: Annex A-Protocol Implementation Conformance Statement (Normative)
(This annex is part of this Standard and is required for its use ) BACnet Protocol Implementation Conformance Statement DateE: 5/12/14 Vendor NameE: Badger Meter, Inc Product NameE: TFX Ultra Flow meter Product Model NumberE: Application Software VersionE: 1 20 Firmware OevisionE: BACnet Protocol OevisionE: Product DescriptionE:... - Page 82 Communications Protocols Data Link Layer OptionsE: BACnet IP, (Annex J) BACnet IP, (Annex J), Foreign Device ISO 8802-3, Ethernet (Clause 7) ATA 878 1, 2 5 Mb ARCNET (Clause 8) ATA 878 1, EIA-485 ARCNET (Clause 8), baud rate(s) ____________ ...
-
Page 83: Ethernet Port Settings
Communications Protocols Ethernet Port Settings Changing IP Connections Follow this procedure to get to the internal web page of the Ethernet Module From the configuration page, you will be able to edit the Device ID and save the changes OTEE: Your actual internal web pages may differ in appearance from those below OTEE:... - Page 84 Communications Protocols 6 MAKE NOTE OF THE EXISTING IP ADDRESS AND SUBNET MASK! YOU WILL NEED TO CHANGE BACK WHEN FINISHED If this is not done, the PC will not re-connect to the original network. 7 Enter the IP and Subnet mask shown above and click OK 8 Click Close on the previous window 9 Connect an Ethernet crossover cable between the PC and the Ethernet module 10 Apply power to the transmitter...
- Page 85 Communications Protocols The Main Page refreshes every 5 seconds and provides real-time data from the transmitter May 2016 TTM-UM-00136-EN-06 Page 85...
- Page 86 Communications Protocols 13 Click Configuration on the Main Page to display the Ultrasonic Flow Meter device configuration page Page 86 TTM-UM-00136-EN-06 May 2016...
-
Page 87: Network Settings
Communications Protocols 14 Click the Edit link to change Device Configuration, Location, Network Settings or Passwords 15 Make the necessary network changes and click Save Settings Internet Explorer will no longer communicate with the module because its IP address has changed After the module resets and the adapter has been re-configured, you can then use the new IP address to connect to the internal webpage Also note you must choose an IP address that is not being used in the existing network... -
Page 88: Troubleshooting
Troubleshooting TOOUBLESHOOTING DTTS/DTTC Small Pipe Transducer Calibration Procedure 1 Establish communications with the transit time transmitter Calibration (Page 3 of 3) - Linearization 2 From the tool bar, select Calibration See Figure 62 1) Please establish a 3 On the pop-up screen, click Next twice to get to 28.2 reference flow rate. - Page 89 Troubleshooting Symptoms: Transmitter does not power up. Possible Causes Oecommended Action • No power or inadequate power • Measure voltage at the power terminals and check that the voltage matches the labels by the power terminals • Blown fuse (AC Model only) •...
- Page 90 Troubleshooting Symptoms: Flow readout is opposite of the flow direction. Possible Causes Oecommended Action • Integral mount transmitter • Change the transducer flow direction parameter (Basic Menu > FLO DIR) is mounted in reverse flow • Rewire the up and down transducers to the transmitter direction so display is properly oriented •...
-
Page 91: Heating And Cooling Measurement
Heating and Cooling Measurement HEATING AND COOLING MEASUOEMENT The Energy model is designed to measure the rate and quantity of heat delivered to a given building, area or heat exchanger The instrument measures the volumetric flow rate of the heat exchanger liquid (water, water/glycol mixture, brine, etc ), the temperature at the inlet pipe and the temperature at the outlet pipe Heat delivery is calculated by the following equation: Oate of Heat Delivery Platinum OTD... -
Page 92: In-Field Calibration Of Rtd Temperature Sensors
In-Field Calibration of RTD Temperature Sensors IN-FIELD CALIBOATION OF OTD TEMPEOATUOE SENSOOS Replacement RTD temperature sensors used in heat flow measurements must be calibrated in the field for proper operation Failure to calibrate the RTDs to the specific BTU inputs will result in inaccurate heat-flow measurements Equipment Oequired 100 °C •... - Page 93 In-Field Calibration of RTD Temperature Sensors 6 Click Calibrate and the following screen should now be visible Make sure that the Calibrate Both RTDs at same temperature box is checked and then enter the temperature to the nearest 0 1° C in the box labeled Reference Temp (deg C) RTD Calibration (Step 1 of 2) Calibrate RTD 1, or select the checkbox below to calibrate both RTDs at the same temperature.
- Page 94 In-Field Calibration of RTD Temperature Sensors Check the RTD’s resistance values with an ohmmeter to make sure they are not “open” or “shorted” See Table 20 for typical RTD resistance values Next, check to make sure that no incorrect “Cal Point” values were entered inadvertently Heat Capacity of Water (J/g°C) °C 4 2174...
-
Page 95: Brad Harrison® Connector Option
Brad Harrison® Connector Option BOAD HAOOISON® CONNECTOO OPTION Downstream Upstream Cable D005-0956-001 (Straight Connector) D005-0956-002 (90° Connector) Bulkhead Connector D005-0954-001 Figure 69: Brad Harrison connections May 2016 TTM-UM-00136-EN-06 Page 95... -
Page 96: Product Labels
Product Labels POODUCT LABELS Figure 70: Product labels Page 96 TTM-UM-00136-EN-06 May 2016... - Page 97 User Manual INTENTIONAL BLANK PAGE May 2016 TTM-UM-00136-EN-06 Page 97...
-
Page 98: Control Drawings
Control Drawings CONTOOL DOAWINGS Figure 67: Control drawing I.S. barrier and DTT transducers Page 98 TTM-UM-00136-EN-06 May 2016... - Page 99 Control Drawings Figure 68: Control drawing May 2016 TTM-UM-00136-EN-06 Page 99...
- Page 100 Control Drawings Figure 69: Control drawing Page 100 TTM-UM-00136-EN-06 May 2016...
- Page 101 Control Drawings Figure 70: Control drawing Class 1 Div 2 installation, AC May 2016 TTM-UM-00136-EN-06 Page 101...
- Page 102 Control Drawings Figure 71: Control drawing Class 1 Div 2 installation, DC Page 102 TTM-UM-00136-EN-06 May 2016...
- Page 103 Control Drawings Figure 72: Control drawing DTFXE Class 1 Div 2 installation, AC May 2016 TTM-UM-00136-EN-06 Page 103...
-
Page 104: Ce Compliance Drawings
CE Compliance Drawings CE COMPLIANCE DOAWINGS 1/2" X 1-1/8" SS NPT NIPPLE DYNASONICS P/N: D002-1203-002* MALE CONDUIT FITTING DYNASONICS P/N: D005-0938-002 STEEL CITY P/N: LT701* FERRITE BEAD DYNASONICS P/N: D003-0117-089 STEWARD P/N: 28B1020-100* LOOP WIRES THROUGH FERRITE BEAD TWO TIMES... - Page 105 CE Compliance Drawings MALE CONDUIT FITTING DYNASONICS P/N: D005-0938-002 STEEL CITY P/N: LT701* ARMOURED CONDUIT DYNASONICS P/N: D002-1401-003 ANACONDA 1/2" UA GRAY* * OR EQUIVALENT Figure 74: CE compliance drawing, DC power May 2016 TTM-UM-00136-EN-06 Page 105...
-
Page 106: K Factors
K Factors K FACTOOS Description The K factor (with regards to flow) is the number of pulses that must be accumulated to equal a particular volume of fluid You can think of each pulse as representing a small fraction of the totalizing unit An example might be a K factor of 1000 (pulses per gallon) This means that if you were counting pulses, when the count total reached 1000, you would have accumulated one gallon of liquid Using the same reasoning, each individual pulse represents an accumulation of 1/1000 of a gallon This relationship is independent of the time it takes to accumulate the counts... - Page 107 K Factors Find the area of the pipe cross section Area = πr 3.068 Area = π = π x 2.35 = 7.39 in Find the volume in one foot of travel 88.71in 7.39 in x 12 in.
-
Page 108: Specifications
Specifications SPECIFICATIONS System Liquid Types Most clean liquids or liquids containing small amounts of suspended solids or gas bubbles Velocity Oange Bi-directional to greater than 40 FPS (12 MPS) DTTR/DTTN/DTTH/DTTL: ±1% of reading or ±0 01 FPS (0 003 MPS), whichever is greater Flow Accuracy DTTS/DTTC: 1 in (25 mm) and larger –... -
Page 109: Transducers
Specifications Transducers PBT glass filled, Ultem, Nylon cord grip, DTTR NEMA 6*/IP67 PVC cable jacket; –40…250° F (–40…121° C) CPVC, Ultem, Nylon cord grip, DTTC/DTTL NEMA 6*/IP67 PVC cable jacket; –40…194° F (–40…90° C) CPVC, Ultem, Nylon cord grip, DTTN (IS) NEMA 6*/IP67 PVC cable jacket;... -
Page 110: North American Pipe Schedules
North American Pipe Schedules NOOTH AMEOICAN PIPE SCHEDULES Steel, Stainless Steel, PVC Pipe, Standard Classes SCH 60 X STG. SCH 80 SCH 100 SCH 120/140 SCH 180 Wall Wall Wall Wall Wall Wall 1 315 0 957 0 179 0 957 0 179 0 815 0 250... - Page 111 North American Pipe Schedules Steel, Stainless Steel, PVC Pipe, Standard Classes (continued) SCH 10 SCH 5 SCH 20 SCH 30 SCH 40 (Lt Wall) Wall Wall Wall Wall Wall Wall 1 315 1 185 0 065 1 097 0 109 1 049 1 049 0 133...
- Page 112 North American Pipe Schedules Copper Tubing, Copper and Brass Pipe, Aluminum Copper Tubing Copper Tubing Copper Copper Nominal Nominal & Brass Alum. & Brass Alum. Diameter Diameter Pipe Pipe Type Type 0 625 0 625 0 625 0 840 3 625 3 625 3 625 4 000...
- Page 113 North American Pipe Schedules Cast Iron Pipe, Standard Classes, 3…20 inch Class Size 3 80 3 96 3 96 3 96 Wall 0 39 0 42 0 45 0 48 — — — — 3 02 3 12 3 06 3 00 4 80 5 00...
- Page 114 North American Pipe Schedules Cast Iron Pipe, Standard Classes, 24…84 inch Class Size 25 80 25 80 26 32 26 32 26 90 26 90 27 76 27 76 Wall 0 76 0 98 1 05 1 16 1 31 1 45 1 75 1 88...
-
Page 115: Fluid Properties
Fluid Properties FLUID POOPEOTIES Sound Speed Specific Gravity delta-v/° C Kinematic Absolute Fluid m/s/° C Viscosity (cSt) Viscosity (Cp) 20° C ft/s Acetate, Butyl — 4163 9 1270 — — — Acetate, Ethyl 0 901 3559 7 1085 0 489 0 441 Acetate, Methyl 0 934... - Page 116 Fluid Properties Sound Speed Specific Gravity delta-v/° C Kinematic Absolute Fluid m/s/° C Viscosity (cSt) Viscosity (Cp) 20° C ft/s Isopropyl Alcohol 0 79 3838 6 1170 — 2 718 2 134 Kerosene 0 81 4343 8 1324 — — Linalool —...
- Page 117 User Manual INTENTIONAL BLANK PAGE May 2016 TTM-UM-00136-EN-06 Page 117...
- Page 118 Transit Time Meter, TFX Ultra INTENTIONAL BLANK PAGE Page 118 TTM-UM-00136-EN-06 May 2016...
- Page 119 User Manual INTENTIONAL BLANK PAGE May 2016 TTM-UM-00136-EN-06 Page 119...
- Page 120 Transit Time Meter, TFX Ultra...
Need help?
Do you have a question about the TFX Ultra and is the answer not in the manual?
Questions and answers