Icom IC-SAT100M Network Setting Manual
Satellite ptt
Hide thumbs
Also See for IC-SAT100M:
- Operating manual (25 pages) ,
- Basic manual (63 pages) ,
- Operating manual (30 pages)
Table of Contents
Advertisement
Quick Links
When the transceiver is connected to the network devices, change the static IP address.
Before using the transceiver, setting a static IP address to the antenna unit and the main unit with EX-4241Utility
for IC-SAT100M.
This manual shows system requirements and how to use the software.
Table of contents
System requirements................................................. 1
Operation note ........................................................... 1
Installing the EX-4241 ............................................... 2
Before connecting the OPC-2357 to the PC.............. 3
Connecting with PC ................................................... 3
System requirements
The following hardware and software are required:
Operating System (OS)
• Microsoft Windows 10 (32/64bit)
• Microsoft Windows 8.1 (32/64bit)*
*Except for Microsoft Windows RT.
L The instructions are based on using Microsoft
Windows 10.
Operation note
• The contents of this sheet, the software associated with the EX-4241, and the appearance of the EX-4241 are
all subject to change without notice.
• The displays, indications, or operations may differ slightly, depending on your system settings, type of OS, and
its service pack level.
Icom, Icom Inc. and the Icom logo are registered trademarks of Icom Incorporated (Japan) in Japan, the United States, the United Kingdom,
Germany, France, Spain, Russia, Australia, New Zealand, and/or other countries.
Microsoft and Windows are registered trademarks of Microsoft Corporation in the United States and/or other countries.
All other products or brands are registered trademarks or trademarks of their respective holders.
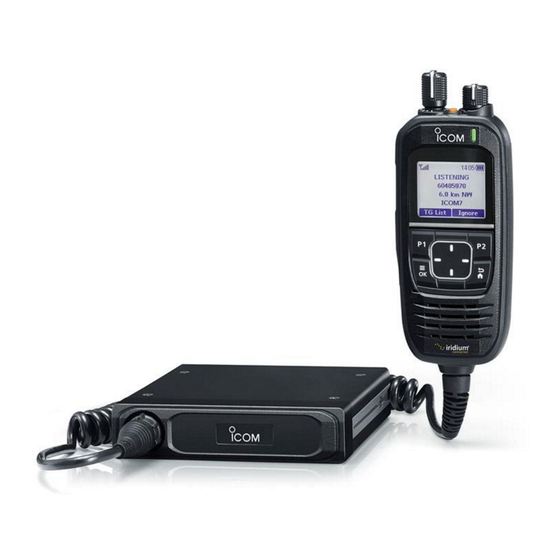
SATELLITE PTT
|SAT100M
Editing Network Setting ............................................. 4
Connecting with the network devices ........................ 6
Connecting the VE-PG4 ............................................ 7
Cables (Purchase separately)
• OPC-2357 PROGRAMMING CABLE
1
NETWORK SETTING
D About basic operation ........................................ 5
D COM Port Searching .......................................... 5
D Entering the Destination Settings .................... 10
Advertisement
Table of Contents

Subscribe to Our Youtube Channel
Related Manuals for Icom IC-SAT100M


Summary of Contents for Icom IC-SAT100M
-
Page 1: Table Of Contents
• The displays, indications, or operations may differ slightly, depending on your system settings, type of OS, and its service pack level. Icom, Icom Inc. and the Icom logo are registered trademarks of Icom Incorporated (Japan) in Japan, the United States, the United Kingdom, Germany, France, Spain, Russia, Australia, New Zealand, and/or other countries. -
Page 2: Installing The Ex-4241
Installing the EX-4241 1. Sign in to the PC as the administrator. 7. On the “Choose Destination Location” screen, L Confi rm that no other applications are running. click <Next>>. 2. Download and unzip the file. L If desired, click <Browse...> and select another 3. -
Page 3: Before Connecting The Opc-2357 To The Pc
Before connecting the OPC-2357 to the PC To use the OPC-2357 PROGRAMMING CABLE, you must first install a USB driver. The driver and installation guide are supplied with the programming cable. Read the guide carefully before installing the driver. Connecting with PC 1. -
Page 4: Editing Network Setting
Otherwise, the data could be lost or deleted. 1. Click “EX-4241” in the Start menu, and then click 5. When registering two or more IC-SAT100M to “EX-4241” to start the software. VE-PG4, set the Control Port and Voice Port. -
Page 5: D About Basic Operation
L If you select “All Reset,” the settings on the 4. Double-click “Ports (COM & LPT).” IC-SAT100M Menu screen is also initialized. To save the settings file to a folder on your PC Select “Save” or “Save As...” in the <File> menu. -
Page 6: Connecting With The Network Devices
Connecting with the network devices After changing the IP address of the IC-SAT100M, connect the black LAN cable (for network) and the network devices such as a HUB. Black: for network Gray: for the Antenna Unit To network LAN cable (Purchase separately) NOTE: Connect the gray LAN cable and the Antenna Unit. -
Page 7: Connecting The Ve
IP transceiver and a client Satellite PTT in the set Talkgroup on the RoIP Gateway. • Each IC-SAT100M connected to the RoIP Gateway is required to be assigned a fixed unique group ID. • Enter only one fixed Talkgroup to the IC-SAT100M. -
Page 8: D Connecting The Ic-Sat100M To The Ip Network
2 Click 3. In [RoIP Gateway], select a RoIP Gateway port (1 ~ 8) that you set in the step 2, and then confirm that the [Transceiver Model] is set to “IC-SAT100M.” (Example: RoIP Gateway 1) 1 Select 2 Confirm... - Page 9 Destination Port Number, and Control Port Number. Then click <Apply>. 1 Enter 2 Click 5. In [Transceiver Connection], click <Connect>. • Connection Status changes to “Connecting.” 1 Click 2 Confirm 6. Do the same way in the steps 2 to 5, enter the Transceiver B (IC-SAT100M) settings.
-
Page 10: D Entering The Destination Settings
2. In [Destination Settings], enter the settings for the Transceiver A (Name, Call Type, Destination ID, and IP Transceiver Controller), and then click <Apply>. 1 Enter 2 Select 3 Click 3. Do the same way in the step 2, enter the Group 00002 settings. 1-1-32 Kamiminami, Hirano-ku, Osaka 547-0003, Japan A7597-4EX Jul. 2020 © 2020 Icom Inc.
Need help?
Do you have a question about the IC-SAT100M and is the answer not in the manual?
Questions and answers