Table of Contents
Advertisement
Quick Links
Easy Search/Contents/Precautions
P-08A
Before Using the Handset
'09.6
Voice/Videophone Calls/PushTalk
Phonebook
ISSUE DATE:
Sound/Screen/Light Settings
Security Settings
NAME:
Mail
i-mode/Full Browser
PHONE NUMBER:
i-motion/Movie/i-Channel/i-concier
Camera
MAIL ADDRESS:
1Seg
Music
INSTRUCTION MANUAL
i-αppli/i-Widget
Osaifu-Keitai/ToruCa
Map/GPS Function
Data Management
Convenient Functions
Character Entry
Network Services
Overseas Use
PC Connection
Appendix/Troubleshooting
Index/Quick Manual
Advertisement
Chapters
Table of Contents

Related Manuals for Docomo P-08A


Summary of Contents for Docomo P-08A
- Page 1 Easy Search/Contents/Precautions P-08A Before Using the Handset ‘09.6 Voice/Videophone Calls/PushTalk Phonebook ISSUE DATE: Sound/Screen/Light Settings Security Settings NAME: Mail i-mode/Full Browser PHONE NUMBER: i-motion/Movie/i-Channel/i-concier Camera MAIL ADDRESS: 1Seg Music INSTRUCTION MANUAL i-αppli/i-Widget Osaifu-Keitai/ToruCa Map/GPS Function Data Management Convenient Functions Character Entry...
- Page 2 FOMA terminal and keep them in a safe Before or during use of the P-08A, make sure that you read this manual and the place. Note that we cannot be held responsible for the unlikely event of loss of...
-
Page 3: Viewing/Searching This Manual
“Osaifu-Keitai compatible i-αppli”. Search from the tabs printed on the cover. ≥Note that “P-08A” is referred to as “FOMA terminal” in this manual. See the next page for details. ≥In the operating procedures of this manual, key operations are described with 11P.6... -
Page 4: Before Using Data Communication
How to search for “Alarm” is explained here as an example of search method. From the Index Additional guidance ..448 11P.540 Address link function ... 208 After-sales services . - Page 5 Function name Menu number You can find this in (See page 34) Items shown on the Index. display (Some items cannot <Alarm> Function Menu while Alarm is Displayed be executed.) Using Alarm Edit Go to step 1 of “Using Alarm” on page 394. You can set Alarm to alert you at the specified time with an alarm tone, Operation and Detail...
-
Page 6: Easy Search
Easy Search To retrieve a desired function with simple words, refer to the following: To know convenient functions for making calls To change/know display settings To/Not to notify your phone number to the other party To know the meaning of marks (icons) on the display .....<Display> 27 ..................<Caller ID Notification>... - Page 7 To use the FOMA terminal with a sense of security Other things you can do To lock the FOMA terminal from away when it gets lost To reduce the battery consumption ......<Power Saver Mode> 112 ※1 ..................<Omakase Lock> To scan QR codes or bar codes ........
-
Page 8: Table Of Contents
Basic Package and Main Options . . . 20 Early Warning “Area Mail”, Chat Mail, SMS, etc. Main Functions of P-08A... .8 i-mode, iMenu, My Menu, Change i-mode Password, Part Names and Functions, Display, Desktop Icon,... - Page 9 PC Connection Notify of Location, Location History, GPS Settings Setup Flow for Data Transfer (OBEX™ Communication), Setup Flow for Data Communication, AT Command, CD-ROM, DOCOMO Keitai Datalink Picture Viewer, i-motion Player, Movie Player, Function List, Options and Related Devices, Appendix/...
-
Page 10: Main Functions Of P-08A
Main Functions of P-08A ◆i-concier 11P.222 ◆i-mode 11P.190 i-concier is a service that enables you to receive useful information from a character You are now enabled to check websites more easily for information by enhanced ® (Machi-chara image) on the Stand-by display and download schedule event operational performance, and to enjoy various moving picture contents as Flash ®... - Page 11 ◆Speed Selector 11P.25 ◆View Blind 11P.113 By the rotating operation, you can scroll displays and select items quickly. Further, in You can make the display hard to see from an angle. You can use the FOMA various situation, you can comfortably operate functions such as volume adjustment terminal without concern for others’...
-
Page 12: Precautions
■The following symbols show specific directions: Precautions ALWAYS FOLLOW THESE DIRECTIONS ■Before using the FOMA terminal, read these safety precautions carefully so that Denotes things not to do. (Prohibition) you can use it correctly. After reading the precautions, keep them in a safe place. Don’t ■Be sure to observe these safety precautions because they are designed to protect you or those around you from causing injury and to avoid unnecessary... - Page 13 Otherwise, injury may result. by NTT DOCOMO, INC. Ensure that you use Osaifu-Keitai with If you use any type of battery or adapter the FOMA terminal turned off when you...
- Page 14 Be especially careful when you Do not put the FOMA terminal in Turn off the FOMA terminal in use the FOMA terminal for a long the place where it could be places where use is prohibited time with the adapter connected. affected by an expanded airbag, such as in airplanes and hospitals.
- Page 15 Turn off the FOMA terminal when If you erroneously break the Caution near electronic devices using display part and then crystal liquid gets leaked, never take or high-precision control or weak suck the liquid to or into your signals. Don’t Do not swing the FOMA terminal mouth, or apply to skin.
- Page 16 Itching, rash or eczema may be If the battery fluid gets into your Precautions for batteries caused depending on your eyes, do not rub them. Flush your ■Check the description on the label of the physical conditions or eyes with clean water and seek battery pack for the type of battery.
- Page 17 AC adapter available overseas: 100 V to Don’t You might be struck by lighting or suffer such as a docomo Shop or dispose of it 240 V AC an electric shock. in accordance with local waste disposal [Connect only to household AC outlet] regulations.
-
Page 18: Handling Precautions
When removing the adapter out If you use an implanted cardiac Notes on using near electronic of the outlet or cigarette lighter pacemaker or implanted medical equipment socket, do not forcibly pull the defibrillator, use the mobile ■The description below meets “Guidelines on adapter cord or power cord, phone 22 cm or more away from the Use of Radio-communication Equipment... - Page 19 ■Use a dry soft cloth such as the one for ■Do not rub or scratch the display part with ■Usually, put the cover of the connector cleaning glasses to clean the equipment. metals. terminal and microSD card slot to use the ≥The screen of the FOMA terminal sometimes has a Doing so might cause damage to the part, resulting in FOMA terminal.
-
Page 20: Starting Docomo Connection Manager
Serial Port. With Audio, you might be able to unneeded UIMs to a handling counter such as ≥There are no land-line phones, television sets or use Audio Video Remote Control. (Only with a docomo Shop. radios nearby. the compatible Bluetooth devices) ■Avoid using in extremely high or low ■While you are charging, the adapter may... - Page 21 Hands-free that you interference. will call him/her back, park your car to somewhere safe, 3. For further details, contact “docomo Information and then dial. Center” on the back page of this manual. ■Use the Bluetooth functions in Japan only.
-
Page 22: Basic Package And Main Options
Basic Package and Main Options <Basic package> <Main Options> ≥P-08A Handset ≥P-08A CD-ROM ≥FOMA AC Adapter 01/02 (With Warranty and Back Cover P36) The PDF versions of “Manual for PC Connection” (With Warranty and Instruction Manual) and “Kuten Code List” are included. - Page 23 Before Using the Handset Part Names and Functions ......Opening/Closing FOMA Terminal......Navigation Displays and Key Operations .
-
Page 24: Part Names And Functions
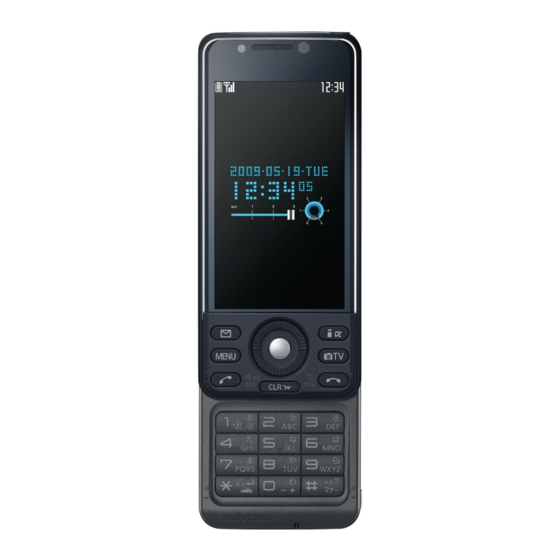
Part Names and Functions < > ■For using earphone Flat plug of the Connect an optional connector-terminal-compatible earphone. When using a Flat-plug Earphone/ connector-terminal-non-compatible earphone, use an optional plug adapter for connection. Microphone with Switch ≥When inserting or pulling the plug adapter, take hold of the plug for the handset side and insert or pull it straight. - Page 25 1Light sensor >h Power/End key GFlash/Photo light ・ For sensing brightness (See page 112) ・ For ending calls ・ Lights/Flickers when you shoot with the camera. ≥Do not cover the light sensor with your hands or do ・ For ending respective functions ・...
-
Page 26: Opening/Closing Foma Terminal
Opening/Closing FOMA Terminal Navigation Displays and Key Operations Hold the FOMA terminal with both hands to slide the display upward/ When you want to execute the operation shown on the vertical display, downward. press the corresponding key as below. ≥While the horizontal display is shown, you can operate in the same way as on the Take care not to touch the keys when you open or close the FOMA vertical display depending on the function. - Page 27 ■Operating speed selector ・Adjusting zoom magnification when shooting with the camera (see page 234) ・Adjusting volume during music playback, etc. (see page 277) ・Switching the displayed still images (see page 335) ・ Moves the cursor or highlighted ・ Moves the cursor to the right. ・Adjusting volume during playback of i-motion files, during playback of movie files, etc.
-
Page 28: Main Key Operations From The Stand-By Display
Press and hold the key for at least Main Key Operations from the Stand-by Press the key for a short time operation one second Display Measures your current location and Enters “1”. executes the GPS function. From the Stand-by display, you can execute the following actions by (See page 322) operating each key: Enters “2”. -
Page 29: Viewing Display
Viewing Display 3 5 8 ; < > Unread Messages R/F exist. During measuring the current location Battery level (estimate) (See page 42) (See page 176) (See page 322) (yellow) Radio waves reception level (estimate) Location Request Set. is set to “ON” or The area for Messages R/F in the FOMA “Reject numbers unset”, and it is within the Strong... - Page 30 During Lock All (See page 124) During Multitask (See page 391) The call cost has exceeded the specified limit. (See page 408) During Personal Data Lock (See page 127) Multiple functions are activated. An alarm is set. (See page 391) During Keypad Dial Lock (See page 131) (See page 260 and page 395) While watching a 1Seg program...
-
Page 31: Using Icons On Desktop
■Operation when a notification icon is selected <Desktop Icon> Missed call Using Icons on Desktop Shows the Missed Call list. (See page 53) Missed call to Number B of 2in1 Shows the Missed Call list. (See page 53) Notification icon Status icon Desktop icon Record message... - Page 32 ※ Timer recording was completed Starts the i-αppli program. (See page 287) Shows the contents and results of the timer recording. (See page 261) ※ Shows it on the Picture viewer. (See page 334) Messages are held at the Voice Mail Center ※...
- Page 33 Information Paste Icons to Desktop ≥When the notification icon of “Messages are held at the Voice Mail Center” ( You can paste up to 15 desktop icons of such as phone numbers, mail appears while you are overseas, you cannot operate the Voice Mail function from the addresses, etc.
-
Page 34: I-Widget Display And Operations
Reset desktop The desktop icons are reset to the default. Selecting Menu 1YES Press m of the FOMA terminal to show Main Menu and then execute, 1YES Delete this set, or check respective functions. In this manual, the way to call up 1YES Delete all functions from Main Menu is described as a standard method. - Page 35 Scroll Selection In this manual, the description of the speed selector operation (selection Select a main menu icon from the menu function o after selecting/entering a of top/bottom/left/right, and press of function item) is omitted. Scroll selection is explained below using the Select “Set./Service”...
- Page 36 Set or check the function Select a sub-menu item from the menu function Some menu items have even more detailed menus. Select “Talk” from “Set./Service”. The example below shows how to set “Low tone” for “Quality alarm”. ≥The highlighted item is the currently selected one.
- Page 37 Function Menu If you press i when “ ” is shown at the lower right of the display, Call up the function using the menu number the Function menu including selectable items such as “Save”, “Edit”, and “Delete” appears in each operation. The contents of the Function From the Stand-by display, press m75.
- Page 38 An actual operation is done as follows: Check box With the functions you can select multiple items, put a check Press mark for check boxes to select them. Each time you press O ), you can switch “ ” and “ ”.
-
Page 39: When You Forget Key Operation
<Guide> Using UIM (FOMA Card) When You Forget Key Operation The UIM is an IC card that holds your information such as phone numbers. It can hold data such as Phonebook entries and SMS You can search for the functions you want to know and use, and then messages as well. - Page 40 Information Your UIM ≥Make sure that you insert/remove the UIM with the FOMA terminal closed and held in ♪ ♪ ♪ ♪ ♪ ♪ ♪ ♪ ♪ ♪ your hand. ≥Take care not to force the UIM into place because this can break it. ≥Take care not to lose the UIM once you remove it.
-
Page 41: Attaching/Removing Battery Pack
≥If you lose your UIM (green/white) or have it stolen overseas, immediately contact ≥The settings of the following functions are stored on the UIM: DOCOMO to take the steps necessary for suspending the use of the UIM. For ・SMS validity period ・SMS center setting... -
Page 42: Charging
1 of To prevent damage to the environment, bring used battery “■Attaching”, and take hold of packs to a docomo service counter, a docomo agent or a the projection of the battery pack Li-ion 00 recycle center. - Page 43 Do not charge for long periods of time (several days) with the FOMA ※The continuous standby time for standstill is the average number of hours you can use the terminal turned on. FOMA terminal in standstill status when it is closed and can receive radio waves normally. ≥If you leave the FOMA terminal powered on for long periods of time during charging, ※The continuous standby time for in motion is the average number of hours you can you may not be able to use the FOMA terminal for long duration as expected and the...
-
Page 44: Checking Battery Level
If the symptom persists, troubles with the AC adapter, desktop holder or battery and turn it as direction B. pack may be involved, so consult a handling counter such as a docomo Shop. ※Check the facing direction (front or rear) of the ≥The charging confirmation tone (see page 105) sounds when charging starts and... -
Page 45: Turning Power On/Off
Information <Power ON/OFF> ≥Depending on the usage state, the battery level indication might significantly vary. Turning Power ON/OFF Check Estimate of Battery Level by Display and Tone Turn Power On You can check an estimate of the battery level by the display and sound. Press and hold h for at least one m1Set./Service1Other settings1Battery second. -
Page 46: Switching To English Display
Check Welcome Mail <Initial Setting> ドコモ動画 The mail messages “Welcome (Welcome DOCOMO moving Configuring Initial Setting picture )” and “緊急速報 「エリアメール」 のご案内 (Introduction of Early Warning o twice or perform step 1 of “Display “Area Mail”)” have been saved by default. Press If the date and time, Terminal Security Code, Keypad Sound, Speed Mail from Inbox”... -
Page 47: Setting Date And Time
Set the size of characters. Enter year, month, date and time. o to move the cursor and enter numbers by the You can set the size of characters on the display at a time. (See page 118) numeric keys. Information ≥To enter one-digit numeral for the date and time, enter ≥When an unset function is found, the Initial Setting display for the unset function two digits beginning with “0”... -
Page 48: Displaying World Time
<World Time Watch> Set Caller ID Notification to Network Displaying World Time You can set whether to notify your caller ID on the network. m1Set./Service1NW services1Caller ID notification You can display the time of the specified area on the Stand-by display. 1Do the following operations. - Page 49 Voice/Videophone Calls/PushTalk Making Calls/Videophone Calls Using Public Mode..........When You could not Answer an Incoming Call .
-
Page 50: Videophone Calls
This is the international standard for the third generation of mobile videophones. need to enter the city code before the phone number. ≥P-08A supports only 64 kbps communication speed of the videophone. You cannot talk on the videophone at 32 kbps communication speed. - Page 51 ≥During a videophone call, you can send a Chara-den image to the other party instead of the image through your camera. (See page 72) ≥The international videophone call is available using the DOCOMO international call service “WORLD CALL”. (See page 58)
- Page 52 If a videophone call could not be connected Auto-redialing The reason why it could not be connected is displayed. (The displayed reason might not If “Voice call auto redial” is set to “ON”, and a videophone call is not connected, a voice be the same as the actual reason depending on the type of the other party’s phone and call is automatically made.
-
Page 53: Switching A Voice/Videophone Call
Switching a Voice/Videophone Call Switch from a Videophone Call to a Voice Call When the other party’s phone has a function to switch between calls, you You (caller) can switch between a voice call and a videophone call. This can switch from a videophone call to a voice call by selecting “CHG to function is available for the mobile phones that can switch between a voice call”... -
Page 54: Using Call Records
※ Received calls/missed calls of 64K data communication <Redial> <Dialed Calls> <Received Calls> Dialed calls of packet communication Using Call Records ※ Received calls/missed calls of packet communication The FOMA terminal can store the other party’s phone number and date/ Received calls of 64K data communication and packet time you have dialed or received. - Page 55 Information Use Received Calls ≥You can make a voice call to the most recently dialed or received number by pressing Press d from the Stand-by display and then ≥You can display the Received Call list also by ≥“Callback” is not displayed for incoming videophone calls and PushTalk calls. m1Phonebook1Dialed/recv.
-
Page 56: Using Chaku-Moji
Calls, Sent Address, and Received Address. (See “Dialed/ message to tell the subject during calling. recv. calls” on page 118) ≥For details on Chaku-moji or compatible models, refer to DOCOMO website or “Mobile Phone User’s Guide [Network Services]”. Set desktop/ ≥The sending end is charged, but the receiving end is not charged. - Page 57 Information Store Messages ≥When a Chaku-moji message has arrived at the other party’s phone, “Transmission You can store up to 10 Chaku-moji messages in the Message list. completed” is displayed, and you are charged a transmission fee. m1Set./Service1NW services1Chaku-moji ≥When a Chaku-moji message does not arrive at the other party’s phone such as when 1Create message the other party’s phone is not a Chaku-moji compatible mobile phone or the call is not 1Highlight <Not stored>...
-
Page 58: Setting Caller Id To Send/Not To Send For Each Call
Select a sent message. Prefer Chaku-moji ≥When the other party’s phone number is stored in the You can set how your FOMA terminal works for incoming Chaku-moji Phonebook, the phone number, name, and icon are messages for when “Setting when opened” is set to “Answer”. displayed. -
Page 59: Sending Touch-Tone Signals
Enter a number string. To notify your caller ID ≥Enter the pause (p) by pressing and holding a for at least one second. 186→Destination phone number1d or ≥You can use only 0 through 9, s, a to enter a number string and the ≥Press l( ) to make a videophone call. -
Page 60: Making International Calls
1Enter numbers in order of country/area code ≥The service is not available with some billing plans. →area code (city code)→destination phone number ≥Contact “docomo Information Center” on the back page of this manual for inquiries 1d or )1Dial about WORLD CALL. -
Page 61: Setting For International Calls
International Dial Assist Country/Area Code You can make a call adding a country/area code or international call You can store up to 27 country/area codes to be added for making access code to a phone number. (Except for some countries and regions, international calls from overseas. -
Page 62: Prefix Setting
)1Prefix numbers1Select a name 1Enter your Terminal Security Code1YES Delete all 1d or Information ≥Press l( ) to make a videophone call and press p to make a PushTalk <Delete this> <Delete all> ≥You cannot delete the country/area code or international call access code set by call. -
Page 63: Making Voice Clear According To Surrounding Noise
Information <Hands-free> ≥The reconnectable time differs depending on the usage status and radio wave conditions. Switching to Hands-free An estimate is about 10 seconds and the call charge is applied also for that duration. ≥While you are disconnected, no sound is transmitted to the other party. When you switch to Hands-free, sound such as the other party’s voice is audible over the speaker. -
Page 64: Receiving A Call/Videophone Call
For Answering a Voice Call Information ≥To connect using a cable (USB connection), set “USB mode setting” to Press d or ) to answer “Communication mode”. the call. ≥“ ” appears while you are talking or communicating using a USB Hands-free compatible device. - Page 65 Information Display for incoming calls ≥You might hear beeps (in-call ring tone) during a call. When a caller’s phone number is provided If you have signed up for any of Voice Mail Service, Call Waiting Service, or Call The phone number is displayed. If that phone number is not stored in the Phonebook but Forwarding Service and set “Arrival call act”...
-
Page 66: Switched Between A Call And A Videophone Call By The Other Party
Switched between a Call and a <Answer Setting> Setting Response of Key Operation for Videophone Call by the Other Party Answering Incoming Calls When you have set “Notify switchable mode” to “Indication ON”, a caller (the other party) can switch between a voice call and a videophone call. You can set to start talking (Any key answer) or to stop the ring tone ≥You (receiving end) cannot switch between a voice call and a videophone call. -
Page 67: Setting Response For When Opening Foma Terminal While Ringing
<Setting when Closed> You can start talking by pressing a key shown below: Setting Response for when Closing FOMA Voice call Terminal during a Call o , m Videophone call o , p PushTalk call Set Response for when Closing FOMA Terminal during a ※1 You can activate Any Key Answer or Quick Silent also by pressing l when Voice Call/Videophone Call record messages have been recorded to the maximum. -
Page 68: Setting Response For When Closing Foma Terminal During A Call
<Volume> <Ring Volume> Adjusting Earpiece Volume Adjusting Ring Volume m1Set./Service1Talk1Volume You can adjust the ring volume for incoming calls and mail. m1Set./Service1Sound1Ring volume o or </> to adjust the earpiece volume. 1Use 1Select an incoming type Adjust the earpiece volume to Level 1 (minimum) through Level 6 (maximum). o to adjust the volume. -
Page 69: Putting A Call On Hold When You Cannot Answer Immediately
Press d or ) to release hold and answer <On Hold> the call. Putting a Call on Hold when You cannot ≥When you have put a voice call on hold, you can release the hold also by Answer Immediately pressing r. ≥If a videophone call is on hold, the image through your camera is sent to the other During ringing1h party when you press d or... -
Page 70: Using Public Mode
When Public mode (Drive mode) is activated Using Public Mode ・Even when a call comes in, the ring tone does not sound. The “Missed call” icon Using Public Mode (Drive Mode) appears on the display and the call is stored in “Received calls”. The guidance is played back to the caller to the effect that you are currently driving or in an area where Public mode is an auto-answer service that puts importance on manners mobile phones should not be used. -
Page 71: When You Could Not Answer An Incoming Call
When Public mode (Power off) is activated <Record Message Setting> The setting stays activated until you dial “:25250” to deactivate Public mode (Power Recording Voice/Video Messages when off). You cannot deactivate the setting just by turning on the power. You cannot Answer a Call The guidance is played back to the caller telling that you are currently in a place where you should turn off the power. -
Page 72: Recording Voice/Video Messages When You Cannot Answer A Call
Information Incoming calls when Record Message Setting is set to “ON” ≥When Voice Mail Service or Call Forwarding Service is set at the same time as Record Message, the priority depends on the ring time set for Voice Mail Service or Call Forwarding Service. -
Page 73: Playing/Erasing Record Messages/A Voice Memo/Videophone Record Messages/Movie Memos
To skip to next message <Play/Erase Messages> <Play/Erase Videophone Messages> Each time you press > during playback, messages are played back in the following Playing/Erasing Record Messages/a Voice order: the next new record message → the oldest record message → a voice memo. Memo/Videophone Record Messages/ To cancel playback midway Movie Memos... -
Page 74: Using Chara-Den
Erase rec. msg. You can erase all record messages from the Record Message Substitute Image list, and can erase all videophone record messages from the You can set a Chara-den image for “Substitute image” of “Select image”. Videophone Record Message list. 1YES Chara-den display/Chara-den list/Chara-den Recording Erase movie memo... -
Page 75: Useful Functions For Videophone Calls
Useful Functions for Videophone Calls Switch Image Display Positions You can switch the display locations of the received image and the sent Switching Cameras image. During a videophone call, press c( At videophone start-up Inside camera ≥Each time you press You can switch images to be sent to the other party from through the ), the displays inside camera to through the outside camera. - Page 76 White balance You can adjust the colors of the camera image to be sent to Zoom the other party, to make the colors look more natural. At videophone 1Select an item. At videophone start-up WIDE start-up Fine weather..For talking outdoors in fine weather Automatic You can adjust the magnification for the camera image to be sent to the Cloudy weather .
-
Page 77: Setting Hands-Free Videophone
<Hands-free with Videophone> <Select Image> Setting Hands-free Videophone Changing Image Displays for Videophone Calls You can set whether to switch to Hands-free automatically for when a videophone call starts. You can set an image to be sent to the other party. m1Set./Service1Videophone m1Set./Service1Videophone1Select image 1Hands-free w/ V. -
Page 78: Redialing As A Voice Call When A Videophone Call Cannot Be Connected
Set by Call <Notify Switchable Mode> Setting for Switching a Voice/Videophone You can set an image to be sent to the other party for making a videophone call. Call during a Call Enter a phone number You can let the other party know that your FOMA terminal can switch between a voice call and a videophone call. -
Page 79: Using Videophone Calls By Interfacing To External Devices
1Enter a phone number. ≥You can use “ドコモテレビ電話ソフト (DOCOMO Videophone Software)” as the ≥To change, select the stored phone number. application program that supports this function. - Page 80 Information Function Menu of the Other ID List ≥When your FOMA terminal is used for the receiving end, an image through the caller’s Look-up address You can call up a phone number in the Phonebook, Dialed Calls, camera appears, and sound comes out. (You cannot switch to a substitute image.) or Received Calls to enter it.
-
Page 81: Pushtalk
(speak). ≥When you get the talker’s right, the talker’s right ≥For details on PushTalk or compatible models, refer to DOCOMO website or “Mobile obtained tone sounds. The other party hears your voice Phone User’s Guide [Network Services]”. only while you are pressing p and having the talker’s right. - Page 82 ■Display while dialing/communicating Information 1The phone number of the member who has the talker’s ≥Whether to notify others of your phone number when you make PushTalk calls follows right is displayed, and the state of the talker’s right is the setting for “Activate/Deactivate” of “Caller ID notification” (see page 46). However, displayed in color of the round icon at the upper left.
-
Page 83: Adding A Member During A Pushtalk Call
The state is other than above: the member does not answer, has View PushTalk PB You can call up a PushTalk Phonebook entry to make a PushTalk ended the PushTalk call, or does not use a DOCOMO mobile call. (See page 84) phone. -
Page 84: Receiving A Pushtalk Call
Press h to end the communication after talking. Information ≥For a member who uses a PushTalk compatible model which does not have this A tone for confirming the end of communication sounds at the other end. function, the members added during PushTalk communication are not shown and a ≥When a call you received is a group call, the PushTalk communication itself continues even if you press h, and “Disconnected”... -
Page 85: Adding Entries To Pushtalk Phonebook
Information Information ≥See page 86 for how to respond to the PushTalk call during i-mode communication. ≥In the PushTalk Phonebook, you cannot store the Phonebook entries set to B by ≥When a PushTalk call comes in during Lock All or Omakase Lock, “ ”... -
Page 86: Making A Call From Pushtalk Phonebook
Making a Call from PushTalk Phonebook Function Menu of the PushTalk Phonebook List/PushTalk Group List/Group Member List You can make a group call to up to four members using the PushTalk Phonebook or PushTalk group. Members to call When the PushTalk Phonebook list or Group Member list is displayed, you can display the checked members only. -
Page 87: Deleting Pushtalk Phonebook Entries
1Enter your Terminal Security Code1YES DEL group See page 85. Delete all ≥The FOMA terminal’s Phonebook entries are not deleted. members [Member list only] Delete from PushTalk Group Sound setting See page 86. PushTalk Group list1i( )1DEL from PT group Vibration setting See page 86. - Page 88 Information Hands-free w/ You can set whether to hear the other party’s voice from the PushTalk speaker or from the earpiece for when PushTalk communication <Sound setting> starts. ≥In the “Simple” mode, some confirmation tones (talking right obtained tone, etc.) 1ON or OFF during PushTalk communication become silent.
- Page 89 Phonebook Phonebooks Available for FOMA Terminal ....Storing Phonebook Entries ... .<Add to Phonebook> Storing Displayed Phone Number/Mail Address in Phonebook .
- Page 90 FOMA terminal Phonebooks Available for FOMA Terminal Name ○ ○ Ring tone You can use two types of Phonebooks, namely the Phonebook in the Vibrator FOMA terminal itself, and the Phonebook on the UIM. Illumination FOMA terminal Picture Number of entries 1,000 entries 50 entries Chara-den...
- Page 91 ≥The mail address can consist of up to 50 half-pitch alphabets, groups are available. numerals or symbol characters. 1Select a group. ≥When the mail address is “phone number@docomo.ne.jp”, ≥When the storage is completed with no group selected, the store the phone number only. Phonebook entry is stored in “No setting”.
- Page 92 1Enter a ZIP code1Enter a postal address. Address Image The stored still image is displayed when you call up the ≥You can enter up to 7 digits for the zip code. Phonebook entry. ≥You can enter up to 50 full-pitch/100 half-pitch characters for the 1Select an item.
- Page 93 Illumination You can set an illumination pattern for when a voice call or Answer You can set an answer message for Record Message by videophone call comes in from the person stored in the message Phonebook entry. 1Select answer message1Select an answer message. Phonebook.
- Page 94 Phone or UIM1Select a storing method. Storing Displayed Phone Number/Mail New . . . Go to step 2 on page 88. Address in Phonebook Add . . . Adds data to the existing Phonebook entry. When storing data on the UIM, “Overwrite”...
- Page 95 Highlight a group and press l( Group? You can show Phonebook entries stored in a specified group. 1Select an item to be set1Set the contents. 1Select a group. ≥The tabs appear on the top of the Phonebook list. (See page 94) ≥When you select “...
- Page 96 ≥After you search by “Memory No.?”, you can move the cursor to the “000~” to “900~” Information tab by pressing each numeric key from the list. ≥In a search method other than “Group?” and “2-touch dial?”, enter nothing and press <Example>Press 5 to move the cursor to the “500~”...
- Page 97 Mail address Sort You can change the display order. ≥When you select the item, you can compose an i-mode mail message with that mail 1Select a type of order. address entered into the address field. ≥You can sort Phonebook entries in reverse order by Personal information selecting “Ascending”...
- Page 98 Delete data See page 98. Store in P-Talk PB You can store the phone number in the PushTalk Phonebook. Set secret/Release secret You can activate/deactivate Secret for the Phonebook entry. Move/copy ≥If you select “Set secret” in ordinary mode (not in “Secret Copy to UIM See page 410.
- Page 99 ≥The secret code can be added only when the recipient’s mail address is in the form of number or mail address to be set with a secret code. “phone number” or “phone number@docomo.ne.jp”. It cannot be added to any other ≥To check the secret code, select “Check code”.
- Page 100 <Delete Data> <No. of Phonebook> Deleting Phonebook Entries Checking Phonebook Storage Status m1Phonebook1No. of phonebook Delete from the Detailed Phonebook Display Phone Detailed Phonebook display1i( )1Delete data Phonebook . . .The number of Phonebook entries stored in the FOMA terminal 1Do the following operations.
- Page 101 Information Information ≥When the Phonebook entry contains multiple phone numbers, the first phone number ≥The voice dial name set by this function is effective only for calling up a voice dial will be dialed. entry. For the voice guidance function, the reading (name) stored in the Phonebook is read aloud.
- Page 102 Information Voice Settings ≥When you vocalize, keep your mouth away from the microphone about 10 cm. If your m1Set./Service1Other settings1Voice settings voice is too distant, it may be difficult to recognize your voice. 1Do the following operations. ≥Pronounce the voice dial name as clearly as possible. ≥Before and after voice production, avoid making the sounds unrelated to the voice dial Auto voice dial You can automatically make a call to the phone number...
- Page 103 Sound/Screen/Light Settings Sound Settings Screen/Light Settings Changing Ring Tone....<Select Ring Tone> 102 Changing Displays ..... .<Display Setting> 109 Setting Sound Effects of Ring Tone or Melody Displaying an Image Stored in Phonebook while Ringing .
- Page 104 Display Title Name of Lyricist/Composer <Select Ring Tone> Ukulele ー ー Changing Ring Tone Waterdrop ー ー ※ 3D sound is supported. See page 103 for 3D sound. You can set a ring tone for each incoming type. (Note) The names of lyricists and composers are described conforming to the JASRAC If you select an i-motion file, the i-motion file is played back with sound website.
- Page 105 Information <Melody Effect> ≥You can set the Call Receiving display by selecting “Phone” or “Videophone”, and Setting Sound Effects of Ring Tone or then by selecting “Select calling disp.”. Go to step 2 on page 110. Melody ≥You can set the Mail Receiving display by selecting “Mail”, “Chat mail”, “MessageR” or “MessageF”, and then by selecting “Select receiving disp.”.
- Page 106 <Vibrator> <Voice Announce> Informing You of an Incoming Call by Using Recorded Sound as Ring Tone Vibration You can set the sound recorded with the FOMA terminal for a ring tone (including a ring tone for Number B of 2in1), On-hold tone/Holding tone, You can set the vibrator to notify you of incoming calls and mail.
- Page 107 Information <Charge Sound> ≥Melody Call is not available for incoming videophone calls and PushTalk calls. Setting Charging-start/end Tones ≥When you select “YES” from the confirmation display asking whether to connect to the site, the line is connected to the i-mode site. You are not charged a packet The confirmation tone sounds twice when charging starts/ends.
- Page 108 Information <Mail/Message Ring Time> ≥In the following cases, the tone sounds from the earphone when an earphone/ Setting Ring Time for Mail and Messages R/F microphone is connected, and from the speaker when it is not connected, regardless of this setting: You can set the duration of the ring tone which sounds for incoming ・While watching a 1Seg program i-mode mail, SMS messages, Chat mail, Messages R/F, and i-concier...
- Page 109 Information <Manner Mode Set> ≥Even if you activate Manner Mode, the shutter sound and focus lock tone of the camera Selecting Manner Mode Type sound. ≥In Manner Mode, if you try to play back a melody, the confirmation display appears You can select one of three types of operations for Manner Mode.
- Page 110 You can select from among standard “Manner mode” to inform you of Manner Super Original incoming calls or mail by the vibrator, “Super silent” to erase sounds Mode Silent ※7 including confirmation tones from the earpiece, or “Original” to Works with the same set value as ①. Timer recording alarm Silent customize operations.
- Page 111 1Select a pattern. Selector sound When Calendar/Schedule is set ≥See page 105 for Speed Selector Sound. You can display schedule events of the day (up to 10) or 1Normal or Up Mic sensitiv. calendar in the set format on the Stand-by display. You can check the schedule events or calendar and can set schedule 1ON or OFF LV alarm tone...
- Page 112 Not to display icons on the Stand-by display Information ≥You cannot set some images or i-motion files for the Wake-up display. Also, some Press h from the Stand-by display. images may not be displayed with correct display direction. Calendar, schedule events, status icons, notification icons, and desktop icons are cleared.
- Page 113 Information Information ≥When you set an i-motion file containing video and sound for a ring tone ≥The image you can set for antenna icons is a GIF image of 44 x 50 dots. (Chaku-motion), it is played back for incoming calls, taking priority over this function. (An antenna icon is composed of an image of 22 x 25 dots.) However, if you set a voice-only i-motion file, the image set by this function is displayed.
- Page 114 Soft light You can set whether to light the backlight softly for the display. Information 1ON or OFF ≥When newly received messages and missed calls are found, the detailed Missed Call ≥Even if you set to “OFF”, the backlight might light softly for some display appears.
- Page 115 ≥You cannot change the color for icons and images displayed in multiple colors, the Around DOCOMO pictograms, and the Internet websites (sites) supporting i-mode. You can adjust the contrast of the display so that it is hardly viewed from a slanted angle.
- Page 116 <Menu Icon Setting> <Kisekae Tool> Setting Displays for Main Menu Using Kisekae Tool You can change the icons and the background images of Main Menu. You can use Kisekae Tool to change the ring tone, Stand-by display, m1l( menu icons and others at a time. )1Select a pattern.
- Page 117 Function Menu of Main Menu <Set to Machi-chara> Setting Machi-chara Image Change launcher You can manually replace the items on Main Menu. 1Select a destination to save to1YES When Machi-chara is set, a Machi-chara image appears on the Stand-by display to tell you missed calls, new mail messages, new i-concier Disp.
- Page 118 Incoming See page 117. Hourly illumination You can be notified of the specified time (every hour at 0 minutes) illumination by the tone and light of the Call/Charging indicator. 1Select a pattern. Illumination in talk You can set the illumination for during a call. OFF .
- Page 119 <Font> Incoming Illumination Changing Character Font You can set an illumination for each incoming type. m1Set./Service1Illumination1Incoming illumination m1Set./Service1Display1Font 1Do the following operations. 1Font 1, Font 2, or Font 3 1Select an incoming type1Select an item. Select color Information ≥To make the indicator light in colors “Color 1” to “Color 12” in ≥Some characters are displayed in “Font 1”...
- Page 120 Information Phonebook You can set the font size for the Phonebook and “Phonebook ≥You cannot change the color of pictograms. settings”. 1Large or Standard ≥You can set also by m1Phonebook1Phonebook settings <Font Size Setting> 1Font size setting1Phonebook. Changing Font Size Dialed/recv.
- Page 121 1Largest, Large, or Small ≥You cannot change the clock size of World Time Watch and the Display size sub clock. When “Select language” is set to “日本語 (Japanese)”, you can Day of week select “日本語 (Japanese)” or “英語 (English)”. ≥If you set to “英語 (English)”, the region names of World Time Watch are displayed in English as well.
- Page 123 Security Settings Security Code Restricting Outgoing/Incoming Calls or Messages Security Codes Used for FOMA Terminal ....122 Setting not to Display Redial/Received Calls Changing Terminal Security Code .
- Page 124 ≥Take care not to let others know your security codes. Even if your security codes are back page of this manual. known and used by a third party, we at DOCOMO take no responsibility in any event for the resultant loss.
- Page 125 1PIN1 code entry set1ON or OFF 1Enter the PIN1 code. Enter PUK (PIN unblock code) ≥See page 122 for the PIN1 code. Entry OK Wrong entry 10 times in succession Consult the handling Set new PIN code counter of a docomo Shop...
- Page 126 Enter the new PIN1 code/PIN2 code again. Change PIN1 Code/Change PIN2 Code You need to have set “PIN1 code entry set” to “ON” to change the PIN1 code. <Lock All> m1Set./Service1Lock/Security1UIM setting Restricting Others from Using 1Enter your Terminal Security Code 1Change PIN1 code or Change PIN2 code If you set Lock All, you can do no operations other than answering calls and turning on/off the power.
- Page 127 ≥Note that neither the UIM nor the microSD card is locked. ※If you are a member of the DOCOMO Premium Club, you can use this service as often as you need without handling charge. If you are not, the service is available on Information chargeable basis.
- Page 128 During Self Mode, the caller hears the guidance to the effect that radio Including the functions which use personal information, you can set the waves do not reach or the power is turned off. If you use DOCOMO Voice following functions not to be used.
- Page 129 Setting/releasing Personal Data Lock Setting Performance During Personal Data Lock m1Set./Service1Lock/Security1Personal data lock Even during Personal Data Lock, you can release the lock for some functions such as a notice of alarm and mail receiving. 1Enter your Terminal Security Code m1Set./Service1Lock/Security1Personal data lock 1Activate/Deactivate 1Enter your Terminal Security Code1Customize...
- Page 130 Information Information ≥When a call or mail message comes in after closing the FOMA terminal, or when you <Mail receiving> open it, the elapsed time counter returns to 0 seconds. ≥When “Not accept” is set, you can automatically receive Messages R/F, i-mode mail ≥When this function is activated, the lock is temporarily released if you release each messages, chat mail messages, and SMS messages during Personal Data Lock;...
- Page 131 Information Store ≥You cannot change PIM/IC Security Mode when the face data files stored by Face To use Face Reader, store 3 or more face data files. You can store up to Reader Setting are fewer than three, or during Personal Data Lock or IC Card Lock. 10 face data files.
- Page 132 Information Recognition-failed Image ≥At shooting, the Call/Charging indicator flickers and the shutter tone sounds The images not judged as yourself by Face Reader recognition operation regardless of the Manner Mode setting. The sound volume for shutter tone cannot be are saved. You can use these images to specify who tried to illegally changed.
- Page 133 Enter a new Face Reader Security Code (four to eight When “Face reader security” is set to “High” digits)1YES After you are successfully authenticated by Face Reader, your eye blinking is checked. Repeat blinking your eyes slowly. When the detection of eye blinking fails, the authentication also fails. Use Face Reader to Release Lock ≥Even in the same environment as that for the authentication by Face Reader, the When “PIM/IC security mode”...
- Page 134 Information Key Lock Setting ≥If you set Keypad Dial Lock, you can send mail only when the address is called up You can set whether to temporarily release Key Lock when you open the from the Phonebook and when the address stored in the Phonebook is called up from FOMA terminal.
- Page 135 Information <Secret Mode> <Secret Data Only> ≥Only the Phonebook entries in the FOMA terminal can be stored as secret data. Protecting Phonebook Entries and ≥When you make a call to the party stored as secret data, his/her name is not Schedule Events from Prying Eyes displayed but the phone number is displayed on the Dialing/Talking display.
- Page 136 Call Acceptance <Mail Security> You can receive voice calls, videophone calls, and PushTalk calls only from specified Setting not to Display Mail in Mailbox phone numbers. You can set only the calls you want to accept to be connected. You can specify up to 20 phone numbers.
- Page 137 Information <Call Setting without ID> ≥You can make emergency calls at 110/119/118 even if you set “Restrict dialing”. Setting Response to Incoming Calls ≥When a call comes in from the phone number set with “Call rejection”, or from other without Caller ID than the phone number set with “Call acceptance”, the call is stored in “Received calls”...
- Page 138 <Ring Time> <Reject Unknown> Delaying Start of Ringing Operation Rejecting Incoming Calls from Phone Numbers which are not Stored in m1Set./Service1Incoming call1Ring time Phonebooks 1Do the following operations. You can reject voice calls, videophone calls, and PushTalk calls from the Ring start time You can set the FOMA terminal not to start ringing operation party whose phone number is not stored in the Phonebook.
- Page 139 ToruCa files, and schedule events (hereafter, “saved data the Data Storage Center to your FOMA terminal, do the following operations. files”) in your FOMA terminal to the DOCOMO’s Data Storage Center and i1English1My Menu to restore them when you unexpectedly lose your handset or change 1電話帳お預かり...
- Page 140 お預かりデータ更新 (Update stored data) Setting Data Security Service m1LifeKit1Data Security Service You can update the data files at the Data Storage Center and in the FOMA terminal. 1Do the following operations. m1i-concier1l(MENU)1設定 (Settings) 1お預かりデータ更新 (Update stored data) Connect to Center See page 137.
- Page 141 ≥During initialization, never turn off the power of the FOMA terminal. docomo Business Online ≥You cannot use other functions during initialization. Also, you cannot receive calls or From personal computers http://www.docomo.biz (in Japanese only) mail messages. ※You may not be able to access due to system maintenance, etc.
- Page 142 Reference Other Security Settings Functions/Service name Purposes page Besides introduced in this chapter, the following functions/services for i-mode Disaster Message Board the Security Settings are available: Service Change Mail Address Reference Functions/Service name Purposes page Spam Mail Prevention (Reject Mail with URL) IC Card Lock To protect the IC card function from (Reject/Receive Mail Settings)
- Page 143 Mail i-mode Mail ......... . 142 Configuring Mail Settings Sorting Mail Automatically to Each Folder .
-
Page 144: I-Mode Mail
Select the address field1Select an item. i-mode Mail Phonebook..Call up a Phonebook entry and select a phone number or Once you subscribe to i-mode, you can exchange e-mails over the mail address. Sent address . - Page 145 ) and select “Change rcv. type” to change ≥If you store the secret code and send mail to a mail address other than that of DOCOMO the type of mail. (See page 144) mobile phones, you might not receive the error message for unknown address.
- Page 146 Delete receiver You can delete the selected address when there are multiple Save template You can save the Deco-mail message you are creating as a addresses. template. 1YES 1YES ≥See page 206 when templates are stored to the maximum. 1Select a receiving type. Change rcv.
-
Page 147: Creating And Sending Deco-Mail
Press Creating and Sending Deco-mail The Message Composition display is displayed. When editing an i-mode mail message, you can change the size of the Go to step 6 on page 142. font and the color of the background as well as inserting images, thus Information composing your own original mail. - Page 148 ■How to use Palette You can insert the image shot by the camera on the spot into Camera Press d from the Message Entry display to display Palette. the text of mail. ≥When the cursor is over the decorated character, the Palette 1Shoot a still image.
- Page 149 You can set Font Color, Blink, Font Size, Word Alignment, You can make characters to be entered blink. Select area Select blink 1Enter text. Ticker and Swing over the selected text you have entered. You can also change the set decoration, add another The set characters are blinking.
-
Page 150: Creating And Sending Decome-Anime
Information Creating and Sending Decome-Anime <Insert image> Decome-Anime is a mail service which enables you to create expressive ≥You can insert up to 20 types of images within 90 Kbytes in total. However, you can mail messages which have Flash movies with messages and images, insert up to 2 types of Flash movies. - Page 151 Select the text field1Phone or microSD1Highlight a Information Decome-Anime template and press l ( ≥You cannot create a Decome-Anime message when sent mail messages in the Outbox are saved to the maximum number/size of storage and all of them are ≥When a Decome-Anime template is already selected, the Edit Decome-Anime protected, when 20 draft mail messages are saved, or when the Draft is full.
-
Page 152: Using A Template To Create Deco-Mail/Decome-Anime
Template You can read in a Decome-Anime template to create a Deco-mail Template Decome-Anime message. l1Template1Deco-mail1Select a template. 1Phone or microSD1Highlight a Decome-Anime template and press l( ≥Press l( ) to Go to step 4 on page 149. create a Deco-mail ≥If any Decome-Anime template is selected, the confirmation message using the display appears asking whether to discard the current contents... - Page 153 Select a template. 1Put a check mark for templates to be deleted Delete selected )1YES The preview of the template is displayed. 1Enter your Terminal Security Code1YES Delete all ≥Press l( ) to create the Decome-Anime Function Menu of the Detailed Deco-mail Template Display message with the template contents.
-
Page 154: Attaching A File
≥Depending on the destination i-mode phone, only the compatible files are received Preview You can display the preview of the Decome-Anime template. within the memory space of that phone. 1Enter a title. Edit title ≥It might take a time to send the i-mode mail depending on the size of attached files. ≥You can enter up to 10 full-pitch/20 half-pitch characters. - Page 155 FOMA terminal. (See page 365) 1Select a bookmark. Bookmark ≥If the receiving end is other than P-08A, the sent melody might not be played back ≥Select the attached bookmark to display the title, address, and correctly or the attachment might be deleted.
-
Page 156: Receiving I-Mode Mail Automatically
Information <Mail Auto-receive> ≥When the unread or protected mail messages in the Inbox has reached the maximum Receiving i-mode Mail Automatically number/size of storage, no new mail can be received and “ (dark blue)” is displayed. To receive i-mode mail, delete received mail or read unread mail or release protection When the FOMA terminal is in the service area, i-mode mail, SMS of mail until “... -
Page 157: Receiving I-Mode Mail Selectively
Information Information ≥When the number of characters in the text of received i-mode mail exceeds the ≥Even when Receive Option Setting is set to “ON”, you will still receive all mail maximum, “/” or “//” is inserted at the end of the text and the excess part is deleted messages if you execute “Check new messages”. - Page 158 ”. ≥Even if the i-mode mail text contains pasted data, you cannot quote it in your forwarding mail. Also, you cannot quote it when using the DOCOMO keitai datalink or Information infrared communication function. See page 161 for pasted data.
-
Page 159: When I-Mode Mail With Files Attached/Pasted Is Received
≥You can display only the first item when a file of Phonebook entries, schedule events, ToDo items or bookmarks is attached. Information ≥When the sender’s device is other than P-08A, the received melodies might not be played back correctly. -
Page 160: Displaying Mail In Inbox/Outbox/Draft
Select a destination or folder to save to. Information ≥When the first attached file is an obtained still image, that still image only is For melodies, go to step 3 on page 205. automatically displayed when the mail message is opened. The size of a still image For still images, go to step 3 on page 204. - Page 161 Select a mail message. Display Mail from Outbox ≥When you select an unread You can save up to 1,000 sent i-mode mail messages including SMS mail message, “ (pink)” messages. changes to “ ”. You can check the sent i-mode mail messages and SMS messages. ≥For a Decome-Anime l1Outbox1Select a folder.
-
Page 162: How To See Inbox/Outbox/Draft List And Detailed Display
Display Mail from Draft How to See Inbox/Outbox/Draft List and Detailed Display You can edit and send i-mode mail messages and SMS messages in the Draft. You can save up to 20 i-mode mail messages including SMS ■Mail menu messages. Inbox, Outbox, and Draft might have the following marks: l1Draft Unread mail messages or messages are... - Page 163 ■Inbox list and detailed Received Mail display 4Subject The number of characters you can display on the list varies depending on the setting of “Mail list display”, and “Mail” of “Font size setting”. When a file is attached, it is decreases by 1 full-pitch/2 half-pitch character/s as the icon is added at the top.
- Page 164 ■Outbox list and detailed Sent Mail display <For Inbox list (Date+subject) (Date+sender/receiver)> Attached file File with the UIM security i-αppli mail 6Feel*Mail icon When you press c( ) from the Inbox list, the Feel*Mail image is played back. See page 176 for Feel*Mail. 7Text of mail ■Outbox Folder list 1Folder status...
- Page 165 4Subject ■Draft list The number of characters you can display on the list varies depending on the setting 1Mail status of “Mail list display”, and “Mail” of “Font size setting”. When a file is attached, it is Ordinary mail decreases by 1 full-pitch/2 half-pitch character/s as the icon is added at the top. (pink) For SMS messages, the beginning of the text is displayed.
-
Page 166: Managing Mail Messages
“phone number@docomo.ne.jp”, the name is not displayed even when ≥You can enter up to 10 full-pitch/20 half-pitch characters. “phone number@docomo.ne.jp” is stored in the mail address field in a Phonebook entry. Store the phone number part only to display the name. When a sender’s/ Sort folder You can sort folders. - Page 167 Re-sort in all You can re-sort mail messages in all Inbox/Outbox folders Information following the sorting conditions specified by “Auto-sort”. <Delete folder> 1YES ≥You cannot delete an i-αppli mail folder if corresponding mail-linked i-αppli exists. ≥When the folder applied with Mail security (see page 165) is If the software program does not exist, you can delete the i-αppli mail folder, but this found, you need to enter your Terminal Security Code.
- Page 168 Protect Search sender/ You can retrieve mail messages with a mail address or Search receiver phone number of a sender or recipient. Protect ON/OFF You can protect the mail message so that it is not [Inbox/Outbox] “Search sender” for received mail and “Search receiver” for [Inbox/Outbox] overwritten and deleted.
- Page 169 Mail history You can display the history of sent/received mail from the No. of messages You can display the number of stored received mail [Inbox/Outbox] sender or to the recipient being selected or displayed. Up messages, sent mail messages and draft mail messages. to 1,000 histories are displayed in the chronological order Delete from the most recent one.
- Page 170 Information Read map You can display a map by selecting a postal address or others in the mail text. <Color label> 1Select a start point1Select an end point. ≥Color Label applied to the mail messages is released when they are copied to the GPS compatible i-αppli program starts via the selected microSD card, copied/moved to the UIM, copied/moved from the UIM or sent via character string.
-
Page 171: Displaying Sent/Received Mail Record
Property You can display the file name and file size of the image Information inserted into the text. <Resend> 1Select an image. ≥If you re-send a failed-to-send mail message, it is saved as the sent mail message. If 1YES you re-send the failed-to-send simultaneous message to all addresses, it is saved as Delete att. - Page 172 When Using Received Address Dialing When the mail address is stored in a Phonebook entry, you can make a voice call, videophone call or PushTalk call to the o for at least one Press and hold phone number stored in the Phonebook. second.
-
Page 173: Sorting Mail Automatically To Each Folder
1YES Delete this To change the condition 1Put a check mark for records to be deleted Delete selected The confirmation display appears asking whether to change the condition or to overwrite )1YES it. Select “YES” to release the set condition and set the new one. 1Enter your Terminal Security Code1YES Delete all When the same condition is set for another folder... - Page 174 ≥You can enter up to 50 half-pitch characters. release the sort condition for them. (The items are deleted ≥When the mail address is “phone number@docomo.ne.jp”, from the Auto-sort Setting display.) enter the phone number only. You can sort SMS messages 1Put a check mark for mail addresses or phone numbers as well if you enter the phone number only.
-
Page 175: Creating Mail Group
Information <Mail Group> <Look-up mail group> Creating Mail Group ≥On the Auto-sort Setting display, “ ” is added to the top of the mail group name. <Subject sort> You can store mail addresses by group. You can send mail to regular ≥When the subject matches sort conditions for multiple folders, it is sorted to the folder destinations. -
Page 176: Setting Mail And Messages R/F
Mail security See page 134. Function Menu of the Detailed Mail Group Display/Mail Group Address Confirmation Display Secret mail display See page 133. Auto color label You can specify the text color of the sender, received date/time Edit address Go to step 3 on page 173. and others on the Inbox list by mail address. - Page 177 Information Receiving display You can set whether to display the Message Receiving and Reception Result displays, even during operation of another <Set check new messages> function. ≥ If you do not want to receive Messages R and Messages F by “Check new 1Alarm preferred or Operation preferred messages”, change these settings to “...
-
Page 178: Receiving Messages R/F Automatically
Quotation marks The quotation mark is the symbol indicating a quotation from Disp. /play in A Feel*Mail icon appears on the Received Address list/detailed received mail for when you reply to mail. history Received Address display, the Inbox list, or the detailed Received 1Enter a quotation mark. -
Page 179: Reading Received Messages R/F
Information <Display Message R/F> ≥When the Messages R/F exceed the maximum number/size of storage, they are Reading Received Messages R/F deleted from the oldest one. However, unread or protected Messages R/F are not deleted. l1Inbox1MessageR or MessageF ≥When the FOMA terminal cannot receive any more Messages R/F, “ (dark blue)” or 1Select a Message R/F to be displayed. - Page 180 2Received date and time Display all After you execute “Sort” or “Filter”, you can reset it and list all The list shows the time for the Message R/F received today, and shows the date for Messages R/F by “By date ↑”. the Message R/F received until yesterday.
-
Page 181: Early Warning "Area Mail
Add to phonebook See page 92. Receiving Early Warning “Area Mail” 1YES Delete When an Area Mail message arrives, the ring tone for Area Mail sounds. “Ring volume”, “Ring time”, and “Vibrator” follows the settings of “Mail”. Early Warning “Area Mail” When an emergency earthquake alert arrives, a dedicated buzzer (alert) This service enables you to receive reports such as emergency sounds, and the vibrator works to notify you. -
Page 182: Setting Early Warning "Area Mail
Receive entry You can register Message IDs for receiving information other <Early Warning “Area Mail” Settings> than Quake Early Warning and Disaster/Evacuation. You can Setting Early Warning “Area Mail” register up to 20 IDs. ≥You do not need to operate “Receive entry” for receiving l1Area Mail settings1Do the following operations. -
Page 183: Using Chat Mail
Chat Member list ≥If you select “Group list”, select a chat group. number@docomo.ne.jp”, store the phone number only. The members from the selected group are stored. ≥You can enter up to 50 half-pitch characters. ≥If you select “Member list”, check the members you want to... - Page 184 r1YES or NO Display setting You can check the chat member’s name, image, background color, and mail address. YES ..You can delete read and sent chat mail message from the “Chat” folder. o to switch members. ≥You can press NO .
- Page 185 ■Chat Mail display Information 1Image ≥When the Inbox is full of unread or protected mail messages, you cannot exchange The image you have stored in Chat Group is chat mail messages. Delete unnecessary mail messages or read unread mail displayed. messages, or release the protection and then operate.
-
Page 186: Creating Chat Group
Delete read mails You can delete all the received read chat mail messages and If you start Chat Mail from the desktop or Chat Group sent chat mail messages including secret mail and chat mail If you start Chat Mail from a mail address or from a chat group that is not stored in Chat messages failed to send. - Page 187 1Select the member name field1Enter a member’s name. stored in the Phonebook, the image is also set. ≥When the mail address is “phone number@docomo.ne.jp”, store the phone ≥You can enter up to four full-pitch/eight half-pitch characters. ≥Not to change the member’s name, go to the next step.
-
Page 188: Composing And Sending Sms
≥You can send and receive SMS messages to and from subscribers of overseas ≥When the sent mail messages exceed the maximum number/size of storage, they are carriers other than DOCOMO. For the countries and overseas carriers available for the deleted from the oldest one. However, protected sent mail messages are not deleted. -
Page 189: Receiving Sms Automatically
Save You can save the SMS message you are composing or editing to Display Newly Received SMS Messages the Draft. Reception Result display1Mail ≥You cannot save the message when the address field and text field are blank. 1Select an SMS message to be SMS report req. - Page 190 “:” is included, you cannot set it for “International”. You can set the period that the SMS Center holds an SMS message sent ≥You can reset User Setting to “DOCOMO” by Reset1Enter your Terminal but unsuccessfully delivered due to the out-of-service area, etc.
- Page 191 i-mode/Full Browser i-mode ..........Accessing Sites .
- Page 192 Press i. i-mode While you are online, “ ” blinks. i-mode is a service that enables you, by using the display of the FOMA ≥“ ” blinks while you are using the i-mode service terminal supporting i-mode (i-mode phone), to use online services such (during i-mode standby).
- Page 193 Change to iMenu in English To return to a non-SSL/TLS site The confirmation display appears asking whether to close the SSL/TLS page. Select iMenu is available in English. “YES” to display an ordinary site; “ ” goes off. i1English Information English iMenu is displayed.
- Page 194 Access Sites from My Menu ≥Note that if you do not remember the i-mode password, you need to bring an i1English1My Menu1Select a site to be accessed. identification card such as your driver’s license to the handling counter of a docomo Shop. Information <Full Browser>...
- Page 195 Information Switch from i-mode to Full Browser ≥You cannot use the following functions in Full Browser: You can switch to Full Browser to show the Internet websites incorrectly ・Phone To function ・i-αppli To function ・Media To function displayed by i-mode. Switch Display Mode While a page to be shown in Full Browser is displayed Two modes, “PC layout mode”...
- Page 196 ■Operations while a site is displayed Return to Obtained Previous Page/Go to Obtained Next Page Key operation The FOMA terminal saves the files such as the displayed Internet Operation Full Browser websites to a temporal storage area called a cache. By pressing i-mode ) or c( Keitai mode...
- Page 197 Information Operate by the Pointer ≥When you display a page stored in cache, you cannot display text or settings you When you set “Display pointer” of “Pointer/scroll” to “ON”, a pointer entered when connected before. appears on the display. Using this pointer, you can scroll displays, select ≥When Flash movies are displayed, the site behavior might differ from the one for a content, etc.
- Page 198 Name Display example Operation/Explanation Display a Site Supporting Frames Text box You can enter characters. Highlight a text box and You can display sites composed of frames. You can select a frame, and press ) to show the Character Entry enlarge each selected frame for displaying.
- Page 199 URL enter history See page 199. Function Menu while Site is Displayed Display URL You can display the URL of the displayed site. Bookmark Window Bookmark Go to step 1 of “Display Websites or Sites from a Open new window See page 195.
- Page 200 Pointer/scroll long press set. See page 404. Display pointer See page 209. Change CHR code When characters are not correctly displayed, you can convert them to the correct ones. Speed See page 209. ≥This setting is valid only for the site and Internet website Focus while scroll See page 210.
- Page 201 Information <Last URL> ≥For i-mode, Internet websites not supporting i-mode or some type of Internet websites Displaying Site Viewed in the Past to be connected might not be displayed correctly. Display Last URL Displaying Websites from URL History Each time you display a site via i-mode or Full Browser, the URL of the Up to 50 entered URLs can be stored in URL History.
- Page 202 FB Home setting You can store the site as Home URL of Full Browser. Display Websites or Sites from a Bookmark 1YES m1i-mode1Bookmark1Select a folder Delete 1Select a bookmark to be displayed. 1YES Delete ≥“ ” is displayed for 1Put a check mark for URL histories to be deleted Delete selected i-mode bookmarks and )1YES...
- Page 203 Send Ir data See page 377. Function Menu of the Bookmark List transmission See page 379. Compose message You can compose an i-mode mail message with the No. of bookmarks You can display the number of bookmarks stored in the highlighted URL pasted to the text.
- Page 204 Select a folder1Select a screen memo. Information ≥When “FB usage setting” ≥When the title exceeds 11 full-pitch/22 half-pitch characters, the excess is deleted. of “Full Browser set.” of ≥If you save the data acquisition completion display, its data file is saved as well. (You “i-mode settings”...
- Page 205 CHG wide scr. mode/ You can switch vertical display and horizontal display. Function Menu of the Screen Memo List RLS wide scr. mode Move See page 201. Full display set. See page 210. Edit title See page 201. Zoom See page 210. Protect ON/OFF You can protect screen memos not to be deleted.
- Page 206 Information <Save Image> ≥Even when an image is displayed on the site, it might not be displayed on the Picture Saving Images from Sites viewer after saving it to the FOMA terminal. ≥The image satisfying the following conditions is saved as a Deco-mail pictogram: You can save the image displayed on a site or screen memo, and then set ・GIF or JPEG image ・Image of 20 x 20 dots...
- Page 207 Call up a data downloadable site1Select a data file. When downloading a Kisekae Tool file or Machi-chara image is suspended Downloading of the data file starts. When downloading is completed, the data acquisition completion display appears. When you press l( ) to suspend downloading or when downloading is ≥For a PDF file, the PDF file is displayed when downloading is completed.
- Page 208 When the data files are stored to the maximum Flash Function If the maximum number of data files is stored or there is not enough memory when you Flash is an animation technology that treats pictures and sound. Flash try to save the data files, the confirmation display appears asking whether to delete the movies make the sites more attractive.
- Page 209 Information Information ≥The maximum display size of a Flash movie on the site is 480 x 662 dots. If a Flash ≥You can upload up to 2 Mbytes in total. movie is larger than 480 x 662 dots, it is displayed shrunk with a proportional ratio ≥You cannot upload files that are prohibited from output from the FOMA terminal to retained.
- Page 210 ≥To set Caller ID Notification, select “Notify caller ID”. (See step 2 of “Set Caller ID the link when forwarding or replying to. Also, you cannot quote it when using Notification when Making a Call” on page 56) DOCOMO keitai datalink or infrared communication function. Mail To Function Media To Function...
- Page 211 Script setting You can set whether to validate JavaScript. JavaScript is a <i-mode Settings> simple program language that runs on Internet websites. It is Setting i-mode widely used to create Internet websites with movements. When “Valid” is set, you can use the JavaScript function to You can configure settings for i-mode and Full Browser, and settings browse Internet websites.
- Page 212 Information Script setting See page 209. <Script setting> Pointer/scroll ≥Some Internet websites may not be displayed correctly unless “Valid” is set. Display pointer See page 209. ≥Even when “Valid” is set, it might not work depending on JavaScript. <Display pointer> Speed See page 209.
- Page 213 Common Settings You can set the host (APN) to use for receiving services other than m1i-mode1i-mode settings1Common settings i-mode (DOCOMO). If you change this setting, you will not be able to use i-mode. 1Do the following operations. m1i-mode1i-mode settings1Common settings Certificate setting See page 213.
- Page 214 Information Setting Cookie ≥When “Sending”, “Receiving”, or “Sending/receiving” is set, the confirmation display By using cookies, you can effectively access the Internet websites you might consecutively appear asking whether to send/receive (update) cookies have accessed once. depending on the Internet website. A cookie is the system to temporarily save personal information such as the date/time or number of times you accessed an Internet website.
- Page 215 FOMA terminal at purchase. for safer data exchange. The site and your FOMA terminal exchange certificates, DOCOMO Certificate . . . Certificates required for connecting to the FirstPass Center or check the other party’s certificate and verify each other for safer communication FirstPass sites;...
- Page 216 Enter your PIN2 code. Access FirstPass Center ≥Enter your PIN2 code within 60 seconds. When the You can perform user certificate operations on the site of the FirstPass code is not entered within 60 seconds, the connection is Center site. cut off as an error entry.
- Page 217 UIM or PIN2 code. certificate to be issued and then download it. ≥If your UIM is lost or stolen, “docomo Information Center” on the back page of this ≥See page 213 for how to view the download user certificate.
- Page 219 i-motion/Movie/i-Channel/i-concier Using i-motion/Movie i-motion/Movie ........Downloading i-motion/Movie from Sites .
-
Page 220: I-Motion/Movie
■Type of movie file i-motion/Movie Categories Description i-motion is a data file composed of video, sound and music, and you can Streaming type (cannot be saved) Plays back while obtaining a movie file. The data play it back after downloading from an i-motion compatible site into your is deleted after playback, so you cannot play it FOMA terminal. -
Page 221: Downloading I-Motion/Movie From Sites
When downloading i-motion file is suspended <Download i-motion/Movie> When you press l( ) to suspend downloading or when downloading is Downloading i-motion/Movie from Sites suspended by an incoming call, the confirmation display appears asking whether to resume downloading. Play Back i-motion/Movie Files Obtained from a Site Select “YES”... -
Page 222: Setting Automatic Replay Of I-Motion/Movie
Information Save i-motion/Movie Files ≥Note that there is no upper size limit for a streaming type of movie file when it is You can save the obtained i-motion/movie files to your FOMA terminal or obtained via Full Browser and you might exchange the unlimitedly bulky file. When microSD card. -
Page 223: I-Channel
Channel the i-Channel list by pressing the i-Channel key. (See page 221) list. Further, two types of channels, “Basic channel” provided by DOCOMO Press and “Favorite channel” provided by IPs (Information Providers) are The Channel list appears regardless of the “Ticker ON/... -
Page 224: Setting How Ticker Is Displayed
Reset i-Channel You can initialize the ticker information and set “Ticker ON/OFF” ≥There are two kinds of information; one is sponsored by DOCOMO and the other is to “ON”. by IPs (Information Providers). You are not charged a packet communication fee for 1Enter your Terminal Security Code1YES DOCOMO-sponsored information. -
Page 225: Displaying I-Concier Screen
Receive Information Displaying i-concier Screen When the FOMA terminal is in the service area, information automatically m1i-concier arrives. 1Select a piece of information. When information arrives, “ ” appears at the top of the display. You can save up to 50 received information files. They are overwritten ≥An unread mark appears for unread information. -
Page 226: Configuring I-Concier Settings
Configuring i-concier Settings i-concier display1l(MENU)1設定 (Settings) 1Do the following operations. iコンシェルとは You can display the explanation about i-concier. (What is i-concier?) インフォメーション You can set the contents of received information, etc. 受信設定 (Information receive settings) 自動お預かり/更新 See page 138. 設定 (Automatic saving/ Update settings) その他共通設定... - Page 227 Camera Before Using Camera ....... . . Shooting Still Images ....<Still Image Shoot> 230 Shooting Moving Pictures.
-
Page 228: Before Using Camera
・If the battery pack is removed off while saving a file to the FOMA Before Using Camera terminal or microSD card, that data becomes contingent. ・You need to obtain a microSD card separately to use the functions Notes for when Shooting Images related to the microSD card. - Page 229 ■Operations for shooting Information ≥While the camera is activated, the photo light turns on or flickers. When “Movie type ※1 Icon menu operation Image size set” is set to “Voice” in Movie mode or when you shoot with the inside camera, the ※1 Photo mode Image quality...
- Page 230 Icon/bar name Icon Description Page Camera Setting and Finder Display 1Photo mode Scenery On the Finder display, the settings are indicated by bars and icons. Night mode 3 4 5 Backlight Character Snow Sunset @ < < 2Camera mode Photo mode Movie mode Continuous mode (Auto, Manual, Auto >...
- Page 231 Icon/bar name Icon Description Page Icon/bar name Icon Description Page 9 Flash setting Auto > Image size VGA (640 x 480) (Movie mode) Forced ON HVGA Wide (640 x 352) QVGA (320 x 240) Always light ON QCIF (176 x 144) Forced OFF Sub-QCIF (128 x 96) Photo light...
-
Page 232: Shooting Still Images
), 0 or p. Press <Still Image Shoot> The still image you shot is saved to the “Camera” folder of Shooting Still Images “My picture” in the FOMA terminal or to the microSD card. ≥See “Store in” and “Select storage” for selecting a ≥See page 334 for how to display saved still images. - Page 233 ), 0 or p. Press To select multiple still images and save them Continuous shooting starts. Select still images to be saved and press ), 0, or p the When “Continuous mode” is set to “Manual”, press 0, or p1l( )1Save or Mirror save number of times of shooting frames.
- Page 234 Icon See page 238. Function Menu of the Post View Display in Photo Mode/ Detailed Display in Continuous Mode Cancel You do not save the shot still image. Save See page 230 and page 231. Information <Attach to mail> Mirror save See page 230 and page 231.
-
Page 235: Shooting Moving Pictures
), 0 or p. Press <Moving Picture Shoot> The shot moving picture is saved to the “Camera” folder Shooting Moving Pictures of “imotion” in the FOMA terminal or to the microSD card. ≥See page 342 for playing back the saved moving pictures. ≥See “Store in”... -
Page 236: Changing Settings For Shooting
Information Changing Settings for Shooting ≥When you switch the subject you are shooting to a subject with a difference in perspective, it takes time to focus on the new subject. You can set the camera when shooting images. ≥When you have difficulty focusing on a subject, switch to another subject. Then the Use Zoom subject might come into focus. - Page 237 The maximum Information Camera mode Size Level of zoom magnifications ≥“TELE” is released in the following cases: (Approx.) h to end the camera ・When you press VGA (640 x 480) 21 levels 2.5 times ・When a size is changed HVGA Wide (640 x 352) 21 levels 2.5 times ・When camera mode is switched...
-
Page 238: Setting Image Size And Image Quality
Information Flash Setting/Photo Light Setting ≥Even when “Forced OFF” is set, the photo light turns on or flickers while the camera is activated or at shooting. At Camera start-up Photo light set.: OFF ≥You cannot use the photo light when “Movie type set” is set to “Voice” in Movie Mode. You can set whether to light the flash/photo light as a spare light for ≥If you shoot from a close distance, a correct exposure may not be obtained, letting the when you use the outside camera to shoot in a dark place. - Page 239 Photo mode You can set a photo mode suitable for the scene. When you Brightness You can adjust to -3 (dark) through +3 (bright). 1Select a brightness level. change this setting, “Brightness”, “White balance”, “Color At Camera mode set”, and “Focus” of “Camera settings” are changed start-up according to the selected mode.
- Page 240 1Select a mode. Shoot with frame You can shoot a still image with a frame. Continuous mode 1ON or OFF1Select a frame. [Continuous Mode Auto...Shoots automatically at an interval and with At Camera only] the number of frames as specified by “Shot...
- Page 241 Information Memory info You can display the used memory space (estimate)/number of stored items. <Shoot with frame> ≥When “Image size” is set to “2M (1200 x 1600)” or larger, you cannot shoot with a Information frame. ≥If you shoot a still image with a frame using the inside camera and save it, the frame is <Inside camera/Outside camera>...
- Page 242 Information Auto Timer <Display size> ≥When “Image size” is set to “HVGA Wide (640 x 352)” or larger, “Fit in display” always At Camera start-up applies. Finder display1i( )1Auto timer1ON or OFF ≥When “Image size” is set to “QCIF (144 x 176)” or “Sub-QCIF (96 x 128)”, the image is enlarged two times at both lengthwise and sidewise when it is displayed in “Actual 1Enter a delay time (seconds).
-
Page 243: Using Bar Code Reader
Kanji, katakana, alphanumeric characters, and pictograms are displayed when you scan it. Some QR codes have image or melody information. ≥“株式会社NTTドコモ (NTT DOCOMO, INC.)” is displayed when you scan this QR code with the FOMA terminal. - Page 244 Press Function Menu of the Scanned Code Result Display The code is scanned. (The shutter tone does not sound.) ≥To cancel scanning, press r or Save result See page 242. ≥When scanning is completed, the scanning completion tone sounds and the Call/ Display list You can show the Bar Code Reader list when one or more files Charging indicator lights.
- Page 245 Information Save image You can save the scanned image data to set to the Stand-by display or other displays. <Save melody> 1Select a destination folder. ≥The file name for the saved melody is “melodyXXX” (XXX are numerals). ≥For the melody with no title, the file name is displayed as the title. Go to step 3 on page 204.
- Page 247 1Seg 1Seg ..........Before Using 1Seg .
- Page 248 ■Messages on the display when you use 1Seg for the first time 1Seg When you use 1Seg for the first time after purchase, the Exemption Clause Confirmation display appears. 1Seg is the terrestrial digital TV broadcasting service for mobile objects, and it If you select “NO”...
- Page 249 ■When a call etc. comes in while you are watching or recording a 1Seg program Activating 1Seg When an event shown below occurs while watching or recording a 1Seg program, the video and audio are suspended, and each function works. Recording is not suspended. Extend the 1Seg antenna, and activate 1Seg.
- Page 250 Information <Channel Setting> ≥When the multiple broadcasting stations which have the same remote-control number Setting Channels are retrieved, the message to the effect that the remote-control number is doubled appears. Select “OK” and select your area from the Local Area Selection display. The To watch 1Seg programs, you need to execute Channel Setting and to channels in the area you select are preferentially assigned to remote-control numbers select a channel list in advance.
- Page 251 1YES Delete Select Channel List ≥When you delete all the broadcasting stations in the channel You can select a channel list to set the broadcasting stations you receive. list, the channel list itself is deleted. Also, you can edit the channel list already stored. ≥You cannot delete the broadcasting station in the channel list m11Seg1Channel list1Select a channel list.
- Page 252 ■About Viewer display 9Reception of Caption (When “Switch display” is “V. img+Caption+DBC”.) “ ” is displayed while caption information is being received. :Sound Volume < ;Program Information (outline) The program name is displayed on the vertical display. The channel, start/end time, and program name are displayed on the horizontal display.
- Page 253 ■Operations while watching a 1Seg program Information ≥The caption might not be displayed depending on the program. Operation Key operation ≥The data broadcasting cannot be displayed on the horizontal display. or </> ※1 Sound volume ≥If you move, the receivable airwaves or broadcasting stations might change being adjustment affected by mountains or buildings.
- Page 254 Back to data BC You can stop browsing the data broadcasting site and AV output See page 388. return to the data broadcasting. Video Reload contents You can reload the data broadcasting site being Brightness You can set the brightness of the display light to Level 1 displayed.
- Page 255 Key guide You can display the guide of key operation during Information watching a 1Seg program. ≥Even when you show the Message Composition display/detailed Sent Mail display by Multitask while you are watching a 1Seg program, the display appears in the Information multiwindow.
- Page 256 Information <Data Broadcasting> ≥Even if “Mail ticker display” is set to “Sender+subject”, the titles are not displayed for Using Data Broadcasting Messages R/F, i-mode mail messages, and SMS messages received from the parties not stored in the Phonebook. 1Seg enables you to use the data broadcasting in addition to the video ≥Even when you show the detailed Received Mail display by Multitask while you are and audio.
- Page 257 Information Store in TV Link ≥While the data broadcasting or data broadcasting site is displayed, the confirmation When you select the item (link) that can be stored in the TVlink list, the display might appear asking whether to send the contents you entered on the site or confirmation display appears asking whether to store it in the TVlink list.
- Page 258 Press p. Function Menu of the TVlink List The confirmation tone sounds and video is saved. ≥You can save the video also by pressing ) in Video Mode. Display detail Displays the title, URL, outline, content type, and validity ≥When the file size is larger than 2 Gbytes, or the storage location becomes full, the period of the TV link.
- Page 259 Information <TV Timer> <Timer Recording> ≥The file name and title name of the saved video are as follows: Setting Timer for Watching or Recording File name: “PRGXXX” Title name: “YYYY/MM/DD hh:mm” 1Seg Programs (X: numerals, Y: year, M: month, D: date, h: hour, m: minute) You can set TV Timer/Timer Recording of 1Seg programs.
- Page 260 1Select an alarm method. Alarm Prefer manner You can set the sound volume of timer alarm for during Manner ON... .Alerts you at the time set for the start date/time mode Mode.
- Page 261 Information Alarm You can set whether to sound alarm at the specified time of timer alarm. ≥When you set TV Timer for multiple programs and set the timer alarm to sound at the 1ON or OFF same date/time, the alarm preferentially sounds for the program whose start date/time is the earliest.
- Page 262 When the time specified for “TV Timer” or “Timer recording” Function Menu while the TV Timer List or the Timer comes Recording List is Displayed <TV Timer> Go to step 1 of “TV Timer List” on page 257 for TV Timer. If you set “Act.
- Page 263 ≥When the timer alarm is set to the same time of “Alarm”, “ToDo”, or “Schedule” Information The alarm sounds in the priority order of “Alarm” → “Timer recording” → “ToDo” ≥Depending on the i-motion file you set for TV timer alarm, only the audio might be →...
- Page 264 Mail ticker display For when you receive an i-mode mail message, SMS Recording Result message, or Message R/F while watching a 1Seg program, You can display up to 20 recording results from the latest one. you can set whether to notify you of the receiving by the ticker m11Seg1Recording result on the viewer display.
- Page 265 Listening You can set the effect of the sound from an earphone or Reset settings If you select “YES (default)” from the confirmation display for Bluetooth device. data broadcasting while watching a 1Seg program or playing 1Select an item. back video, the same confirmation display does not appear Surround.
- Page 266 Information <Icon> ≥The guide display might appear even if “Icon” is set to “OFF” when the airwave conditions have got worse. <Mobile W-Speed> ≥When you set to “ON”, you might not be able to have enough effects of “Image quality”. ≥Mobile W-Speed becomes invalid during ECO mode, AV output, or while the video is displayed in the multiwindow.
- Page 267 Music Music&Video Channel Music&Video Channel ....... . . Setting Programs ........Playing/Operating Programs .
-
Page 268: Music&Video Channel
Music&Video Channel Setting Programs Music&Video Channel is a service which automatically delivers up to If you previously set a program that you want to watch, the FOMA about one-hour programs at night by just setting your favorite music terminal automatically downloads the program data at night. programs in advance. - Page 269 Information Obtain a Program Manually ≥You cannot copy or save the obtained program to the microSD card. “ ” appears on the desktop when the automatic program acquisition ≥To set programs, you need to register the site which offers Music&Video Channel fails or the program is not updated even after the program distribution programs to your My Menu.
-
Page 270: Playing/Operating Programs
Playing/Operating Programs Operate Music&Video Channel from Data Box You can play back programs also from Data Box. From Data Box, you can ≥You can enjoy playing back programs in stereo sound by connecting to the Stereo play back currently distributed programs as well as the programs that Earphone Set (option). - Page 271 :…Listening (No indication for “OFF”) Operation Key operation : Surround : Natur1 : Natur2 Equalizer ;…Remaster (No indication for “OFF”) ≥Each time of pressing switches in order of “Normal” → : ON “H.BASS1” → “H.BASS2” → “Train”. <…Icon of Bluetooth connection (No indication for not connected) ※...
- Page 272 1Normal or Repeat Play mode setting Information Normal . . .Plays back the program once in the order of the ≥The information of the previously played program is erased if you do the following chapters. operations: Repeat..Plays back the program repeatedly in the order of ・...
- Page 273 Delete/Delete this You can delete the program. Listening You can set the effect of the sound from an earphone or 1YES Bluetooth device. 1Select an item. Delete all You can delete all the programs stored in the “Saved Surround ..Makes the sound natural and stereophonic. program”...
-
Page 274: Music Player
® When downloading Chaku-uta Full music file is suspended Playing Music When you press l( ) to suspend downloading or when the downloading is You can play back music files on your FOMA terminal by using MUSIC suspended by an incoming call, the confirmation display appears asking whether to Player or i-motion player. - Page 275 ≥The WMA files saved to the microSD card using another FOMA terminal might not be ≥FOMA USB Cable with Charge Function 01/02 (option) recognized by the P-08A. Further, the files might not be recognized by the P-08A ≥Personal computer with Windows Media Player 10 (10.00.00.3802 or later)/11 installed even when it is connected to the personal computer with “USB mode setting”...
-
Page 276: Using Music Player
≥SD-Jukebox (commercial item) ≥If the number of stored files increases, it may take long to start MUSIC Player. ≥Music CD you want to save ≥For details on MUSIC Player, refer to the DOCOMO website. Install SD-Jukebox Install SD-Jukebox on the personal computer. - Page 277 ≥The “★” mark is added to the Play Back Music Files playlist which is being played Press and hold p for at least one back or was previously played back. second. ≥When you select “Artist”, “Album”, or “Genre”, and press The Player Menu display appears.
- Page 278 ® Select a Chaku-uta Full music file or WMA file. Manage Folders or Music Files Only the selected music file is played back as a demo. m1Data box1MUSIC ≥Press and hold p for at least one second or press h during playback or pause to end playback.
- Page 279 ■Operations of MUSIC Player in use From the playback display during use of MUSIC Player, you can do the following operations by using the switch of an earphone/microphone Operation Key operation (option): Halt Operation Switch operation ) or p to play back ≥O Pause Press once.
- Page 280 ≥All Chaku-uta Full ■Icons on the Music list ® music files are set with file restrictions. See page 240 for file When you select a music file from “MUSIC→MUSIC Player”, the following icons are restrictions. displayed: Icon Acquired source Icon Description ※...
- Page 281 Information Function Menu of the Music Folder List/i-mode (Chaku-uta ≥In the following cases, the playback pauses and resumes after you finish each ® Full ) Folder List/Player Menu Display operation: ・ When you make/receive a voice call, videophone call, or PushTalk call 1Select a play mode.
- Page 282 ® Select storage You can set the destination folder for when you move the Point ring tone You can set a part of Chaku-uta Full music file as a ring tone. ® 1Select a range to be set1Select an item. Chaku-uta Full music file to the microSD card.
- Page 283 ® ® Move to phone You can move the Chaku-uta Full music file on the microSD Display lyric You can display lyric images stored in the Chaku-uta Full card to the FOMA terminal. (See page 366) music file. o to display ≥When multiple lyric images are stored, press ®...
- Page 284 Previous image/ You can display a previous jacket image or lyric image. Function Menu during Playback/Pause/Halt Previous lyric Player menu You can show the Player Menu display from the playback Next image/Next lyric You can display a next jacket image or lyric image. display during using MUSIC Player.
-
Page 285: Using Playlist
Using Playlist Create Playlist Player Menu display1Playlist You can create the list of music files you want to listen to, and play them back in the order you like. You can play back using the playlists created by the FOMA terminal or Windows Media Player, or the SD-Audio playlists created by SD-Jukebox. - Page 286 Function Menu of the Playlist List Function Menu of the Music List of a Playlist Player menu You can display the Player Menu display. Player menu You can show the Player Menu display. ≥Playback state continues even when you show the Player Menu Play mode setting See page 279.
- Page 287 i-αppli/i-Widget i-αppli ..........Downloading i-αppli from Sites .
-
Page 288: I-Αppli
When downloading is suspended i-αppli When you press r or h to suspend downloading an i-αppli program of 100 Kbytes “i-αppli” is a software program for i-mode mobile phones. You can use or more, or when downloading is suspended by the radio wave conditions, the ※... -
Page 289: Starting I-Αppli
Information <i-αppli Run> ≥“ ” appears at the top of the display while software information or a software program Starting i-αppli is being downloaded from SSL/TLS pages. ≥At downloading, the confirmation display might appear asking whether to send the i(for at least one second) “Phone/Terminal and UIM ID”. - Page 290 ≥When you select a partially saved i-αppli program, you can download the Information remaining part of it. ≥Some i-αppli programs save the various information used on the i-αppli programs ≥“ ” or “ ” is displayed while an i-αppli program is running. when you end them.
- Page 291 Use Bar Code Reader Trace Information You can use the camera to scan JAN codes, QR codes, and CODE 128 depending on You can check the details when a software program malfunctions. the software program. m1i-αppli1iαppli info1Trace info When you start Bar Code Reader while an i-αppli program is running, the camera (Bar Code Reader) starts up.
- Page 292 1YES Stand-by set See page 304. Upgrade Network set You can set whether to communicate while an i-αppli program Set desktop/ is running. Add desktop icon See page 31. 1ON or OFF1l( long press set. See page 404. Stand-by net See page 305.
- Page 293 When you delete mail-linked i-αppli Pre-installed i-αppli Programs The confirmation display appears asking whether to delete the i-αppli mail folder as well. The following i-αppli programs are pre-installed: If you do not delete it, you can check the text of mail from the Outbox/Inbox list. ≥You can delete the pre-installed i-αppli programs.
- Page 294 レイトン教授と悪魔の箱 スーパーパズルボブル (SUPER PUZZLE BOBBLE) (Professor Layton and Pandora’s Box) Aim at a target by the key to shoot bubbles. Connect three This is a fantasy adventure game. You bubbles of the same color to erase them. The rule is simple, so challenge various puzzles to solve a mystery even a beginner can enjoy this puzzle game.
- Page 295 Select a menu item. 日英版/日中版 しゃべって翻訳 for P (J-E/J-C Speech Translation for P) 日→英 翻訳 (Translate Japanese to English) . . .Starts translation from Japanese to English. Just by speaking a phrase to be translated into your FOMA 英→日 翻訳 (Translate English to Japanese) terminal, this application program translates it from Japanese .
- Page 296 About TV timer function iD 設定アプリ (iD appli) “iD” denotes convenient electronic money that makes use of You can set 1Seg TV Timer for programs you want to watch by selecting from the the credit settlement system. You can easily do shopping by program list of this application program.
- Page 297 “DCMX” is a credit service that supports “iD” and offered by ・i-mode site: iMenu→DCMX iD NTT DOCOMO, INC. DCMX provides DCMX mini that enables you to use up to ¥10,000 per month and respective DCMX/ DCMX GOLD services that enable you to use more amount QR code for and save up DOCOMO points.
- Page 298 IC card (full format, hereafter). © 2009 Google - Map data © 2009 ZENRIN ≥You need to visit a docomo Shop to perform a full format. ■About the Map display ≥All the data files on the IC card are deleted by the full format.
- Page 299 iアバターメーカー (i-Avatar Maker) ファミリー伝言板 (Family Message Board) What you can do with i-Avatar Maker Family Message Board is an application program that enables you to share memos and schedule events among your family ■Create avatars or friends. After registering to join a group, you can share the You can easily create avatars by using various parts prepared memos and schedule events with other members of the group.
- Page 300 時刻表ウィジェット (Timetable Widget) 楽オク☆アプリ (Rakuoku ☆ Application) “楽オク☆アプリ (Rakuoku ☆ Application)” enables you to With this Widget Appli program, you can download the timetable and check the countdown of minutes/seconds until easily exhibit your goods on Rakuoku whenever you want the train’s departure.
- Page 301 地図アプリ (Map Application) Start! iウィジェット (Start! i-Widget) This is a convenient i-αppli program that enables you to read the map of the place you “Start! iウィジェット (Start! i-Widget)” is an application are currently in or you specify, check area information, or navigate yourself to the program that enables you to watch how to use i-Widget destination by using the location information.
- Page 302 ≥We take all possible measures to ensure the contents of information of this application The actual one may differ. program, but this does not provide guarantees to the contents. Note that we at DOCOMO and the Information Provider cannot be held responsible for the loss due to the information from this application program.
-
Page 303: Setting I-Αppli
i-Widget sound effect See page 307. Googleモバイル (Google Mobile) iαppli call settings “Googleモバイル (Google Mobile)” is a useful application program that enables you to use the mobile web search iαppli call DL set. See page 304. function. You can easily enter the trendy words and keywords iαppli call sound See page 304. -
Page 304: Starting I-Αppli Automatically
Starting i-αppli Automatically Auto Start Info You can check whether a software program has started automatically You can make an i-αppli program start automatically at the set date and and properly. Also, you can check the information of start failure from IC time. -
Page 305: Setting I-Αppli Call
Send i-αppli Calls to Call up Members Check i-αppli Call Logs While an i-αppli program which supports i-αppli call is Up to 30 received i-αppli calls are recorded in i-αppli call logs, and you can check how they were replied. running1Make an i-αppli call1YES ≥After 30 i-αppli calls are received, the older log is automatically deleted from the oldest ≥The operation differs depending on the i-αppli program. -
Page 306: Operating I-Αppli Stand-By Display
i-αppli Call Download Setting <i-αppli Stand-by Display> Operating i-αppli Stand-by Display You can set whether to reject the i-αppli download notice for when a target i-αppli program for i-αppli calls is not found. Software Setting (Stand-by Set) m1i-αppli1iαppli settings1iαppli call settings 1iαppli call DL set.1Reject or Not reject You can set an i-αppli program for the Stand-by display. -
Page 307: Displaying I-Αppli Data Files On The Microsd Card
Information End Stand-by Info ≥When you show the Stand-by display while a menu function is operating, the image When the i-αppli Stand-by display does not end successfully, you can set for “Stand-by display” of “Display setting” is displayed, even when the i-αppli check the date/time and its reason. -
Page 308: I-Widget
i-Widget Using i-Widget i-Widget is a useful function that enables you to access the Start i-Widget frequently-used contents such as the calculator, clock, and stock price After starting i-Widget, you can simultaneously start multiple Widget information (Widget Appli) by pressing the i-Widget key (r). Appli programs. -
Page 309: Setting I-Widget
■About i-Widget display End i-Widget You can end i-Widget to return to the Stand-by display. Widget Appli list/i-Widget display/Widget Appli operation display1h ≥You can return to the Stand-by display also by pressing r or m[戻る (Return)] from the i-Widget display. ≥For the Widget Appli operation display, the confirmation display appears asking whether to finish it. -
Page 310: Starting Widget Appli
<Start Widget Appli> Starting Widget Appli Widget Appli list 1Select a Widget Appli program to be started. You can show the Widget Appli operation display. ≥You can start a Widget Appli program also by selecting it from the Software list. ≥You can show the Widget Appli operation display also by selecting a running Widget Appli program. - Page 311 Osaifu-Keitai/ToruCa Osaifu-Keitai ......... iC Transfer Service .
- Page 312 ※1 Both the transferring end and transferred end have to be the FOMA terminal that ※2 iMenu→メニューリスト (Menu List)→おサイフケータイ (Osaifu-Keitai) supports iC transfer service. Visit a nearby counter such as a docomo Shop to use ≥Data on the IC card (including electronic money, reward points, etc.) might be lost or iC transfer service.
- Page 313 <IC Card Content> Use Osaifu-Keitai Starting Osaifu-Keitai Compatible i-αppli Place the f mark of the FOMA terminal over the scanning device, and you can use the FOMA terminal as electronic money to pay for shopping Read and Write Data inside the IC Card or to use it as a traffic ticket.
- Page 314 <IC Card Lock> <Check IC Owner> Locking IC Card Function Checking Owner Information of IC Card To prevent the IC card function from being used by others, you can set You can check whether IC owner information required for using the IC the Osaifu-Keitai, received ToruCa, or iC communication disabled.
- Page 315 ■Flow for using ToruCa <Receive ToruCa Files> Receiving ToruCa Receive from Scanning Device You can receive the ToruCa file from a scanning device using the IC card Place your Osaifu-Keitai over a scanning function. By receiving detailed information, a ToruCa file becomes a device to receive a ToruCa file.
- Page 316 About Auto-reading Function of ToruCa When receiving detailed information from a ToruCa file If you set “Auto reading ToruCa” to “Accept” to use the ToruCa files by placing the FOMA A ToruCa file before receiving detailed information itself does not show the detailed terminal over the scanning device, the available ToruCa files are automatically information.
- Page 317 Search all folders You can search through all ToruCa files in the FOMA terminal Copy to microSD You can copy the ToruCa files together with the folder from (except ToruCa files stored in the “Used ToruCa” folder) by the FOMA terminal to the microSD card. specifying a search condition.
- Page 318 Information How to See ToruCa File List/Detailed <Auto-sort> ToruCa File Display ≥“ ” is displayed when the Genre sort is set, “ ” is displayed when the Title sort is set, and “ ” is displayed when the Index sort is set. ≥When a file satisfies multiple conditions, it is sorted into the top of the folder in the ToruCa Folder list.
- Page 319 Connect to Center See page 137. Function Menu of the ToruCa File List/Detailed ToruCa File [List only] Display ToruCa folders You can display the ToruCa folder list. ≥You can display it also by pressing c( Attach to mail You can compose an i-mode mail message with the ToruCa [List only] file attached.
- Page 320 Information Retry You can play back an animation image or Flash movie in the [Detailed display only] ToruCa file from the beginning. <Copy to microSD> ≥When a part of the Flash movie is outside the display area, ≥The ToruCa file (details) is copied as a ToruCa file before receiving details if it the Flash movie might not be played back.
- Page 321 <ToruCa Settings> Setting ToruCa m1Osaifu-Keitai1Settings 1Do the following operations. Receive ToruCa You can set whether to receive ToruCa file from a scanning device using the IC card function or from another FOMA terminal via iC transmission. 1Accept or Reject Auto reading You can set whether to have the available ToruCa files ToruCa automatically recognized for when you place the FOMA terminal...
- Page 323 Map/GPS Function Using GPS Function ........Checking Your Location ....<Position Location> 322 Using Map/GPS Compatible i-αppli .
- Page 324 Stand-by display. After measuring, the “Function Menu while Current Location is Displayed” on page 323 is performed following the setting of service providers or on the DOCOMO website. Further, you might be charged a fee “GPS button setting” on page 327.
- Page 325 Function Menu while Current Location is Displayed Start GPS Compatible i-αppli You can select an i-αppli program from the GPS compatible i-αppli list to Read map You can display a map by starting GPS compatible i-αppli start it. program set by “Select map”. m1LifeKit1Map/GPS1Map/GPS αppli Map/GPS αppli You can use the location information on a GPS compatible i-αppli...
- Page 326 ■About Service Charge <Provide Location> The services provided by this application are classified as follows: Providing Location Information on Request Charge-free functions ≥Map viewing and area information search are available. Gourmet-coupon search is You can provide your location information on the request from others. also available.
- Page 327 Notify of Location. Further, you might be charged a fee for using the service. ≥For using the service, refer to the information on your service provider or the ≥You cannot enter any digits during Keypad Dial Lock. DOCOMO website. ≥Regardless of the mode of 2in1, your location information is notified by Number A.
- Page 328 Add to phonebook You can store the location information, phone number, or mail <Location History> address in the Phonebook. Displaying History of Checked Location 1Store loc. info., Store phone number, or Store mail address1YES Information Go to step 2 on page 92. Up to 50 histories of Position Location, Notify of Location, and Provide Attach to image See page 323.
- Page 329 GPS button setting You can set a function which is performed after measuring Positioning Tone/Illumination your location by pressing and holding 1 for at least one You can select a tone to sound for when you check your current location second from the Stand-by display.
- Page 330 Information Register LCS Client ≥Even if “Notify when dialing” is set to “ON” or to “Confirm every dial”, you cannot notify If you have stored LCS clients, you can select an LCS client when you of your current location when you make a call without notifying of your caller ID. notify of your current location.
- Page 331 Select “YES” to set a validity period ■Operations when the validity period for location provision is specified Example: When the current date and time are 12:00/18/Nov and you set 14:00 as the 1Do the following operations. start time and 21:00 as the end time 1Enter the time for starting permission.
- Page 332 Example: When the current date and time are 12:00/18/Nov and you set 14:00 as the Host Selection start time and 10:00 as the end time ※Normally, you do not need to change this setting. Repeat Validity period Period of location provision You can use this setting for changing the host for Service Settings.
- Page 333 Data Management Data Box ..........332 Managing Unsupported Files .
-
Page 334: Data Box
MUSIC Data Box ® i-mode Initial folder Chaku-uta Full music files obtained from sites Search by i-mode Connects to the data site. Data Box contains the items and folders as listed below. Data is saved to ※2 ® User folder Chaku-uta Full music files in the user folder respective folders according to the contents. - Page 335 ■Icons on the File list Voice announce Data files recorded by using “Voice announce” Playlist Playback of playlist Search by i-mode Connects to the data site. microSD Melody Melodies copied from the FOMA terminal Movable contents Copyrighted melodies moved from the FOMA terminal My documents i-mode Pre-installed or downloaded PDF files...
-
Page 336: Displaying Images
3Available operation Icon Type File format Incomplete PDF file Icon Description Damaged PDF file Attach to i-mode mail Kisekae Tool file — Insert images into Deco-mail, or create Decome-Anime messages Partially saved Kisekae Tool file — Set display Machi-chara image —... - Page 337 Display Images Recorded by 1Seg Function Menu of the Still Image List m1Data box11Seg1Image1Select a file. Edit picture See page 339. 1Enter a title. Edit title ≥For a file in the FOMA terminal, you can enter up to 9 ■Operations when playing back still images ≥See page 338 for when you operate from the Function menu.
- Page 338 1Select an item. Attach loc. info Store in Center See page 137. By position loc. Copy to phone See page 365..Measures the current location (see page 322) and stores Move to microSD See page 366. the location information. After checking the location information, press Move to phone See page 366.
- Page 339 Information Move You can move the still image, i-motion file, movie file, PDF file, document file, Kisekae Tool file, Machi-chara image, or SD <Display picture> other file to another folder. ≥You may not be able to execute Display Picture depending on the file. 1Select a destination folder.
- Page 340 Information Send Ir data See page 377. <Edit file name> transmission See page 379. ≥You may not be able to edit the file name depending on the file. Display size You can set whether to display the still image in original size ≥You cannot use half-pitch space for the file name.
-
Page 341: Editing Still Images
Information <Edit Picture> ≥When you select “Edit picture” while playing back a still image whose display direction Editing Still Images is switched, it returns to the original direction. ≥You cannot edit some still images, or you might have difficulty to produce editing Still Image list/Still image in play effect. - Page 342 1Select a Frame frame1O Trim away You can trim the still image to a certain size. ≥You can add the frame whose size is the same as the size of 1Select an image size to trim to. ≥You cannot select a trimming frame larger than the still image the image you are editing.
- Page 343 Set display See page 335. Information <Marker stamp> Picture info See page 335. ≥You cannot enlarge a marker stamp to the size larger than the still image you are Release animation 1YES editing. <Character stamp> Function Menu while Playing Back Original Animation ≥You cannot edit the still image smaller than 24 x 24 dots.
-
Page 344: Playing I-Motion/Movie
≥The following images are displayed when you cannot display a preview image. <i-motion Player> <Movie Player> Playing i-motion/Movie Unplayable No preview Playback restrictions have Incomplete You can play back the i-motion files stored in the FOMA terminal or ※1 ※2 image images expired, and the like. - Page 345 ■Specifications for i-motion file playback Operation Key operation File format MP4, ASF Change vertical disp./ ≥Each time of pressing switches display formats. horizontal disp./ Coding system MP4 file Video: MPEG4, H.263, H.264 ※3※4 full disp. Audio: AMR, AAC, AAC+ (HE-AAC), Enhanced aacPlus Remaster ASF file Video: MPEG4...
- Page 346 When you select “Position memory” of “imotion” or Information “Movie” from the folder list ≥Search (fast forward or fast rewind) and frame-by-frame playback are silent. Search (fast forward or fast rewind) is available during pause or playback (including slow and The display for selecting a position memory appears.
- Page 347 Copy to microSD See page 364. Memory info You can display the used memory space (estimate)/number of stored items. Copy to phone See page 365. Sort See page 337. Move to microSD See page 366. Listing You can change the displayed contents on the i-motion list/ Move to phone See page 366.
- Page 348 Listening You can set the effect of the sound from an earphone or Function Menu during Pause/at the End of Playback Bluetooth device. 1Select an item. Normal play The i-motion file is played back at the normal speed. Surround . . . Makes the sound natural and stereophonic. Chapter list You can display the list of chapters stored in the i-motion file Natur 1/2 .
-
Page 349: Using Playlist
Information Copy URL You can copy the URL of a movie file published on the Internet during playback. <Position memory> ≥You can copy up to 512 half-pitch characters for the URL. ≥Depending on the i-motion/movie file, you might not be able to store the position memory. -
Page 350: Editing I-Motion
)1Edit the i-motion file. Play Back Playlist See page 349 for the operation. Playlist list1Highlight a playlist and press l( Press ≥Not to save the edited i-motion file, press r or h; then select “YES”. Function Menu of the Playlist List ≥See page 206 when i-motion files are stored to the maximum. - Page 351 File restriction See page 336. Function Menu of the Edit motion Display Information Trim imotion You can cut out a certain range from an i-motion file. <Trim imotion> o to display a start frame1l( 1Use ≥If you execute “Trim imotion”, the file size may become larger. The start frame is set and the i-motion file is played back.
-
Page 352: Playing Video
Operation Key operation <Video Player> ) or p ※1 Pause Playing Video ) or p to play back ≥O You can play back the video saved to the microSD card. Play back frame by ) during pause ≥You can play back the sound of video files in stereo sound by connecting to the Stereo ≥Each time of pressing proceeds frame by frame. - Page 353 When you select “Position memory” from the Folder list for Function Menu of the Video List videos 1Enter a title. Edit title The display for selecting Position Memory appears. When you select “Marker to resume” ≥You can enter up to 18 full-pitch/36 half-pitch characters. or “Position memory 1/2”, the video is played back from the stored position.
- Page 354 Switch display You can switch the contents on the viewer display. Function Menu during Pause/at the End of Playback 1Select an item. At player start-up ≥If you set to “Enlarged V. img+DBC”, the video on the Normal play The video is played at the normal speed. When “Caption”...
-
Page 355: Chara-Den
Sound setting See page 263. <Chara-den Player> Reset settings See page 263. Displaying/Operating Chara-den Images Back to data BC You can stop browsing the data broadcasting site and You can display stored Chara-den images. return to the data broadcasting. You can make the Chara-den image move by key operation. m1Data box1Chara-den1Select a Chara-den image. -
Page 356: Recording Chara-Den Images
Function Menu of the Chara-den List Function Menu of the Chara-den Display Chara-den call See page 72. Chara-den call See page 72. Substitute image See page 72. Substitute image See page 72. Rec. Chara-den See page 354. Rec. Chara-den See page 354. 1Enter a title. -
Page 357: Displaying Machi-Chara Images
Recording size You can set the image size for recording and saving a still Shoot Still Images Chara-den image. You can set only in Photo Mode. Display “ ” on the Chara-den Recording display and 1QCIF (176 x 144) or Small (117 x 96) press Recording type You can set whether to record video or voice for recording and... -
Page 358: Playing A Melody
Information Function Menu of the Machi-chara List <Set to Machi-chara> Edit title See page 335. ≥When you set to “まめはかせ (Dr. Bean)” which is a pre-installed Machi-chara image, it is displayed in the Santa version from November 20 through December 25, 2009 Preview You can display the Machi-chara image. - Page 359 Play melody See page 356. Play Back Playlist 1Select an incoming type. Set as ring tone You can repeatedly play back the melodies selected by “Edit playlist”. ≥“★” indicates the set item. m1Data box1Melody1Playlist File restriction You can set the file restrictions on the selected melody. 1File unrestricted or File restricted ≥See page 240 for the file restrictions.
- Page 360 Information Delete all You can delete all melodies stored in the selected folder in the FOMA terminal. <File restriction> 1Enter your Terminal Security Code1YES ≥You can set the file restrictions only to the melody with the acquired source icon “ ”.
-
Page 361: Checking Kisekae Tool
<Kisekae Tool> Function Menu of the Kisekae Tool List/Detailed Kisekae Tool Display Checking Kisekae Tool Edit title See page 335. ≥You can delete the pre-installed Kisekae Tool files. You can re-download them from the “P-SQUARE” site (see page 205). When you use Preview You can display the detailed Kisekae Tool display. -
Page 362: Microsd Card
The microSD card is available at electronics retail stores, etc. ≥P-08A supports a commercial microSD card of up to 2 Gbytes and microSDHC card of ≥When you insert a microSD card which has been used with another device such as a up to 16 Gbytes (As of April 2009). - Page 363 ■Removing <microSD> Open the cover following step 1 Displaying Data Items on microSD Card of “■Inserting” and push the You can display the Phonebook entries, schedule events, ToDo items, microSD card until it stops. mail messages, text memos, and bookmarks stored on the microSD card. ≥By pushing all the way in, the microSD card ≥You can operate in the same way on the detailed Phonebook display, detailed mail pops out.
- Page 364 Function Menu of the Category List/microSD File Display/ Copy Data Items in the FOMA Terminal to the microSD Data List/Detailed Data Display Card You can copy the Phonebook entries, schedule events, ToDo items, mail 1Enter a title. Edit title messages, text memos, and bookmarks stored in the FOMA terminal to ≥You can enter up to 15 full-pitch/31 half-pitch characters.
- Page 365 Information Add to phone ≥When you copy all files, the files stored as secret data are also copied. You can copy all data items in a file selected on the microSD File display ≥When you copy all the Phonebook entries, the information from the PushTalk or all data items displayed on the data list to the FOMA terminal.
-
Page 366: Displaying Data Items On Microsd Card
Information Overwrite to phone ≥If the number of files stored on the microSD card increases, it may take long to read or You can copy all data items in a file selected on the microSD File display write data. or all data items displayed on the data list to the FOMA terminal. ≥During copying, the FOMA terminal is placed in the same status as it is out of the Note that the data items already stored in the FOMA terminal are service area. - Page 367 Information Information ≥You can copy JPEG, GIF, SWF, MP4, MFi, SMF, PDF files and Decome-Anime ≥Do not pull out the microSD card during copying. templates in the “i-mode” folder, “Camera” folder, “Deco-mail picture” folder, ≥You can copy JPEG, GIF, SWF, MP4, MFi, SMF, PDF files and Decome-Anime “Deco-mail pictograms”...
-
Page 368: Moving Copyrighted Files
“Available (Same model)” to the FOMA terminal other than Move Files in the FOMA Terminal to the microSD Card P-08A. See “Picture info”, “imotion info”, “Machi-chara info”, “Melody info”, “Kisekae Tool info”, “File info”, “Music info”, or “Document info” to check whether the file is You can move the copyrighted file obtained from a site to the microSD “Available”, “Unavailable”... -
Page 369: Back Up/Restore Data Files Collectively
≥When backup is completed, the saved date/time of the backup file is displayed. ≥When you restore backup files to other than P-08A, all the backup files and setting contents/information may not be restored. -
Page 370: Managing Unsupported Files
When you use the microSD card for the first time, you need to format You can save various files unsupported by the FOMA terminal or files in (initialize) it. Be sure to use P-08A for formatting. The microSD card BMP or PNG format downloaded from sites, to the microSD card. (See... -
Page 371: Checking Microsd Card
<Check microSD> Using a microSD Card with a Personal Checking microSD Card Computer You can check and recover the microSD card. By connecting the microSD card to the microSD card adapter, you can m1LifeKit1microSD1Refer microSD data use the microSD card on a personal computer which supports SD card. The microSD card adapter is available at electronics retail stores, etc. -
Page 372: Folder Configuration On Microsd Card
≥You cannot read from/write to a personal computer while reading from/writing to the SUDbbb FOMA terminal, and vice versa. STILgggg.### (Extension is JPG, GIF, or SWF.) ≥To use the DOCOMO keitai datalink, set it to “Communication mode”. DOCUMENT (Folder for PDF files) PUDbbb Folder Configuration on microSD Card PDFDCbbb.PDF... - Page 373 MOVIE (Folder for movie files) SD_PIM (Folder for Phonebook entries, schedule events, ToDo items, mail MVUDbbb messages, text memos, and bookmarks) MOVIEbbb.### (Extension is WMV, WMA, WVX, WAX, ASF, or ASX.) PIMddddd.### (Extension is VCF for Phonebook entries, VCS for schedule events DECO_A_T (Folder for Decome-Anime templates) and ToDo items, VMG for mail messages, VNT for text memos, and DTUDbbb...
-
Page 374: Managing Folders
≥Do not use the personal computer to delete or move the folders on the microSD card. the Folder list is displayed. The microSD card might not be read by P-08A. ≥You cannot see the files in the “SD_AUDIO”, “SD_BIND” and “PRGccc” folders on a Function Menu of the Folder List personal computer, as they are encrypted. - Page 375 Folder security You can set the folder to open only when you enter your Information [My picture/ Terminal Security Code. <Add folder> imotion/Movie] 1Enter your Terminal Security Code1YES ≥You can add up to 20 folders in the FOMA terminal. However, you can add up to 19 The folder changes to “...
-
Page 376: Using Infrared Communication
Information Using Infrared Communication <Select storage> ≥The following icons are displayed for the folder set as a destination folder: The FOMA terminal conforms to IrMC™ version 1.1 standard. “ ” . . . Folders in the “Picture” folder and “SD video” folder You can exchange data files with the devices supporting the infrared “... - Page 377 ■List of data files you can transfer ■Storage location and order of received files Data Storage location/Order Transfer terms Multiple One item All items Transferable data items Phonebook receive one data The phone number is stored to the lowest empty memory (Own number in “010”...
- Page 378 Information Data Storage location/Order ≥You can send/receive up to 9 full-pitch/18 half-pitch characters for a title of a still Still Image receive one data/ Stored on the top in the “i-mode” folder in “My picture” image, i-motion file, or PDF file, or up to 31 full-pitch/63 half-pitch characters for a title file receive multiple inside “Data box”.
-
Page 379: Sending/Receiving One Or Multiple Data
Receive1YES Sending/Receiving One or Multiple Data ≥When you receive Phonebook entries in which phone numbers are stored, the You can send/receive the data files one by one using infrared rays. confirmation display appears asking whether to store them also in the PushTalk Phonebook. -
Page 380: Using Infrared Remote Control Function
1Enter the same session number as that entered at the sending end1YES1YES For when you forward Phonebook entries using infrared rays, iC communication, microSD card, or DOCOMO keitai datalink, you can Information specify whether to forward the stored still images together. -
Page 381: Ic Communication Function
<iC Transmission> iC Communication Function iC communication is the function that enables you to send/receive data Receive One Data files to/from another FOMA terminal using the FeliCa reader/writer ≥You cannot use this function during Multitask. function. You can send/receive data files by facing the f mark of your Face the f mark of the FOMA terminal of the receiving FOMA terminal toward that of another FOMA terminal supporting the iC communication function. -
Page 382: Using Voice Recorder
), 0 or p. Press Receive All Data Recording starts. ≥You cannot use this function during Multitask. ), 0 or p. Face the f mark of the FOMA terminal of the receiving Press Recording ends. The Voice Recorder Saving Pre-check display appears. end while the Stand-by display is shown to that of the ≥Press m( ) to play back the recorded voice. -
Page 383: Displaying Pdf Data
■Operations when displaying a PDF file Attach to mail You can save the recorded voice and attach it to i-mode mail. ≥See page 382 for when you operate from the Function menu. Go to step 2 on page 142. ≥You can compose it also by pressing l( Operation Key operation Operation... - Page 384 Copy to microSD See page 364. Search You can display the screen in which the specified character string is contained. The point that matches the specified Copy to phone See page 365. character is marked in yellow green. Move to microSD See page 366.
- Page 385 Page layout You can change the display layout of the PDF file. Information 1Single page, Continuous or Continuous-facing At Viewer <Search> start-up ≥The search conditions work as shown below: Single page Match case: Identifies between uppercase and lowercase for search. Whole words only: Searches for character strings that completely match by unit of a Display link You can display links set in the PDF file.
-
Page 386: Displaying Word, Excel, And Powerpoint Files
1Enter your Terminal Security Code1YES Delete all When bookmarks or marks are set to the maximum If you try to add a bookmark or mark to the PDF file for which 10 bookmarks or marks Display Mark have been set, or if you try to save the PDF file for which 11 or more bookmarks or marks have been set, the confirmation display appears asking whether to add/save the You can list the marked pages and positions stored in the PDF file. - Page 387 ■Operations when displaying a document file Function Menu while Document File is Displayed ≥See page 385 for when you operate from the Function menu. Zoom in You can zoom in the file. Operation Key operation Operation Key operation You can zoom in the file up to 1,000%. Upper scroll Zoom out Zoom out...
-
Page 388: Printing Saved Images
(The icon and Picture Information, however, indicate DPOF is set.) ≥You can connect to the devices other than TV sets for output. ≥Still images shot by P-08A also support PRINT Image MatchingⅢ. ≥When connecting to the Flat-plug AV Output Cable or Earphone Plug Adapter for External connector terminal, make sure that you firmly insert it. - Page 389 Information Information ≥To pull the plug out, take hold of the plug and then pull it out softly. ≥On some TVs, still images may not be displayed correctly when the display size is switched. Display Still Images on TV Display i-motion Files on TV Play back a still image while the Flat-plug AV Output Play back an i-motion file while the Flat-plug AV Output Cable is connected...
- Page 390 Display Video from i-αppli Display Video from 1Seg Start an i-αppli program while the Flat-plug AV Output At 1Seg start-up Released Cable is connected Watch a 1Seg program while the Flat-plug AV Output Cable is connected connect the Flat-plug AV Output Cable while an i-αppli program is running.
- Page 391 Convenient Functions Multiaccess ......<Multiaccess> 390 Checking Call Duration/Charge ....<Call Data> 407 Multitask .
- Page 392 <Multiaccess> Receive a Voice Call during i-mode or during Packet Communication Multiaccess You can receive a voice call without disconnecting i-mode or packet Multiaccess enables you to simultaneously connect to three lines; a communication. voice call, packet communication, and SMS. The Call Receiving display appears when a call comes in To switch the displays, press and hold x for at least one second;...
- Page 393 <Multitask> Start Another Function Multitask When a function is running1x The FOMA terminal supports “Multitask” that enables you to use up to 1Start another function. three functions such as menu functions (see page 32) at the same time. By combining Multiaccess and Multitask, you can use following For the icon of the group in use, “...
- Page 394 Switch Displays <Reading Aloud> Informing You of an Incoming Call/Mail When multiple menu functions are working, you can switch the displays by pressing and holding x for at least one second. The display switches Message by Voice from the latest one in chronological order. You can set to be notified of incoming calls by voice instead of a ring To display the menu list for functions in use tone, or to have the mail contents automatically read aloud.
- Page 395 Read Aloud Volume Read Aloud Valid Setting m1Set./Service1Other settings1Voice settings You can set the voice guidance to be provided only when an earphone/ microphone (option) is connected. o to adjust the volume. 1Read aloud volume1Use m1Set./Service1Other settings1Voice settings 1Read aloud valid set.1Normal or Earphone Read Aloud Speed Normal.
- Page 396 <Symbol> Information ≥Symbols are read aloud according to the Symbol list. When the same symbol ≥When you set “Auto power OFF” to the same time of an alarm, schedule alarm, or continues three times or more, that symbol is not read aloud. others, those alarms preferentially work.
- Page 397 o to adjust the volume. 1Use Volume Release this You can invalidate the stored alarm. ≥If you set “Step”, the alarm tone is silent for about three 1YES ≥You can invalidate also by pressing seconds, and then the volume steps up every about three seconds, from Level 1 through Level 6.
- Page 398 When the time specified for “Alarm”, “Schedule” or “ToDo” Information comes ≥If you set “Alarm setting” to “Alarm preferred” and the alarm time has come when you are dialing, the alarm sounds after calling up the other party. If the alarm time has The alarm sounds for about five minutes (in the case of “Alarm”, the alarm sounds for come when receiving a call, the alarm sounds after starting communication.
- Page 399 1Select a type of repeat. Repeat <Schedule> ≥If you select “Select day”, put a check mark for days of the week Using Calendar to Manage Schedule to be set and press l( Set repeat time. You can display the calendar by month to check the stored schedule 1Unrestricted or XX times1Enter the repeat time.
- Page 400 Store Holidays Check Schedule Events You can store up to 100 holidays. However, you cannot store multiple You can check the details of schedule events and holidays. You can holidays for the same date. check birthdays stored in the Phonebook as well. m1Stationery1Schedule1i( m1Stationery1Schedule )1Settings...
- Page 401 Select a schedule event or birthday. Settings ≥When you select a birthday and select “Sending mail”, Kisekae setting You can change the design of the Calendar display. you can compose an i-mode mail message to the first 1Select a pattern. mail address in the Phonebook entry.
- Page 402 Filter See page 399. Function Menu of the Schedule List/Detailed Schedule Display Release filter See page 399. Set holiday Go to step 1 on page 397. Go to step 1 of “Store Holidays” on page 398. Edit Edit Go to step 1 of “Store Holidays” on page 398. Edit Go to step 1 on page 397.
- Page 403 Set secret/ You can set/release secret for/from the schedule event. Function Menu of the i-schedule List/Detailed i-schedule 1YES Release secret Display ≥When you select “Set secret” in ordinary mode (not in “Secret mode” or “Secret data only”), enter your Terminal Schedule list You can display the schedule list stored in the i-schedule Security Code.
- Page 404 1Select an item. Due date Change status The set status icons are displayed on the ToDo list. 1Select a status. Enter date ..Enter the date (due date) directly. ≥The status icons switch from blue to red after the due date. Choose date .
- Page 405 Information <Private Menu Setting> ≥During standby, the alarm tone sounds at the level set for “Phone” of “Ring volume”. Using Your Original Menu During a call, the alarm tone sounds at the level set for “Volume” (earpiece volume). You can store frequently used functions in the Private menu. You can <Alarm Setting>...
- Page 406 Function Menu of the Private Menu List <Multi Key Long Press Setting> Storing Frequently Used Function for Multi Add to menu You can store the frequently used function in the Private menu. 1Select a function to be stored. o to display the storable functions by main menu You can store frequently-used functions and phone numbers for ≥Press o to highlight the function...
- Page 407 Information <Own Number> ≥When “2in1 setting” is activated and you execute “Auto input” to obtain the first mail Storing Your Name, Mail Address and address, both Address A and Address B are entered as the 1st addresses Other Information respectively. Function Menu of the Own Number Display In addition to the phone number (own number) you have signed up, you can store your personal information such as your name, reading of your...
- Page 408 Reset You can reset (delete) all the stored personal data such as phone Record Your Voice during Standby numbers or mail addresses except own number. m1LifeKit1Rec. msg/voice memo1Voice memo 1YES ≥When the display for entering your Terminal Security Code 1YES appears, enter the code.
- Page 409 Total calls Information Displays the call cost from the time Reset Total Cost was executed to the current ≥You cannot record a movie memo while operating each item in the Function menu. call. Calls reset <Call Data> Displays the date and time when Reset Total Duration was executed last time. Checking Call Duration/Charge Cost reset Displays the date and time when Reset Total Cost was executed last time.
- Page 410 <Notice Call Cost> <Calculator> Setting Call Cost Limit Using Calculator You can set the call cost limit for Total Calls and can be notified when it is You can display the calculator to make the four rules of calculation exceeded. If you set “Auto reset setting” to “ON”, the call cost is reset at (+, −, ×, ÷).
- Page 411 Function Menu while Text Memo is Displayed <UIM Operation> Copying/Deleting Data Items between Edit Go to step 1 of “Making Text Memos” on page 408. FOMA Terminal and UIM Compose message You can compose an i-mode mail message containing the contents of the text memo.
- Page 412 Information Function Menu while the Phonebook List or SMS List is ≥When you copy Phonebook entries from the FOMA terminal to the UIM, the name of Displayed up to 10 full-pitch/21 half-pitch characters and the reading of up to 12 half-pitch characters are converted to full-pitch katakana characters and copied.
- Page 413 <Headset Microphone Setting> Receive Calls Using the Switch Selecting a Microphone for Use when an During ringing Earphone is Connected 1Press the switch of the Stereo Earphone Set. A beep sounds and you are connected. For when the Stereo Earphone Set 01 (option) is connected, you can With a videophone call, the image through your camera is sent to the other party.
- Page 414 Information <Headset Switch to Call> ≥When the FOMA terminal automatically answers a videophone call, a substitute Selecting Other Party to Call for when an image is sent to the other party. You can switch between the substitute image and the Earphone is Connected m during the videophone call.
- Page 415 ■Talk Hands-free What You can Do with Bluetooth Function When you connect a Bluetooth communication device such as a car navigation system (commercial item) to the FOMA terminal using Bluetooth communication, you With your FOMA terminal, the following six services are available: can communicate hands-free using the microphone and speaker on the car navigation Headset, Hands-free, Audio, Dial-up Communication, Object Push and system.
- Page 416 Connected service Notes on using Bluetooth devices A2DP ■Observe the following to make a good connection: ≥The distance between your mobile phone and another Bluetooth device must be Caller’s voice from Record Message at voice call ○ ○ within about 10 meters under line-of-sight conditions. The allowable connection ※3 PushTalk ring tone ○...
- Page 417 Select a service to be connected. Register Device The Bluetooth device is connected and “ (blue)” blinks. You can register a Bluetooth device to the FOMA terminal. You can When no communication with the Bluetooth device is register up to 10 Bluetooth devices. made for a certain period of time, your FOMA terminal is Service Selection m1LifeKit1Bluetooth1Register New Devices...
- Page 418 ■Device list Function Menu of the Device List 1Device class : PC : Phone Register devices Go to step 3 on page 415. : Network device : Audio device Preferred device You can set a Bluetooth device to be connected taking priority : Peripheral device : Imaging device over other devices when a call comes in.
- Page 419 Information Make a Call <Preferred device> You can make a call wirelessly when the FOMA terminal is connected to a ≥Even when Preferred Device is set, you cannot connect that device unless the Bluetooth device using Headset service or Hands-free service. Headset service is placed on standby for connection.
- Page 420 Information Information ≥When the Bluetooth communication is disconnected during a call on the Bluetooth ≥If the audio from a 1Seg program stops while it is output on the Bluetooth device, device, the call state follows the setting of “Disconnection settings”. check your FOMA terminal as the possible causes are as follows: ・When the Bluetooth device is disconnected Play Back Audio of 1Seg Programs...
- Page 421 Play back an i-motion file, movie file, video or music. Information ≥When you activate MUSIC Player with a Bluetooth device connected and the The sound is output from the Bluetooth device. Bluetooth device is disconnected from the FOMA terminal which is closed, MUSIC ≥When the confirmation display appears asking whether to start output to the Player ends.
- Page 422 Dial from headset You can set whether to make a call by pressing the switch on the <Check Settings> Headset. Checking the Setting of Various Functions 1Valid or Invalid MUSIC Player You can set whether to automatically start/end MUSIC Player You can check the setting contents of the following functions: autostart when you use the Audio service to connect to/disconnect from a...
- Page 423 ....... . <Mode 3 (NIKO-touch)> 430 For details on “Kuten Code List”, refer to the PDF version of “Kuten Code List” on the provided CD-ROM or DOCOMO website.
- Page 424 <Character Entry> Select Character Input Method Entering Characters Three types of character input methods are available as shown below: Mode 1 (5-touch) ..See page 422 The FOMA terminal is provided with many functions that require to enter Multiple characters are assigned to a single key.
- Page 425 o to move the cursor onto the candidate list <Example> Enter “タダの菓子” in a text memo. m1Stationery1Text memo1Select <Not recorded>. o to highlight “タダの” and press 1Use ≥By pressing m( The Character Entry (Edit) display appears in prediction conversion mode when )/c( ), you can scroll the candidate list page by “Predict”...
- Page 426 Data you are editing Other Entry Functions When the battery alarm sounds Item Operation/Explanation The data you have been editing is automatically fixed and saved. Charge the battery or replace it with a new charged battery to resume editing. However, you cannot save the Press l( Katakana input ) a few times to switch to Katakana input...
- Page 427 Load template See page 144. Symbols You can enter symbols while showing them on the display. [Message Entry display 1Select a symbol. only] The selected symbol is entered and the Character Entry (Edit) display returns. Save template See page 144. ≥Highlight a symbol and press l( ), you can [Message Entry display...
- Page 428 1Select a format for entering the date/time Input time Character input 1Enter the date/time. Own dictionary See page 428. ≥You can enter the date/time using the numeric keys. Learned words See page 429. ≥You can enter years 1800 through 2099. Change input mode You can switch the character input methods.
- Page 429 Information <Common Phrases> <Undo> Using Common Phrases ≥Once you use “Undo” to return to the former state, you cannot cancel this by using “Undo” again. You can call up and enter, on the Character Entry (Edit) display, the ≥If you close the Character Entry (Edit) display, you cannot return to the former state by common phrases pre-installed in the FOMA terminal, or your own using “Undo”.
- Page 430 Reset name You can reset the folder name to the default. Paste 1YES You can paste cut or copied characters. Function Menu of the Common Phrase List/Common Character Entry (Edit) display Phrase Display 1Move the cursor to a start position for pasting 1Enter a common phrase.
- Page 431 Information <Download Dictionary> <Delete this> <Delete all> Using Downloaded Dictionary ≥When you display Own Dictionary from the Function menu of the Character Entry (Edit) display, select “Delete” from the Function menu, then select “Delete this” or You can make dictionaries downloaded (see page 204) from sites valid. “Delete all”.
- Page 432 <Mode 2 (2-touch)> <Mode 3 (NIKO-touch)> Entering Characters in Mode 2 (2-touch) Entering Characters in Mode 3 (NIKO-touch) When you press two numeric keys to enter two-digit numerals, a When you press two numeric keys to enter two-digit numerals, a character (symbol) that corresponds to the numerals is entered.
- Page 433 Charged ≥“OFFICEED” is a pay service which is available on a subscription basis. For details, visit the DOCOMO-enterprise-oriented website (in Japanese only). http://www.docomo.biz/d/212/ ≥“Deactivate” does not mean that the contract for Voice Mail Service, Call Forwarding Service or other services is canceled.
- Page 434 <Check New Messages> <Voice Mail> Checking New Voice Mail Messages Using Voice Mail Service You can check whether any message is held at the Voice Mail Service This service provides an answer message for incoming voice calls/ Center. videophone calls and then holds voice mail messages on behalf of you m1Set./Service1NW services1Voice mail when you are in a place where radio waves do not reach, the power is turned off, or you cannot answer calls.
- Page 435 Activate notice call By SMS messages, you can be notified of the information (date/ Use Voice Mail Service time of receiving and caller ID) of missed calls which came in m1Set./Service1NW services1Voice mail while you were out of the service area or the power was turned off.
- Page 436 Forward an Incoming Call to Voice Mail Service Center <Call Waiting> during Ringing Using Call Waiting Service You can connect an incoming call to the Voice Mail Service Center just by When a call comes in during a call, this service notifies you of it by the a simple key operation.
- Page 437 Information Hold a Call to Make a New Call ≥For an incoming call or communication that is not supported by Call Waiting, press Enter another party’s phone number during a call1d d from the Call Receiving display to show the confirmation display telling that you h to end the current call, can answer a new call if you end the current call.
- Page 438 <Call Forwarding> Use Call Forwarding Service m1Set./Service1NW services1Call forwarding Using Call Forwarding Service 1Do the following operations. This service forwards incoming voice calls/videophone calls when you are in a place where radio waves do not reach, the power is turned off, or 1Register fwd number Activate you do not answer calls within a specified time.
- Page 439 Set On/Off of Forwarding Guidance <Nuisance Call Blocking> 14291d Using Nuisance Call Blocking Service 1Operate following the voice guidance. You can register so as not to receive “nuisance calls” such as crank calls. Once you register a phone number for rejection, calls from that phone Forward an Incoming Call during Ringing number is automatically rejected and the guidance answers the caller.
- Page 440 Delete last entry You can delete the phone number registered last. Repeat the Information same procedures to delete phone numbers one by one from the ≥If you activate this service while “Call setting w/o ID” is set to “Reject”, this service has one registered last.
- Page 441 Switching Guidance Language between Using Service Numbers Japanese and English You can make calls to the docomo Information Center or DOCOMO repair counter. You can set the guidance for network services such as “Voice mail” or ≥Depending on the UIM you use, the displayed items might differ or no items are the voice guidance such as for the out-of-service area, to be played back displayed.
- Page 442 You can set “Voice mail” or “Call forwarding” to be operated from touch-tone land-line phones, public phones, DOCOMO mobile phones, or Answer If you have set “Call waiting” to “Activate” and receive a voice call others.
- Page 443 Number Setting Set Own Phone Number when Making a Call You can register additional numbers, and edit the registration names for Before making a call, you can select a phone number to be notified to the them. other party from the Function menu, and then make a call. m1Set./Service1NW services1Multi number Enter a phone number 1Number setting1Select an additional number.
- Page 444 <2in1> Configure 2in1 Setting Using 2in1 2in1 Setting Menu display1Do the following operations. You can use two phone numbers/mail addresses on your single FOMA terminal. By using respective modes, you can operate your FOMA Mode switching You can switch to the mode you use. terminal as if you are using two sets of them.
- Page 445 Stand-by display You can set the Stand-by display that appears in Dual Mode Change recv. avoid. You can set Receive Avoidance Set. manually for Number A or B Mode. and Number B. 1Select a mode1Set the Stand-by display. 1Number A or Number B1Select an item. ≥See page 109 for how to set the Stand-by display.
- Page 446 Information Send an i-mode Mail Message in Dual Mode <Mode link setting> When you compose an i-mode mail message in Dual Mode, you can ≥When “Mode link setting” is activated, you cannot switch the mode of 2in1 out of the select a sender’s address from “Address A”...
- Page 447 ■Services available to each mode ≥The items whose operations differ depending on the mode are listed. (Items that work the same way as with A Mode are omitted.) Item A Mode B Mode Dual Mode ※1 Voice call Dialing Number A Number B Selectable when dialing ※2...
- Page 448 Item A Mode B Mode Dual Mode ※6 Displaying Sent/Received SMS messages for Received SMS messages for Number All SMS messages Number A Sending SMS messages from Number A Unusable SMS messages from Number A Receiving SMS messages to Number A SMS messages to Number A All SMS messages (with ring tone/vibration)
- Page 449 IMCS (In-building Mobile Communication System). to another function does not appear. The separate subscription is required for use. ≥In B Mode, you cannot use the following mail functions: For details, check the DOCOMO-enterprise-oriented website (in Japanese ・Composing SMS messages ・Forwarding SMS messages only). http://www.docomo.biz/d/212/ ・Replying SMS messages...
- Page 450 Saving and Using Services 1Additional service1Select a service1O When a new network service is provided by DOCOMO, you can register that service in the menu to use it. Dialing to the Service Center starts. Add New Service Register Additional Guidance m1Set./Service1NW services1Additional service...
- Page 451 Overseas Use Outline of International Roaming (WORLD WING) ..Available Services Overseas ......Confirmation for Using .
-
Page 452: Outline Of International Roaming (World Wing)
“Mobile Phone User’s Guide [International ≥For the country/area codes, international call access codes, and international prefix Services]” or the DOCOMO International Services website. numbers for the universal number, see page 452 and page 453. -
Page 453: Confirmation For Using
≥When the text of an SMS message sent to the other party who is using an overseas Confirmation for Using carrier contains characters that do not support those on the destination phone, the characters might not be correctly displayed. Confirmation before Departure Check Required at the Country You Stay Confirm below in Japan before you use the FOMA terminal overseas. - Page 454 United Kingdom Macau United States of America 011 Macau United States of America 1 Malaysia Vietnam Malaysia Vietnam ≥For the code for other countries or for details, refer to “Mobile Phone User’s Guide [International Services]” or the DOCOMO International Services website.
-
Page 455: Making A Call At The Country You Stay
■International prefix numbers for the universal number (Table 2) Check Required after Homecoming The international prefix numbers for the universal number for major countries are listed below. After you return to Japan, the FOMA network is automatically searched and connected. International International Service area... -
Page 456: Receiving A Call
Use “+” to Make an International Call Making a Call to a Person in the Country You Stay Press and hold 0 for at least one second, then you can enter “+” when In the same way as you do in Japan, you can make a voice call or dialing. -
Page 457: Setting A Network To Use
Information <Network Search Mode> ≥While you use the FOMA terminal overseas, “Call setting w/o ID”, “Reject unknown”, Setting a Search Method of and “Restrictions (except Restrict Dialing)” might not work. In addition, it might work as “Answer” regardless of the setting of “Arrival call act”. Telecommunication Carrier ≥When a call comes in during international roaming, the call is forwarded from Japan. -
Page 458: Setting A Telecommunication Carrier To Preferentially Connect To
Information <PLMN Setting> ≥When the “DOCOMO” network is available, you are preferentially connected to it Setting a Telecommunication Carrier to regardless of this setting. Preferentially Connect to ≥This setting is stored on the UIM. ≥You cannot set this function if the UIM is not inserted. -
Page 459: Setting Guidance During Roaming
Missed call NTC You can set “Missed roaming notice” during international <Set Roaming Guidance> (Int.) roaming. Setting Guidance during Roaming 1YES1Operate following the voice guidance. For an incoming voice call or videophone call during international <Call Barring> roaming, you can have the voice guidance played back to the caller to Setting Incoming Calls to be Rejected that effect. -
Page 460: Using Network Services During Roaming
Using Network Services during Roaming Operate Caller ID Request Service at the Country You Stay You can use some network services such as Voice Mail Service or Call m1Set./Service1Network setting1Int’l roaming Forwarding Service from overseas. 1Caller ID req. (Int.)1YES You can set Roaming Guidance as well. ≥See page 443 for “Receive avoidance set.”... - Page 461 Using CD-ROM ........Introduction of DOCOMO Keitai Datalink ....
- Page 462 ≥You can perform data communication by connecting the FOMA terminal with DOCOMO keitai datalink (See page 463) DOCOMO’s PDA “sigmarion lll” or “musea”. To use “musea”, the update is required. For details such as how to update them, refer to the DOCOMO website.
- Page 463 Unused memory space of 5 Mbytes or more To carry out the communication by using the FOMA terminal in Japan, the ※Unused memory space of 15 Mbytes or more for “DOCOMO Connection Manager” following conditions are required: ≥The operation on the upgraded OS is not guaranteed.
- Page 464 ≥Install the FOMA communication configuration file from the provided CD-ROM or The following three ways are available for connecting the FOMA terminal to download them from the DOCOMO website and install. another device: Use FOMA USB Cable with Charge Function 01/02...
- Page 465 For operations after installation, refer to Help contained in the software Install “DOCOMO Connection Carry out the setting manually without program. To use the DOCOMO keitai datalink, you need to separately have the USB Manager”. using “DOCOMO Connection Manager”.
- Page 467 Appendix/Troubleshooting Function List ......... . 466 Simple Menu Function List .
-
Page 468: Function List
Function List Execute “Reset settings” on page 138 for the items indicated by , and “Reset TV settings” on page 263 for the items indicated by ※, to return to the respective defaults. If you execute “Initialize” on page 139, all items return to the defaults. ≥Even if you execute “Initialize”, the pre-installed i-αppli programs you have deleted are not restored. - Page 469 Main menu item Sub-menu item Lower sub-menu item Setting at purchase Reference Mail Mail settings Auto-start attachment Feel*Mail All ON Chat setting Sound setting: Alarm 1 Chat image: ON User setting Name: Own Image: Apple Check settings — SMS settings SMS report request SMS validity period —...
- Page 470 Full Browser Home set.: Home URL http://www.google.co.jp FB permission display: Display always FB usage setting: No Common settings Certificate setting: All Valid Secure trans. serv. Center host setting: DOCOMO Access point setting ( 81): i-mode i-mode arrival act: PushTalk preferred i-mode button setting: Display iMenu/Search...
- Page 471 Main menu item Sub-menu item Lower sub-menu item Setting at purchase Reference i-mode i-mode settings Check settings — Full Browser Home — i-αppli Software list(phone) Pre-installed i-αppli programs only Display: Icon display Auto start time: All unchecked iαppli(microSD) Software list —...
- Page 472 Main menu item Sub-menu item Lower sub-menu item Setting at purchase Reference Set./Service Sound Mail/Msg. ring time ( All ON Ring time: All 5 seconds Charge sound Display Display setting ( Stand-by display “Story” for body color “Ivory White” “Digital Clock” for body color “Mat Black” “Animals”...
- Page 473 Main menu item Sub-menu item Lower sub-menu item Setting at purchase Reference Set./Service Display Backlight ( Lighting: ON Power saver mode: ON (Power saver mode) Light time: 60 seconds Charging: Standard Area: LCD+Keys Brightness: Auto setting Soft light: ON View blind Contrast: Level 1 (when “View blind”...
- Page 474 Main menu item Sub-menu item Lower sub-menu item Setting at purchase Reference Set./Service Illumination All illum. setting — Incoming illumination ( 89) Select color For body color “Ivory White”/“Mint Choco” Phone/Videophone: D-Signal PushTalk: D-Wave Mail/Chat mail/MessageR/MessageF/i-concier: D-Rhythm For body color “Mat Black” Phone/Videophone: B-Signal PushTalk: B-Wave Mail/Chat mail/MessageR/MessageF/i-concier: B-Rhythm...
- Page 475 Main menu item Sub-menu item Lower sub-menu item Setting at purchase Reference Set./Service Lock/Security Self mode Released Lock all Released Personal data lock Activate/Deactivate: Deactivate Customize: All Not accept IC card lock Released Key lock Secret mode ( Released Secret data only ( Released Keypad dial lock Released...
- Page 476 Main menu item Sub-menu item Lower sub-menu item Setting at purchase Reference Set./Service Call time/cost Call data ( Last call duration/Total calls duration: 0 seconds Last call cost: ¥** Calls reset/Cost reset: --/-- --:-- Reset total cost&dura. ( — Notice call cost Max cost: ¥0 (when “Notice call cost”...
- Page 477 Main menu item Sub-menu item Lower sub-menu item Setting at purchase Reference Set./Service Talk Hold tone setting On hold tone: Tone 1 Holding tone: RHAPSODY ON A THEME OF Shikkari Talk Noise reduction ( Quality alarm ( No tone Reconnect signal ( No tone PushTalk Auto answer setting...
- Page 478 Main menu item Sub-menu item Lower sub-menu item Setting at purchase Reference Set./Service NW services 2in1 setting Deactivated Mode switching: Dual mode Stand-by display Dual mode “Bench” for body color “Ivory White”/“Magenta” “Bouquet” for body color “Mat Black” “Submarine” for body color “Mint Choco” B mode “Bouquet”...
- Page 479 Main menu item Sub-menu item Lower sub-menu item Setting at purchase Reference Set./Service NW services 2in1 setting Receive avoidance set. Mode link setting: Deactivated Multi number Number setting: Not stored Select ring tone: All Same as ring tone Arrival call act Answer Set in-call arrival act —...
- Page 480 Main menu item Sub-menu item Lower sub-menu item Setting at purchase Reference Set./Service Other settings Check settings — Reset settings ( — Initialize — Software update Set auto-update: Auto-update Date: Default Time: 3:00 Data box My picture ( Pre-installed data only User created folder: None Original animation: Not stored Folder security: All released...
- Page 481 Main menu item Sub-menu item Lower sub-menu item Setting at purchase Reference imotion/Movie Data box Pre-installed data only User created folder: None Playlist: Not stored Position memory: All not stored Played history: No histories Volume i-motion: Level 4 Movie: Level 12 Folder security: All released Set imotion: All released Sort: By date↑...
- Page 482 Main menu item Sub-menu item Lower sub-menu item Setting at purchase Reference Data box 1Seg Image No data Sort: By date↑ Picture/Title name: Picture Display size: Normal Video Volume: Level 12 Listing: Title + image Position memory All not stored Document viewer —...
- Page 483 Main menu item Sub-menu item Lower sub-menu item Setting at purchase Reference LifeKit Camera View photos Same as “My picture” in “Data box” View movies Same as “imotion/Movie” in “Data box” Bluetooth Device list Not stored Preferred device: Not set Register New Devices —...
- Page 484 Main menu item Sub-menu item Lower sub-menu item Setting at purchase Reference LifeKit Map/GPS GPS settings Reg. LCS client: Not stored Location request set.: OFF Host selection: Default Rec. msg/voice memo Play/Erase msg. Not recorded Play/Erase VP msg. Not recorded Record message setting Answer message: Japanese 1 (when “Record message setting”...
- Page 485 Main menu item Sub-menu item Lower sub-menu item Setting at purchase Reference Phonebook Group setting Edit group Group name: Group 01 to 19 (except inside the UIM) Settings: None Restrictions Restrict dialing All released Call rejection All released Call acceptance All released Call forwarding All released...
- Page 486 Main menu item Sub-menu item Lower sub-menu item Setting at purchase Reference MUSIC MUSIC Player No data Playlist: Not stored Information of previously played music file: None Display: Title + Image Volume: Level 12 Play mode setting: Normal Sound effect Remaster: OFF Listening: OFF Equalizer: Normal...
- Page 487 Main menu item Sub-menu item Lower sub-menu item Setting at purchase Reference ※ 1Seg User settings Data broadcasting Image display setting: ON Sound setting: ON ※ ECO mode Released Reset channel setting — Reset storage area — Reset TV settings —...
-
Page 488: Simple Menu Function List
Simple Menu Function List Main menu item Sub-menu item/Lower sub-menu item Reference Main menu item Sub-menu item/Lower sub-menu item Reference Phone Add to phonebook Data box Music/Melody MUSIC Search phonebook Melody Dialed/recv. calls Dialed calls 1Seg Image Received calls Video Record message Play/Erase msg. - Page 489 Main menu item Sub-menu item/Lower sub-menu item Reference Main menu item Sub-menu item/Lower sub-menu item Reference Settings Display/Font Private menu setting Settings Incoming call Answer setting Desktop icon Setting when opened Key guidance Record display set Font Disp. PH-book image Font size setting Disp.
-
Page 490: List Of Characters Assigned To Keys (5-Touch Input Method)
List of Characters Assigned to Keys (5-touch Input Method) Display 漢 カナ ˜ ※2 ※1 . / @ - : 〜 _ 1 あいうえおぁぃぅぇぉ アイウエオァィゥェォ 1 a b c A B C 2 かきくけこ カキクケコ 2 d e f D E F 3 さしすせそ... -
Page 491: List Of Characters Assigned To Keys (2-Touch Input Method)
List of Characters Assigned to Keys (2-touch Input Method) Kanji/Hiragana input mode Katakana input mode Alphabet input mode <Uppercase input mode> <Uppercase input mode> Second digit Second digit Second digit " $ % + a b c d e あ い う え お A B C D E ア... -
Page 492: List Of Characters Assigned To Keys (Niko-Touch Input Method)
List of Characters Assigned to Keys (NIKO-touch Input Method) Kanji/Hiragana input mode Katakana input mode Information Second digit Second digit ≥A space is entered if you press keys that correspond to a blank where no character is assigned. あ い う え お .... -
Page 493: Symbol List
Symbol List When “Read aloud settings” is set to “ON”, symbols are read aloud. Symbol Voice guidance Symbol Voice guidance Symbol Voice guidance Symbol Voice guidance Symbol Voice guidance — — 、 ‖ ≠ ノットイコール △ サンカク ∇ ナブラ — ※1 。... - Page 494 Symbol Voice guidance Symbol Voice guidance Symbol Voice guidance Symbol Voice guidance Symbol Voice guidance Ζ ゼータ σ シグマ Ь ミャーフィーズナーク я ヤー ④ マルヨン — Η イータ τ タウ Э エー ─ ⑤ マルゴ — Θ シータ υ ユプシロン Ю...
- Page 495 Symbol Voice guidance Symbol Voice guidance Symbol Voice guidance Symbol Voice guidance Symbol Voice guidance ㍗ ワット ㎞ キロメートル ㏍ ケーケー ㈹ カッコダイ √ ルート ㌍ カロリー ㎎ ミリグラム ℡ デンワ ㍾ メージ ⊥ スイチョク ㌦ ドル ㎏ キログラム ㊤ マルウエ...
-
Page 496: Pictogram List
Pictogram List When “Read aloud settings” is set to “ON”, pictograms are read aloud. Picto- Picto- Picto- Picto- Picto- Voice guidance Voice guidance Voice guidance Voice guidance Voice guidance gram gram gram gram gram ハートマーク ダッシュマーク サソリザマーク ギンコーマーク キンエンマーク ユレルハートマーク ウーマーク... - Page 497 Picto- Picto- Picto- Picto- Picto- Voice guidance Voice guidance Voice guidance Voice guidance Voice guidance gram gram gram gram gram シンゲツマーク ドコモポイント ケッテーマーク ボケーッマーク ナミマーク マーク カケヅキマーク アイアプリマーク ラブラブマーク フジサンマーク ユーリョーマーク ハンゲツマーク アイアプリマーク オーケーマーク クローバーマーク ムリョーマーク ミカヅキマーク ティーシャツマーク アッカンベーマーク サクランボマーク アイディーマーク...
-
Page 498: Multiaccess Combinations
Multiaccess Combinations Communication event i-αppli Packet communication 64K data ※1 Voice call Videophone call PushTalk i-mode i-mode mail i-αppli software (Data communication) communication running Outgoing Incoming Outgoing Incoming Outgoing Incoming Connecting Sending Receiving Sending Receiving Outgoing Outgoing Sending Receiving Sending Receiving Communication status ※2 ※3... -
Page 499: Multitask Combinations
Multitask Combinations When the functions in the same group ( part in the table) conflict, the display for switching active functions appears. However, it might not appear depending on the operation. Started i-mode group Tool group Video Set./ Private function Voice Push Phone... - Page 500 ※10: If you use Multitask to switch functions while you are using the Picture viewer (microSD card), i-motion player, Video player, Chara-den player, or Melody player, or while playing back a demo from “MUSIC” in Data Box, display or playback ends. You cannot switch functions while you are editing an i-motion file. ※11: Playback/Recording stops when a call comes in while you are playing back “Record message”, “Videophone record message”, “Voice memo”, or “Movie memo”, or while recording “Voice memo”.
-
Page 501: Services Available For Foma Terminal
Information Services Available for FOMA Terminal ≥This FOMA terminal supports “Emergency Location Report”. When you make an emergency call such as at 110/118/119, information about the Available services Phone number place where you are dialing from (location information) is automatically notified to Directory assistance service emergency-response agencies such as police stations. -
Page 502: Introduction Of Options And Related Devices
※6 AC Adapter for Bluetooth Headset F01 is required. versatile use from personal purpose to business purposes. Some ※7 To charge the P-08A, FOMA In-Car Hands-Free Cable 01 is required. products may not be dealt in depending on the area. For details, consult a handling counter such as a docomo Shop. -
Page 503: Troubleshooting
“Repairs” counter listed on the back ≥The usable time of the battery pack varies page of this manual or a repair counter specified by DOCOMO. depending on the usage environment or its remaining life. - Page 504 IC card. ≥Make sure ECO Mode of 1Seg is deactivated. When you cannot delete it, contact the docomo ≥Make sure View Blind is not set to “ON”. Shop, etc. You cannot delete “iD 設定アプリ (iD ≥You might have changed the earpiece volume.
- Page 505 ≥“×” may appear when the image file is broken. GSM/GPRS network. “×” appears on a — preview image. ≥Confirm your accumulated charges at the docomo Cannot make or receive — ≥Confirm the setting of Attachment Preference. calls unexpectedly Information Center. An approximate limit for service Attached files are ≥Confirm the setting of Limit Mail Size.
-
Page 506: If Error Messages Appear As Mentioned Below
Address is not valid (451) Cannot display If Error Messages Appear …You could not send the mail correctly. Check the …Corresponding software program is running. End the as Mentioned Below address and try again. (See page 142, page 181) software program and try again. (See page 288) All protected Cannot edit message ≥“(numerals)”... - Page 507 Check SMS center setting Connection is not valid …The SMS Center is not correctly specified by SMS …The destination address set by Access Point Setting is Data in IC card is full Center Setting. Specify the SMS Center and try again. not compatible, so you cannot operate.
- Page 508 Input error (205) back normally. …The format of the microSD card is incompatible with …The entered contents are wrong. Check the contents P-08A. Use P-08A to format it. (See page 368) and try again. Failed in transmission Input too long …An error occurred, so you could not perform iC...
- Page 509 Invalid Invalid UIM Auto-start failed …You cannot start up the i-αppli program because of the Cannot resend 以下の宛先にはメール送信できませんでした (561) …The address is invalid or the text exceeds the size that UIM security function. Insert the UIM which had been Mails could not be sent to following address. (561) can be entered, so you cannot re-send.
- Page 510 Memory shortage No response (408) …No response from the site or Internet website, so you Cancel update Page is not found (404) could not connect to it. Try again. …The site or Internet website does not exist, or URL is Memory shortage No set melody wrong.
- Page 511 Select “YES” to display the service to be …Failed to update the software program. Contact a Cannot delete deleted, and then delete that service already stored. handling counter such as a docomo Shop. Protected message Service unavailable Root certificate has expired Cannot delete …The function cannot be operated with the inserted UIM.
- Page 512 Software already updated Sort is full This file is not attachable …The target software program is not updated, so you Cannot add Cannot resend cannot execute. …The maximum number of settings is already set. …The output-prohibited file from the FOMA terminal has Release unnecessary settings and try again.
- Page 513 Contact the handling counter of a characters or entering only space is disabled while it exceeded the maximum size of the images to be docomo Shop. editing the title. Enter characters and try again. inserted. …Check to see if the correct UIM is inserted.
- Page 514 Using mail folder Unable to support this card Cannot download …The inserted memory card cannot be used on P-08A. Using mail folder Use P-08A compatible microSD card. (See page 360) Cannot start Unable to switch audio data …Corresponding software program is running.
-
Page 515: Warranty And After-Sales Services
If you notice that necessary items of Bring your FOMA terminal to a repair counter specified by DOCOMO. Note that your the warranty card are not filled in, immediately contact the shop where you purchased FOMA terminal is accepted for repair during the repair counter’s business hours. -
Page 516: I-Mode Fault Diagnosis Site
Only at the time of repair, we move the files from your FOMA terminal including the images and ring melodies downloaded to your FOMA terminal or the files you at DOCOMO never use the sent information for other purposes than for the i-mode fault diagnosis. -
Page 517: Updating Software
“お客様サポート (User support)” in Japanese iMenu let you know about operate Record Message during download.) ≥When updating, the FOMA terminal is connected to the server (DOCOMO site) using “Auto-update”, “Update Now” and “Reserve Update” are available for SSL/TLS communication. You need to validate the SSL/TLS certificate. - Page 518 When Update is Needed Update Software Programs Automatically <Set Auto-update> Select the “Rewrite notification” icon on the Stand-by display, and select “OK”, “Change time” or “Now You can download new software programs automatically, then the updating is operated at the time you specified beforehand. rewrite”.
- Page 519 Start Software Update from Menu ≥“Update notification icon” appears in the following cases: m1Set./Service1Other settings1Software update ・When notification is provided by DOCOMO 1Enter your Terminal Security Code1Update ・When “Update is needed” is displayed in step 3 ・When you fail to update software programs during updating in Reserve Update ・When you cancel the reservation for the software update...
- Page 520 After confirming the update Update Software Now (Update Now) completion, select “OK”. When you select “Now update”, “Start download” is ≥If you do not select “OK” at the update completion, the displayed and downloading starts after a while. (Select “Rewrite completion” icon indicating the update is “OK”...
- Page 521 Confirm the date and time you selected. Select “YES”. Check, Change, or Cancel the Reserved Date and Time Your FOMA terminal communicates with the server Select “Software update” from the setting menu, then enter your again and then the reservation is completed. Terminal Security Code and select “Update”;...
-
Page 522: Protecting Foma Terminal From Harmful Data
Set Scanning Function <Set Scan> (model name, serial number, etc.) is automatically sent to the server (DOCOMO-managed server for the scanning function). We at DOCOMO never use If you set “Scan” to “Valid”, data or a program can be automatically the sent information for other purposes than for the scanning function. - Page 523 ≥When setting auto-update or updating automatically, the proper information about your FOMA terminal (model name, serial number, etc.) is automatically sent to the server (DOCOMO-managed server for the scanning function). We at DOCOMO never use the sent information for other purposes than for the scanning function.
-
Page 524: Main Specifications
Main Specifications ※1 still images Approx. 3,500 max. (when the deletable pre-installed data files are ■Handset deleted) Model P-08A Number of still VGA: 4 QVGA: 5 through 10 Dimensions Height: Approx. 112 mm images for QCIF: 5 through 20 Sub-QCIF: 5 through 20 (when closed) Width: Approx. - Page 525 Video: MPEG4 Voice: AMR, G.726 limit. Extension 3gp, asf ■The number of files that can be saved to P-08A Title/File name Automatically set according to the date and time the image Image quality was recorded (when shot at 10:00 on November 18, 2009)
- Page 526 The recordable time varies depending on shooting environments. Take reference to the recordable time and memory capacity which appear on the Finder display as well. ■Recordable time to P-08A (See “Voice” for the recordable time of Voice Recorder.) Recordable time per recording (Approx.) Total recordable time (Approx.)
- Page 527 ■Recordable time to microSD card (64 Mbytes) (See “Voice” for the recordable time of Voice Recorder.) Recordable time per recording (Approx.) Total recordable time (Approx.) File size Image size Movie type set Image quality Image quality setting Super fine Fine Normal Super fine Fine...
-
Page 528: Number Of Savable/Registerable/Protectable Items In Foma Terminal
Number of savable/registerable items Reference Number of Savable/Registerable/ Function <Number of protectable items> page Protectable Items in FOMA Terminal Screen memo Screen memo ※4 300 max. (Full Browser) ※4 <150 max. > Screen memo folder 40 (incl. “Screen memo”) Number of savable/registerable items Reference Function Still image... -
Page 529: Specific Absorption Rate (Sar) Of Mobile Phone
※The European RTTE approval of this product is limited to the use of the P-08A For further information about SAR, please see the following websites: handset, Battery Pack and FOMA AC Adapter for Global use (100 to 240 V AC) only. -
Page 530: Export Administration Regulations
FCC RF Exposure Information Important Safety Information THIS MODEL PHONE MEETS THE U.S. GOVERNMENT’S REQUIREMENTS FOR AIRCRAFT EXPOSURE TO RADIO WAVES. Switch off your wireless device when boarding an aircraft or whenever you are instructed Your wireless phone contains a radio transmitter and receiver. Your phone is designed to do so by airline staff. -
Page 531: Intellectual Property Right
“DCMX”, “iD”, “Security Scan”, “i-motion mail”, “i-area”, “Short Mail”, “WORLD WING”, OKAO is a registered trademark or trademark of OMRON Corporation in JAPAN and “Public mode”, “DoPa”, “sigmarion”, “musea”, “IMCS”, “OFFICEED”, “2in1”, “docomo other countries. STYLE series”, and the logos of “FOMA”, “i-mode”, “i-αppli”, “DCMX”, “iC”, “iD”, ≥Napster is a registered trademark of Napster, LLC. - Page 532 Bluetooth SIG, Inc. and any use of has been compromised, owners of Secure Content (“Secure Content Owners”) may such marks by NTT DOCOMO, INC. is under license. Other trademarks and trade request that Microsoft revoke the WM-DRM Software’s right to acquire new licenses to names are those of their respective owners.
- Page 533 MEMO...
- Page 534 MEMO...
- Page 535 MEMO...
- Page 536 MEMO...
- Page 537 MEMO...
- Page 538 MEMO...
- Page 539 MEMO...
- Page 541 Index/Quick Manual Index ..........Quick Manual .
- Page 542 Attach schedule events ..152 Battery level....42 Index Attach SD other files ... 153 Battery pack.
- Page 543 End a held call ....435 Channel list... 221, 248, 249 Chara-den list ....353 Connect to Bluetooth device .
- Page 544 Detailed phonebook display ..94 DOCOMO certificate ... .213 Folder list (PDF) ....381 Equalizer (MUSIC player) .
- Page 545 Forwarding guidance ... 437 Holding ..... . . 67 Icon color ....111 i-motion list .
- Page 546 i-Widget .....306 Listening (MUSIC player) ..282 Setting group ....391 Message entry display.
- Page 547 Multitask combinations ..497 Numeric keys ....23 PDF......381 Play back playlist .
- Page 548 Incoming illumination ..117 Quotation marks ....176 Reconnect signal....60 Reset channel setting .
- Page 549 Search phonebook display ..93 Set auto-update (Scanning function) SMS center setting ... . .188 Sticky..... . . 300 Secret code .
- Page 550 Title name ....337 USB mode setting ....369 White balance ... . . 74, 237 ToDo .
- Page 552 Quick Manual How to Use Quick Manual Cut out Quick Manual interleaved into this manual along the cutout line, and then fold it as shown below: Take Quick Manual “For Overseas Use” with you for using an international roaming service (WORLD WING) overseas. ■How to cut Cut out Quick Manual along the cutout line.
- Page 553 Shop etc..Measures the current location and store the location information near you on the NTT DOCOMO website or the i-mode site. →Check the location General inquiries <docomo Information Center>...
- Page 554 ■Line Feed Enter “タダの菓子” in a Text Memo Camera Press a. ■Bringing up the Character Entry (Edit) display ■Shooting a Still Image m→Stationery→Text memo c→O o , 0 or p→O o , 0 or p ■Entering a Space i→Pictograms/symbols→Space →Select <Not recorded>→Press l a few ■Continuous Shooting times to switch to Kanji/Hiragana input mode.
- Page 555 i-mode Mail Attach Files Receive i-mode Mail ■Picture/Melody/imotion/ToruCa/PDF/ “ (pink)” blinks Compose and Send i-mode Mail Phonebook/Schedule/ToDo/Bookmark/ →The Reception Result display appears →Select “Mail” Document file/Other Address field Subject field →Select an i-mode mail message to be displayed. Call up the Message Composition display Attachment field →Select the attachment field Check New Messages...
- Page 556 Backlight Slide illumination Call setting w/o ID View blind Hourly illumination Change security code Color theme setting MUSIC illumination UIM setting Machi-chara Bluetooth illumination Scanning function Menu icon setting IC card illumination Lock setting Private menu setting PushTalk illumination Call time/cost Desktop icon Speed selector illum.
- Page 557 Check settings Map/GPS Guide Stationery Reset settings Rec. msg/voice memo Common phrase/dic. Set./ LifeKit Service Initialize Voice recorder MUSIC Player MUSIC Data Security Service Software update Music&Video Channel My picture i-concier — Activate 1Seg MUSIC Add to phonebook Program guide Music&Video Channel Search phonebook TV timer list...
- Page 558 Omakase Lock (yellow): Messages R/F are held at the i-mode : While Vibrator is set to other than “OFF” ※ If you are a member of the DOCOMO Premium Club, Center. (See page 20) you can use this service as often as you need without handling charge.
- Page 559 <docomo Information Center> (available 24 hours a day) land-line phone, etc. ・PDF file “海外ご利用ガイド (Guide for Overseas Use)” ≥From DOCOMO mobile phones ※ If you use P-08A, you should dial the number +81-3-6718-1414 pre-installed in “My documents” in Data Box 81-3-5366-3114 International call access code (to enter “+”, press and hold the “0”...
- Page 560 Setting a Telecommunication Display Making/Receiving a Call Carrier to Preferentially Connect to The type of network you are using is displayed. Make a Call to Outside the Country m→Set./Service→Network setting You Stay (Including Japan) →Int’l roaming→PLMN setting→i ■Use Phonebook to Make an International Call to Japan →PLMN list select→Select a carrier→O Call up the detailed Phonebook display...
- Page 561 Ireland Brazil 0021/0014 ≥ For the code for other countries or for details, refer Italy Canada to “Mobile Phone User’s Guide [International Luxembourg China Services]” or the DOCOMO International Services Macau Czech Republic website. Malaysia Denmark Monaco Finland Netherlands France...
- Page 562 International Prefix Numbers for Service area Access code Service area Access code the Universal Number (Table 2) Philippines United Kingdom Poland United States of America International Service area prefix number Portugal Vietnam Argentina Russia Australia 0011 Singapore Austria South Korea Belgium Spain Brazil...
- Page 563 • You will need your “network ID” for the access from i-mode. • If you do not have or you have forgotten your “network ID” or “docomo ID/password”, • No packet communication charges are incurred for the access from i-mode. Accessing contact the docomo Information Center listed on the back page of this manual.
- Page 564 Available from mobile phones and PHSs. ●Please confirm the phone number before you dial. ●For Applications or Repairs and After-Sales Service, please contact the above-mentioned information center or the docomo Shop etc. near you on the NTT DOCOMO website or the i-mode site.
- Page 565 Installing DOCOMO Connection Manager........
- Page 566 FOMA terminal to an access point which does not support HIGH-SPEED or the terminal is outside the FOMA High-Speed Area, or when you use the device which does not support High-Speed such as DOCOMO’s PDA “sigmarion III” or “musea”. ≥The packet communication is charged according to the amount of data you sent and received. Note that you are charged a high communication fee for the massive data communication such as browsing Internet websites having many images or downloading data files.
- Page 567 ≥You can perform data communications by connecting the FOMA terminal with DOCOMO’s PDA “sigmarion lll”, or “musea”. When you use “musea”, the update is required. For details such as how to update them, refer to the DOCOMO website. Before Using Data Communication Charge of Internet service provider To use the Internet, you need to pay the charge for the Internet service provider you use.
- Page 568 Display resolution 800 x 600 dots, high color 16 bits or more recommended. Windows Vista, Windows XP, Windows 2000 (Japanese version in each) ≥Windows 2000 Service Pack 4 or later, Windows XP Service Pack 2 or later, for “DOCOMO Connection Manager”...
- Page 569 Connect FOMA Terminal to Other Devices The following three ways are available for connecting the FOMA terminal to another device: Use FOMA USB Cable with Charge Function 01/02 Connect the FOMA terminal to a personal computer provided with the USB port using the FOMA USB Cable with Charge Function 01/02 (option).
-
Page 570: Setup Flow For Data Transfer (Obex™ Communication)
Charge Function 01/02, install the “FOMA communication configuration file” (driver) from the provided “P-08A CD-ROM” onto the personal computer. You are advised to install “DOCOMO Connection Manager” which enables you to easily set up the APN or dial-up for communication. - Page 571 Connecting PC and the FOMA Terminal The following steps explain how to connect the FOMA USB Cable with Charge Function 01/02 (option). Check the direction of the Connector terminal connector terminal of the FOMA External connector terminal, then straight insert the (Face up the engraved external connector of the FOMA surface of the connector...
-
Page 572: Installing Foma Communication Configuration File (Driver)
≥Operate as the user who has the PC administrator right. For Windows Vista Connect the FOMA terminal and the FOMA USB Cable with Charge Function 01/02. (See page 6) Start Windows, then set the provided “P-08A CD-ROM” into the personal computer. Click “データリンクソフト・各種設 定ソフト (Data link software/Setup software)”. - Page 573 ≥Installation of the FOMA communication configuration file (driver) finishes. When you install “DOCOMO Connection Manager” successively, click “インストールする(推奨)[Installing (Recommend)]”. See page 14 for installation of “DOCOMO Connection Manager”. ≥When you do not install “DOCOMO Connection Manager”, go to step 10. Click “閉じる (Close)”.
- Page 574 Confirm Installed Driver Confirm that the “FOMA communication configuration file” (driver) is installed correctly. For Windows Vista “ [スタート (Start)]”1Open “コントロールパネル (Control panel)” 1Open “システムとメンテナンス (System and maintenance)” <For Windows XP> “スタート (Start)”→Open “コントロールパネル (Control panel)” →“パフォーマンスとメンテナンス (Performance and maintenance)”→Open “システム (System)”. <For Windows 2000>...
- Page 575 “FOMA communication configuration file” (driver), the “FOMA communication configuration file” (driver) may not be installed correctly. In this case, open “P08A_USB_Driver” → “Drivers” → “Win2k_XP” or “WinVista32” inside “P-08A CD-ROM”, and execute “P08A_un.exe” to delete the “FOMA communication configuration file” (driver), and then install the files again.
-
Page 576: Preparing Bluetooth Communication
< Dial-up Communication Service > Preparing Bluetooth Communication You can make data communication by connecting a Bluetooth communication compatible personal computer wirelessly to your FOMA terminal. Connect to Personal Computer for the First Time To connect a personal computer to the FOMA terminal for the first time, register the personal computer to the FOMA terminal. - Page 577 Confirm the Modem Before setting communication, confirm the name and COM port number of the modem used for connecting the dial-up service. For Windows Vista “ [スタート (Start)]”1Open “コントロールパネル (Control panel)” 1Open “システムとメンテナンス (System and maintenance)”. <For Windows XP> “スタート (Start)”→Open “コントロールパネル (Control panel)” →“パフォーマンスとメンテナンス...
-
Page 578: Docomo Connection Manager
DOCOMO Connection Manager “DOCOMO Connection Manager” is a convenient software program to perform flat-rate data communication and volume charging data communication. It enables you to sign up for “mopera U” and easily make PC settings according to your contract situation. -
Page 579: Before Installing Docomo Connection Manager
FOMA USB Cable (option). Check the service contents and the contract contents with Internet service provider. When a connection software program other than “DOCOMO Connection Manager” is installed, set it not to start automatically. ≥See page 19 for using communication software other than “DOCOMO Connection Manager”. -
Page 580: Installing Docomo Connection Manager
When MSXML6 and Wireless LAN API are not installed on the Windows XP environment, you need to install them before installing “DOCOMO Connection Manager”. When a confirmation display appears, click “Install” and install MSXML6/Wireless LAN API. When you restart Windows after installation of MSXML6/Wireless LAN API is completed, installation of “DOCOMO Connection Manager” automatically starts. - Page 581 Click “次へ (Next)”. Confirm the display precautions and click “次へ (Next)”. Confirm the displayed the licensing contract contents. If you agree with the contents, select “使用許諾契約の条項に同意 します (Agree with the licensing contract contents)” and click “次へ (Next)”. Confirm the installation destination folder, then click “次へ...
- Page 582 Click “インストール (Install)”. Installation starts. Click “完了 (Finish)”. Installation is completed.
- Page 583 When this is the first start-up, the setting wizard appears automatically. Hereafter, proceed operation/settings following the instruction of software to complete the preparation to access the Internet. For details, refer to “ドコモ コネクションマネージャ操作マニュアル.pdf (DOCOMO Connection Manager operation manual by PDF format)”.
-
Page 584: Setting Dial-Up Network
The confirmation method varies depending on the operating system of your personal computer. ≥When using DOCOMO Internet access service “mopera U” or “mopera”, you do not need to set an access point name (APN); therefore, you do not need to confirm the modem. - Page 585 Open the “モデム (Modem)” tab, confirm the COM port number in the “接続先 (Access point)” field of “FOMA P08A”, then click “OK”. ≥When connecting wirelessly using Bluetooth communication, confirm the COM port number of the in-use Bluetooth linked standard modem or Bluetooth modem provided by a Bluetooth device maker in the “接続先...
- Page 586 Open the “モデム (Modem)” tab, confirm the COM port number in the “接続先 (Access point)” field of “FOMA P08A”, then click “OK”. ≥When connecting wirelessly using Bluetooth communication, confirm the COM port number of the in-use Bluetooth linked standard modem or Bluetooth modem provided by a Bluetooth device maker in the “接続先...
- Page 587 Select a connection method. <When you can select the COM port number of “FOMA P08A”> Select the COM port number with which you install the “FOMA P08A” in the “接続方法 (Connection method)” field, then click “OK”. Then, go to step 6. ≥Here, “COM3”...
- Page 588 Confirm that “OK” appears on the display. “ファイル (File)” menu1Select “ハイパーターミナルの終了 (Exit Hyper Terminal)” to exit Hyper Terminal. ≥If the message “現在、接続されています。切断してもよろしいですか? (Currently connected. Do you want to disconnect this line?”) appears, select “はい (Yes)”. ≥The message “セッションXXXを保存しますか? (Do you want to save session XXX?)” then appears. You do not need to especially save that session.
- Page 589 Confirm that “OK” appears on the display. Information ≥When using DOCOMO Internet access service “mopera U” or “mopera”, you need to set your caller ID to be “notified”. ≥If the entered AT command is not displayed, enter “ATE1 ”. ■Specifying “caller ID notified/not notified” in dial-up network Also by dial-up network setting (see page 25), you can add “186 (notify)”...
- Page 590 Set Dial-up Network for Windows Vista “ [スタート (Start)]”1“接続先 (Access point)”1Click “接続または ネットワークをセットアップします (Setup the connection or network)”. Select “ダイヤルアップ接続を セットアップします (Setup the dial-up connection)”, then click “次へ (Next)”. If the display for selecting a modem appears, click “FOMA P08A”. ≥When connecting wirelessly using Bluetooth communication, put a check mark for only the in-use Bluetooth linked standard modem or Bluetooth modem provided by a Bluetooth device maker.
- Page 591 Click the “全般 (General)” tab to confirm the setting contents. When two or more modems are connected to your personal computer, confirm that “モデム (Modem) - FOMA P08A” or “モデム (Modem) - the name of the in-use Bluetooth linked standard modem or Bluetooth modem provided by a Bluetooth device maker”...
- Page 592 Set Dial-up Network for Windows XP “スタート (Start)”1“すべてのプログラム (All programs)” 1“アクセサリ (Accessories)”1“通信 (Communications)” 1Open “新しい接続ウィザード (New connection wizard)”. When the “新しい接続ウィザード (New connection wizard)” display appears, click “次へ (Next)”. Select “インターネットに接続する (Connect to the Internet)”, then click “次へ (Next)”. Select “接続を手動でセットアップする (Manually set up the connection)”, then click “次へ...
- Page 593 Enter an access point number in the “電話番号 (Phone number)” field, then click “次へ (Next)”. ≥When connecting to “mopera U”, enter “¢99¢¢¢3#” as the access point number. See page 23 for access point numbers other than “mopera U”. Enter the user name and password supplied from your Internet service provider or network administrator in the...
- Page 594 Click the “全般 (General)” tab to confirm the setting contents. When two or more modems are connected to your personal computer, confirm that “モデム (Modem) - FOMA P08A” or “モデム (Modem) - the name of the in-use Bluetooth linked standard modem or Bluetooth modem provided by a Bluetooth device maker”...
- Page 595 Set Dial-up Network for Windows 2000 “スタート (Start)”1“プログラム (Programs)” 1“アクセサリ (Accessories)”1“通信 (Communications)”1Open “ネッ トワークとダイヤルアップ接続 (Network and dial-up connections)”. Double-click “新しい接続の作成 (Create a new connection)” in “ネットワークとダイヤルアップ接続 (Network and dial-up connections)”. If the “所在地情報 (Address information)” display appears, enter “市外局 番 (City code)”, then click “OK”. ≥The “所在地情報...
- Page 596 Confirm that “FOMA P08A” is displayed in the “インターネットへ の接続に使うモデムを選択する (Select a modem for connection to Internet)” field. Then click “次へ (Next)”. ≥If “FOMA P08A” is not selected in that field, select it. ≥When connecting wirelessly using Bluetooth communication, select the in-use Bluetooth linked standard modem or Bluetooth modem provided by a Bluetooth device maker.
- Page 597 Specify IP address and DNS (domain name service) address. Enter “IPアドレス (IP address)” and “ISPによるDNS(ドメイ ンネームサービス)アドレスの自動割り当て [Automatically allocate a DNS (domain name service) address by ISP]” according to the information supplied from your Internet service provider or network administrator. After you finish entering all the items, click “OK”. The display in step 10 returns;...
- Page 598 “スタート (Start)”1“プログラム (Programs)” 1“アクセサリ (Accessories)”1“通信 (Communications)”1 Open “ネッ トワークとダイヤルアップ接続 (Network and dial-up connections)”. Select the icon of the access point name you entered in step 15, then select “ファイル (File)” menu 1“プロパティ (Properties)”. Click the “全般 (General)” tab to confirm the setting contents. ≥When two or more modems are connected to your personal computer, confirm that “モデム...
-
Page 599: Making Dial-Up Connection
Making Dial-up Connection Making Dial-up Connection for Windows Vista Perform the operation on page 6 to connect the FOMA terminal to your personal computer. “ [スタート (Start)]”1Open “接続先 (Access point)”. Select access point and click “接続 (Connect)”. Confirm the contents and click “ダイヤル (Dial)”. ≥When connecting to “mopera U”... - Page 600 Making Dial-up Connection for Windows XP Perform the operation on page 6 to connect the FOMA terminal to your personal computer. “スタート (Start)”1“すべてのプログラム (All programs)” 1“アクセサリ (Accessories)”1“通信 (Communications)” 1Open “ネットワーク接続 (Network connection)”. Open the access point to be used. Select the access point icon of the ISP name (see page 27) you specified in “Set Dial-up Network”, then “ネットワークタ...
- Page 601 Your personal computer ・ Confirm whether your personal computer satisfies the operating environment (see page 3). cannot recognize “P-08A” ・ Confirm whether “FOMA communication configuration file” (driver) is installed in your personal computer. ・ Confirm whether the FOMA terminal is connected to your personal computer and powered on.
-
Page 602: At Command
AT Command AT commands are used to specify and modify the functions of the FOMA terminal through the personal computer. ※The following abbreviations are used in the AT command list: [AT]: Commands which are available at the FOMA P08A Command Port. [M]: Commands which are available in the FOMA P08A (modem). -
Page 603: At Command List
AT Command List Command execution AT command Outline Parameter/Explanation example Re-executes the last executed − command. No carriage return is required. AT%V Displays the version of the AT%V − FOMA terminal. Ver1.00 AT&Cn Selects the operating conditions n=0: CD is always ON. AT&C1 of the circuit CD signal sent to n=1: CD varies according to the carrier of the other... - Page 604 Command execution AT command Outline Parameter/Explanation example AT¢DGPIR=n This command is valid at dialing/ n=0: Uses the APN as it is. (default) AT¢DGPIR=0 receiving calls. n=1: Adds “184” to the APN. (always not notify) In the dial-up network setting, n=2: Adds “186” to the APN. (always notify) AT¢DGPIR? ¢DGPIR:0 you can add “186”...
- Page 605 Command execution AT command Outline Parameter/Explanation example AT+CGREG=n Sets whether the network n=0: Not notified. (default) AT+CGREG=1 registration state is notified. n=1: Notified at switching between the inside and Displays whether you are inside outside of the service area. (set to “Notified”) or outside the service area (Inquiry) AT+CGREG?
- Page 606 Command execution AT command Outline Parameter/Explanation example AT+COPS=n,2,m Selects the carrier to be n=0: Automatic (searches the network and switches the AT+COPS=1,2,"44F001" connected. network operator automatically) (default) n=1: Manual (connects to the network operator specified in “m”) n=2: Disconnects the connection to the network operator n=3: Mapping is not performed.
- Page 607 AT+GMI Displays the manufacturer name AT+GMI − (Panasonic). Panasonic AT+GMM Displays the product name AT+GMM − (FOMA P-08A) of the FOMA FOMA P08A terminal. AT+GMR Displays the version of the AT+GMR − FOMA terminal. Ver1.00 AT+IFC=n,m Selects the flow control method. n: DCE by DTE...
- Page 608 Command execution AT command Outline Parameter/Explanation example ATIn Displays the ID code. n=0: Displays “NTT DoCoMo”. ATI0 n=1: Displays the product name. (same as +GMM) NTT DoCoMo n=2: Displays the version of the FOMA terminal. (same as +GMR) ATI1 n=3: Displays ACMP information element.
- Page 609 Command execution AT command Outline Parameter/Explanation example ATZn Resets the setting to the Only n=0 is specifiable. (Can be omitted) (In online) contents of the nonvolatile memory. If this command is NO CARRIER entered during communication, (In offline) the line is disconnected. AT¥Sn Displays the contents of the each Only n=0 is specifiable.
- Page 610 ≥Command name: +CGEQMIN=[parameter] ・ Outline This command registers the reference value to judge whether the system permits QoS (Quality of service) reported from the network at establishment of the packet communication. You can specify four setting patterns described in the command execution example below. ・...
- Page 611 Disconnection Reason List ■64K Data Communication Value Reason The specified number does not exist. The line was normally disconnected. Cannot communicate because the other party is communicating. Dialed but no response has come in within the specified duration. Cannot communicate because the other party is dialing. The other party rejected to receive the call.
- Page 612 For &E1 Numeric Character notation Connection speed notation CONNECT 1200 1,200bps CONNECT 2400 2,400bps CONNECT 4800 4,800bps CONNECT 7200 7,200bps CONNECT 9600 9,600bps CONNECT 14400 14,400bps CONNECT 19200 19,200bps CONNECT 38400 38,400bps CONNECT 57600 57,600bps CONNECT 115200 115,200bps CONNECT 230400 230,400bps CONNECT 460800 460,800bps...
- Page 613 P-08A Kuten Code List...
- Page 614 <How to read Kuten Code List> First enter the number for “Kuten digit 1 to 3”, and enter the number for “Kuten digit 4”. ≥Some characters in Kuten Code List may appear different on the display. Kuten Kuten Kuten Kuten digit 4 Kuten digit 4 Kuten digit 4 digit...
- Page 615 Kuten Kuten Kuten Kuten digit 4 Kuten digit 4 Kuten digit 4 digit digit digit 1 to 3 1 to 3 1 to 3 讃 賛 酸 餐 斬 暫 残 【 た 】 函 箱 硲 箸 肇 筈 櫨 幡 肌 【...
- Page 616 Kuten Kuten Kuten Kuten digit 4 Kuten digit 4 Kuten digit 4 digit digit digit 1 to 3 1 to 3 1 to 3 揚 揺 擁 曜 楊 様 洋 溶 熔 用 圷 圸 坎 圻 址 坏 坩 埀 垈 坡 椢...
- Page 617 Kuten Kuten Kuten Kuten digit 4 Kuten digit 4 Kuten digit 4 digit digit digit 1 to 3 1 to 3 1 to 3 竊 竍 竏 竕 竓 站 竚 竝 竡 竢 誨 誡 誑 誥 誦 誚 誣 諄 諍 諂 鷯...
Need help?
Do you have a question about the P-08A and is the answer not in the manual?
Questions and answers