Table of Contents
Advertisement
Quick Links
Advertisement
Table of Contents

Related Manuals for Docomo P-01D


Summary of Contents for Docomo P-01D
- Page 1 P-01D ISSUE DATE: NAME: PHONE NUMBER: MAIL ADDRESS: INSTRUCTION MANUAL...
- Page 2 Preface Thank you for selecting the “P-01D”. For proper use, read this manual before and when you use the P-01D. Notes on Using this Mobile Phone This mobile phone is compatible with W-CDMA, GSM/GPRS and wireless LAN systems. Because this mobile phone uses radio waves, you cannot use it in places where the radio waves do not reach such as inside tunnels, basements and buildings, where the radio waves are weak even outdoors, or out of FOMA service area.
-
Page 3: Basic Package/Samples
Basic Package/Samples Basic Package Q P-01D Q Battery Pack P25 (with warranty and Back Cover P53) Q AC Adapter Cable P01 (with warranty) <AC adapter> < microUSB cable> Q Quick Start Guide (in Japanese) Sample Q microSD card (2 GB) (with manual) *Installed in the mobile phone at the time of purchase. -
Page 4: Descriptions Of Operating Procedures
Descriptions of Operating Procedures The operating procedures of the P-01D are described in the following manuals. ■ “Quick Start Guide” (in Japanese only) (supplied with this mobile phone) Describes operating procedures of basic functions. ■ [Instruction Manual] (in Japanese only) -
Page 5: Handling Precautions For This Mobile Phone
(OS) upgrading. For the latest information on additional features and change of operation method, see DOCOMO website. • OS upgrading may disable applications used in the old OS version or pose unwanted failure. - Page 6 • Although you can use this mobile phone without installing a microSD card, there are files that can only be stored on microSD card, such as images shot by Camera. Therefore, installing a microSD card is recommended when using this mobile phone. •...
-
Page 7: Table Of Contents
Character Entry....53 Home Screen....67 docomo Palette UI Application Screen....71 Home Application Settings. - Page 8 Setting Menu....115 Wireless & Networks... . 116 Call Settings....120 Sound.
- Page 9 Android Market....186 Using docomo market... 188 Future Plus....189 Google Maps.
- Page 10 Optional Items and Associated Equipment ......234 Troubleshooting (FAQ)..235 Warranty and After-Sales Service.
-
Page 11: Precautions (Always Follow These Directions)
Precautions (ALWAYS FOLLOW THESE DIRECTIONS) ■ Before using the mobile phone, read these safety precautions carefully so that you can use it correctly. After reading the precautions, keep them in a safe place. ■ Be sure to observe these safety precautions to prevent you or those around you from inflicting injury and to avoid unnecessary damage to the property. - Page 12 Denotes mandatory instructions (matters that must be complied with). Denotes to pull the power plug out of an outlet. Pull the power plug ■ “Precautions” are divided into the following six sections: General Precautions for this Mobile Phone, Battery Packs, AC Adapter Cable, and UIM.
- Page 13 With your mobile phone, use the battery packs and AC adapter cables specified by NTT DOCOMO, INC. Fire, burns, injury or electric shock may result. Warning Do not throw the mobile phone or accessories, or subject them to severe force or shocks.
- Page 14 If the mobile phone and its accessories are used by a child, a guardian should explain how to operate them correctly. During use, a guardian should also check that they are being used as instructed. Otherwise, injury may result. Keep out of the reach of small children. Accidental swallowing or injury may result.
- Page 15 Do not turn on the light toward car drivers. It disturbs driving, and accidents may result. Don’t Turn off this mobile phone in places where use is prohibited such as in airplanes and hospitals. Otherwise, the electronic devices and electronic medical equipment in those places may be adversely affected.
- Page 16 Turn off this mobile phone when near electronic devices using high-precision control or weak signals. The mobile phone may cause the electronic devices to malfunction and have other adverse effects. * Electronic devices that may be affected: Hearing aids, implanted cardiac pacemakers, implanted defibrillators, other electronic medical equipment, fire alarms, automatic doors and other automatically controlled devices.
- Page 17 The surface of the display is coated by a film that prevents the surface from damage so that your safety is ensured when you accidentally drop or give shock Don’t to your mobile phone (for preventing the reinforced glass from scattering). Do not forcibly peel off or give damage to the film.
- Page 18 Danger Do not let any metal object such as a wire come in contact with the battery terminals. Also do not carry or store the battery pack together with any metal Don’t objects like a necklace. Otherwise, the battery pack may ignite, burst or overheat and its electrolyte may leak.
- Page 19 After insulating the battery terminals with Don’t tape, take the unneeded battery pack to a handling counter such as a docomo Shop or dispose of it in accordance with local waste disposal regulations. Do not use or attempt to charge a wet battery pack.
- Page 20 If a thunderstorm is nearby, do not touch the AC adapter cable. Otherwise, you may receive an electric shock. Don’t Never short-circuit the AC adapter cable plug or terminal when the AC adapter is plugged into the power outlet. Also, never touch the plug or terminal Don’t with fingers or other bare skin.
- Page 21 If liquids such as water get in the adapter, unplug the power plug immediately from the outlet. Fire, burns or electric shock may result. Pull the power plug Before cleaning, pull the power plug out of the outlet. Fire, burns or electric shock may result. Pull the power plug Precautions for UIM...
- Page 22 Turn off this mobile phone in trains during the rush hour or other crowded areas as there may be someone near you with an implanted cardiac pacemaker or implanted defibrillator. The mobile phone’s radio waves may adversely affect the operation of implanted cardiac pacemakers and implanted defibrillators.
- Page 23 Where it is used Material/Finishing Battery compartment surface Glass epoxy substrate Battery Resin part terminal Terminal area Beryllium copper/nickel plating, gold plating Battery pack Resin part PC+ABS Label Terminal area Copper/nickel plating, gold plating UIM/microSD Resin part card slot Terminal area Beryllium copper/nickel plating, gold plating Top end area...
-
Page 24: Handling Precautions
Handling Precautions General Notes ■ Do not wet the equipment. This mobile phone, battery pack, AC adapter cable, and UIM are not waterproofed. Do not use them in environments, which are high in humidity such as in bathrooms, and do not allow them to get wet from rain. - Page 25 ■ Do not apply excessive force onto this mobile phone and battery pack. If you put the mobile phone in a bag along with many other articles or sit with the mobile phone in a clothes pocket, the display, internal circuitry and the battery pack could be damaged or malfunction.
- Page 26 ■ This mobile phone becomes warm during use or charging but this is not an abnormality. Use the mobile phone as it ■ Do not leave the camera in places exposed to direct sunlight. Pixels may be discolored or burns may result. ■...
- Page 27 Notes on Handling Battery Packs ■ Battery pack is a consumable item. Though it depends on the usage state, you are advised to replace the battery pack if its usable time is extremely short even when you fully charge it. Make sure that you buy a specified battery pack.
- Page 28 We take no responsibility for any loss of the stored data items. ■ For the environmental protection, bring any unneeded UIMs to a handling counter such as a docomo Shop. ■ Do not damage, carelessly touch, or shortcircuit the IC.
- Page 29 Notes on Using Bluetooth Function ■ This mobile phone supports the security function that meets the Bluetooth Specification, to secure Bluetooth communication. However, the security may not be sufficient depending on the settings. Take care of the security for communication when using the Bluetooth function.
- Page 30 ■ Cautions on Using Bluetooth Devices Bluetooth operates at radio frequencies assigned to the in- house radio stations for mobile object identifiers that have to be licensed and are used in production lines of a factory, specific unlicensed low power radio stations, and amateur radio stations (hereafter, referred to “another radio station”) in addition to scientific, medical, industrial devices, or home electric appliances such as microwave...
- Page 31 ■ Radio frequencies The radio frequencies for WLAN devices are written on battery compartment of your mobile phone. Label description are as follows: 2.4 DS/OF 4 : Indicates radio facilities that use 2400 MHz frequencies. DS/OF : Indicates modulation is the DS-SS/OFDM system. : Indicates that an estimated interference distance is 40 meters or less.
- Page 32 ■ Cautions on Using 2.4 GHz Devices The bandwidth of the WLAN devices is assigned to the in- plant radio stations for identification of mobile objects used in production lines of a factory (a license is required), specified low power radio stations (a license is not required), or amateur radio stations (a license is required), in addition to home electric appliances such as a microwave oven, industrial/scientific/medical devices.
- Page 33 ■ Take special care not to operate the mobile phone while driving. Holding a mobile phone in your hand while driving is subject to a fine or other penalties. However, this does not apply in unavoidable circumstances when, for instance, rescuing someone who is sick or injured or when maintaining public order.
-
Page 34: Part Names And Functions
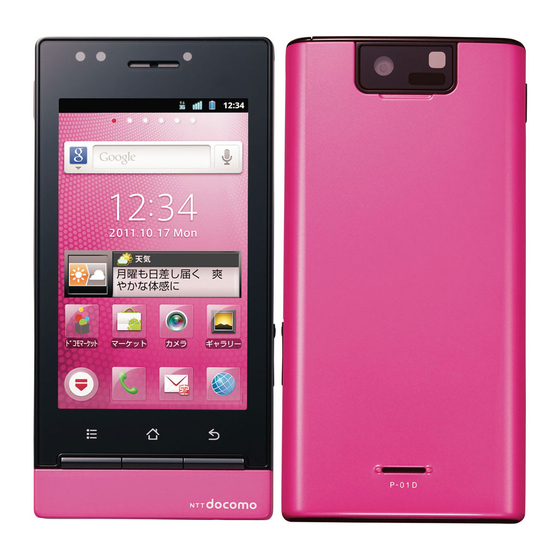
Preliminary Check Part Names and Functions " &... -
Page 35: Home Key
Name Description 1 H Power key Press and hold this key for at least two seconds to turn the power on (Z P.44). To press and hold this key for at least one second when the power is on, set/cancel the Silent mode or Flight mode, or turn the power off. - Page 36 Name Description " Microphone Send your voice from this part. Serves as a microphone when recording sound. # 1Seg antenna Extend this antenna when you watch 1Seg (Z P.200). $ Strap hole % E / F Volume keys Adjust the volume of the other party’s voice or sound from the speaker (Z P.98, P.122).
-
Page 37: Uim
• The UIM (blue) is not usable with this mobile phone. If you have a UIM (blue), bring it to a docomo Shop to replace. • For details about the UIM, refer to the Instruction Manual of the UIM. - Page 38 Removing UIM While pushing the UIM with the tip of your finger, slide it slowly toward you, and remove it About Security Codes for UIM Two security codes are provided for the UIM: PIN1 code and PIN2 code (Z P.128).
-
Page 39: Microsd Card
microSD Card • This mobile phone supports microSD cards of up to 2 Gbytes and microSDHC cards of up to 32 Gbytes (as of October 2011). For the latest information on supported microSD cards including manufacturers and storage capacities, refer to the following website. - Page 40 Removing microSD Card Hook the tip of your finger into the groove of the microSD card, and pull the card straight out of the slot...
-
Page 41: Battery Pack
Battery Pack Installation/Removal of Battery Pack • Installation/removal of the battery pack should be performed with the mobile phone turned off. Installing Battery Pack To remove the back cover, press on the area of the cover around the speaker with both hands, and slide in the direction indicated by the arrow until the lock is released as per the illustration Speaker... -
Page 42: Removing Battery Pack
To attach the back cover, align the cover with the mobile phone and slide it in the direction of the arrow • Confirm there is no gap between the back cover and the mobile phone. Removing Battery Pack Remove the back cover (Z step 1 in P.39 “Installing Battery Pack”) Lift the battery pack in the direction of the arrow using its projection... -
Page 43: Preliminary Check Charging
• Continuous 1Seg watching while charging may shorten the battery pack operating life. To prevent damage to the environment, bring used battery packs to a docomo service counter, a docomo agent or a recycle center. - Page 44 Charging by Using AC Adapter Cable Power plug Connector terminal cover AC adapter Hook USB plug Call/Charging indicator microUSB cable microUSB plug Insert the provided microUSB plug of microUSB cable horizontally into the connector terminal with USB mark ( ) facing up •...
- Page 45 If the symptom recurs, the AC adapter and battery pack may be failed. Contact a handling counter such as a docomo Shop. ■...
-
Page 46: Power On/Off
Power On/Off Turning Power On Press and hold H for at least two seconds The lock screen appears after a while. Turning Power Off Press and hold H until Phone options menu appears [Power off] [OK] • Wait for a while, as it may take some time before the power is turned off. - Page 47 Unlocking Lock Screen Drag to the right • Drag to left to set/cancel Silent mode. Lock screen...
-
Page 48: Basic Operations (How To Use Touch Panel)
Basic Operations (How to Use Touch Panel) Touch Panel Operations The display of this mobile phone is a touch panel, which is operated by direct touch with fingers. • Before use, peel off the protective sheet which is stuck on the touch panel at the time of purchase. - Page 49 ■ Drag Move an item or icon on the screen while holding it with your finger. ■ Scroll Slide your finger up/down or right/left on the screen to show the hidden part. ■ Pinch (spread apart/pinch together) Placing two fingers on the screen, spread them apart to zoom in, or pinch them together to zoom out, when a web page or still image is displayed.
- Page 50 Information • Operate the mobile phone in nearly upright state. If the mobile phone lies flat, the sensor cannot detect a change in orientation and motion properly, and the display modes may not be switched. • Changing the mobile phone’s orientation may not switch display modes depending on the screen displayed.
-
Page 51: Screen Display/Icons
Screen Display/Icons Icon Definitions Icons that indicate the mobile phone status are displayed in the status bar. Notification icons are displayed on the left part while status icons are displayed on the right part of the status bar. Status bar ■... - Page 52 Icon Description Refer to Call on hold P.98 P.111 Data upload Data download Application installed from Android Market P.186 Update of Android Market application available P.186 Hidden notification P.52 microSD card unmounted P.138 Watching a 1Seg program P.200 Connecting to data broadcast security page P.201 eco mode P.217...
- Page 53 Icon Description Refer to Connecting to Wi-Fi P.89 Bluetooth ON P.168 Bluetooth device connected P.168 Data sync P.135 UIM not installed P.35 Alarm set P.211 Speakerphone ON P.98 Microphone mute P.98 Silent mode (vibration ON) P.122 Silent mode (vibration OFF) P.97 Charge required P.41...
-
Page 54: Notification Panel
Notification Panel When notification icons are displayed, you can open the notification panel to check notifications of messages, Calendar events, and so on. Opening Notification Panel Drag the status bar downward • Tap a notification to check details or configure necessary settings. -
Page 55: Character Entry
Character Entry With this mobile phone, you can enter characters by tapping the text entry field and using the keypad displayed. You can also enter characters with handwriting. Switching Input Method Any of three input methods can be used to enter characters with this mobile phone. - Page 56 [10-key ⇔ QWERTY] • To close the keypad, press C. 1 Indicates the currently used input mode. : Hiragana-Kanji : Full-width Katakana : Half-width Katakana : Full-width Alphabet : Half-width Alphabet : Full-width Numeric : Half-width Numeric : Pictogram/Symbol 2 The character assigned to the key concerned is input. Tap a key repeatedly until desired character is displayed, or touch and hold a key and flick to desired character.
-
Page 57: The Keypad
6 Insert a space. When this key is tapped with characters entered, conversion candidates are displayed. Flick left to display characters in reverse order. Flicking to left the key right after confirming entered characters returns the characters to unconfirmed state. 7 Confirm entered characters or feed a new line. - Page 58 Entering Pictograms/Symbols In the Pictogram/Symbol input mode, you can enter pictograms, symbols or emoticons. You might not be able to enter pictograms depending on the text entry field. several times to switch to Pictogram/ Symbol input mode 1 Switch pictogram/symbol/emoticon entering. 2 Scroll the screen up/down and tap a desired pictogram/ symbol/emoticon.
- Page 59 Entering Characters with Handwriting Touch and hold the text entry field [Input Method] [Quick Handwriting] Tap the text entry field 3 4 5 6 1 The types of characters which can be entered are displayed here. : Kanji/Hiragana/Katakana/Alphabet/Numeric/Symbol : Hiragana/Katakana/Alphabet/Numeric : Alphabet/Numeric/Symbol : Numeric/Symbol •...
- Page 60 6 Move the cursor right/left. • When the cursor is moved during character input, a list of recognition candidates for the handwritten character input is displayed. 7 Confirm entered characters or feed a new line. The function now activated is executed using the characters which have been input.
- Page 61 Perform operations listed below: Sound on Key Enable key-tapping sound. Press Vibrate on Enable key-tapping vibration. Key Press Key Preview Display key preview. Auto Automatically capitalize the first character of a Capitalization sentence in alphabet input mode. Keyboard Set keyboard type for each screen orientation Type and input mode.
- Page 62 Download Set whether to enable dictionaries which were Dictionary downloaded from websites. iWnn IME Version of iWnn IME etc. are displayed. Quick Handwriting Settings Home screen [Setting] [Language & keyboard] [Quick Handwriting] Perform operations listed below: Input Input Set input frames number. Method Context Set whether to use the context...
- Page 63 Conversion Word Display conversion candidates as you Prediction enter characters. Input Word Learn converted words. Learning Recognition Display the conversion candidates Error including the recognition error Correction correction candidates. User Z P.61 Dictionary Clear Z P.62 Learning Dictionary Sound on Sound on Enable key-tapping sound.
- Page 64 For Fit Key [Fit Key] [Japanese User Dictionary] • To add English words used in half-width alphabet input mode, tap [English User Dictionary]. For Quick Handwriting [Quick Handwriting] [Conversion] [User Dictionary] [Add] Tap the text entry field of [Reading] Enter reading Tap the text entry field of [Word] Enter word...
- Page 65 Customizing Fit Key You can adjust the size and position of the keypad to fit on your hand. In addition, you can decorate the keypad with stamps and change the color, background and key shape. Home screen [Fit Key] 1 Pallet Flick right or left to select.
- Page 66 To attach stamps [デコ (Deco)] Select a pallet Tap a stamp to attach Tap preferred location in the keypad preview to attach the stamp Perform stamp operations as necessary (Z P.65) To change color [カラー (Color)] Select a pallet • Drag the slider to adjust color transparency. •...
- Page 67 To select from packages [パッケージ (Package)] Select a pallet • Tapping [初期状態に戻す (Initialize)] [Yes] will reset the keypad to the default state. • You can receive/send the package via infrared communication by tapping [赤外線受信 (Receive via IrDA)]/[赤外線送信 (Send via IrDA)]. •...
- Page 68 Operation Procedure Rotate Display the stamp guide Trace the outer side of the stamp guide corner in direction you want to rotate Copy & paste Display the stamp guide Touch and hold the center of the stamp guide Tap the location you want to attach the stamp Delete Display the stamp guide...
-
Page 69: Docomo Palette Ui
Press B to display the home screen. You can choose from the following three home applications: docomo Palette UI, “Fit Home” and Launcher. This section describes how to operate docomo Palette UI. 1 Indicators Current location (sheet) within the home screen is indicated. -
Page 70: Deleting Shortcuts
Adding Shortcuts etc. to Home Screen Home screen Touch and hold the background • Applications or groups can also be added by touching and holding the target application or group on the application list screen, and then by tapping [Add to home]. [Shortcut]/[Widget]/[Folder]/[Group]/[Web page] Select a shortcut etc. - Page 71 Uninstalling Applications or Widgets Home screen Touch and hold an application or a widget to uninstall [Uninstall] [OK] • Applications can also be uninstalled by touching and holding the target application on the application list screen, and then by tapping [Uninstall] [OK].
- Page 72 Searching for Mobile Phone Applications and Web Page Information Home screen Tap the entry field within the quick search box • You can also search by displaying the application list screen [Search]. • Press A [Search settings] to change search target types and settings. Tap a search target Enter keyword Search candidates that contain characters you just...
-
Page 73: Application Screen
Application Screen Displaying Application List Screen On the application list screen, the installed applications are displayed on a group by group basis. Home screen 1 The group names and number of applications are displayed. Tap a group to switch between displaying and hiding the application icons. -
Page 74: List Of Applications
Catalyst Reader View Office documents and PDF P.220 files. docomo災害用伝 This is a disaster message board 言板 (docomo application. It allows your Disaster personal safety to be registered Message Board and checked at times when a Service) disaster has occurred. - Page 75 Mobage An application, which allows you to enjoy content provided by Mobage. My docomo アプ An application, which allows you リ (My docomo to easily view information such appli) as your usage fees and your docomo points.
- Page 76 Refer to SD backup Back up and restore P.222 phonebook, messages (SMS) and bookmarks to/from microSD card. spモードメール Exchange mails using docomo P.144 (sp-mode mail) mail address (@docomo.ne.jp). You can use Pictograms and Deco-mail, and automatic reception is also supported. Twitter A Twitter official client application.
- Page 77 Task Viewer You can check and terminate running applications. Talk You can chat with people using P.156 Google Talk. docomo market Access docomo market to P.188 search for applications and videos. ドコモ海外利用 This application supports packet (docomo communication while overseas.
- Page 78 Icon Application Description Refer to Voice Dialer Just say the name of the other P.104 party to call up the contact and make a call. Home Switcher An application, which allows you to switch home applications. Market Use Android Market. P.186 マクドナルド...
- Page 79 Icon Application Description Refer to Infrared An application, which allows you P.164 to exchange data such as Phonebook etc. via infrared communication. Settings Configure various settings of P.115 this mobile phone. 地図アプリ (Map This application provides maps, appli) a search function for stores and facilities, navigation, public transportation timetables, a record of places visited, and...
-
Page 80: Moving An Application
Icon Application Description Refer to 毎日新聞 (The View latest news stories Mainichi Daily provided by THE MAINICHI News) NEWSPAPERS. 楽天 gateway Allow easy access to all kinds of (Rakuten Rakuten services via the service gateway) launcher. 楽天オークション This application lets you list (Rakuten items or place bids on Rakuten auction) -
Page 81: Home Application Settings
Home Application Settings Home screen [More] Perform operations listed below: Home Settings Set Version check etc. Application info Display the version of home application etc. -
Page 82: Initial Setting
Initial Setting Initial Setting When you turn on the power of this mobile phone for the first time after purchase, configure settings for Google account and GPS positioning by following the on-screen instructions. [言語変更] [English (United States)] • If [機能バージョンアップ (Update features)] screen is displayed during initial setting, tap [OK] to return to the previous screen and continue operation. - Page 83 Enter characters indicated in the picture [Next] Read the note about Google location service [Next] • To make your data backed up in the Google server with your Google account, mark the checkbox. [Next] [Finish setup]...
-
Page 84: Changing Screen Display To English
Changing Screen Display to English If you have not changed the display language to English in the initial setting, you can do it by following the steps below. Home screen [本体設定] [言語とキー ボード] [言語を選択] [English (United States)]... -
Page 85: Google Account
Google Account Once Google account is set, you can download applications from Android Market. If you already have your own Google account, you can use the existing account with this mobile phone. Home screen [Setting] [Accounts & sync] [Add account] [Google] [Next] [Create]... -
Page 86: Setting Access Point
Setting Access Point Access points for Internet connection (sp-mode and mopera U) are added by default. You can add and modify access points as necessary. • By default, sp-mode is selected as default access point. However, the settings may differ depending on the terms set forth in your contract. - Page 87 ISP for NTT DOCOMO smartphones. In addition to the Internet connection, you can use mail service with the same mail address (@docomo.ne.jp) as that of the i-mode. sp-mode is a pay service requiring subscription. For details of sp-mode, refer to DOCOMO website.
- Page 88 For details of mopera U setting, refer to mopera U website. • To use [mopera U (Smartphone Fixed Rate)], subscription to flat-rate packet service is required. For details of mopera U (スマートフォン定額) (flat-rate for smartphone), refer to DOCOMO website.
-
Page 89: Email Setting
Email Setting You can configure mail account provided by mopera U or general providers to use mail function. • Configure access point setting in advance (Z P.84). Setting mopera U Mail Account Subscribers for mopera U can use mopera U mail. ■... - Page 90 Setting General Provider’s Mail Account • Obtain information required for settings from your service provider in advance. Home screen [Email] Enter mail address and password [Next] Follow on-screen instructions Information • If automatic settings of mail account does not complete, tap [Manual setup] in step 2 to enter the account setting information manually.
-
Page 91: Wi-Fi
Wi-Fi You can use mail and the Internet by connecting to your home or corporate network or a public wireless LAN access point using the Wi-Fi function of this mobile phone. Home screen [Setting] [Wireless & networks] Mark [Wi-Fi] checkbox Wi-Fi is turned on and available Wi-Fi networks are detected. - Page 92 ■ Available channels The Wi-Fi function of this mobile phone can use the frequency bands of channels 1 to 11. ■ Radio wave interference with Bluetooth devices Wireless LAN (IEEE802.11b/g/n) and Bluetooth devices use the same frequency band (2.4 GHz). As such, when using the mobile phone near a Bluetooth device, radio wave interference may occur, causing a drop in the communication speed and/or resulting in noise or a connection failure.
- Page 93 Checking MAC Address or IP Address Home screen [Setting] [Wireless & networks] [Wi-Fi settings] [Advanced] "MAC address" and "IP address" are displayed. Using Static IP Address You can also connect to a Wi-Fi network by inputting its static IP address. Home screen [Setting] [Wireless...
-
Page 94: Online Service Accounts
Online Service Accounts You can set accounts of online services such as mixi and Twitter, and synchronize and exchange data between this mobile phone and each service server. • To set Exchange account, check with your network administrator about setting information. Home screen [Setting] [Accounts... -
Page 95: Phone
Phone/Network Services Phone Making a Call Home screen [Phone] Enter the other party’s phone number • If you enter a wrong number, tap to clear the entered number. To end the call, [End] Emergency Call Emergency call Phone number Call to police Call to fire station and ambulance Call for accidents at sea •... - Page 96 • This mobile phone supports “Emergency Location Report”. When you make an emergency call such as at 110/119/118, information about the place where you are dialing from (location information) is automatically notified to emergency- response agencies such as police stations. It might happen that your correct location is not detected by emergency- response agencies depending on the location you dial from or radio wave conditions.
- Page 97 Selecting Whether to Notify or Withhold Caller ID for Each Call • Caller ID is your important information. Be careful about notifying it. Home screen [Phone] Enter the other party’s phone number [Set Notify caller ID active] (186 added)/[Set Notify caller ID inactive] (184 added) Entering Push Signals Push signals are used for operating home answer phone or...
-
Page 98: Receiving A Call
Using International Call • For overseas use, Z P.224 • If you have any question about WORLD CALL, contact “General Inquiries” on the back page of this manual. Home screen [Phone] Enter + (touch and hold [0]) Country code Area code Phone number •... -
Page 99: Silent Mode
Muting Phone Ringtone Temporarily Incoming call Silent Mode When you set the Silent mode, any sound other than music, video and alarm is muted. Press and hold H for at least one second [Silent mode] Either appears in the status bar depending on the vibration setting (Z P.122). - Page 100 Operations during Call : Hold the call. : Unhold the call. *1*2 : Switch parties. 2 End the call. 3 Make a call to another party. 4 Switch to hands-free call using a Bluetooth headset. 5 Display the dialpad to transmit push signals. 6 Mute the microphone so that your voice is not heard by the other party.
- Page 101 Call Log Home screen [Phone] [Call log] tab The call log screen is displayed. • To delete a call from the log, touch and hold the call to delete [Remove from call log]. To delete all calls from the log, display the call log screen [Clear call log] [OK].
-
Page 102: Phonebook
Phonebook Adding a Contact to Phonebook You can save names, phone numbers and mail addresses in the phonebook. Home screen [Phonebook] [New contact] Enter necessary items • Tap to add an image. When an image shot using [Take photo] has been registered, both the image that was shot and the trimmed image are saved on the microSD card. - Page 103 Checking Contacts Home screen [Phonebook] Contact list screen or favorite list screen is displayed. Contact list screen 1 Tap the phone number to display My Details (Z P.104). 2 Index bar 3 Tap to make a call or send a message (SMS). 4 Name Tap to confirm details of the contact.
-
Page 104: Importing Contacts
Contact List Screen/Favorite List Screen Menu Contact list screen [Favorites] tab) Perform operations listed below: Display Select from display options: to show contacts accompanied by phone numbers only or options contacts of marked items only. Delete Delete contact(s). Group setting Add/edit/delete group(s). - Page 105 [Share visible contacts]. To include group names when exporting all contacts, use [Share all via IrDA], PhoneBookCopy (Z P.105) or SD backup (Z P.222). • The exported contacts are saved to the docomo account on the receiving terminal.
- Page 106 My Details The phone number of the mobile phone can be confirmed. You can also enter or edit your own details. Home screen [Phonebook] Tap the phone number in the My Details field Perform operations listed below: Edit contact Edit My Details. Share Share My Details via infrared communication, etc.
-
Page 107: Phonebookcopy
By using microSD card you can exchange phonebook data with other mobile phones. In addition, you can copy the phonebook data added to your Google account to docomo account. • If you use this function for the first time, you need to accept “License Agreement”. - Page 108 [docomoアカウントへコピー (Copy to docomo account)] tab Tap Google account to copy [上書き (Overwrite)]/[追加 (Add)] Copied phonebook data is saved to the docomo account. Information • If the phonebook item names (Phone number, etc.) of the other mobile phone are not consistent with those of this mobile phone, item names may be changed or deleted.
-
Page 109: Available Network Services
Available Network Services You can use the following DOCOMO network services on this mobile phone. • Network services are unavailable when you are out of the service area or out of reach of radio waves. • “Deactivating service” does not mean termination of subscription to services such as Voice Mail Service and Call Forwarding Service. -
Page 110: Using Voice Mail Service
Basic Flow of Voice Mail Service Step 1: Activate the service Step 2: The caller records a message Step 3: Play the message *1 If the caller is in a rush and wants to skip the answering message to record a message immediately, he/she can do so by inputting “#”... -
Page 111: Call Forwarding Service
*1 You will receive message (SMS) “NTT DOCOMO VM:XX” after each operation. Call Forwarding Service When you cannot answer a call because the mobile phone is turned off or out of reach of radio waves, or if you do not answer a call within a set ring time, this service allows you to have the call forwarded to another phone number. - Page 112 Call Charges for Call Forwarding Service • Charges for calls from the caller to the service subscriber shall be paid by the caller. • Charges for calls from the service subscriber to a forwarding number shall be paid by the subscriber. Information •...
-
Page 113: Call Waiting Service
Setting Call Forwarding Announcement You can turn on or off the voice announcement, which informs the caller that the call is being forwarded. Home screen [Phone] [1][4][2][9] • Configure settings following the audio guidance. Call Waiting Service If there is another incoming call during a call, this service notifies of it with a call waiting tone, and allows you to answer the new call by putting the current call on hold. - Page 114 To end the second call [End] Connection is switched to the first call. To hold the second call (Swap) Connection is switched to the first call. Calls are switched each time you tap (Swap). Holding Call to Make Another Call During call (Hold) The first call is put on hold.
-
Page 115: Caller Id Notification Service
Caller ID Notification Service You can display your phone number on the other party’s phone when you make a call. • Phone number is your important information. Be careful about notifying it. Network service settings screen [Notify caller Activate/deactivate/check the settings of Caller ID Notification Service Information •... - Page 116 To set public mode (power OFF) ][2][5][2][5][1] The public mode (power OFF) is set (no change in the home screen). To cancel public mode (power OFF) ][2][5][2][5][0] To confirm public mode (power OFF) setting ][2][5][2][5][9] When Public Mode (Power OFF) Is Set The setting remains valid until you tap [ ][2][5][2][5][0] to cancel public mode (power OFF).
-
Page 117: Setting Menu
Various Settings Setting Menu Display home screen [Setting] to call up the setting menu and configure various settings for this mobile phone. • The setting menu can be displayed by displaying the home screen [Settings]. -
Page 118: Wireless & Networks
Wireless & Networks Home screen [Setting] [Wireless & networks] Perform operations listed below: Flight mode Disable the wireless communication feature of this mobile phone. • Though marking [Flight mode] checkbox will turn off Wi-Fi, Wi-Fi tethering and Bluetooth functions. Wi-Fi Z P.89 Wi-Fi settings Network Configure settings to provide... -
Page 119: Usb Tethering
Mobile Data enabled Enable Internet access via networks mobile networks. Data roaming Enable connection to data services during roaming. Network Z P.229 Mode Access Point Z P.84 Names Network Z P.229 operators Using USB Tethering You can connect a USB-compatible personal computer to the mobile phone using the microUSB cable supplied, and then use the mobile phone as a modem to connect to the internet. - Page 120 Information • The following PC environments (OS) are required to use USB tethering. Proper operation is not guaranteed if the OS has been upgraded, added or modified. Windows 7, Windows Vista, Windows XP (service pack 3 or later) • Depending on the PC environment, it may be difficult to connect to the Internet or USB tethering may be disabled.
- Page 121 Setting Portable Wi-Fi Hotspot Home screen [Setting] [Wireless & networks] [Tethering & portable hotspot] [Portable Wi-Fi hotspot settings] [Configure Wi-Fi hotspot] Enter necessary information • You can set a password by selecting [WPA2 PSK] in the Security field. [Save]...
-
Page 122: Call Settings
Call Settings Home screen [Setting] [Call settings] Perform operations listed below: Fixed Dialing Enable FDN/ When FDN is turned on, you can Disable FDN call the phone numbers added Numbers to the FDN list only. Change PIN2 Z P.130 FDN list Manage the phone number list. - Page 123 Use Internet calling Set whether or not to use Internet calling while connected to Wi-Fi network. *1 Not available with a DOCOMO UIM.
-
Page 124: Sound
Sound Home screen [Setting] [Sound] Sound settings screen is displayed. Perform operations listed below: Silent mode Set/cancel the Silent mode. Vibrate Set whether to keep vibration always on/off, or to turn it on only when the Silent mode is set/canceled. Volume Z P.122 Phone ringtone... - Page 125 Information • Ringer (ringtone) volume can be adjusted by E/F. Note that during music/video playback or 1Seg watching, these keys are used as volume keys for the respective functions.
-
Page 126: Display
Display Home screen [Setting] [Display] Perform operations listed below: Brightness Set the brightness. Auto-rotate Vertical/horizontal display modes are screen automatically switched according to the direction of mobile phone. Animation Set whether or not to use animation to indicate screens and items. Screen timeout Set the time length before the mobile phone automatically enters the Sleep mode when it... -
Page 127: Location & Security
Location & Security Home screen [Setting] [Location & security] Perform operations listed below: Use wireless Search for the present location based on networks information acquired from Wi-Fi and mobile network base stations. Use GPS Measure more accurate location information. satellites •... -
Page 128: About Gps
About GPS • GPS is a function to obtain location information of this mobile phone by receiving radio waves from GPS satellites. • This cannot be used as navigation equipment for airplane, vehicle or person, or as high-accuracy surveying GPS. Note that we do not take any responsibility for a loss, such as pure economic loss resulting from use of GPS function for these purposes, or the facts that you have missed the chance to... - Page 129 • The PIN unblocking key (PUK) is described on the application form (your copy) that is handed over to you at a docomo Shop at the time of contract. If your contract has been made at a shop other than a docomo Shop, you need to bring an identification card such as your driver’s license, and the UIM...
-
Page 130: Network Security Code
Network Security Code This is a four-digit number required for your identification when you place an order at a docomo Shop or docomo Information Center, or when you use network services. This number is determined at the time of contract and you can also change the number later by yourself. -
Page 131: Setting Pin Code
PIN1 code and PIN2 code. You cannot change this PIN unblocking key by yourself. • If you fail to enter PIN unblocking key (PUK) correctly ten times in succession, the UIM is locked. In this case, contact a docomo Shop. Setting PIN Code Configure settings so that the mobile phone prompts you to enter PIN1 code at startup. - Page 132 Unlocking PIN1 Lock If you fail to enter PIN1 code correctly three times in succession, PIN1 is locked and [SIM card is PUK-locked.] appears. You can unlock PIN1 lock by following operations. Drag to the right • When [Entering wrong number 10 times will cause SIM lock.] appears, tap [OK].
- Page 133 Unlocking PIN2 Lock If you fail PIN2 authentication three times in succession, and [Password incorrect, please change PIN2 and retry!] is displayed, perform the following procedure to unlock PIN2 lock. Fixed Dialing Numbers screen [Change PIN2] Enter new PIN2 code [OK] Enter new PIN2 code again [OK]...
- Page 134 Setting Screen Lock This mobile phone can be locked with unlocking pattern, PIN or password to prevent unauthorized use by any third party. Home screen [Setting] [Location & security] Location & security settings screen is displayed. [Set up screen lock] [Pattern]/[PIN]/ [Password] Follow on-screen instructions...
- Page 135 Setting Terminal Password Home screen [Setting] [Location & security] Location & security settings screen is displayed. [Terminal password setting] Enter terminal password [OK] Enter terminal password again [OK] Changing Terminal Password Location & security settings screen [Terminal password setting] Enter current terminal password [OK] Enter new terminal password [OK]...
-
Page 136: Applications
Applications Home screen [Setting] [Applications] Application settings screen is displayed. Perform operations listed below: Unknown Permit installation of applications sources obtained from websites other than Android Market or by mail. • Download applications only from trusted sources such as Android Market to protect your mobile phone and personal information. -
Page 137: Accounts & Sync
Accounts & Sync Home screen [Setting] [Accounts & sync] Accounts & sync settings screen is displayed. Perform operations listed below: Background Permit all applications installed in the mobile data phone to automatically perform data communication. Auto-sync Permit applications to automatically perform data synchronization. - Page 138 Information • The Google account that was set first cannot be removed by [Remove account]. To remove the first Google account, reset the mobile phone (Z P.137). • The docomo account cannot be removed.
-
Page 139: Privacy
Privacy Home screen [Setting] [Privacy] Privacy settings screen is displayed. Perform operations listed below: Back up my data Back up application data and settings to Google server. Automatic Restore backup settings and data when an restore application is reinstalled. Factory data Z P.137 reset Resetting Mobile Phone... -
Page 140: Storage
Storage Home screen [Setting] [Storage] Storage settings screen is displayed. Perform operations listed below: Total space Display total capacity of microSD card. Available space Display available space of microSD card memory. Unmount SD Securely remove microSD card from this card/Mount SD mobile phone/Make this mobile phone card recognize microSD card. -
Page 141: Language & Keyboard
Language & Keyboard Home screen [Setting] [Language & keyboard] Perform operations listed below: Select language Set a display language. User dictionary Add words to the user dictionary for Android keyboard. [Add] Enter a word [OK] Fit Key Z P.58 Quick Z P.60 Handwriting Android... -
Page 142: Voice Input & Output
Voice Input & Output Home screen [Setting] [Voice input & output] Perform operations listed below: Voice Language Set a language for voice text input. recognizer SafeSearch Apply adult filter to voice search settings results. Block Set to allow no offensive words to be offensive displayed for voice text input. -
Page 143: Accessibility
Accessibility Home screen [Setting] [Accessibility] • When [No accessibility related applications found] appears, tap [OK] to install a screen reader from Android Market, or tap [Cancel]. Perform operations listed below: Accessibility Enable accessibility-related applications for audio and vibration responses to user operations and for text-to-speech service. -
Page 144: Date & Time
Date & Time This is set to [Automatic] by default. It is not necessary to set date and time manually. Home screen [Setting] [Date & time] Perform operations listed below: Automatic Date, time zone and time are acquired from the network and automatically corrected. Set date Set the date manually. -
Page 145: About Phone
About Phone Home screen [Setting] [About phone] Perform operations listed below: Software Update Z P.248 Upgrade Z P.260 features Status The remainder of the battery and phone number can be confirmed. Battery use Battery power consumption of each application can be confirmed. Legal Open source licenses (including GPL/ information... -
Page 146: Sp-Mode Mail
Mail/Internet sp-mode Mail Exchange mails using i-mode mail address (@docomo.ne.jp). Pictograms, Deco-mail, and automatic reception features are available. • For detailed information of sp-mode mail, refer to “ご利用ガイ ドブック (spモード編) (Mobile Phone User’s Guide [sp-mode])” (in Japanese only). Home screen [ spモードメール... -
Page 147: Message (Sms)
For available countries and overseas operators, refer to “Mobile Phone User’s Guide [International Services]” or DOCOMO International Services website. • To send a message (SMS) to a subscriber of an overseas operator, enter “+” followed by “country code” and “the other party’s mobile phone number”. - Page 148 Receiving and Reading a Message (SMS) When you receive a new message (SMS), a notification icon is displayed in the status bar. You can check the message by opening the notification panel and tapping the notification. Home screen [Messaging] Message list screen is displayed. Tap a thread to read Replying to a Message (SMS) Message list screen...
- Page 149 Deleting Messages (SMS) Message list screen To delete a message (SMS) Tap a thread to delete Touch and hold a message (SMS) to delete [Delete message] To delete a thread Tap a thread to delete [Delete thread] • You can also touch and hold a thread to delete [Delete thread].
-
Page 150: Email
Email You can use Email application by setting mail accounts provided by mopera U or other Email service providers. • Set an access point (Z P.84) and mail account (Z P.87) in advance. Creating and Sending an Email Home screen [Email] •... -
Page 151: Replying To An Email
Receiving and Reading an Email Home screen [Email] Email list screen is displayed. • If you have more than one mail account, press [Accounts] and select a mail account in the account list screen. • Tapping [Combined Inbox] in the account list screen will show an inbox for all mail accounts. -
Page 152: Deleting Emails
Deleting Emails Email list screen To delete an Email Touch and hold an Email to delete To delete multiple Emails Mark Emails to delete [Delete] Switching Folder Display Email list screen [Folders] Tap a folder to open Setting Email Account Options Email list screen [Account settings] •... -
Page 153: Gmail
Gmail Gmail is Google’s online Email service. You can exchange Emails using Gmail application on this mobile phone. • Set your Google account (Z P.83) in advance. Refreshing Gmail Home screen [Gmail] Inbox is displayed. [Refresh] Gmail application on the mobile phone is synchronized with your Gmail account to refresh the inbox. - Page 154 Displaying a New Mail Inbox Tap a thread with any unread mail • When a notification icon is displayed in the status bar, you can display the inbox by opening the notification panel and tapping the notification. Searching for a Mail Inbox [Search] [Search mail] field...
- Page 155 [Compose Mail] field Enter message • To attach an image, press A [Attach] select an image. Message Thread Operations Inbox Touch and hold a thread Perform operations listed below: Read Unfold the thread. Archive Archive (store) the thread. Archived thread is not shown in the inbox.
-
Page 156: Early Warning "Area Mail
Early Warning "Area Mail" This service allows you to receive Earthquake Early Warnings or other disasters which are sent out by the Japan Meteorological Agency. • Area Mail is a free service for which subscription is not required. • You can save up to 50 Area Mail messages. •... - Page 157 Reading Received Area Mail Home screen [Area Mail] Area Mail message list screen is displayed. Tap an Area Mail to read Setting Early Warning "Area Mail" Set whether to receive an Area Mail message, also set the performance when you receive it. Area Mail message list screen [Settings] Perform operations listed below:...
-
Page 158: Google Talk
Google Talk Google Talk is Google’s online instant messaging service. You can enjoy chatting with other members using Talk application on this mobile phone. • Set your Google account (Z P.83) in advance. Online Chat Adding a New Member Home screen [Talk] Friends list is displayed. -
Page 159: Starting Chat
Starting Chat Friends list Tap the name of a friend to chat with Chat screen is displayed. Enter message in [Type to compose] field • To enter a smiley, press A [More] [Insert smiley] select a smiley. [Send] Switching Chats You can switch chats when you are chatting with more than one friend. -
Page 160: Signing Out
Managing Members Members on the friends list are displayed by online status (Available, Busy, Invisible). Depending on the setting, only the members that you frequently exchange Emails with or chat with are preferentially shown. To display all listed members, press [All friends] in the friends list. -
Page 161: Web Browser
Web Browser Using the web browser, you can view web pages and play Flash contents as you do with a PC. Connection to a Wi-Fi network or wireless mobile network using packet communication is necessary to use the web browser on this mobile phone. Starting Web Browser Address bar Home screen... - Page 162 Screen Operations When Web Page Is Displayed Operation Description Switch Vertical/ Z P.47 horizontal display modes Zoom Pinch out/in Z P.47 in/out Double-tap Z P.46 Scroll Z P.47 Select and copy text Touch and hold a part with no link Drag the slider in four directions to select text range to copy selected text...
- Page 163 Menu for Currently Displayed Web Page Web page displayed Perform operations listed below: New window Open the web page in a new window. Bookmarks Display the bookmark list. Windows Display the window list to switch web pages. Refresh/Stop Refresh or stop refreshing the web page.
- Page 164 Managing Bookmarks and History Adding a Bookmark Display the web page you want to add to Bookmarks [Bookmarks] [Bookmark last-viewed page] Confirm/change the bookmark name [OK] Editing a Bookmark Web page displayed [Bookmarks] Touch and hold a bookmark to edit [Edit bookmark] Enter change...
- Page 165 Displaying a Web Page from History Web page displayed [Bookmarks] [Most visited] tab/[History] tab • Tap (gray) in History to add to Bookmarks. Tap a web page to display Clearing History Web page displayed [Bookmarks] [History] tab To delete a web page from history Touch and hold a web page to delete [Remove from history]...
-
Page 166: Infrared Communication
File Management Infrared Communication This mobile phone is compliant with IrMC™ version 1.1 standard. Data transmission with other mobile phones, etc. that have infrared communication feature is possible. • Data of phonebook, images, Fit Key and Odekake features in Future Plus can be sent/received. •... - Page 167 Sending Data via Infrared Communication Start each application Select data to send Tap the menu item for sending/ sharing via infrared communication • To send a package of Fit Key, display the home screen [Fit Key] [パッケージ (Package)] select a package [赤外線送信...
- Page 168 • To add the received contacts to the phonebook, tap [Add] after receiving [OK]. • To overwrite your phonebook with the received contacts, tap [Over write] after receiving [Yes] [OK]. • The received contacts are saved to the docomo account phonebook.
-
Page 169: Bluetooth Communication
Bluetooth Communication You can wirelessly exchange data with nearby Bluetooth devices using the Bluetooth function of this mobile phone. • For Bluetooth supported version and profiles, Z P.263 • For detailed information of settings and operation procedures, also refer to the Instruction Manual for the Bluetooth device to be connected. -
Page 170: Connecting A Bluetooth Device
■ Radio wave interference with wireless LAN As Bluetooth and wireless LAN (IEEE802.11b/g/n) use the same frequency band (2.4 GHz), use of Bluetooth device around wireless LAN device may cause radio wave interference, leading to decreased communication speed, noise or connection failure. In this case, take actions below: •... - Page 171 [Scan for devices] • Detected Bluetooth devices are listed in the Bluetooth device list. • Mark [Discoverable] checkbox to allow other Bluetooth devices to detect this mobile phone for about 120 seconds. Select a detected Bluetooth device and perform pairing with the device If necessary, enter pass code (PIN) [OK] •...
-
Page 172: Receiving Data Via Bluetooth
Sending and Receiving Data via Bluetooth Communication • Depending on the application, even when you select a menu for sharing data via Bluetooth communication, the data may not be sent, or received data may be unavailable. Sending Data via Bluetooth Communication You can send images, web page URLs, etc. -
Page 173: Vpn (Virtual Private Network) Connection
VPN (Virtual Private Network) Connection VPN (Virtual Private Network) refers to a technology that allows for access to information within a protected local network for a company, university or the like from outside. To configure settings for VPN connection from this mobile phone, acquire security information from network administrator. - Page 174 Disconnecting VPN Open the notification panel Tap the notification that indicates connection with VPN to disconnect Once the VPN is disconnected, the notification icon in the status bar is grayed out.
-
Page 175: External Device Connection
External Device Connection Connecting to a PC When you connect this mobile phone and a PC using the included microUSB cable, the microSD card in the mobile phone is recognized as a removable disc of the PC, and you can read and write data in the microSD card from the PC. •... - Page 176 PC side Open [My Computer]/[Computer] Select [Removable disc] Files in the microSD card are displayed. Drag and drop files between the mobile phone and PC Information • Once microSD card is mounted on the PC, you cannot use any application that uses microSD card such as camera. Securely Removing microUSB Cable •...
-
Page 177: Camera
Applications Camera Precautions for Use • Ensure the lens is clean before shooting. If it is not, clean up with soft cloth. Any dirt on the lens such as fingerprint or oil content may cause defocusing or dots in still images and videos. - Page 178 Displaying Shooting Screen You can shoot images in either portrait or landscape format. Home screen [Camera] Still image shooting screen is displayed. • To switch to the video shooting screen, tap " Still image shooting screen " Video shooting screen 1 Icons indicating setting status Z P.177 2 Setting still image shooting mode Z P.177 3 Setting focus mode Z P.178...
- Page 179 $ Set resolution mode % Recording time ■ Icons indicating setting status Item Icon Flash Mode Flash Torch, Flash Off Self Timer 3 seconds, 5 seconds, 10 seconds Photo Resolution WVGA, Scene Night ■ Setting still image shooting mode Still image shooting screen Tap 2 icon Perform operations listed below: Normal Shot...
- Page 180 ■ Setting focus mode Still image shooting screen Tap 3 icon Perform operations listed below: Auto Tap the shutter button to set focus in the focus frame. Macro Focus on a close object. Infinity Focus on distant landscape. ■ Setting from the setting panel Still image/video shooting screen Perform operations listed below: •...
-
Page 181: Shooting A Video
Review Set whether to display/hide review screen after shooting. Set whether or not to shoot a video to attach Shot Mode to mail. Reset Restore the default shooting settings. *1 Still image shooting only *2 Video shooting only Shooting a Still Image Follow the procedure below when the shooting mode is “Normal Shot”... - Page 182 Review Screen Icons Icon Description You can upload the file to Facebook or YouTube, or send the file via Bluetooth communication or by Gmail, etc. Switch to the previous/next file. Display picture/video information. Return to the shooting screen. Save (set) the shot still image. Play the video.
-
Page 183: Gallery
Gallery You can use Gallery to view still images and videos saved in microSD card. ■ Supported files Type File format Still image JPEG, GIF, PNG, BMP Video H263, H264, MPEG-4, VC-1, Divx Displaying a Still Image/Video Home screen [Gallery] Album list screen is displayed. - Page 184 To play a video Tap a video to play Start playing the video. • By tapping the icon displayed on the screen, the video can be paused/played, rewound or forwarded. If the icons and progress bar showing the playback time are not displayed, they will be displayed when the screen is tapped.
-
Page 185: Music Player
Music Player Start the music player to play songs stored in microSD card. • For copying music data from PC, Z P.173 ■ Supported files Some songs may not be playable even though they are supported files. File format (extension) 3gp, mp4, m4a, mp3, mid, xmf, mxmf, rtttl, rtx, ota, imy, ogg, Playing Songs Home screen... - Page 186 Tap a song to play Playback screen is displayed and playback is started. : Display the song list screen. : Tap to enable/disable shuffle feature. : Tap each time to repeat all songs → repeat current song → cancel repeat. : Skip to the start of song/next song.
-
Page 187: Creating A Playlist
Creating a Playlist Song list screen Touch and hold a song to add to a new playlist [Add to playlist] [New] Enter playlist name [Save] • To add a song to a playlist, display the song list screen touch and hold a song to add [Add to playlist] tap the destination playlist. -
Page 188: Android Market
Android Market Search for convenient applications and fun games in Android Market to install to this mobile phone. • Set your Google account (Z P.83) in advance. Installing Applications Home screen [Market] • Read Android Market Terms of Service for initial startup and tap [Accept]. - Page 189 Information • Be sure to check the security and safety of the application, then install it at your own risk. Your mobile phone may be infected with a virus or data may be damaged. It may cause excessive sound volume. •...
-
Page 190: Using Docomo Market
• Some applications introduced in the docomo market may be pay applications. • We at DOCOMO take no responsibility for any losses arising out of sites introduced in the docomo market or information obtained from the sites. -
Page 191: Future Plus
Future Plus Once you have started Future Plus, you can check updates in Twitter, mixi and Facebook, call log, new messages (SMS), sp-mode mails, recently played songs, recently shot photos, etc. from the same screen. Furthermore, you can automatically obtain desired information from web services, and view tweets that are found by automatic search of Twitter. - Page 192 3 User name, character and point display 4 Changes to the gleaming icon when you enlarge the panel by tapping it. 5 Jump to unread button Tap to place unread message (SMS), sp-mode mail or missed call panel at the center. 6 Refresh button Refresh the Twitter, mixi and Facebook panels.
- Page 193 Future Plus Setting Menu Mainline/function line screen [設定 (Settings)] Perform operations listed below: ユーザ名 (User Set your user name. name) キャラクター Select a character. Characters in [SECRET] (Character) are disclosed depending on the amount of used points. • Character decoration is canceled when you change character.
- Page 194 Information • Contents of the services and information are offered by their respective providers. Due to any reason of the providers, the contents of the services and information may change or no longer delivered in the future without notice. About Desired Information Information applicable to present location and time are automatically obtained from web services and displayed in the mainline.
- Page 195 Using Surrounding Search The names of landmarks near the present location are automatically set as a keyword for Tweet search in Twitter. • Set your own Twitter account and select [Twitter] in the desired function setting in advance. Mainline screen Surrounding search result line appears.
- Page 196 When [よろこんでいただけましたか? (Satisfied?)] appears, [はい (Yes)]/[いいえ (No)] Obtained points are shown. Using Odekake Function Use infrared communication to exchange with other mobile phones. Mainline screen Tap Odekake start button Perform operations listed below: でかける (Visit) Your character visits the counterpart mobile phone.
- Page 197 Using Shop Function You will get points according to how you use Future Plus. You can purchase decoration items of your choice with earned points, and decorate your character screen. Purchasing Items Mainline screen Tap the point display Select items to purchase [購入...
- Page 198 Decorating Screen with Purchased Items Mainline screen Tap the point display [クロ ーゼット (Closet)] Select items to use [デコる (Decorate)] When the item is 空デコ (sky deco) Drag the item in four directions to define the position When the item is 丘デコ (hill deco) Drag the item right or left to define the position When the item is キャラデコ...
-
Page 199: Google Maps
Google Maps Using Google Maps, you can locate your current position, and search for places or routes to destinations. • To use Google Maps, the mobile phone must be connected to a Wi-Fi network or 3G/GPRS network to enable data communication. - Page 200 Searching for a Route to Destination Map displayed [Directions] • You can start Google Maps Navigation (Beta version) by displaying the home screen [Navigation] to search for a route from your current location to any destination without efforts. Enter start and end points •...
-
Page 201: 1Seg
1Seg 1Seg is terrestrial digital TV broadcasting service dedicated for mobile devices. With 1Seg, you can watch data broadcast along with video and audio. Further, detailed program information, participation in quiz show, etc. and TV shopping are readily available. For details on the 1Seg service, browse the following website: The Association for Promotion of Digital Broadcasting: http://www.dpa.or.jp/... - Page 202 • Places where radio waves are weak or cannot reach such as in tunnels, underground malls and recesses inside a building To improve reception, fully extend the 1Seg antenna. Reception may also be improved by changing the antenna direction or moving to a different place.
- Page 203 1Seg Watching Screen At the time of purchase, the screen is displayed in landscape mode, and video is displayed full-screen. Data broadcast is displayed in portrait mode. 1 Video area 2 Program information 3 Controller panel Displayed by pressing A [Controller] : Direct channel selection : Switch channels...
- Page 204 *1 Displayed when portrait and landscape modes are switched. Also displayed when you tap the video area or caption area. *2 You can also select a channel by tapping the video area or caption area. *3 Displayed by tapping the screen when video is displayed full- screen in landscape mode.
- Page 205 Caption Turn caption display ON/OFF. setting Switch Port/ Set the 1Seg watching screen to portrait or landscape mode. Land Icon in Set whether to display icons in landscape landscape mode. When this checkbox is unmarked, video is displayed full-screen. Off timer Display a confirmation screen after a specified time to end 1Seg watching.
-
Page 206: Setting Channels
Reset storage Delete broadcasting data saved by each area affiliated station. Reset TV Restore the default 1Seg settings. settings *1 Settings are automatically changed when you operate [Display switch] in the 1Seg function menu. Setting Channels Setting a Channel List Set a channel list corresponding to the region of use. - Page 207 Switching Channel Lists 1Seg watching screen [Settings] [Select channel list] Select channel list screen is displayed. Tap a channel list to activate Editing a Channel List • The currently active channel list cannot be edited. Select channel list screen Touch and hold a channel list to edit [Channel info] Touch...
- Page 208 Displaying Information from a TV Link 1Seg watching screen [Settings] [TVlink] TV link list screen is displayed. : Memo : Link content : HTML content : Expired (unavailable) Tap the TV link from which you want to view information Creating a TV Link Shortcut in Home Screen TV link list screen Touch and hold a TV link to create shortcut...
-
Page 209: Toruca
“ToruCa” application that allows you to view, find or update a ToruCa. For details on ToruCa, refer to “ご利用ガイドブック (spモード 編) (Mobile Phone User’s Guide [sp-mode])” (in Japanese only) or docomo market. • Read Software Licence Agreement (in Japanese only) for initial startup, and tap [同意する(Accept)]. Information •... -
Page 210: Youtube
YouTube YouTube is Google’s online video streaming service. You can play and upload videos. Home screen [YouTube] • Read mobile terms of service at initial startup and tap [Accept]. To play a video Tap a video to play • Tap the screen to pause/resume the video. •... -
Page 211: News & Weather
News & Weather You can check weather information and news. Home screen [News & Weather] Top screen for news or weather is displayed. • Flick the top tab right and left to switch categories of weather and news, or flick the screen right and left. - Page 212 News Select news Select news categories to show. settings topics Prefetch Mark this checkbox to download articles and show articles. Prefetch Mark this checkbox to download images images along with articles. This option is available when [Prefetch articles] is marked. News terms of Show news terms of service.
-
Page 213: Clock
Clock This mobile phone can be used as a desk clock. Home screen [Clock] Clock screen is displayed. : Dim the screen. To restore the original brightness, tap the screen. : Display the Alarms screen. : Start slideshow using still images. : Start the music player. - Page 214 Advanced Settings of Alarm Alarms screen [Settings] Perform operations listed below: Alarm in silent Mark this checkbox to activate alarm in Silent mode mode. Alarm volume Set alarm volume. Snooze duration Set the snooze duration if you activate snooze in the alarm notification screen. Volume key Set behavior (None/Snooze/Dismiss) behavior...
-
Page 215: Calendar
Calendar You can synchronize this mobile phone calendar with online service calendars such as Google Calendar to manage your schedule. • Set your Google account (Z P.83) in advance. Displaying Calendar Home screen [Calendar] Calendar screen is displayed. • Press A [Day]/[Week]/[Month]/[Agenda] to switch display formats. -
Page 216: Adding An Event
Adding an Event Calendar screen [More] [New event] Enter event name, date and time, place and description • If you set more than one calendar, select the calendar to which you want to add the event. • Tap to add more notifications. •... -
Page 217: Changing Calendar Settings
Changing Calendar Settings Calendar screen [More] [Settings] Perform operations listed below: Hide declined Hide events you declined. events Use home time Mark this checkbox to show the zone calendar times in your home time zone during roaming. Home time zone When [Use home time zone] checkbox is marked, specify the time zone of your home region. -
Page 218: Calculator
Calculator Home screen [Calculator] Enter a formula in the formula field at the top • Flick the button display right or left, or tap A [Advanced panel]/[Basic panel] to switch advanced/basic calculation screens. • Touch and hold the formula field to copy/paste the formula. -
Page 219: Econavi
ECONAVI By switching to the eco mode, you can reduce battery consumption. You can also set the mobile phone to [Auto eco] so that it automatically switches to the eco mode when the battery level goes below the preset level. Switching to the eco Mode Home screen [ECONAVI]... -
Page 220: Barcode Reader
QR code concatenated QR codes Example of read consisting of up to 16 information: segments. 株式会社NTTドコモ (NTT DOCOMO, INC.) Barcode representing numbers with vertical lines (bars) of different widths. JAN code Example of read This mobile phone can read information:... - Page 221 URL information, even if you tap in the read result screen [共有する (Share)] and select [Bluetooth]/ [Facebook]/[Twitter]/[Web page widget (docomo Palette UI)]. • Depending on the application used for sharing, login operation may be necessary, or sharing may not be done correctly due...
-
Page 222: Catalyst Reader
Catalyst Reader You can view PC documents saved in microSD card (Office documents, PDF files, etc.). ■ Supported files • Documents using fonts not installed in the mobile phone may not be displayed correctly, because incompatible fonts are substituted by some other fonts to display the documents. •... - Page 223 Information • The text file cannot be sent, even if you open a text file [Share] [Facebook]/[Twitter]. • Depending on the application used for sharing, login operation may be necessary, or sharing may not be done correctly due to restrictions of the application.
-
Page 224: Sd Backup
[Replace]/[Addition] Tap a file to restore [Yes] When restoration is completed, [OK] • Restored phonebook data is saved to the docomo account. • When you restore an unsent message (SMS), only message part is restored. Touch and hold the restored unsent message (SMS) [Forward] to enter address. - Page 225 Deleting Backup Data Home screen [SD backup] [Deletion of backup data] Enter terminal password [OK] Tap data to delete Mark file(s) to delete [Deletion execution] [Yes] When deletion is completed, [OK]...
-
Page 226: Overview Of International Roaming (World Wing)
International roaming (WORLD WING) is a service that allows you to use in the service areas of overseas operators affiliated with DOCOMO with the same phone number and mail address as used in Japan. You can use the call and message (SMS) features without changing the settings. -
Page 227: Available Services
Available Services (○: Available ー: Unavailable) Main communication GSM/ services GPRS Call ○ ○ ○ Message (SMS) ○ ○ ○ ○ ○ ー Mail ○ ○ ー Browser Locating current position ○ ○ ー with GPS *1 To use data communication feature during roaming, mark [Data roaming] checkbox (Z P.230). -
Page 228: Confirmation Before Use
Confirmation before Use Confirmation before Departure If you use the mobile phone abroad, check the items indicated below while you are still in Japan. About Subscription • Check your WORLD WING application status. For details, contact “General Inquiries” on the back page of this manual. About Charges •... - Page 229 Subscription to flat-rate packet service is necessary to use the service. For details, refer to “Mobile Phone User’s Guide [International Services]” or DOCOMO International Services website. About Screen Display • The network type in use is displayed in the status bar.
- Page 230 About Inquiry • In case this mobile phone or UIM is lost or stolen overseas, contact DOCOMO immediately from where you are and take the procedure to suspend the service. For contact information, refer to the back page of this manual. Note that you are liable for any call and data communication charges incurred after loss or theft.
-
Page 231: Settings For Overseas Use
Settings for Overseas Use Although by default, the mobile phone automatically searches for and connects to an available operator’s network when you arrive overseas, you can manually configure settings. Setting Network Mode Home screen [Setting] [Wireless & networks] [Mobile networks] [Network Mode] Perform operations listed below:... - Page 232 Setting Data Roaming Home Screen [Setting] [Wireless & networks] [Mobile networks] Mark [Data roaming] check box [OK]...
-
Page 233: Making/Receiving Calls In The Country You Stay
Japan) You can make international calls from the country you stay to other countries by using the international roaming service. • For available countries and operators, refer to DOCOMO International Services website. Home screen [Phone] Enter + (touch and hold [0]) - Page 234 Making Domestic Calls in the Country You Stay You can make calls to land-line phones or mobile phones in the same way as you do in Japan. Home screen [Phone] Enter phone number with area code • If the other party is a subscriber to “WORLD WING”, enter “81”...
-
Page 235: Confirmation After Returning Home
Confirmation after Returning Home When you return to Japan, the mobile phone automatically connects to the DOCOMO network. If not, take following actions to establish connection: • Set [Preferred network mode] in [Network Mode] to [GSM/ WCDMA] (Z P.229). • Set [Available networks] in [Network operators] to [Select... -
Page 236: Optional Items And Associated Equipment
Some products may not be dealt in depending on the area. For details, consult a handling counter such as a docomo Shop. For details on optional items, refer to the user’s manuals of respective options and related devices. -
Page 237: Troubleshooting (Faq)
• If the symptom does not improve after taking actions listed in the check item, feel free to contact “Repairs” on the back page of this manual or a repair counter specified by DOCOMO. The “Repairs” counter is available in Japanese only. - Page 238 ■ Charging Symptom Check item Cannot charge • Make sure that the battery pack is installed (Charging properly (Z P.39). indicator does not • Make sure that the power plug of the light, or it flickers) included AC adapter is securely inserted into the outlet (Z P.42).
- Page 239 Symptom Check item Usable time of the • Check if the mobile phone is left out of battery pack is service area for a long time. short While being out of service area, the mobile phone consumes more power to search for radio wave to establish communication (Z P.263).
- Page 240 • Activating Safe mode Press H for two seconds or more when the mobile phone is turned off, and in the time from when the docomo logo is displayed to when the home screen is displayed, hold down A. * When Safe mode is activated, "Safe mode"...
- Page 241 ■ Call Symptom Check item Cannot make calls • Check if FDN (Fixed Dialing Numbers) is set (Z P.120). by tapping • Check if [Flight mode] checkbox is marked (Z P.116). No ringtone • Check if the ringer volume is set to silent (Z P.122).
- Page 242 ■ Sound Symptom Check item Cannot hear the • Check if you have changed the in-call voice of the other volume (Z P.98). party, or the voice is too loud ■ Data display Symptom Check item Images and • Make sure that the same UIM is installed melodies you set as when you obtained the images and in individual...
- Page 243 Check for available service areas or overseas operators referring to “Mobile Phone User’s Guide [International Services]” or DOCOMO International Services website. • Try different network modes and/or network operators. Set [Network Mode] to [GSM/WCDMA] (Z P.229).
-
Page 244: Data Management
Symptom Check item The other party’s • Even when the other party notifies the phone number is caller ID, the ID is not displayed on this not notified/ mobile phone unless notified from the Notified phone network or operator used. Moreover, a number is number different from the other party’s different from that... -
Page 245: Error Messages
Symptom Check item Cannot make calls • If you try to make a call to the same from this mobile number several times while the other phone with party does not answer because he/she is external device out of service area, etc., it may become such as car impossible to call to the number. -
Page 246: Warranty And After-Sales Service
If Repair Is Necessary after Inquiry Bring your mobile phone to a repair counter specified by DOCOMO. Note that your mobile phone is accepted for repair during the repair counter’s business hours. You will need to bring the warranty card to the counter. Further, note that you may need to wait for fixing depending on the malfunction state. - Page 247 (the damages of LCD, connector, etc.), the repair cost is charged even within the warranty period. • The cost for troubles caused by the use of devices and consumables other than those specified by DOCOMO is charged even within the warranty period. ■...
- Page 248 (the nameplate is peeled off intentionally or replaced) and therefore cannot verify the product conformity to the technical standard, it might happen that we at DOCOMO reject to repair the malfunction. • The information such as about function settings, etc. might be reset depending on the troubles or repairs, or the way you handle the mobile phone.
- Page 249 Memory Dial (Phonebook Function) and Downloads etc. Data you have created, imported or downloaded into your mobile phone might be altered or lost when you change the model or the mobile phone is repaired. We assume no responsibility for such alteration or loss of data. Moreover, instead of repairing your mobile phone, we may replace it with another one at our discretion, in which case it is not possible to transfer these data to the replacement terminal...
-
Page 250: Software Update
Software Update About Software Update Software Update is a function that connects to the network to check whether P-01D software update is necessary or not. If necessary, Software Update will download part of software through packet communication to update the software. -
Page 251: Notes On Use
• For software update, the mobile phone connects to the server (DOCOMO website) through SSL/TLS communication. • You are advised to update software when radio wave is strong enough with the four-bar antenna mark displayed and while you are not moving. - Page 252 • Messages (SMS) received during software update are stored in the SMS center. • When updating software, the proprietary information about your P-01D (model name, serial number, etc.) is automatically sent to the server (DOCOMO-managed server for Software Update). We at DOCOMO never use the sent information for purposes other than to update software.
-
Page 253: Updating Software Automatically
Updating Software Automatically (Automatic Update) New software is automatically downloaded and updated at a preset time. By default, automatic update setting is set to [Automatic Update]. (software update available) appears in the status bar once rewriting is ready. Then you can check the rewriting time, and select whether to change the rewriting time or immediately start rewriting. - Page 254 Select behavior upon software update notification • To update software automatically: [Automatic Update] • Not to update software automatically: [Manual Update] Procedure When Update is Necessary When software is downloaded automatically, (software update available) appears in the status bar. Open the notification panel Tap the notification •...
- Page 255 To perform rewriting at set time [OK] • The home screen reappears. Rewriting starts at the set time. To change rewriting time [Sets Time] (Z step 1 in P.258 “Updating Software at Scheduled Time (Scheduled Update)”) • Set the time to install an update package. To perform rewriting now [Starts update] (Z step 1 in P.256 “Updating...
- Page 256 Starting Software Update (Immediate Update) Home screen [Setting] [About phone] [Software Update] • You can do this by displaying the home screen [Setting] [About phone] [Upgrade features] [Update from server] [Update software]. [Start the software update] [Yes] • Software update is performed automatically once download is started.
- Page 257 [OK] • Update starts after reboot. • During update, all key operations are disabled. Further, you cannot cancel the update. • Reboot is automatically performed a few times during update. Home screen appears • appears in the status bar. disappears once confirmed.
-
Page 258: Updating Software Now
Updating Software Now [Starts update] [Ready for update.] appears [OK] • After [Ready for update.] is displayed for about three seconds, rewriting is automatically started. • During rewriting, all key operations are disabled. Further, you cannot cancel rewriting. • Once rewriting is completed, reboot is performed automatically. - Page 259 Open the notification panel Tap the notification • Software update is finished and the home screen appears. • (software update completed) appears in the status bar to indicate completion of the update. (software update completed) disappears once confirmed. About Display After Completion of Software Update appears in the status bar of the home screen.
- Page 260 [Sets Time] • Rewriting start time setting screen is displayed. • The initial time is displayed according to the clock of P-01D. Enter preferred time [Set] • Set the time. • Tap [+]/[-] to change the update time and then...
- Page 261 • If an alarm is set at the same time as the scheduled update time, software update is given priority. • If P-01D is off at the scheduled time for software update, software update will be performed at the same time as the scheduled time after the P-01D...
- Page 262 Updating Software for Upgrading Features Home screen [Setting] [About phone] [Upgrade features] [Update from server] [Update software] [Yes] [Yes] [Start now] Update file is downloaded. • When you select [Reserve a time], set the download start time and tap [Yes]. Open the notification panel Tap the notification...
- Page 263 Updating Software from microSD Card • Obtain new software from Panasonic website and store it in [Download] folder in microSD card in advance. Home screen [Setting] [About phone] [Upgrade features] [Update from microSD] [OK] Find new software in microSD card. [OK] The mobile phone is rebooted and rewriting starts.
-
Page 264: Main Specifications
Main Specifications ■ Main unit Model P-01D Approx. 110 mm (H) × Dimensions Approx. 55 mm (W) × Approx. 12.8 mm (D) Approx. 117 g (with the battery Weight pack installed) ROM 1024 MB Memory RAM 512 MB Standstill (automatic):... - Page 265 Continuous playback time: Music Approx. 2000 minutes MP3 file playback (supports background playback) Compliant with Wireless LAN IEEE802.11b/g/n Bluetooth standard Ver. Supported version 2.1+EDR Bluetooth Bluetooth standard Power Class Output function Supported HFP, HSP, OPP, A2DP, AVRCP, PBAP profiles *1 Compliance with Bluetooth standards of this mobile phone and all Bluetooth devices are verified and certified in accordance with procedures set forth by Bluetooth SIG.
-
Page 266: File Format
■ Battery pack Name of product Battery Pack P25 Battery type Li-ion (lithium ion) battery Voltage 3.7 V Capacity 1200 mAh ■ AC adapter cable Name of product AC Adapter Cable P01 100 V to 240 V AC Input 0.14 A, 50/60 Hz Output 5.0 V DC, 1.0 A Charging... - Page 267 ■ Maximum number of shot still images (estimate) The following are the maximum numbers that can be saved under default conditions. Resolution Number of images that can be saved in microSD card (2 GB) 5M (2592 × 1944) Approx. 3278 3M (2048 ×...
-
Page 268: Specific Absorption Rate (Sar) Of The Phone
This mobile phone satisfies the international guidelines when used with a carrying case or a wearable accessory approved by NTT DOCOMO, INC.** In case you are not using the approved accessory, please use a product that does not contain any metals, and one that positions the mobile phone at least 1.5 cm away... - Page 269 Ministry of Internal Affairs and Communications Website: http://www.tele.soumu.go.jp/e/sys/ele/index.htm Association of Radio Industries and Businesses Website: http://www.arib-emf.org/index02.html (In Japanese only) NTT DOCOMO, INC. Website: http://www.nttdocomo.co.jp/english/product/sar/ Panasonic Mobile Communications Co., Ltd. Website: http://panasonic.jp/mobile/ (In Japanese only) Technical regulations are defined by the Ministerial Ordinance Related to Radio Law (Article 14-2 of Radio Equipment Regulations).
-
Page 270: European Rf Exposure Information
European RF Exposure Information This mobile phone complies with the EU requirements for exposure to radio waves. Your mobile phone is a radio transceiver, designed and manufactured not to exceed the SAR limits for exposure to radio-frequency (RF) energy, which SAR value, when tested for compliance against the standard was 1.170 W/kg. -
Page 271: Declaration Of Conformity
Declaration of Conformity The product “P-01D” is declared to conform with the essential requirements of European Union Directive 1999/5/EC Radio and Telecommunications Terminal Equipment Directive 3.1(a), 3.1(b) and 3.2. The Declaration of Conformity can be found on http://panasonic.net/pmc/support/index.html. Concerning European Economic Area: The use of Wi-Fi is... -
Page 272: Fcc Notice
FCC Notice • This device complies with part 15 of the FCC Rules. Operation is subject to the following two conditions: 1. This device may not cause harmful interference, and 2. This device must accept any interference received, including interference that may cause undesired operation. •... -
Page 273: Fcc Rf Exposure Information
FCC RF Exposure Information This model phone meets the U.S. government’s requirements for exposure to radio waves. Your wireless phone contains a radio transmitter and receiver. Your phone is designed and manufactured not to exceed the emission limits for exposure to radio frequency (RF) energy set by the Federal Communications Commission of the U.S. - Page 274 model phone is on file with the FCC and can be found under the Display Grant section at http://www.fcc.gov/oet/ea/fccid/ after search on FCC ID UCE211044A. For body worn operation, this phone has been tested and meets the FCC RF exposure guidelines when used with an accessory designated for this product or when used with an accessory that contains no metal and that positions the handset a minimum of 1.0 cm from the body.
-
Page 275: Important Safety Information
Important Safety Information Aircraft Switch off your mobile phone when boarding an aircraft or whenever you are instructed to do so by airline staff. If your mobile phone offers a ’flight mode’ or similar feature consult airline staff as to whether it can be used on board. Driving Full attention should be given to driving at all times and local laws and regulations restricting the use of mobile phones while driving... - Page 276 Do not dispose of battery packs with ordinary waste. The battery pack may catch fire or damage the environment. After insulating the battery terminal with tape, take the unneeded battery pack to a docomo Shop, or follow the instructions of local authorities in charge of collecting used batteries.
-
Page 277: Export Administration Regulations
Export Administration Regulations This product and its accessories might be covered by the Japan Export Administration Regulations (“Foreign Exchange and Foreign Trade Law” and its related laws). In addition, U.S. Re- export Regulations (Export Administration Regulations) are applied to this product and its accessories. To export and re- export this product and its accessories, take the required measures on your responsibility and at your expenses. -
Page 278: Intellectual Property Right
Trademarks • “FOMA”, “i-mode”, “i-αppli”, “Deco-mail”, “ToruCa”, “mopera”, “mopera U”, “WORLD CALL”, “WORLD WING” and “sp-mode” are trademarks or registered trademarks of NTT DOCOMO, INC. • “Catch Phone (Call waiting service)” is a registered trademark of Nippon Telegraph and Telephone Corporation. - Page 279 • The Bluetooth word mark and logos are owned by the Bluetooth SIG, INC. and any use of such marks by NTT DOCOMO, INC. is under license. Other trademarks and trade names are those of their respective owners. ® • Wi-Fi is a registered mark of the Wi-Fi Alliance.
- Page 280 • This product contains software licensed complying with GNU General Public License (GPL), GNU Lesser General Public License (LGPL), etc. The program is free software; you can copy it and/or redistribute it and/or modify it under the terms of the GPL or LGPL as published by the Free Software Foundation.
- Page 281 (d) THE SOFTWARE IS PROVIDED “AS IS” WITHOUT WARRANTY OF ANY KIND, EXPRESS OR IMPLIED, INCLUDING BUT NOT LIMITED TO THE WARRANTIES OF MERCHANTABILITY, FITNESS FOR A PARTICULAR PURPOSE AND NONINFRINGEMENT OF THIRD PARTY RIGHTS. IN NO EVENT WILL PROVIDER OR ADOBE OR ITS LICENSORS BE LIABLE TO YOU FOR ANY DAMAGES, CLAIMS OR COSTS WHATSOEVER INCLUDING ANY CONSEQUENTIAL, INDIRECT, INCIDENTAL DAMAGES, OR ANY...
-
Page 282: Index
Index About phone....... . . 143 Access point........84 Access point Reset to default. - Page 283 Disaster Message Board Service....72 docomo market....... 188 docomo Overseas Use.
- Page 284 G-Guide EPG........73 Gallery........181 Gmail.
- Page 285 My Details........104 My docomo appli....... 73 Navigation.
- Page 286 QWERTY keypad....... 53 Rakuten auction....... . 78 Rakuten gateway.
- Page 287 Vibrate........122 VirusScan (docomo security scan)....74 Voice Dialer.
- Page 288 TV link........205...
- Page 289 (in Japanese only) You will need your “docomo ID/password” to access the site. If you do not have or you have forgotten your “docomo ID/password”, contact “General Inquiries” listed on the back page of this manual. You may not be able to access the site depending on the details of your subscription.
- Page 290 ● If you lose your mobile phone or have it stolen, immediately take the steps necessary for suspending the use of the mobile phone. ● If the mobile phone you purchased is damaged, bring your mobile phone to a repair counter specified by DOCOMO after returning to Japan.
Need help?
Do you have a question about the P-01D and is the answer not in the manual?
Questions and answers