Wisdom Sage Series Installation And Owner's Manual
Minimal appearance point source loudspeaker
Hide thumbs
Also See for Sage Series:
- Owner's manual (20 pages) ,
- Installation and owner's manual (12 pages) ,
- Installation and owner's manual (10 pages)

Related Manuals for Wisdom Sage Series


Summary of Contents for Wisdom Sage Series
- Page 1 Installation and Owner’s Manual Sage Series ICS3 Sage Series SUB1 Minimal Appearance Point Source Loudspeaker Gypsum 1/2” (13mm) and 5/8” (16mm) Mounting Platform...
-
Page 2: Table Of Contents
Table of Contents Quick Start: ......................................4 Preparing the Gypsum Mounting Platform............................5 Before Installing the Platform with SUB1 ............................5 Before Installing the Platform with ICS3 ............................5 Mounting Platform Installed Accessories............................6 Storing the mounting platform ............................... 6 Cutting the panel bracket ................................ - Page 3 Document Conventions This document contains general safety, installation, and operation instructions for the Wisdom Audio Sage Series Minimal Appearance loudspeakers. It is important to read this document before attempting to use this product. Pay particular attention to: WARNING: Calls attention to a procedure, practice, condition, or the like that, if not correctly performed or adhered to, could result in injury or death.
-
Page 4: Quick Start
Quick Start: 1. Prewire speaker wires to each location. 2. Install SUB1 cabinet (for SUB1 locations only) to ceiling joists using included L-brackets. 3. Attach ICS3-Backbox to Mounting Platform (for ICS3 locations only). 4. Attach Mounting Platform to ceiling joists. 5. -
Page 5: Preparing The Gypsum Mounting Platform
Preparing the Gypsum Mounting Platform Before Installing the Platform with SUB1 The SUB1 is shipped with the subwoofer cabinet (band-pass box) and port tube “Bass Snorkel”. The cabinet should be mounted to the ceiling joists using the included L-Bracket screwed into the studs. The cabinet should not be allowed to rest on the ceiling surface gypsum. -
Page 6: Mounting Platform Installed Accessories
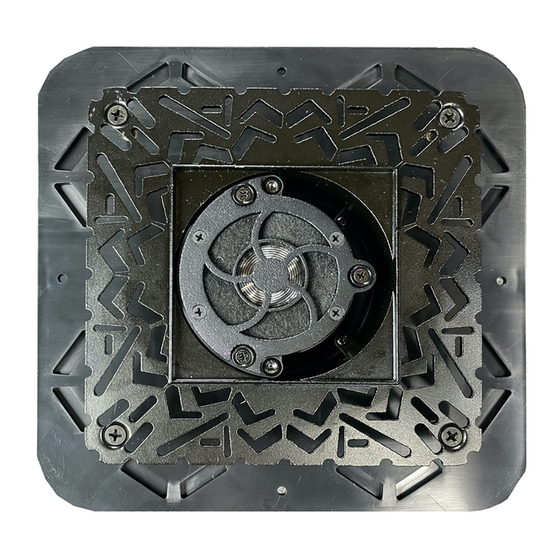
Mounting Platform Installed Accessories The gypsum, 1/2” (13mm) and 5/8” (16mm) mounting platform ships with the Clamping Plate installed and ready for either (1) mounting to an ICS3-Backbox or (2) a SUB1 port tube. A mud ring, sanding shield and paint shield are also pre-installed within the mounting platform. -
Page 7: Installing The Gypsum Mounting Platform
Installing the Gypsum Mounting Platform NOTE: The installation and finishing of the gypsum panel requires knowledge and experience in finishing to a Level 5 finish. If you are not familiar with this level of finish, consult with an experienced drywall installer. Step 1 - ICS3-Backbox Attachment to Platform DO NOT THROW AWAY THE SANDING GUIDE / PAINT SHIELD! NOTE: For SUB1 skip to Step 2. -
Page 8: Step 4 - Ics3 And Sub1 Wiring
Step 4 – ICS3 and SUB1 Wiring Step 5 - SUB1 Port Tube Connection Make speaker wire connections on the back of the ICS3 Attach to the rear of the Clamping Plate using the screw down enclosure or the SUB1 band-pass box prior to continuing to the collar. -
Page 9: Mudding The Panel
Mudding the Panel Step 1- Fill Step 2- Tape Before applying mud, be sure that the sanding shield is still in Using mesh tape, apply tape around all adjoining surfaces. This place securing in the speaker opening. Using quick-set includes areas around the mounting platform and around the compound, fill all gaps and let fully cure. -
Page 10: Sanding
Sanding Step 1- Sand and Check Step 2- Unscrew Step 3- Pull Using a sanding pole with a 60-micron film, Once the sanding is complete, push firmly Then remove the shield using a screw and sand the drywall and the opening until the on the sanding shield to break any a pair of pliers or a slotted screwdriver. -
Page 11: Using Paint Shield To Adjust For Final Grill Depth
Using Paint Shield to Adjust for Final Grill Depth The paint shield is held in place with magnets and has access holes for three (3) adjustment screws as part of the Magnetic Recoil Fastener (Patent Pending). The paint shield is the same thickness as the speaker grille that will be installed at the end of the installation. - Page 12 WISDOM and the stylized W are registered trademarks of Wisdom Audio Magnetic Recoil Fastener (Pat. Pend) Wisdom Audio 1572 College Parkway, Suite 164 Carson City, Nevada 89706 USA Telephone: 775.887.8850 Fax: 775.887.8820 www.wisdomaudio.com GYPSUMIM-1.0 ©11/17/2020 Wisdom Audio, Inc. All rights reserved.
Need help?
Do you have a question about the Sage Series and is the answer not in the manual?
Questions and answers