Wisdom Sage ICS3 Series Installation And Owner's Manual
Minimal appearance point source loudspeaker
Hide thumbs
Also See for Sage ICS3 Series:
- Installation and owner's manual (12 pages) ,
- Installation and owner's manual (12 pages)

Related Manuals for Wisdom Sage ICS3 Series


Summary of Contents for Wisdom Sage ICS3 Series
- Page 1 Installation and Owner’s Manual Sage Series ICS3 Sage Series SUB1 Minimal Appearance Point Source Loudspeaker Solid Surface Mounting Kit For 3” and 4” square and round solid surface mounting with ICS3 or SUB1 loudspeakers...
-
Page 2: Table Of Contents
Adjust Grill Mounting Depth: SUB1 ..............................11 Document Conventions This document contains general safety, installation and operation instructions for the Wisdom Audio Sage Series Minimal Appearance loudspeakers. It is important to read this document before attempting to use this product. Pay particular attention to: WARNING: Calls attention to a procedure, practice, condition or the like that, if not correctly performed or adhered to, could result in injury or death. - Page 3 Sage Series Minimal Appearance System Ordering and Planning Planning Stage Pre-construction / Pre-wire Stage Finishing Stage Surface Platform (Size & Shape) Speaker Final Assembly Grille • • • • Gypsum, 1/2” (12.5mm) 1/2" round 3" Platform ICS3-BackBox ICS3-SPMD 3" round •...
-
Page 4: Preparing For Solid Surface Mounting
Preparing for Solid Surface Mounting Included Parts Depending on the size and shape of the cutout the dimensions of the mounting shims and accessories will change, but the instructions to install are the same. There are several parts to allow proper adjustment for a fully flush mount speaker to be properly installed. -
Page 5: Cutting The Solid Surface
- they install flush to the material surface, therefore leaving zero tolerance for uneven, or unclean cuts in the opening. Below are instructions for the two options, (1) Water Jet / CNC and (2) Router Template. The router template can be purchased from Wisdom Audio. Method 1: Water Jet / CNC Using CAD... - Page 6 Router template Step 5: Second Cut Mark here → 1/16” (1.6mm) NOTE: This step is only required with the 3” openings and not the 4” grille openings. 4” openings can skip this step as it is not needed. The Grille will cover the flange.
-
Page 7: Selecting And Installing Shims And Mounting Plate
Selecting and Installing Shims and Mounting Plate After the opening has been cut in the solid material, the Mounting Plate and shims (if needed) are installed to the back (in-ceiling) of the solid surface. To allow for the speaker grill to fit completely flush the Solid Surface Mounting Kit comes with (2) 1/4” thick shims and (3) 1/8”... -
Page 8: Attach Mounting Plate To Solid Surface
Attach Mounting Plate to Solid Surface Once the correct number of shims are selected for the finish material, the mounting ring shim(s) can be fastened to the mounting ring before attaching it to the finish material. To attach the mounting ring to the finish material you can use either or epoxy/glue or screws. The method that you select depends on the type of material speaker is being attached to. -
Page 9: Ics3-Backbox Attachment To Platform
ICS3-Backbox Attachment to Platform DO NOT THROW AWAY THE PAINT SHIELD! Attach ICS3-Backbox to platform first. The ICS3-Backbox attaches to the Mounting Plate using 4 screws. The back-box and the Locate the four screw locations on the mounting plate and line Mounting Plate have a keyed connection and can only fit one them up to the four screw holes on the back box. -
Page 10: Sub1 Port Tube Connection
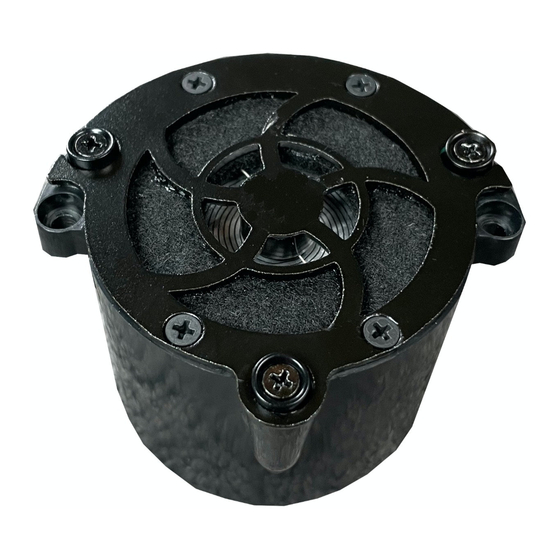
Step 3: Install the Spiral Planar Magnetic Driver (ICS-SPMD). The Step 4: The electrical connection to the ICS3-SPMD is mated by ICS3-SPMD can only be inserted in one way to make the electrical securing the ICS3-SPMD to the ICS3-Backbox. Insert the (2) #6- connection. -
Page 11: Using Paint Shield To Adjust Grille Flush And Level
Using Paint Shield to Adjust Grille Flush and Level The paint shield is held in place with magnets and has access holes for three (3) adjustment screws as part of the Magnetic Recoil Fastener (Patent Pending). The paint shield is the same thickness as the speaker grille that will be installed at the end of the installation. - Page 12 Do not touch the surface of the planar magnetic drivers, under any circumstances. The thin film has been carefully pre-tensioned at the factory; any subsequent contact can only damage it. WISDOM and the stylized W are registered trademarks of Wisdom Audio. Magnetic Recoil Fastener (Pat. Pend)
Need help?
Do you have a question about the Sage ICS3 Series and is the answer not in the manual?
Questions and answers