Table of Contents
Advertisement
Quick Links
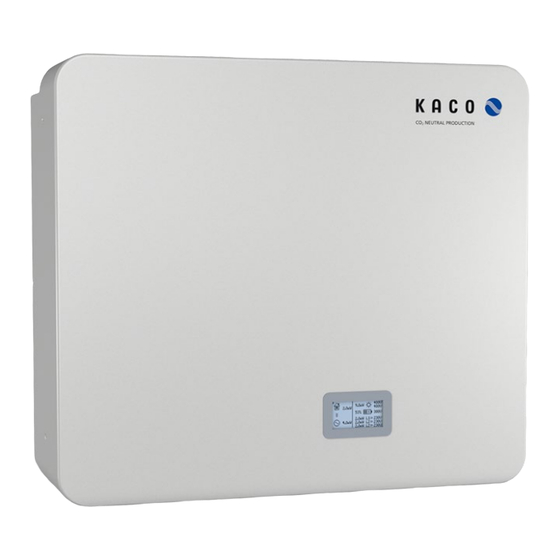
blueplanet hybrid 10.0 TL3
Hybrid inverter for residential and small commercial
battery storage and solar PV systems.
Storing the sun the easy way.
10 kW inverter output, also in
battery operation
3-phase mains parallel operation,
off-grid capable
3rd place in energy storage
inspection 2021
2 MPP trackers for flexible
integration of solar PV systems
98% efficiency, outstanding
partial load behaviour
Integrated battery management
and monitoring
Adapter plate and low weight for
easy installation
kaco-newenergy.com
Advertisement
Chapters
Table of Contents
Troubleshooting

Subscribe to Our Youtube Channel
Related Manuals for Kaco blueplanet hybrid 10.0 TL3


Summary of Contents for Kaco blueplanet hybrid 10.0 TL3
- Page 1 10.0 TL3 Hybrid inverter for residential and small commercial battery storage and solar PV systems. Storing the sun the easy way. 10 kW inverter output, also in 2 MPP trackers for flexible Integrated battery management battery operation integration of solar PV systems...
- Page 2 Technical Data PV Input (DC) hybrid 10.0 TL3 Max. recommended PV generator power 15 000 W Number of inputs / MPP Tracker Nom. / max. DC voltage 680 V DC / 900 V DC Start-up voltage 240 V DC MPP range@rated power 420 V DC –...
- Page 3 General Data Protection class (IEC 62109-1) DC Overvoltage category (IEC 60664-1) AC Overvoltage category (IEC 60664-1) WEEE-Reg.-Nr. DE57110363 Certificates VDE 0126, VDE AR-N 4105 97,58 97,87 98,1 98,28 Warranty 5 years 96,73 96,91 97,06 97,19 Connections 0,94 0,95 0,95 0,96 DC connection for battery with automatic cut-off poin PhoenixContact Sunclix 0,959...
- Page 4 Your smart power switch. Automatic switching and current measurement. Real-time measurement of power Flexibly expandable Safe due to all-pole separation consumption Ready for retrofit Easy installation www.kaco-newenergy.com www.kaco-newenergy.com...
- Page 5 Degree of protection (IEC 62109-1) Certificates VDE 0126, VDE AR-N 4105 Warranty 2 years Dimension (W x H x D) 170 x 280 x 92 mm Weight 1.2 kg Supported devices Inverter blueplanet hybrid 10.0 TL3 KACO new energy GmbH | Werner-von-Siemens-Allee 1 | 74172 Neckarsulm | Germany...
- Page 6 The types mentioned above are therefore labelled with the CE mark. Unauthorised modifications to the supplied devices and/or any use of the devices that is contrary to their intended use render this Declaration of Conformity null and void. Manufacture Declaration blueplanet hybrid 10.0 TL3 Page 1...
- Page 7 English translation of German original This declaration of conformity is issued under the sole responsibility of KACO new energy GmbH. Neckarsulm, 10.03.2022 Neckarsulm, 10.03.2022 KACO new energy GmbH KACO new energy GmbH i.V. Matthias Haag i.V. Thomas Kittel Head of R&D and Technology...
- Page 8 Grid standby operation blueplanet hybrid 10.0 TL3 Application note for electricians...
- Page 9 For standby power operation, an earthing point is required that remains functional in the event of a grid failure. In this application note, the product "blueplanet hybrid 10.0 TL3" is referred to as the device for ease of reading. 2 Intended use The blueplanet hy-switch (hy-switch) serves as an all-pole disconnection point from the public grid for standby power operation in the house installation.
- Page 10 Application note - Grid standby operation for blueplanet hybrid 10.0 TL3 Danger to life! The cables between the device and the residual current monitor are not protected against leakage currents! The installation of the electrical system must be carried out in such a way that the electrical equipment on ...
- Page 11 Application note – Grid standby operation for blueplanet hybrid 10.0 TL3 5.2 Installation with TN-C-S distribution in sub-distribution In existing house installations, it is possible that N and PE are connected in the house grid, e.g. with 4-wire cabling (PEN) or PE/N bridges.
- Page 12 Note: The certificate for standby power operation is device-specific. If you do not have a certificate file, please contact KACO Service and have your proof of purchase ready. TAB User Settings: Right Upload of the certificate, centre Check function for the phase position APL_ Grid_Standby_Operation_for_ blueplanet hybrid 10.0 TL3...
- Page 13 Application note – Grid standby operation for blueplanet hybrid 10.0 TL3 Check the version of the certificate. Hint window: Certificate version Check the phase position. If successful, the phases are displayed in ascending order and with the green connection arrow.
- Page 14 Application note - Grid standby operation for blueplanet hybrid 10.0 TL3 6 Installation verification for standby power operation Product description blueplanet hybrid 10.0 TL3 blueplanet hy-switch I/We confirm that the devices listed above have been properly installed in compliance with the manufacturer's instructions and the respective laws and standards valid on the installation date, in particular: ...
- Page 15 Werner-von-Siemens-Allee 1 · 74172 Neckarsulm · Germany · Tel. +49 7132 896-0 · info@kaco-newenergy.de · www.kaco-newenergy.com...
- Page 16 KACO blueplanet hybrid 10.0 TL3 Operating Instructions ⬛ English translation of German original Important safety instructions These instructions form part of the product and must be carefully read, observed and stored in a place which is freely accessible at all times.
- Page 17 KACO warranty You can download the current warranty conditions on the Internet at http://www.kaco-newenergy.com. Definitions on product designations In these operating instructions, the product "blueplanet hybrid 10.0 TL3" is referred to as the device for ease of reading. Trademarks All trademarks are recognised, even if not explicitly identified as such. A lack of identification does not mean that a product or designation/logo is free of trademarks.
-
Page 18: Table Of Contents
3.2.2 Operation mode: Battery Charging ....................9 3.2.3 Operation mode: External presetting (External) ................9 Integration diagram ........................10 Compatible accessories ........................11 3.4.1 KACO blueplanet hy-switch ......................11 3.4.2 Released battery storage units ....................11 Technical data ........................... 12 General data ............................ 12 Detailed technical data ........................ - Page 19 7.5.1 Checking the battery storage unit ....................35 7.5.2 Configuring the DC connectors....................36 7.5.3 Connecting the battery storage unit ................... 36 Connecting the KACO blueplanet hy-switch to the device ............. 37 Start-up ............................. 39 Hardware commissioning ....................... 39 Configuration with the blueplanet hy-sys software ............... 39 Display .............................
-
Page 20: General Information
These instructions also apply to the equipment, related components and other parts of the system. Some of the documents required for the registration and approval of your system are included with the operating instructions. Links to more detailed information can be found at www.kaco-newenergy.com. Document title Document type... -
Page 21: Safety Warnings Symbols Guide
1.2.2 Safety warnings symbols guide DANGER High risk Failure to observe this warning will lead directly to serious bodily injury or death. WARNING Potential risk Failure to observe this warning may lead to serious bodily injury or death. CAUTION Low-risk hazard Failure to observe this warning will lead to minor or moderate bodily injury. -
Page 22: Safety
Country Standard Harmonised document - HD 60364-7-712 (European implementation of the IEC standard) Examples of standards specific to business premises blueplanet hybrid 10.0 TL3 Page 7... -
Page 23: Protection Concepts
The device is intended for use in air-conditioned indoor rooms and may only be used in countries for which it has been approved or for which it has been released by KACO new energy and the grid operator. Operate the device only with a permanent connection to the public power grid. The country and grid type selection must be commensurate with the respective location and grid type. -
Page 24: Unit Description
The device has integrated energy management. It is designed for mains parallel operation with load compensation. To use load compensation, the KACO blueplanet hy-switch is required as measuring point. The settings for integrated energy management are made in the blueplanet hy-sys software. -
Page 25: Integration Diagram
Integration diagram Grid connection line fuse Power supply company counter All-pole disconnection Counter, Flu type B Fuse protection inverter 4p20A Load Inverter PV generator Battery DC switch for PV generator integrated in inverter DC relay for battery storage integrated in the inverter Fig. -
Page 26: Compatible Accessories
KACO blueplanet hy-switch KACO blueplanet hy-switch is used to record the power at the grid connection point or the installation string to be compensated by the device. This measured value is transmitted to the device via data communication between the device and KACO blueplanet hy-switch. -
Page 27: Technical Data
– Aluminium housing – Convection cooling – All connections are plug-and-play Fig. 3: KACO blueplanet hybrid 10.0 TL3 inverter Detailed technical data PV input (DC) Efficiency Max. recommended PV generator power 15000 W PV (DC) to grid (AC) [max.]... -
Page 28: Environmental Data
Inrush current 1.7 A Conversion efficiency Environmental data Table 1: Environmental data Installation height <2,000 m Ambient temperature +5°C + 40°C Protection rating (KACO installation location) IP20 Humidity range (non-condensing) [%] 20 - 90 blueplanet hybrid 10.0 TL3 Page 13... -
Page 29: Delivery And Transport
5 Transportation and Delivery Every product leaves our factory in perfect electrical and mechanical condition. Special packaging ensures that the devices are transported safely. The shipping company is responsible for any transport damage that occurs. Scope of delivery The following parts and components are supplied with the device: Inverter 3 pairs of DC connectors 1 x AC connector (Phoenix... -
Page 30: Installation Tool
Tab. 2: Key and description of tool codes Code (s) Shape of the connector Tightening torque External hexagon Spanner size or number Internal hexagon Outer contour Torx Fig. 5: Form pattern Slot blueplanet hybrid 10.0 TL3 Page 15... -
Page 31: Assembly And Preparation
Communication cable Patch cable for communication with KACO blueplanet hy-switch, the battery and the Internet. An RJ45 connector must be fitted on the device side. The cable must comply with CAT 5E S/FTP. The length depends on the installation location, but should not exceed 20m. -
Page 32: Choosing The Installation Location
Requirements on the installation surface – Must have adequate load-bearing capacity – Must be accessible for installation and maintenance – Must be made of heat-resistant material (up to 90 °C) – Must be flame resistant blueplanet hybrid 10.0 TL3 Page 17... -
Page 33: Unpacking The Device
Unpacking the device CAUTION Property damage as a result of condensation Faulty storage can form condensate in the device and impair the device functioning (e.g. storage outside the ambient conditions or temporary relocation from a cold to a hot environment). ›... - Page 34 The appropriate screw connection (fixings and screws) is selected and provided by the installer, taking the wall thickness and material into consideration. The wall bracket must be firmly screwed to the wall with the four suitable screws. Fig. 9: Drill hole dimensions blueplanet hybrid 10.0 TL3 Page 19...
-
Page 35: Installing And Securing The Device
When inserting, make sure that the hooks are not bent. When the bolts are hooked into the wall bracket, the device is carefully tilted down until it is parallel to the wall. Screw connection Fig. 10: Installation blueplanet hybrid 10.0 TL3 Page 21... - Page 36 1.5 Nm] for fixing. Make sure that the bottom of the housing cannot be moved forward. » The device is successfully installed. CAUTION Safety catch The safety screws are used to prevent the device from being accidentally unhooked. › This screw connection may only be removed for disassembly! blueplanet hybrid 10.0 TL3 Page 21...
-
Page 37: Installation
7 Installation General information PV generator (PV1) PV generator (PV2) DC connection PV2 DC connection PV1 DC isolator switch Communication connection for hy-switch DC connection battery storage AC grid connection Connection for local network/Internet SET button (control button) Battery Communication connection for battery storage Fig. -
Page 38: Information Regarding Electrical Connections
Cable connections may only be connected or disconnected to a switched-off device. Please note 10.1. NOTE Select conductor cross-section, safety type and safety value in accordance with the following basic conditions: Country-specific installation standards; power rating of the device; cable length; type of cable installation; local temperature blueplanet hybrid 10.0 TL3 Page 23... -
Page 39: Connecting The Device To The Power Grid
Connecting the device to the power grid WARNING Possible risk of fatal electric shock This device may cause a current with a DC component. If additional residual current devices (RCD) and residual current monitors (RCM) are used to protect against direct or indirect contact, only RCD or RCM type B are permitted on the supply side of this product. -
Page 40: Connecting The Device To A Standalone Grid
Island network formation is only activated by manual intervention directly on the device or in the hy-sys software. After a fault-related switch-off, the device must also be switched on again manually. • Password protection against activation by unauthorised persons can be activated in hy-sys. blueplanet hybrid 10.0 TL3 Page 25... -
Page 41: Connecting The Device For Standby Power Operation
NOTE AC-side disconnection unit › An AC-side disconnection unit must be provided during the final installation stage. ›This disconnector mechanism must be installed so that it can be accessed at any time without obstruction. › The grid connection leads (AC) must be protected with a four-pole circuit breaker type B 20A. Tab. -
Page 42: Permissible Connectors
Observe the permissible bending radii during installation, as the protection rating is endangered by excessive bending forces (Fig.19: Connecting the connector Fig. 20: Minimum bending radius ). Intercept mechanical loads upstream of the connector (e.g. with cable ties). blueplanet hybrid 10.0 TL3 Page 27... -
Page 43: Ac Cable Fitting Assembly
CAUTION Only use the original PRC 5-FC-FS6 connector from Phoenix Contact to connect to the PRC 5-FT25-MC device connector. NOTE Use a 5-pin cable with the diameter stated/suitable in the table and with wires with a cross-section of 2.5 ...6 mm². The cable diameter must lie between 12 and 16 mm. ›... -
Page 44: Connecting The Connectors
7.3.5 Connecting the connector Authorised electrician Latch the assembled connector with the device connector (Fig. 19: Connecting the connectors). Observe the required minimum bending radii when laying the cable (Fig. 20: Minimum bending radius). blueplanet hybrid 10.0 TL3 Page 29... -
Page 45: Technical Data
CAUTION Plug in or disconnect connectors Never connect or disconnect the connectors under load. The connectors are not suitable for disconnecting the power. Fig. 19: Connecting the connectors Fig. 20: Minimum bending radius 7.3.6 Technical data Protection rating IP65/IP68 (2 m, 24 h) Nominal current 35 A (observe the derating and the cable cross-section) Nominal voltage... -
Page 46: Connecting The Pv Generator To The Device
It is a transformerless inverter. It can be operated with mono- or polycrystalline PV modules. If you wish to operate thin-film modules together with the hybrid inverter, please contact the module manufacturer beforehand to ensure the compatibility of the entire system. blueplanet hybrid 10.0 TL3 Page 31... - Page 47 Recommended standard connection Authorised electrician Fig. 22: Recommended standard wiring and Fig. 23: Assignment of only one MPP Fig. 24: Parallel input circuit for one or assignment of both MPP trackers. tracker. more module strings. Possible wiring variants 1 PV generator each on one MPP 1 PV generator for one tracker.
-
Page 48: Configuring The Dc Connectors
The permissible bending radius of at least 4x the cable diameter should be observed during installation. Excessive bending forces endanger the protection rating. › All mechanical loads must be absorbed in front of the plug connection. › Rigid adaptations are not permitted on DC plug connectors. blueplanet hybrid 10.0 TL3 Page 33... -
Page 49: Checking The Pv Generator For A Ground Fault
7.4.3 Checking the PV generator for a ground fault Authorised electrician DANGER Risk of fatal injury due to electric shock! Severe injury or death will result if the live connections are touched. When there is sunlight present on the PV generator, there is DC voltage on the open ends of the DC cables. ›... -
Page 50: Connecting The Battery Storage Unit To The Device
Check the earthing of the battery storage! Check that the battery storage unit is properly grounded according to the manufacturer's instructions. It must be connected to the same ground potential as the device itself. blueplanet hybrid 10.0 TL3 Page 35... -
Page 51: Configuring The Dc Connectors
7.5.2 Configuring the DC connector Authorised electrician DANGER Risk of fatal injury due to electric shock! Severe injury or death will result if the live connections are touched. A high DC voltage can be applied to the battery storage unit at the open ends of the DC lines. ›... -
Page 52: Connecting The Kaco Blueplanet Hy-Switch To The Device
Connecting KACO blueplanet hy-switch to the device Authorised electrician KACO blueplanet hy-switch is required for the adjustment and disconnection of the grid connection or the installation string to be compensated. This component is not required for installations without access to the public power grid. - Page 53 The communication cable must comply with the requirements described in 6.1. Especially in the case of longer cable lengths, high-quality communication cables and connectors must be used to ensure that the signal quality is adequate. › KACO blueplanet hy-switch is also powered by the device via the communication cable. blueplanet hybrid 10.0 Page 38...
-
Page 54: Start-Up
"0" position and the polarity of the PV connections must be checked. If warnings/errors are displayed on the LCD display, a problem or error is present. Please consult chapter 9.3 of this manual for troubleshooting or contact your installer. Configuration with the KACO blueplanet hy-switch software Authorised electrician NOTE Configuration of the device The device is configured using the blueplanet hy-sys software. -
Page 55: Display
Update the country settings of the device using country-specific setup files. Set and check the software settings when commissioning the device. Optional: Install existing function extension certificates. Save all changes made in the User Settingstab. Display The display shows the device status. Current measurements and fault messages are displayed on this display. The various basic settings can be made on this display. -
Page 56: Operating Display
After blueplanet hy-switch has been connected and activated, the display shows the total household consumption , the grid power P and the direction of energy transfer. House Grid The device feeds into the grid. blueplanet hybrid 10.0 TL3 Page 41... - Page 57 Feed into the House public grid (domestic consumption) PGrid Display of the public grid (Grid power) Fig. 37: Grid operation with hy-switch – ">>>" - Energy surplus, energy is fed into the public grid – "<<<" - Energy shortage, energy is drawn from the public grid –...
-
Page 58: Selection Menu
(position marker). In the selection menu,you can jump to the next selection by briefly pressing the "Set" button. To select and activate a menu, press and hold the "Set" button for about 2 seconds. The selection menu is exited with the back symbol (Exit). blueplanet hybrid 10.0 TL3 Page 43... - Page 59 Position marker Fig. 43: Selection Selection for device information Information Fig. 44: Information The information field shows: Versions of the individual software units (control, communication, blueplanet hy-switch), current date and time, the current temperature in the device, the currently assigned IP address, the serial number of the device and its MAC address.
- Page 60 The battery can be switched on or off. When the battery is connected, a one-time search process is performed in which the battery type is automatically detected. The search procedure can take a few minutes. Connecting the battery. Battery Battery ON/OFF Fig. 50: Battery selection blueplanet hybrid 10.0 TL3 Page 45...
- Page 61 8.3.3.3 Disconnection from standalone or standby power operation With the selection, standalone or standby power operation can be disconnected. Disconnection requires the corresponding function extension certificate. Standby power or standalone mode Fig. 51: Standalone or standby power symbol Disconnecting the standby standalone power function. Standby power Standby power on/off Fig.
-
Page 62: Switching Off The Inverter
After the device has been shut down, the PV switch must be set to position 0 to switch the device off completely. Turn the PV switch to the "0" Fig. 56: Turning off the PV switch After switching off the device, check that the connected battery is safely disconnected with the main switch. blueplanet hybrid 10.0 TL3 Page 47... -
Page 63: Warning/Error
8.3.5 Warning/fault If the device is in a warning or error state, a warning (A) or fault (E) message is displayed. Up to three messages can be displayed simultaneously. Display of warning messages / fault messages on the display. Fault Warning Fig. -
Page 64: Warning Display
When updating the COM COM update Fig. Symbol when updating the COM When updating the control Control update Fig. Symbol when updating the control When updating the hy- switch hy-switch update Fig. Symbol when updating hy-switch blueplanet hybrid 10.0 TL3 Page 49... -
Page 65: Maintenance And Troubleshooting
9 Maintenance and troubleshooting Visual inspection DANGER Risk of fatal injury due to contact voltages! Removing the plug connections before disconnecting the device from the PV generator may lead to injuries and damage the device. › During installation: Electrically disconnect the DC positive and DC negative from the protective earth (PE). -
Page 66: Cleaning
Clean the space between the cooling ribs with a suitable brush. Fig. 63: Radiator fins and top air outlet If necessary, remove coarse dust from the ventilation inlets on the bottom of the device. blueplanet hybrid 10.0 TL3 Page 51... -
Page 67: Warning Messages / Error Messages / Information
Warning messages / error messages / information 9.3.1 List of warning messages Warnings indicate a temporary device shutdown. The device restarts automatically once the cause of the warning has been eliminated. Code Meaning Explanation / recommendation A001 Grid voltage: The device monitors the voltage level in the grid. If the voltage falls below the configured limit values, Undervoltage the device stops and only starts up again once the... - Page 68 A121 Setting parameters EEPROM can not be written because not enough supply voltage is available. Make sure that the PV A122 voltage amounts to at least 240V. blueplanet hybrid 10.0 TL3 Page 53...
- Page 69 A123 Setting parameters The EEPRPOM cannot be read. Contact Service. A124 A125 Unsaved changes Settings have been made on the device, but have not yet been saved. If necessary, the settings can be saved under User Settings. A130 Check supply settings Check the Pav,e and P_feed_in_limit settings.
-
Page 70: List Of Error Messages
9.3.2 List of error messages Faults indicate states of the device where a defect may exist or which may cause a defect. If faults occur repeatedly or regularly, KACO Service must be informed and the device decommissioned. Code Meaning Explanation / recommendation... - Page 71 E101 Device fault Internal power supply Inform the service technician in case E102 of repeated faults. E103 E104 E110 E120 Self test initialisation error Check the operating conditions, and contact the service technician if necessary. E130 General fault Inform the service technician in case of repeated faults. E140 General fault Inform the service technician in case of repeated faults.
-
Page 72: List Of Displayed Information
FRT undervoltage detected Wait until the result is no longer present. If it persists, check the installation. I905 FRT overvoltage FRT overvoltage detected Wait until the result is no longer present. If it persists, check the installation. blueplanet hybrid 10.0 TL3 Page 57... -
Page 73: Other Faults
I906 Power reduction Power reduction due to overfrequency. Wait until the result is overfrequency no longer present. I907 Power reduction Power reference due to underfrequency. Wait until the result underfrequency is no longer present. I908 Unsaved settings New settings have been made on the device, but have not yet been saved. -
Page 74: Decommissioning And Dismantling
Set the DC isolator switch to "0" to prevent unintentional starting. NOTE If the display is dark, the device does not necessarily have to be switched off permanently. › To prevent the device from starting, the DC switch must be set to "0". blueplanet hybrid 10.0 TL3 Page 59... -
Page 75: Uninstalling The Device
10.2 Uninstalling the device DANGER Dangerous voltage due to several operating voltages Severe injuries or death may occur if the cables and/or terminals/busbars in the device are touched. The discharge time of the capacitors is up to 5 minutes. › The device is supplied on the DC side from the PV system and the battery storage unit. -
Page 76: Disconnecting The Dc Connector
Never connect or disconnect the connectors under load. › The connectors are not suitable for disconnecting the power. Disengage the two connectors by pressing down the retaining lug with a screwdriver. Remove the DC connector. Fig. 65: Disconnecting the DC connector. blueplanet hybrid 10.0 TL3 Page 61... -
Page 77: Disassembling The Device
10.3 Disassembling the device CAUTION Risk of injury from improper lifting and transport If the device is lifted improperly, it can tilt and result in a fall. › Always lift the device vertically. › Use a climbing aid for the chosen installation height. ›... -
Page 78: Disposal
The KACO new energy brand is registered in Germany under WEEE reg. no: DE 57110363. 12 Service and warranty If you need help solving a technical problem with one of our KACO products, please contact our service hotline. Please have the following information ready so that we can help you quickly and efficiently: –... - Page 79 Werner-von-Siemens-Allee 1 · 74172 Neckarsulm · Germany · Tel. +49 7132 896-0 · info@kaco-newenergy.de · www.kaco-newenergy.com...
- Page 80 KACO hy-switch blueplanet Accessories for blueplanet hybrid inverters Operating Instructions English translation of German original Important safety instructions These instructions form part of the product and must be carefully read, observed and stored in a place which is freely accessible at all times.
- Page 81 Legal provisions The information contained in this document is the property of KACO new energy GmbH. Publication, in whole or in part, requires the written permission of KACO new energy GmbH. KACO warranty For current warranty conditions, contact your system integrator.
- Page 82 10. Maintenance and troubleshooting ..............28 10.1. Visual inspection ..................28 10.2. Cleaning ....................28 10.3. Fault displays ..................29 10.4. Shutting down for troubleshooting ............30 10.5. Manual reset of the mains relay ............. 30 hy-switch for KACO blueplanet hybrid inverters Page 3...
- Page 83 Uninstalling the component ..............32 11.3. Disassembling the component ..............33 11.4. Packaging the component ............... 33 11.5. Storing the component ................33 12. Disposal ......................34 13. Service and warranty ..................34 hy-switch for KACO blueplanet hybrid inverters Page...
-
Page 84: General Information
All other language versions are translations of the original version. WARNING Improper handling of the component can be hazardous! You must read and understand the operating instructions in order to install and use the component safely. hy-switch for KACO blueplanet hybrid inverters Page 5... -
Page 85: Design Features
CAUTION Low-risk hazard Failure to observe this warning will lead to minor or moderate bodily injury. CAUTION Risk of damage to property Failure to observe this warning will lead to property damage. hy-switch for KACO blueplanet hybrid inverters Page... -
Page 86: Target Group
– Education concerning the installation and start-up of electrical devices and systems. – Knowledge of applicable standards and directives. – Knowledge and adherence to this document with all safety notices. hy-switch for KACO blueplanet hybrid inverters Page 7... -
Page 87: Identification
Product name Part no. Serial number Date of manufacture Technical data Disposal information Certification marking, CE marking Fig. 1 Name plate hy-switch for KACO blueplanet hybrid inverters Page... -
Page 88: Safety
Remove all jewellery from wrists and fingers Ensure that the testing equipment is in safe operating condition. – Modifications to the surroundings of the component must comply with the applicable national standards. hy-switch for KACO blueplanet hybrid inverters Page 9... -
Page 89: Proper Use
The component is intended for indoor applications and may only be used in countries for which it has been approved or for which it has been released by KACO new energy and the grid operator. Operate the component only with a permanent connection to the public power grid. -
Page 90: Component Description
External current sensors are offered as accessories. These enable the measurement of higher powers, as well as a separation of measuring and switching point. The current sensors are designed with jack plugs, which are connected to the side of the component. hy-switch for KACO blueplanet hybrid inverters Page 11... -
Page 91: Structure Of The Component
4.3. Structure of the component Communication RS485 external current sensor L3 external current sensor L2 external current sensor L1 Building Grid connection Ground PE Fig. 2: Structure of the component with external connections hy-switch for KACO blueplanet hybrid inverters Page... -
Page 92: Technical Data
Tab. 1 Technical data 5.2. Environmental data blueplanet hy-switch Ambient temperature +5°C + 40°C Protection rating (KACO installation location) IP20 Humidity range (non-condensing) [%] 0 to 90 % Tab. 2 Environmental data hy-switch for KACO blueplanet hybrid inverters Page 13... -
Page 93: Delivery And Transport
Transporting the component For safe transport of the product, please use the original packaging (cardboard box). Packaging: Folding cardboard box Packaging size: 400 x 245 x 100 mm Total weight approx. 1.5 kg hy-switch for KACO blueplanet hybrid inverters Page... -
Page 94: Installation Tool
The codes given in the table below are used in all usage instructions for assembly/installation/maintenance and disassembly for the tools and tightening torques being used. Code (s) Shape of the connector External hexagon Internal hexagon Torx Slot Tightening torque Spanner size or number Outer contour hy-switch for KACO blueplanet hybrid inverters Page 15... -
Page 95: Assembly And Preparation
AC cables below the hy-switch must be provided. Observe the permissible bending radii of the cables. NOTE Access by maintenance personnel for service Any additional costs arising from unfavourable structural or mounting conditions shall be billed to the customer. hy-switch for KACO blueplanet hybrid inverters Page... - Page 96 » Component is mounted next to the switch box/control cabinet on the wall. CAUTION Avoid damage due to hard striking! Hard strikes or an uneven surface can damage the component. Fig. 3: Hole spacing for mounting hy-switch for KACO blueplanet hybrid inverters Page 17...
-
Page 97: Installation And Start-Up
Country-specific installation standards; power rating of the component; cable length; type of cable installation; local temperatures. Install the blueplanet hy-switch near the building connection or energy sub-distributor. hy-switch for KACO blueplanet hybrid inverters Page... -
Page 98: Integration Possibilities
Power supply company counter (bidirectional meter) blueplanet hy-switch Switchable line protection (4p 20A) EVU counter for generation (optional) RCD type B, 30 mA (required for backup power operation) blueplanet hybrid inverter Load hy-switch for KACO blueplanet hybrid inverters Page 19... - Page 99 Installation of grid parallel and standby power operation (standard) type B Load Fig. 4: Installation of grid parallel and standby power operation Installation Grid parallel operation Load Fig. 5: Installation of grid parallel operation hy-switch for KACO blueplanet hybrid inverters Page...
- Page 100 Fig. 6: Installation with separate external supply Integration according to grid types: The component is suitable for integration into various grid types. The wiring from the component in the local installation must always be a 5-core design. hy-switch for KACO blueplanet hybrid inverters Page 21...
-
Page 101: Connection To The Mains
Serious injury or death from touching live parts. > Disconnect the electric circuits to be worked on from all power sources. > Switch off all inverters and all local generators. > Switch off grid connection hy-switch for KACO blueplanet hybrid inverters Page... - Page 102 Insert the cable into the component and into the control cabinet. Insulate all wires of the cable properly. Wire the component on the cable clamps with S_2.5] (see Fig. 9): Insert the cables through the cable gland. Connect PE hy-switch for KACO blueplanet hybrid inverters Page 23...
- Page 103 The component must be securely closed with this. 12. Switch the grid connection back on. » Component is mounted next to the switch box/control cabinet on the wall. hy-switch for KACO blueplanet hybrid inverters Page...
-
Page 104: Communication To The Inverter
CAT 5E S/FTP. The length depends on the installation location, but should not exceed 20 m. Cross-over assignments cannot be used. The hy-switch connection of the blueplanet hybrid inverter must be connected to the hy-switch connection of the component. hy-switch for KACO blueplanet hybrid inverters Page 25... -
Page 105: Start-Up
The component is ready for operation when the green LED on the circuit board lights Check whether the current firmware version is installed and update it if necessary. For more information, see 9.3. hy-switch for KACO blueplanet hybrid inverters Page... -
Page 106: Operation
The firmware of the component should be updated regularly. The update is carried out via the hy-sys software. This must be run on a computer connected to the blueplanet hybrid inverter. The current firmware version can be found in the download area of the KACO homepage, under www.kaco-newenergy.de A special update file with the file extension .EDU is required for the firmware update. -
Page 107: Maintenance And Troubleshooting
If the component is dirty, clean the housing and the housing cover with a dry cloth only. NOTE The cleaning intervals must be adapted to the environmental conditions of the installation site. hy-switch for KACO blueplanet hybrid inverters Page... -
Page 108: Fault Displays
Warning and error messages of the component can also be output via the connected blueplanet hybrid inverter and the associated hy-sys software. These are documented in the operating manual of the blueplanet hybrid inverter. hy-switch for KACO blueplanet hybrid inverters Page 29... -
Page 109: Shutting Down For Troubleshooting
In exceptional cases, it may be necessary to reset the mains relays so that the voltage supply to the local installation can be restored by the public grid. If a reset via the hy-sys software is not possible, proceed as follows: hy-switch for KACO blueplanet hybrid inverters Page... - Page 110 Remove the voltage source from the XS500 socket. Place the cover plate upwards and snap the plastic hinge back into place. » Component is closed again. S500 XS500 Fig. 11: Resetting the mains relays hy-switch for KACO blueplanet hybrid inverters Page 31...
-
Page 111: Decommissioning And Dismantling
Open the two cable glands [ W_36]. Pull the cables out downwards. 7. Carry out necessary work in the control cabinet in which the component was integrated. The component is now electrically disconnected. hy-switch for KACO blueplanet hybrid inverters Page... -
Page 112: Disassembling The Component
11.5. Storing the component ↻ Component is packed (see 11.4). Store the component at a dry location, in accordance with the ambient temperature range. Environmental data [see chapter 5.2] hy-switch for KACO blueplanet hybrid inverters Page 33... -
Page 113: Disposal
Packaging: Ensure that the transport packaging is disposed of properly. Service and warranty If you need help solving a technical problem with one of our KACO products, please contact our service hotline. Please have the following information ready so that we can help you quickly and efficiently: –... - Page 114 NOTE Observe our general warranty conditions for inverters and accessories. The maximum length of the warranty is based on the currently applicable national warranty conditions. hy-switch for KACO blueplanet hybrid inverters Page 35...
- Page 115 Werner-von-Siemens-Allee 1 · 74172 Neckarsulm · Germany · Tel. +49 7132 896-0 · info@kaco-newenergy.de · www.kaco-newenergy.com...
Need help?
Do you have a question about the blueplanet hybrid 10.0 TL3 and is the answer not in the manual?
Questions and answers