Advertisement
Quick Links
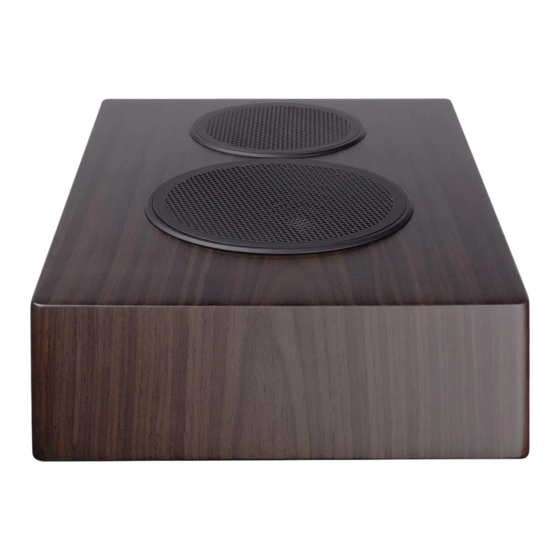
Episode HT Series
Welcome to the documentation page for Episode HT in-room speakers.
Use the navigation to access our various installation guides.
These docs get updated from time to time based on your feedback. To ensure you have
Pro Tip:
-_
the latest version, either clear your cache, or open this in a new incognito/privacy tab.
Build 230414
1
Advertisement

Subscribe to Our Youtube Channel
Related Manuals for Episode HT Series


Summary of Contents for Episode HT Series
- Page 1 Episode HT Series Welcome to the documentation page for Episode HT in-room speakers. Use the navigation to access our various installation guides. These docs get updated from time to time based on your feedback. To ensure you have Pro Tip: the latest version, either clear your cache, or open this in a new incognito/privacy tab.
-
Page 2: Box Contents
Install the HT-IRATM Box Contents Your box should contain: speaker 2 × grilles 2 × screws 4 × small feet 4 × large feet 2 × mounting pins mounting bracket mounting pad locking bar Ensure your mounting surface is able to hold three times the weight of the speaker. - Page 3 Attach the grilles Place the magnetic grilles over the speakers for protection during the install.
- Page 4 Select the speaker mode Flip the switch to designate whether the speaker is aimed at a wall or ceiling ("Reflected," right), or is aimed at the audience ("Directed," left).
- Page 5 Attach the wires Run the wires beneath the stress relief bar as shown, and connect them to the speaker terminals. If your wires already have banana clips attached, you can loosen the screws holding the stress relief bar.
- Page 6 For standing installs... If you are installing this on a flat place like a bookshelf or on top of a floor-standing speaker, attach the four small adhesive feet. Set the speaker in place, and you're done! Otherwise, continue.
- Page 7 Attach the mounting pins Insert the mounting pins into the mounting pad.
- Page 8 Attach the large feet Attach the four large feet to the speaker to insulate it from the mounting surface.
- Page 9 Secure the pad to the speaker Use the screws provided to secure the mounting base to the speaker body as shown.
- Page 10 Attach the bracket Attach the bracket to the mounting surface. Note that the keyholes are angled; be sure to use the guides etched into the bracket for proper centering.
-
Page 11: Mount The Speaker
Mount the speaker Insert the mounting pins into the keyholes of the bracket. Ensure that the pins are seated in the keyholes. - Page 12 Insert the locking bar Slide the locking bar into the gap between the edge of the mounting bracket and the mounting pins on the speaker. This prevents the speaker from vibrating itself loose in ceiling installs.
- Page 13 Install the HT-IRLCR Box Contents Your box should contain: speaker 3 × grilles 2 × port plugs 4 × adhesive feet foot mounting template Ensure your mounting surface is able to hold three times the weight of the speaker.
- Page 14 Attach the grilles Place the magnetic grilles over the speakers for protection during the install.
- Page 15 Attach the feet You can select a horizontal or vertical install. Use the enclosed template to attach the feet properly to the bottom of the speaker. Be sure to align the rounded corners of the feet correctly.
- Page 16 Remove the shorting bar (optional) This speaker is designed for biamplification. If you wish to use it, loosen the nuts and remove the shorting bars (shown in yellow).
- Page 20 Attach the wires Connect your wires to the speaker binding posts (strip the wires or use banana plugs).
- Page 21 Plug the rear ports If you will be placing this speaker in a cabinet or a recessed area, you may wish to insert the foam plugs in ports at the rear of the speaker. This prevents unwanted buzzing caused by the environment.
- Page 22 Complete the Install Place the speaker in the desired location, and you're done!
- Page 23 Install the HT-IRMON Box Contents Your box should contain: speaker 2 × grilles port plug Ensure your mounting surface is able to hold three times the weight of the speaker.
- Page 24 Attach the grilles Place the magnetic grilles over the speakers for protection during the install.
- Page 25 Remove the shorting bar (optional) This speaker is designed for biamplification. If you wish to use it, loosen the nuts and remove the shorting bars (shown in yellow).
- Page 29 Attach the wires Connect your wires to the speaker binding posts (strip the wires or use banana plugs).
- Page 30 Plug the rear port If you will be placing this speaker in a cabinet or on a bookshelf, insert the foam plug in port at the rear of the speaker. This prevents unwanted buzzing caused by the cabinet or bookshelf.
- Page 31 Complete the Install Place the speaker in the desired location, and you're done!
- Page 32 Install the HT-IRSAT Box Contents Your box should contain: speaker 2 × grilles port plug Ensure your mounting surface is able to hold three times the weight of the speaker.
- Page 33 Attach the grilles Place the magnetic grilles over the speakers for protection during the install.
- Page 34 Attach the wires Connect your wires to the speaker binding posts (strip the wires or use banana plugs).
- Page 35 Plug the rear port If you will be placing this speaker in a cabinet or on a bookshelf, insert the foam plug in port at the rear of the speaker. This prevents unwanted buzzing caused by the cabinet or bookshelf.
- Page 36 Complete the Install Place the speaker in the desired location, and you're done!
- Page 37 Install the HT-IRTWR Box Contents Your box should contain: speaker 3 × grilles 2 × port plugs 4 × foot spikes Ensure your mounting surface is able to hold three times the weight of the speaker.
- Page 38 Attach the grilles Place the magnetic grilles over the speakers for protection during the install.
- Page 39 Remove the shorting bar (optional) This speaker is designed for biamplification. If you wish to use it, loosen the nuts and remove the shorting bars (shown in yellow).
- Page 43 Attach the wires Connect your wires to the speaker binding posts (strip the wires or use banana plugs).
- Page 44 Plug the rear ports If you will be placing this speaker in a cabinet or a recessed area, you may wish to insert the foam plugs in ports at the rear of the speaker. This prevents unwanted buzzing caused by the environment.
- Page 45 Complete the Install Optional: If you are placing this speaker on a thicker carpet, thread the floor spikes into the holes on the feet. These keep the speaker secure on carpets. Place the speaker in the desired location, and you're done!
- Page 46 Install the HT-OWLCR Box Contents Your box should contain: speaker 3 × grilles 2 × port plugs 4 × rubber bumpers wall mount bracket mounting template mounting accessories Ensure your mounting surface is able to hold three times the weight of the speaker.
- Page 47 Attach the grilles Place the magnetic grilles over the speakers for protection during the install.
- Page 48 Attach the bumpers Attach the four rubber bumpers to the rear of the speaker as shown.
- Page 49 Install the mounting bar Attach the mounting bar to the wall using the enclosed hardware. It can be placed vertically or horizontally. Note that the speaker uses keyhole seating; the mounting bar is marked with the true center lines along each side.
- Page 50 Attach the wires Connect your wires to the speaker binding posts (strip the wires or use banana plugs).
- Page 51 Plug the end ports If you will be placing this speaker in a cabinet or a recessed area, you may wish to insert the foam plugs in the ports at the ends of the speaker. This prevents unwanted buzzing caused by the environment.
- Page 52 Place the speaker on the mounting bar Slide the keyholes on the back of the speaker over the knobs on the mounting bar. Ensure that both speaker keyholes are securely seated.
- Page 53 Snap One, LLC (formerly known as Wirepath Home Systems, LLC), in the United States and/or other countries. 4Store, 4Sight, Control4, Control4 My Home, SnapAV, Araknis Networks, BakPak, Binary, Dragonfly, Episode, Luma, Mockupancy, Nearus, NEEO, Optiview, OvrC, Pakedge, Sense, Strong, Strong Evolve, Strong VersaBox, SunBriteDS, SunBriteTV, Triad, Truvision, Visualint, WattBox, Wirepath, and Wirepath ONE are also registered trademarks or trademarks of Snap One, LLC.
Need help?
Do you have a question about the HT Series and is the answer not in the manual?
Questions and answers