Advertisement
Quick Links
Advertisement

Subscribe to Our Youtube Channel
Summary of Contents for VEVOR OVERHEAD GARAGE RACK
- Page 1 OVERHEAD GARAGE RACK ASSEMBLY INSTRUCTION MANUAL...
- Page 3 CustomerService@vevor.com This is the original instruction, please read all manual instructions carefully before operating. VEVOR reserves a clear interpretation of our user manual. The appear- ance of the product shall be subject to the product you received. Please forgive us that we won't inform you again if there are any technology or software updates on our product.
- Page 4 WARNINGS -Install into Wood Joists only -Distribute weight evenly -Opposite ends may come loose when installing side beams -Objects can fall off the rack after being loaded Tools Required (Not Included)
- Page 5 WARNING THIS IS A DO IT YOURSELF (DIY) PROJECT. DO NOT ATTEMPT THIS INSTALLATION WITHOUT A BASIC UNDERSTANDING OF THE CONTENTS IN THESE ASSEMBLY INSTRUCTION. IF YOU ARE NOT CONFIDENT WITH LOCATING AND ANCHORING THE STORAGE RACK TO THE CEILING JOISTS, DO NOT ATTEMPT THIS INSTALLA- TION WITHOUT SOMEONE WHO IS.
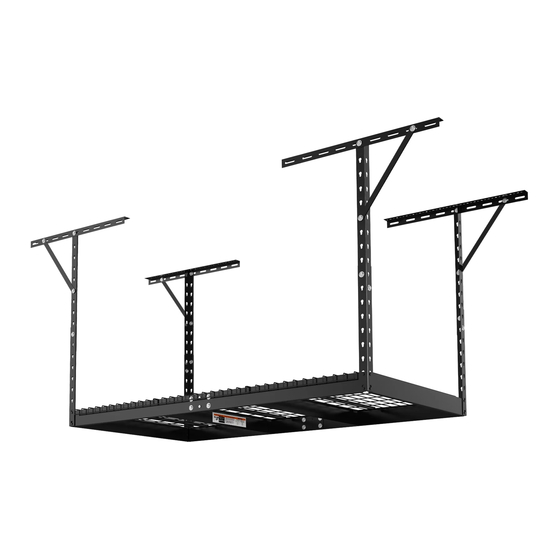
- Page 6 COMPONETS 4ft x 8ft Unit: 4ft x 6ft Unit: 3ft x 8ft Unit: Vertical Posts Vertical Posts Vertical Posts Side Beams Side Beams Side Beams C Channel Beams 4/2 C Channel Beams 4/2 C Channel Beams Center Supports Center Supports Center Supports Ceiling Brackets Ceiling Brackets...
- Page 7 Hex Bolt Hex Bolt M8x16 M6x 16 Lag Bolt St8.0×75mm Diagonal Brace...
- Page 8 Pre-Assenbly Completing the following 1~3 steps to assemble the long C Channel beam. 2pcs connecting beam design needed only! The whole beam design can ignore the assembly steps on this page. Step 1, Align the holes at the center of the 2pcs C Channel beams as seen in the illustration (8ft size only).
- Page 9 Assenbly To punch holes on the ceiling more quickly and accurately, we have thoughtfully designed the ceiling drilling positioning paper(included in the package). If necessary, please follow the steps below: 1. First, find the beam position on the ceiling, stick one of the long beam positioning paper on the ceiling with double-sided tape, ensure that the two black lines at both ends are on the beam or across the two beams, and the positioning paper is not bent or sagging.
- Page 10 3. Next, align the two ends of the last long beam positioning paper with the edge of the short beam positioning paper respectively, and stick it on the ceiling parallel to the first long beam positioning paper. Drill 2 holes on the black line, making sure they are on either side of the red line Drill 2 holes on the black line, making sure they are on either side of the red line Ceiling drilling positioning paper: first stick the positioning paper on the appropriate position of the ceiling ①...
- Page 11 4. After pasting, drill holes on the black lines at both ends of the long beam positioning paper. 1) make sure the hole is punched on the beam. 2) There are 2 holes at both ends of each long beam positioning paper, a total of 4 holes.
- Page 12 6. Adjust the length of the Vertical Post to the desired distance from the ceiling. Ensure the lower section of the vertical post is placed on the inside of the two post pieces. All posts are adjusted to the exact same length. Secure the post together using 2pcs Hex Bolt M8x16, 2pcs Hex Nut and 4pcs Washer.
- Page 13 ALWAYS install the vertical posts between the Lag screws in the ceiling bracket. DO NOT attach the vertical posts outside of the lag screws in cantilevered fashion. WARNING If you install the ceiling bracket & vertical posts as the left drawing, the ceiling brackets will bend, causing your storage items to fall to the floor.
- Page 14 7. Place the rivets of the Side beams in the bottom 2 holes of the vertical posts. Ensure the side beams are on the inside of the vertical posts. Use a rubber mallet to hammer the rivets into the bottom of the teardrop holes. 8.
- Page 15 9. A: Connect Center support to C channel beams by using 2pcs Hex Bolt M6xl6, 2pcs Hex Nut and 2pcs Washer. Repeat this step to the opposite of Center support (4pcs C Channel beam design only). *Fully tighten the bolts. B: Place the center support to the rivets on C channel beam.
- Page 16 *Once the center support is installed, go back and tighten the vertical posts to the ceiling brackets. 10. Install and fix the two ends of the diagonal brace on the holes of the ceiling bracket and the vertical post respectively (as seen in the picture). There are 4 diagonal braces in total.
- Page 17 11. Take the Wire Decking unit and place them on the rack one by one. *Look at the ceiling brackets and Lag screws to make sure that they have not pulled out during the beam seating process. If they have, it is an indication that the Lag screws may not be in the center of the ceiling joist, or that they were not fully tightened when installed.
- Page 18 E-mail: CustomerService@vevor.com Manufacturer: QINGDAO SHUNXINYI METAL PRODUCTS CO.,LTD. ADDRESS: No.555, Jiaozhouwan West Road, Huangdao, Qingdao, China Importer: WAITCHX Address: 250 bis boulevard Saint-Germain 75007 Paris Importer: FREE MOOD LTD Address: 2 Holywell Lane, London, England, EC2A 3ET EUREP UK LTD...
- Page 20 E-mail: CustomerService@vevor.com...


Need help?
Do you have a question about the OVERHEAD GARAGE RACK and is the answer not in the manual?
Questions and answers