
Related Manuals for Opengear SD4000


Summary of Contents for Opengear SD4000
- Page 1 USER MANUAL SD4000 Secure Device Server User Manual Rev: 1.7 April 8, 2006 _____________________________________________________________________ Opengear SD4000 User Manual Page 1 of 159...
- Page 2 Enable Remote Desktop on the Windows computer to be accessed 6.1.2 Set up SDT Hosts on the SD4000 6.1.3 Establish a PPP connection from the computer’s COM port to SD4000 6.1.4 Set up SDT Ports on SD4000 _____________________________________________________________________ Opengear SD4000 User Manual...
- Page 3 Install and configure the VNC Server on the computer to be accessed 6.2.2 Set up SDT Hosts on the SD4000 6.2.3 Establish a PPP connection from the computer’s COM port to SD4000 6.2.4 Set up SDT Ports on the SD4000 6.2.5 Establish a connection between the Viewer PC and SD4000 6.2.6...
- Page 4 12.2 External Scripts and Alerts 12.3 Raw Access to Serial Ports 12.4 IP- Filtering 12.5 Modifying SNMP Configuration 12.6 Secure Shell (SSH) Support 12.7 Secure Sockets Layer (SSL) Support 12.8 HTTPS 12.9 Power Strip Control _____________________________________________________________________ Opengear SD4000 User Manual Page 4 of 159...
- Page 5 APPENDIX A. Linux Commands B. Hardware Specification C. Safety and Certifications D. Connectivity and Serial I/O E. Hardware Test F. Terminology G. End User License Agreement H. Service and Warranty _____________________________________________________________________ Opengear SD4000 User Manual Page 5 of 159...
-
Page 6: This Manual
This Users Manual walks you through installing and operating your SD4002 or SD4008 secure device server (referred to generically in the manual as SD4000). Once configured, your SD4000 will enable you to connect your serial devices to the local network and securely control these devices, locally and remotely. - Page 7 A unique benefit of the SD4000 secure device server is to provide you with secure low bandwidth VNC, HTTP and Windows Remote Desktop capabilities. So in addition to communicating with serial devices, you can also take secure local and remote control of the PCs, Windows embedded machines and browser controlled appliances - just as though you were in front of the local computer screens.
-
Page 8: Manual Conventions
Bold text indicates text that you type, or the name of a screen object (e.g. a menu or button) on the Management Console. Italic text indicates a text command to be entered at the command line level. _____________________________________________________________________ Opengear SD4000 User Manual Page 8 of 159... -
Page 9: Installation
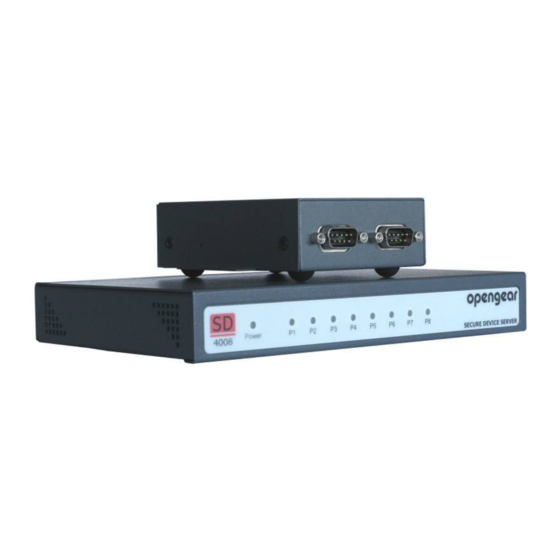
Appendix C on Safety Models There are four models of the SD4000, each with a different number of serial ports: SD4002 – two serial ports (one dedicated RS232 port – configurable as console/modem or a general serial port - and one general serial port that can be configured as RS232, RS422 or RS485) SD4008 –... - Page 10 IEC AC power cable Part #539000 Quick Start Guide and CD-ROM Unpack your SD4008 Kit and verify you have all the parts shown above, and that they all appear in good working order _____________________________________________________________________ Opengear SD4000 User Manual Page 10 of 159...
-
Page 11: Power Connection
IN-GND and IN-VIN+ screw jacks. Alternately SD4002 wall mount power units are available from Opengear for North American, Europe, UK, Japan and Australian connection. The 12V DC connector from this power unit plugs into the VIN+ power socket on the rear of the SD4002 chassis. -
Page 12: Network Connection
230,400bps and are surge protected. Port 1 on the SD4002 can operationally be configured to be a LOCAL console/modem port. Opengear supplies an extensive range of cables and adapters that may be required to connect to the more popular network appliances. These are overviewed online at http://www.opengear.com/cabling.html... - Page 13 Note Care should be taken in handling SD4000 products. There are no operator serviceable components inside, so please do not remove covers, and do refer service to qualified personnel. _____________________________________________________________________ Opengear SD4000 User Manual Page 13 of 159...
-
Page 14: System Configuration
To browser configure the SD4000; the connected PC or workstation should have an IP address in the same range as the SD4000. If this is not convenient, you can use the ARP-Ping command as described in the Note below to reset the... - Page 15 Note The PC/workstation must have an address in the same network range as the SD4000 (e.g. 192.168.0.100). To configure the IP Address of your Linux or Unix PC/workstation simply run ifconfig. For Windows PCs (Win9x/Me/2000/XP/ NT): Click Start -> (Settings ->) Control Panel and double click Network Connections (for 95/98/Me, double click Network).
- Page 16 Type arp –a to view the current ARP cache which should be empty Now add a static entry to the ARP table and ping the SD4000 to have it take up the IP address. In the example below we have a...
-
Page 17: Change The Default Password
Note If you are not able to connect to the Management Console at 192.168.0.1 or if the default Username / Password were not accepted then reset your SD4000 (refer Chapter 10.3) Change the default Password _____________________________________________________________________ Opengear SD4000 User Manual... - Page 18 At this stage you may also wish to enter a System Name and System Location to give your SD4000 secure device server a unique ID and make it simple to identify Click Apply.
-
Page 19: Set The Network Ip Address
Mask, Default Gateway and DNS Server. This selection automatically turns off the DHCP client If you selected dhcp, the SD4000 will look for configuration details from a DHCP server on your LAN. This selection automatically disables any static address. The SD4000 MAC address can be found on a label on the base plate By default the SD4000 LAN port auto detects the Ethernet connection speed. - Page 20 Network Service selection The Administrator can access and configure the SD4000 server using a range of access protocols. The factory default configuration enables HTTP, HTTPS, Telnet and SSH access. You can modify this very simply to disable any of the services, or enable others:...
- Page 21 Management Console. By default both HTTP and HTTPS are enabled, however either or both can be disabled. It is recommended the HTTP service be disabled if the SD4000 is to be remotely administered over the Internet. HTTPS This allows secure HTTP access to the Management Console. If you enable HTTPS, the Administrator will be able to use a secure browser connection to the SD4000 Management Console.
- Page 22 SNMP settings, the Administrator must make the edits at the command line as described in Chapter 12 – Advanced Configuration. Ping This allows the SD4000 to respond to incoming ICMP echo requests Ping is enabled by default, however for security reasons this service should generally be disabled.
- Page 23 Client Communications Software To interconnect with the access protocol you have configured for the Administrator client accessing the SD4000 (and for User clients who you set up later who’ll access the SD4000 serial ports) you will also need to configure appropriate communications software on the client’s PC/workstation.
- Page 24 ‘yes’ or ‘always’ to continue. The next step is password authentication and you will be prompted for your user name and password from the remote system. You will then be logged into the remote system connected to the serial port chosen on the SD4000 device and presented with its serial console screen.
- Page 25 Specifying where those users have to be located to have access to the ports Configuring appropriate communications client software on each user’s PC/workstation (refer Chapter 3.5) Port Labels Assigning each port a label will ease management of the connected computers and network devices: _____________________________________________________________________ Opengear SD4000 User Manual Page 25 of 159...
- Page 26 So you must select Telnet, SSH, RAW TCP, RFC2217 or SDT for each port you will be using. You will now be presented with the protocol options for the port you have chosen to edit: _____________________________________________________________________ Opengear SD4000 User Manual Page 26 of 159...
- Page 27 This will provide authenticated SSH communications between the SSH client program on the remote user’s PC/workstation and the secure device server, so the user’s communication with the serial device attached to the secure device server is secure _____________________________________________________________________ Opengear SD4000 User Manual Page 27 of 159...
- Page 28 For RAW TCP, the port address is IP Address _ Port (4000 + serial port #) i.e. 4001 – 4048 RFC2217 Selecting RFC2217 enables serial port redirection on that port. Special client software is available for Windows UNIX and Linux that supports _____________________________________________________________________ Opengear SD4000 User Manual Page 28 of 159...
- Page 29 Desktop Protocol RDP and VNC through to computers which are locally connected to the SD4000 by their serial COM port. This port forwarding requires a PPP link to be set up over this serial port. Refer to Set up SDT Ports on SD4000 (Chapter 6.1.4) for configuration details...
- Page 30 Priority to critical. So if the syslog server does receive a message, it will SMS/ email it etc. Refer to Alerts & Logging (Chapter 7). You must now apply all the Serial Port Configuration edits you have specified: _____________________________________________________________________ Opengear SD4000 User Manual Page 30 of 159...
-
Page 31: Add Users
Add a Username and Password for each new user. You may also include information related to the user (e.g. contact details) in the Description field You can now nominate which Ports you wish that user to have access to Click Apply _____________________________________________________________________ Opengear SD4000 User Manual Page 31 of 159... -
Page 32: Trusted Networks
Trusted Networks The Trusted Networks facility gives you an option to nominate specific IP addresses that Users must be located at, to have access to the SD4000 Ports. Select Serial Port: Trusted Networks To add a new trusted network, select Add Rule... - Page 33 Advanced. Serial Port Redirection Client To access the virtual serial ports that RFC2217 support, you need to run client software (to actually redirect local serial ports to remote SD4000 serial ports). _____________________________________________________________________ Opengear SD4000 User Manual Page 33 of 159...
- Page 34 Tactical Software provides a trial copy of its products http://www.tacticalsoftware.com/products/serialip.htm. A single Serial/IP Redirector license is also supplied with each SD4000 - enabling one virtual COM port on a single computer. This license can be upgraded for additional virtual COM ports.
- Page 35 _____________________________________________________________________ Opengear SD4000 User Manual Page 35 of 159...
-
Page 36: Dial In Access
Dial-In Access DIAL IN ACCESS Introduction The Administrator can access the SD4000 out-of-band (OoB) from a remote location, using dial-up modem (or ISDN) connections. To set up dial-in: Connect an external modem to the secure device server Configure the secure device server for dial-in access... - Page 37 Configure for Dial-In PPP Access Next you configure the secure device server for dial-in PPP access, and the SD4000 will then await incoming connection from a remote site. To enable dial-in access to the console modem port: Select the Network: Dial In menu option The console/modem port is set by default to 115200 baud, No parity, 8 data bits and 1 stop bit, with software (Xon-Xoff) flow control enabled.
- Page 38 In the Local Address field enter the IP address for the Dial-In PPP Server. This is the IP address that will be used by the remote client to access SD4000 once the modem connection is established. Again you can select any address for the...
- Page 39 Set up the remote Client For dial-in clients access you will need to set up a network connection from the client modem to the dial in modem on the remote SD4000: A. For Windows XP and Windows 2003 clients: Open Network Connections in Control Panel and click the New Connection...
- Page 40 Enter a Connection Name (any name you choose) and the dial-up Phone number that will connect thru to the SD4000 modem Enter a User name and Password for have set up for the SD4000 B. For clients running earlier Windows versions:...
- Page 41 Note Set the PPP link up with TCP/IP as the only protocol enabled Specify that the Server will assign IP address and do DNS Do not set up the SD4000 PPP link as the default for Internet connection _____________________________________________________________________ Opengear SD4000 User Manual...
- Page 42 To set up Secure Desktop Tunnel access, the computer being accessed can be: located on the same local network as the SD4000, or cabled to the SD4000 via its serial COM port.
- Page 43 (like electricity/gas service meters, health monitors) that have web browser control interfaces. These appliances or computers being are located on the same local network as the SD4000, and the remote user/administrator then connects to the SD4000 thru an SSH tunnel (over dial-up or the Internet).
- Page 44 I. Enable Remote Desktop on the Windows computer that is to be accessed (Section 6.1.1) II. Establish an RDP link from the SD4000 to the Windows computer: For Windows computers that are network connected to the SD4000, you must set up Secure Desktop Tunneling - Hosts on the SD4000 (Section 6.1.2) For Windows computers that are serially connected through their COM port to the SD4000, you must first establish a PPP connection (Section 6.1.3);...
- Page 45 B. For dial-in Clients, you must first establish a PPP connection between the PC and the SD4000 IV. Then set up the secure SSH tunnel from Client PC to the SD4000. An SSH secure tunnel should be used for all public network connections (via dial-in or broadband Internet);...
- Page 46 Check Allow users to connect remotely to this computer Click Select Remote Users _____________________________________________________________________ Opengear SD4000 User Manual Page 46 of 159...
- Page 47 CTRL+ALT+DEL. 6.1.2 Set up SDT Hosts on the SD4000 To set up RDP (and VNC and HTTP) forwarding on the SD4000 for network connected computers: _____________________________________________________________________ Opengear SD4000 User Manual...
- Page 48 Enter a Description (optional) for the SDT Host computer Select the Permitted Users who can have access to the SDT Host computer. You can add SD4000 Users (or reconfigure User profiles) by selecting Serial Port:User menu tag - as described earlier in Chapter 4 Configuring Serial Ports...
- Page 49 Firstly, physically connect the COM port on the Windows computer that is to be accessed, to the serial port on the SD4000. Then set up an advanced network connection between the Windows computer, through its COM port to the SD4000. Both Windows 2003 and Windows XP Professional allow _____________________________________________________________________ Opengear SD4000 User Manual...
- Page 50 Remote Desktop connection to the SD4000: Open Network Connections in Control Panel and click the New Connection Wizard Select Set up an advanced connection and click Next...
- Page 51 Select the Connection Device (i.e. the serial COM port on the Windows computer that you cabled through to the SD4000). By default select COM1. The COM port on the Windows computer should be configured to its maximum baud rate. Click Next...
- Page 52 On the Network Connection screen select TCP/IP and click Properties Select Specify TCP/IP addresses on the Incoming TCP/IP Properties screen select TCP/IP. Nominate a From: and a To: TCP/IP address and click Next _____________________________________________________________________ Opengear SD4000 User Manual Page 52 of 159...
- Page 53 The default Password is portXX So to use the defaults for a RDP connection to the serial port 2 on the SD4000, you would have set up a Windows user named port02 When the PPP connection has been set up, a network icon will appear in the...
- Page 54 6.1.4 Set up SDT Ports on SD4000 (This step is only necessary for serially connected computers) To set up RDP (and VNC) forwarding on the SD4000 Serial Port that is connected to the Windows computer COM port: _____________________________________________________________________...
- Page 55 Click Secure Desktop Tunneling This will enable RDP forwarding (and VNC forwarding, and SSH tunneling for these facilities) Note When you enable SDT, this will override all other Configuration protocols on that port _____________________________________________________________________ Opengear SD4000 User Manual Page 55 of 159...
- Page 56 10.233.111.<portnumber> eg 10.233.111.2 for Secure RDP over Port 2 Ensure the SD4000 RS232 Settings (Baud Rate, Flow Control) are the same as were set up on the Windows computer COM port and click Apply RDP and VNC forwarding over serial ports is enabled on a Port basis. You can...
- Page 57 6.1.5 Establish connection between the remote Client PC and SD4000 A. If the remote RDP client PC is connecting to the SD4000 through the public Internet, before you can set up the secure SSH tunnel, you will need to: Determine the public IP address of the SD4000 (or of the router/firewall that connects the SD4000 to the Internet) as assigned by the ISP.
- Page 58 B. If the RDP client PC is dialing into Local/Console port on the SD4000 you will need to set up a dial-in PPP link: _____________________________________________________________________ Opengear SD4000 User Manual...
- Page 59 SSH tunnel from the remote Client PC to the SD4000. 6.1.6 Create the SSH tunnel To set up the secure SSH tunnel from the remote Client PC to the SD4000, you must install and launch SSH client software on the remote Client PC. There’s a wide selection...
- Page 60 The steps below show the establishment of an SSH connection and then forwarding the RDP port over this SSH connection - using the PuTTY client software: Under the Session tab, enter the IP address of the SD4000 in the Host Name or IP address field.
- Page 61 SD4000 is win2k3, then specify the remote host as win2k3:3389 . Alternative you can set the Destination as portXX:3389 where XX is the SDT enabled serial port number e.g. if port 4 is on the SD4000 is to carry the RDP traffic then specify port04:3389...
- Page 62 PuTTY for SSH tunneling Select Local and click the Add button Click Open to SSH connect the Client PC to the SD4000 You will now be prompted for the Username/Password for the SD4000 user you SDT enabled _____________________________________________________________________...
- Page 63 You can also secure the RDP communications from local and enterprise VPN connected Client PCs using SSH as above. This will protect against the risk of the “man in the middle” attacks to which RDP has a vulnerability http://www.securiteam.com/windowsntfocus/5EP010KG0 G.html _____________________________________________________________________ Opengear SD4000 User Manual Page 63 of 159...
- Page 64 CM4000, to the Windows computer To do this connection you simply enable the Remote Desktop Connection on the remote client PC then point it to the Secure Desktop Tunnel port in the SD4000: A. On a Windows client PC: Click Start.
- Page 65 Address of the SD4000, and the Port Number of the Secure Desktop Tunnel for the SD4000 serial port that is attached to the Windows computer to be controlled e.g. if the Windows computer is connected to serial Port 3 on a SD4000 located at 192.168.0.50 then you would enter 192.168.0.50:7303...
- Page 66 You can use GUI front end tools like the GNOME Terminal Services Client tsclient to configure and launch the rdesktop client. (Using tsclient also enables you to store multiple configurations of rdesktop for connection to many servers) _____________________________________________________________________ Opengear SD4000 User Manual Page 66 of 159...
- Page 67 UNIX based platforms with the X Window System and can be downloaded from http://www.rdesktop.org/ C. On a Macintosh client: Download Microsoft's free Remote Desktop Connection client for Mac OS X http://www.microsoft.com/mac/otherproducts/otherproducts.aspx?pid=remotedes ktopclient _____________________________________________________________________ Opengear SD4000 User Manual Page 67 of 159...
- Page 68 III. Establish a connection between the Viewer PC and the SD4000 (Section 6.2.5): VI. Then set up the secure SSH tunnel from Viewer PC to the SD4000 (Section 6.2.6) VII. Install and configure the VNC Viewer software on the Viewer PC (Section 6.2.7)
- Page 69 So, for example, to install and configure the UltraVNC Server on Windows computer, you first select a language (e.g. English) then use the Set Up wizard to install the Server software: _____________________________________________________________________ Opengear SD4000 User Manual Page 69 of 159...
- Page 70 Red Hat Enterprise Linux 4 there’s VNC Server software and a choice of Viewer client software, and to launch: Select the Remote Desktop entry in the Main Menu -> Preferences menu _____________________________________________________________________ Opengear SD4000 User Manual Page 70 of 159...
- Page 71 VNC bundled, or have third party VNC software that you can download. 6.2.2 Set up SDT Hosts on the SD4000 For computers that are network connected to the SD4000, you must set up RDP (and VNC) forwarding on the SD4000:...
- Page 72 (This step is only necessary for serially connected computers) For computers that are serially connected from their COM port to the serial port on the SD4000, you must establish the PPP network connection, and then set up Secure Desktop Tunneling - Ports on the SD4000 To establish the PPP network connection between the serial ports: A.
- Page 73 A. When the remote Viewer PC is dialing-in to the SD4000, you must first establish a PPP link B. When the remote Viewer PC is connecting to the SD4000 via a public Internet (or private LAN) connection, you must ensure that TCP Port 22 is forwarded through all the firewall/NAT/routers To set up the above, follow the steps in Section 6.1.5...
- Page 74 5900 (rather than port 3389 as was used for RDP) e.g. if using PuTTY: Opengear also supplies SDTConnector a Java client for the Secure Desktop Tunneling. The SDTConnector software (and manual) can be freely downloaded _____________________________________________________________________ Opengear SD4000 User Manual Page 74 of 159...
- Page 75 SSH connection, the only port which you're opening on your SD4000 the SDT port 22. So sometimes it may be prudent to tunnel VNC through SSH even when the Viewer PC and the SD4000 are both on the same local network. 6.2.7 Install, configure and connect the VNC Viewer VNC is truly platform-independent so a VNC Viewer on any operating system can connect to a VNC Server on any other operating system.
- Page 76 To establish the VNC connection, first configure the VNC Viewer, entering the VNC Server IP address A. When the Viewer PC is connected to the SD4000 thru a SSH tunnel (over the public Internet, or a dial-in connection, or private network connection), enter locahost (or 127.0.0.1) as the IP VNC Server IP address;...
- Page 77 79xx on the SD4000 is tunneled thru to port 5900 on the PPP connection on serial Port xx) e.g. for a Windows Viewer PC using UltraVNC connecting to a VNC Server which is attached to Port 1 on a SD4000 located 192.168.0.1...
- Page 78 Secure remote access of a home network using SSH, Remote Desktop and VNC for the home user http://theillustratednetwork.mvps.org/RemoteDesktop/SSH- RDP-VNC/RemoteDesktopVNCandSSH.html Taking your desktop virtual with VNC, RedHat magazine http://www.redhat.com/magazine/006apr05/features/vnc/ http://www.redhat.com/magazine/007may05/features/vnc/ Wikipedia general background on VNC http://en.wikipedia.org/wiki/VNC _____________________________________________________________________ Opengear SD4000 User Manual Page 78 of 159...
- Page 79 Browser is dialing-in to the SD4000, you must establish a PPP link; when the Browser is connecting to the SD4000 via a public Internet or a private VPN/LAN connection; you must ensure that TCP Port 22 is forwarded through all the firewall/NAT/routers, and determine the Public IP Address of the SD4000.
- Page 80 6.3.3 Create the SSH tunnel and connect To set up the secure SSH tunnel from the remote Browser PC to the SD4000, you must install and launch SSH client software on the remote PC. There’s a wide selection of commercial and free SSH client programs available:...
- Page 81 Under the Session tab, enter the IP address of the SD4000 in the Host Name or IP address field. For dial-in connections, this IP address will be the Local Address that you assigned to the SD4000 when you set it up as the Dial-In PPP Server...
- Page 82 You will now be prompted for the Username/Password for the SD4000 user you SDT enabled Now you have connected through the secure SSH tunnel to the SD4000, you can browse the data on the HTTP Server appliance by filling in local host at the remote...
-
Page 83: Alerts And Logging
Select Administration: SMTP and in the Server field enter the IP address of the outgoing mail server You may optionally enter an Sender email address which will appear as the from address in all sent email from this CM4000 Click Apply to activate SMTP _____________________________________________________________________ Opengear SD4000 User Manual Page 83 of 159... - Page 84 To set up SNMP destination: Select Administration: SNMP and specify the SNMP management destination server and protocols, and configure access security. Click Apply _____________________________________________________________________ Opengear SD4000 User Manual Page 84 of 159...
-
Page 85: Serial Port Logging
1 Logs all connection events to the port 2 Logs all data transferred to and from the port and all changes in hardware flow control status and all user connection events _____________________________________________________________________ Opengear SD4000 User Manual Page 85 of 159... - Page 86 The Alerts facility enables the data stream from a nominated serial port to be monitored for trigger conditions. When triggered, an Alert message is emailed to a nominated email address, or an SNMP server is notified Select Alerts & Logging: Alerts and click Add Alert _____________________________________________________________________ Opengear SD4000 User Manual Page 86 of 159...
- Page 87 Nominate the email address for the Email Recipient who will be notified of the alert, and/or activate SNMP notification for this event _____________________________________________________________________ Opengear SD4000 User Manual Page 87 of 159...
- Page 88 The Linux System Logger maintains a record of all system messages and errors. Select Alerts & Logging: Syslog The syslog record can be redirected to a remote Syslog Server: Enter the remote Syslog Server Address and Port details and click Apply _____________________________________________________________________ Opengear SD4000 User Manual Page 88 of 159...
- Page 89 Specify the Match Pattern that is to be searched for (e.g. the search for Mount is shown below) and click Apply. The Syslog will then be represented with only those entries that actually include the specified pattern _____________________________________________________________________ Opengear SD4000 User Manual Page 89 of 159...
- Page 90 _____________________________________________________________________ Opengear SD4000 User Manual Page 90 of 159...
-
Page 91: Power Control
Power Control POWER CONTROL Introduction The SD4000 secure device server can remotely power on, power off and power cycle the appliances, and services, that are connected to the power strips: Remote users and Administrators can control network attached power strips by securely sending HTTP commands as detailed in Chapter 6.3... -
Page 92: Controlling Power
Select the appropriate Power Strip for the connected Port Click Apply Controlling Power Select the Port / Power Strip and the particular Outlet to be controlled _____________________________________________________________________ Opengear SD4000 User Manual Page 92 of 159... - Page 93 Then select the desired Action to be taken (Power ON, Power OFF, Power Cycle or Display Status). You are only presented with those operations supported by the selected Power Strip Type. _____________________________________________________________________ Opengear SD4000 User Manual Page 93 of 159...
-
Page 94: Remote Authentication Configuration
Authentication AUTHENTICATION Introduction The SD4000 platform is a dedicated Linux computer, and it embodies a myriad of popular and proven Linux software modules for networking, secure access (OpenSSH) and communications (OpenSSL) and sophisticated user authentication (PAM, RADIUS, TACACS+ and LDAP). - Page 95 TACACS+ allows for a single access control server (the TACACS+ daemon) to provide authentication, authorization, and accounting services independently. Each service can be tied into its own database to take advantage of other services available _____________________________________________________________________ Opengear SD4000 User Manual Page 95 of 159...
- Page 96 Which authentication module is to be attached is dependent upon the local system setup and is at the discretion of the local Administrator. The SD4000 family supports PAM to which we have added the following modules for remote authentication:...
- Page 97 Secure Management Console Access If you selected HTTPS Server in Network: Services then this will enable you, the Administrator, to establish a secure browser connection to the SD4000 Management Console. To securely access the Management Console from a network connected PC...
- Page 98 Activate your preferred browser and enter https:// SD4000’s IP address For example, if the SD4000 has been set up with an IP address of 200.122.0.12 you need to type https:// 200.122.0.12 in your address bar Your browser may respond with a message that verifies the security certificate is valid but notes that it is not necessarily verified by a certifying authority.
-
Page 99: System Management
Monitoring Statistics 10.1 Configure Date and Time It is recommended that you set the local Date and Time in the SD4000 as soon as it is configured. Some features, like Syslog and NFS logging, use the system time for time- stamping log entries, while certificate generation depends on a correct Timestamp to check the validity period of the certificate. -
Page 100: Configure Ntp
SD4000 clock will be accurate soon after the Internet connection is established. Also if NTP is not used, the system clock will be reset randomly every time the SD4000 is powered up. To set the system time using NTP:... - Page 101 ON. However if you cycle the power and the unit is writing to flash you could corrupt or lose data, so the software reboot is the safer option. A hard erase (hard reset) will reset the SD4000 back to its factory default settings. The hard simplest method to perform a erase, and clear all the SD4000 appliance’s stored...
-
Page 102: Upgrade Firmware
10.4 Upgrade Firmware Before upgrading you should ascertain if you are already running the most current firmware in your secure device server. Your SD4000 will not allow you to upgrade to the same or an earlier version. Select Administration: Support Report and note the Firmware Version To upgrade, you first must download the latest firmware image from ftp://ftp.opengear.com... - Page 103 Specify the address and name of the downloaded Firmware Upgrade File, or Browse the local subnet and locate the downloaded file Click Apply and the SD4000 appliance will undertake a soft reboot and commence upgrading the firmware. This process will take several minutes After the firmware upgrade has completed, click here to return to the Management Console.
-
Page 104: Support Reports
The Support Report provides useful status information that will assist the Opengear technical support team to solve any problems you may experience with your SD4000. If you do experience a fault and have to contact the support team, ensure you include the Support Report with your email support request. - Page 105 Port Access and Active Users _____________________________________________________________________ Opengear SD4000 User Manual Page 105 of 159...
- Page 106 _____________________________________________________________________ Opengear SD4000 User Manual Page 106 of 159...
- Page 107 Management Console). For advanced and custom configurations using other standard commands, refer to Chapter 12. The SD4000 runs a standard Linux kernel so it is also possible to configure the secure device server using other standard Linux and Busybox commands and applications (ifconfig, gettyd, stty etc.) However doing this will not guarantee these changes are...
- Page 108 WARNING This chapter is not intended to teach you Linux. We assume you already have a certain level of understanding before you execute Linux kernel level commands. _____________________________________________________________________ Opengear SD4000 User Manual Page 108 of 159...
- Page 109 Ethernet ports and direct your terminal emulator program to the IP address of the SD4000 (192.168.0.1 by default) Log on to the SD4000 by pressing ‘return’ a few times. The SD4000 will request a user name and password. Enter the user name root and the password default.
- Page 110 The following commands must be issued: # /bin/config –-set=config.system.name=og.mydomain.com # /bin/config –-set=config.system.password=secret # /bin/config –-set=config.system.smtp.server=192.168.0.124 # /bin/config –-set=config.system.smtp.sender=og@mydomain.com The following command will synchronize the live system with the new configuration. # /bin/config –-run=systemsettings _____________________________________________________________________ Opengear SD4000 User Manual Page 110 of 159...
-
Page 111: Authentication Configuration
Alternately to change the hardware clock time you need to issue the following commands: # /bin/hwclock --set --date=092216452005.05 Where the format is MMDDhhmm[[CC]YY][.ss] Then the following command will save this new hardware clock time as the system time: _____________________________________________________________________ Opengear SD4000 User Manual Page 111 of 159... -
Page 112: Network Time Protocol
The following command will synchronize the live system with the new configuration. # /bin/config –-run=ipconfig Note: “/bin/config” commands can be combined into one command for convenience. Please note that supported interface modes are 'dhcp' and 'static'. Static _____________________________________________________________________ Opengear SD4000 User Manual Page 112 of 159... -
Page 113: Dial-In Configuration
Serial Port Flow Control: Hardware Custom Modem Initialization: ATQ0V1H0 You would need to issue the following commands from the command line to set system configuration: # /bin/config –-set=config.console.ppp.localip=172.24.1.1 # /bin/config –-set=config.console.ppp.remoteip=172.24.1.2 _____________________________________________________________________ Opengear SD4000 User Manual Page 113 of 159... -
Page 114: Services Configuration
Disabled SSH Server Enabled SNMP Server Disabled Ping Replies (Respond to ICMP echo requests) Disabled You would need to issue the following commands from the command line to set system configuration: _____________________________________________________________________ Opengear SD4000 User Manual Page 114 of 159... -
Page 115: Serial Port Settings
The following command will synchronize the live system with the new configuration. # /bin/config –-run=serialconfig Note that supported serial port baud-rates are '9600', '19200', '38400', '57600', '115200', and '230400'. Supported parity values are 'None', 'Odd', 'Even', 'Mark' and 'Space'. _____________________________________________________________________ Opengear SD4000 User Manual Page 115 of 159... - Page 116 Determine the total number of existing users (if you have no existing users) you can assume this is 0. # /bin/config –-get=config.users.total This command should display: config.users.total 1 Note that if you see: config.users.total _____________________________________________________________________ Opengear SD4000 User Manual Page 116 of 159...
- Page 117 If you want to restrict access to serial port 5 to computers from a single C class network 192.168.5.0, you need to issue the following commands (assuming you have a previous rule in place): _____________________________________________________________________ Opengear SD4000 User Manual Page 117 of 159...
-
Page 118: Event Logging Configuration
# /bin/config –-set=config.ports.port5.loglevel=2 The following command will synchronize the live system with the new configuration. # /bin/config –-run=eventlog Note that supported remote storage server types are 'None', 'cifs', 'nfs' and 'syslog'. _____________________________________________________________________ Opengear SD4000 User Manual Page 118 of 159... -
Page 119: Alert Configuration
SDT host TCP Ports To setup the list of tcp ports for a host, you use the config command: # config -s config.sdt.hosts.host3.tcpports.tcport1 = 23 # config -s config.sdt.hosts.host3.tcpports.tcport2 = 5900 _____________________________________________________________________ Opengear SD4000 User Manual Page 119 of 159... - Page 120 The above assumes the config below: # vi /etc/config/config.xml ~ </users> </host1> <total>3</total> <host2> <address>accounts.intranet.myco.com</address> <description>Accounts server</description> <users> <total>1</total> <user1>JohnWhite</user1> </users> </host2> <host3> <address>192.168.254.191</address> <description>Tonys Win2000 Box</description> <users> <total>1</total> <user1>JohnWhite</user1> </users> <tcpports><tcpport1>23</tcpport1></tcpports> </host3> </hosts> </sdt> </config> _____________________________________________________________________ Opengear SD4000 User Manual Page 120 of 159...
-
Page 121: Advanced Configuration
Advanced Configuration ADVANCED CONFIGURATION Introduction This chapter documents the portmanager application, which was developed by Opengear for secure device server serial port management, and gives examples of its use: Portmanager documentation Scripts and alerts Raw data access to the ports and modems... -
Page 122: Advanced Portmanager
Set RTS to 1 run the command: # pmshell --rts=1 Show all signals # pmshell --signals DSR=1 DTR=1 CTS=1 RTS=1 DCD=0 Read a line of text from the serial port: # pmshell --getline _____________________________________________________________________ Opengear SD4000 User Manual Page 122 of 159... - Page 123 The above output indicates that a user named “user1” is actively connected to ports 1 and 2, while “user2” is connected to both ports 1 and 8. Portmanager Daemon Command line options _____________________________________________________________________ Opengear SD4000 User Manual Page 123 of 159...
-
Page 124: External Scripts And Alerts
/etc/config/scripts/portXX.chat via the chat command on the serial port. When an alert occurs on a port. When an alert occurs on a port, the portmanager will attempt to execute /etc/config/scripts/portXX.alert (where XX is the port number, e.g. 08) _____________________________________________________________________ Opengear SD4000 User Manual Page 124 of 159... -
Page 125: Raw Access To Serial Ports
All standard mgetty options are supported. Modem initialization strings To override the standard modem initialization string either use the Management Console (see chapter 5) or the command line config tool (see Dial-In Configuration in Chapter 11). _____________________________________________________________________ Opengear SD4000 User Manual Page 125 of 159... - Page 126 Rules are added which explicitly allow network traffic to access enabled services e.g. HTTP, SNMP etc. e) Rules are added which explicitly allow traffic network traffic access to serial ports over enabled protocols e.g. Telnet, SSH and raw TCP. _____________________________________________________________________ Opengear SD4000 User Manual Page 126 of 159...
- Page 127 There are many high-quality tutorials and HOWTOs available via the netfilter website, in particular peruse the tutorials listed on the netfilter HOWTO page. A list of useful web locations has been compiled for your convenience below: _____________________________________________________________________ Opengear SD4000 User Manual Page 127 of 159...
-
Page 128: Modifying Snmp Configuration
The snmpd.conf provides is extremely powerful and too flexible to completely cover here. The configuration file itself is commented extensively and good documentation is available at the net-snmp website http://www.net-snmp.org, specifically: Man Page: http://www.net-snmp.org/docs/man/snmpd.conf.html FAQ: http://www.net-snmp.org/docs/FAQ.html Net-SNMPD Tutorial: http://www.net-snmp.org/tutorial/tutorial-5/demon/snmpd.html _____________________________________________________________________ Opengear SD4000 User Manual Page 128 of 159... - Page 129 OpenSSH has been created by Aaron Campbell, Bob Beck, Markus Friedl, Niels Provos, Theo de Raadt, and Dug Song. It has a homepage at http://www.openssh.com/ The only changes in the SD4000 SSH implementation are: PAM support EGD[1]/PRNGD[2] support and replacements for OpenBSD library functions that are absent from other versions of UNIX The config files are now in /etc/config.
-
Page 130: Secure Sockets Layer (Ssl) Support
SD4000 is 192.168.0.1 (default); and the public key is on the linux/unix computer in ~/.ssh/id_dsa.pub. Execute the following command on the linux/unix computer: scp ~/.ssh/id_dsa.pub \root@192.168.0.1:/etc/config/users/fred/.ssh/authorized_keys The authorized_keys file on the SD4000 needs to be owned by "fred", so login to the Management Console as root and type: chown fred /etc/config/users/fred/.ssh/authorized_keys More documentation on OpenSSH can be found at: http://openssh.org/portable.html... - Page 131 In the SD4000 OpenSSL is used primarily in conjunction with ‘http’ in order to have secure browser access to the GUI management console across insecure networks.
- Page 132 3. Installing the key and certificate The recommended method for copying files securely to the SD4000 unit is with an SCP (Secure Copying Protocol) client. The scp utility is distributed with OpenSSH for most Unices, while Windows users can use something like the PSCP command line utility available with PuTTY.
-
Page 133: Power Strip Control
12.9 Power Strip Control The SD4000 supports a limited set of power-control devices which can be configured using the Management Console as described in Chapter 8. However it is fairly simple to add support for more devices, or to customize the existing device support. - Page 134 "chat" program, only it ensures interoperation with the port manager. The final options, speed, charsize, stop and parity define the recommended or default settings for the attached device. _____________________________________________________________________ Opengear SD4000 User Manual Page 134 of 159...
- Page 135 _____________________________________________________________________ Opengear SD4000 User Manual Page 135 of 159...
- Page 136 (OpenSSL) and sophisticated user authentication (PAM, RADIUS, TACACS+ and LDAP). Many components of the SD4000 software are licensed under the GNU General Public License (version 2), which Opengear supports. You may obtain a copy of the GNU General Public License at http://www.fsf.org/copyleft/gpl.html. Opengear will provide source code for any of the components of the Software licensed under the GNU General Public License upon request.
- Page 137 A full list of the Linux commands and applications included in the latest SD4000 build can be found at http://www.opengear.com/faq233.html More details on the Linux commands can found online at: http://en.tldp.org/HOWTO/HOWTO-INDEX/howtos.html http://www.faqs.org/docs/Linux-HOWTO/Remote-Serial-Console-HOWTO.html http://www.stokely.com/unix.serial.port.resources/serial.switch.html The SD4000 also embodies the okvm console management software.
-
Page 138: Hardware Specifications
SD4008: 8 RJ-45 serial ports (All selectable RS-232/422/485) 1 DB-9 RS-232 console/ modem serial port Serial Baud Rates RJ45 ports - 2400 to 230,400bps DB9 port - 2400 to 115,200 bps _____________________________________________________________________ Opengear SD4000 User Manual Page 138 of 159... - Page 139 Ethernet Connectors 1 RJ-45 10/100Base-T Ethernet port _____________________________________________________________________ Opengear SD4000 User Manual Page 139 of 159...
-
Page 140: Safety & Certifications
Always pull on the plug, not the cable, when disconnecting the power cord from the socket. Do not connect or disconnect the SD4000 during an electrical storm. Also it is recommended you use a surge suppressor or UPS to protect the equipment from transients. - Page 141 SD4000. In an endeavor to create some move to standardization, Opengear products all use the same RJ45 RS232 pinout convention as adopted by Avocent and Equinox.
- Page 142 Data Terminal Ready Signal Quality Detector Ring Indicator CH/CI Data Signal Rate Selector Transmit Signal Element Timing Unassigned FEMALE MALE 25 pin DB25 9 pin DB9 8 pin RJ45 Connectors included in SD4000 _____________________________________________________________________ Opengear SD4000 User Manual Page 142 of 159...
- Page 143 Part # 319001 Other available connectors and adapters Opengear also supplies a range of cables and adapters that will enable you to easily connect to the more popular servers and network appliances. More detailed information can be found online at http://www.opengear.com/cabling.html...
- Page 144 For RS-485 it’s half duplex – single pair. The user loops RX+ to TX+ and RX- to TX- at the screw terminal block and takes a single pair from the + and - The RS-232 ports are standard DB-9 male PC pinout on Port 1 and Port 2 _____________________________________________________________________ Opengear SD4000 User Manual Page 144 of 159...
-
Page 145: Hardware Test
Appendix E Hardware Test This section describes the Loopback Test facilities built into the SD4000 code. When undertaking a Loopback Test, each of the serial ports loop data transmitted to data received, RTS to CTS, and DTR to DSR + DCD. The loopback program senses that data sent is received properly and that signals set and received properly. - Page 146 Signal Wiring on Custom made loopback plug: Wire TXD+ to RXD+ (1 to 3) Wire TXD- to RXD- (2 to 6) The RJ-45 Ethernet modular jack pinout is: TXD+ TXD- RXD+ _____________________________________________________________________ Opengear SD4000 User Manual Page 146 of 159...
-
Page 147: Test Procedure
RXD- Test Procedure Power up the SD4000 and you should observe the Power LEDs turn on and the Serial LEDs (P1 through P8, or Serial 1 and 2) light up in sequence Configure the serial connection of the “terminal” device/program you are using to 9600bps, 8 data bits, no parity and one stop bit Plug a serial cable between the SD4000 local DB-9 port and terminal device. - Page 148 (RTS set but not sensed) This will test port 1 through 8 and will repeat indefinitely. The test can be terminated by pressing Ctrl C. A successful test must have ‘L’ active in each column. _____________________________________________________________________ Opengear SD4000 User Manual Page 148 of 159...
- Page 149 This may be necessary if the private key certificate has been compromised Revocation List or if the holder of the certificate is to be denied the ability to establish a connection to the SD4000. CHAP Challenge-Handshake Authentication Protocol (CHAP) is used to verify a user's name and password for PPP Internet connections.
- Page 150 The MAC address is used by the local Internet router in order to direct SD4000 traffic to it rather than somebody else in the local area. It is a 48-bit number usually written as a series of 6 hexadecimal octets, e.g.
- Page 151 "intelligent" and can route packets to their final destination. SMTP Simple Mail Transfer Protocol. SD4000 includes, SMTPclient, a minimal SMTP client that takes an email message body and passes it on to a SMTP server (default is the MTA on the local host).
- Page 152 Wide Area Network WINS Windows Internet Naming Service that manages the association of workstation names and locations with IP addresses For further technology definitions refer: http://linux-documentation.com/en/documentation/linux-dictionary/index.html _____________________________________________________________________ Opengear SD4000 User Manual Page 152 of 159...
-
Page 153: End User License Agreement
Software, you agree to be bound by the terms of this EULA. If you do not agree to the terms of this EULA, Opengear is not willing to license the Software to you. In such event, do not use or install the Software. If you have purchased the Software, promptly return the Software and all accompanying materials with proof of purchase for a refund. - Page 154 Should you have any questions concerning this EULA, or if you desire to contact Opengear for any reason, please contact the Opengear representative serving your company.
- Page 155 Proof of date of purchase will be required. Any updates to the Software provided by Opengear (which may be provided by Opengear at its sole discretion) shall be governed by the terms of this EULA. In the event the product fails to perform as warranted, Opengear’s sole obligation shall be, at Opengear’s discretion, to refund the purchase price paid by you for the Software on...
-
Page 156: Service And Warranty
STANDARD WARRANTY Opengear, Inc., its parent, affiliates and subsidiaries, (collectively, "Opengear") warrant your Opengear product to be in good working order and to be free from defects in workmanship and material (except in those cases where the materials are supplied by... - Page 157 Opengear's standard warranty includes free access to Opengear's Knowledge Base as well as any application notes, white papers and other on-line resources that may become available from time to time. Opengear reserves the right to discontinue all support for products that are no longer covered by warranty. LIMITATION OF LIABILITY No action, regardless of form, arising from this warranty may be brought by either party more than two (2) years after the cause of action has occurred.
- Page 158 _____________________________________________________________________ Opengear SD4000 User Manual Page 158 of 159...
- Page 159 _____________________________________________________________________ Opengear SD4000 User Manual Page 159 of 159...
Need help?
Do you have a question about the SD4000 and is the answer not in the manual?
Questions and answers