Sign In
Upload
Download
Table of Contents
Contents
Add to my manuals
Delete from my manuals
Share
URL of this page:
HTML Link:
Bookmark this page
Add
Manual will be automatically added to "My Manuals"
Print this page
×
Bookmark added
×
Added to my manuals
Manuals
Brands
Opengear Manuals
Gateway
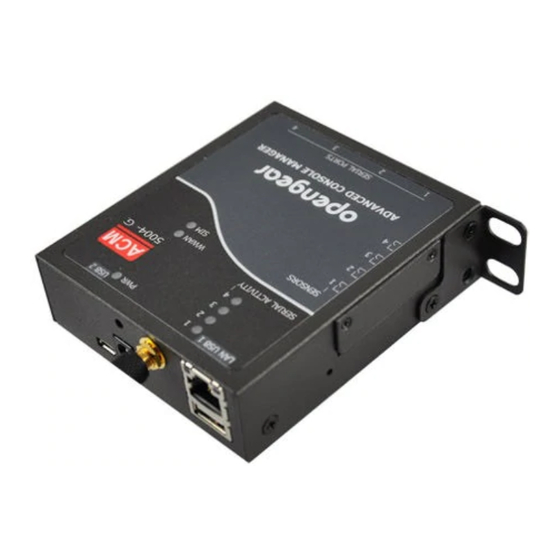
ACM5000
User manual
Opengear ACM5000 User Manual
Hide thumbs
1
2
3
Table Of Contents
4
5
6
7
8
9
10
11
12
13
14
15
16
17
18
19
20
21
22
23
24
25
26
27
28
29
30
31
32
33
34
35
36
37
38
39
40
41
42
43
44
45
46
47
48
49
50
51
52
53
54
55
56
57
58
59
60
61
62
63
64
65
66
67
68
69
70
71
72
73
74
75
76
77
78
79
80
81
82
83
84
85
86
87
88
89
90
91
92
93
94
95
96
97
98
99
100
101
102
103
104
105
106
107
108
109
110
111
112
113
114
115
116
117
118
119
120
121
122
123
124
125
126
127
128
129
130
131
132
133
134
135
136
137
138
139
140
141
142
143
144
145
146
147
148
149
150
151
152
153
154
155
156
157
158
159
160
161
162
163
164
165
166
167
168
169
170
171
172
173
174
175
176
177
178
179
180
181
182
183
184
185
186
187
188
189
190
191
192
193
194
195
196
197
198
199
200
201
202
203
204
205
206
207
208
209
210
211
212
213
214
215
216
217
218
219
220
221
222
223
224
225
226
227
228
229
230
231
232
233
234
235
236
237
238
239
240
241
242
243
244
245
246
247
248
249
250
251
252
253
254
255
256
257
258
259
260
261
262
263
264
265
266
267
268
269
270
271
272
273
274
275
276
277
278
279
280
281
282
283
284
285
286
287
288
289
290
291
292
293
294
295
296
297
298
299
300
301
302
303
304
305
306
307
308
309
310
311
312
313
314
315
316
317
318
319
320
321
322
323
324
325
326
327
328
329
330
331
332
333
334
335
page
of
335
Go
/
335
Contents
Table of Contents
Bookmarks
Table of Contents
Table of Contents
This Manual
Installation
Models
IM4208-2, IM4216-2, IM4232-2, IM4248-2 and IM4216-34 Kit Components
IM4004-5 Kit Components
CM4116, CM4132 and CM4148 Kit Components
CM4008 Kit Components
CM4001 and SD4002 Kit Components
SD4001 Kit Components
ACM5000 Kit Components
ACM5500 Kit Components
Power Connection
IM4216-34-DAC, IM4208-2-DAC, IM4216-2-DAC, IM4232-2-DAC and IM4248-2-DAC Power
CM4116-SAC, CM4132-SAC and CM4148-SAC Power
IM4004-5 and CM4008 Power
CM4001/ SD4002 and SD4001 Power
Acm500X, Acm500X-2, Acm500X-M/W/I/G and Acm500X-SDC Power
ACM5508-2-M, ACM5508-2-I, ACM5504-5-G-I, ACM5504-5-GV-I and ACM5504-2-P Power
IM4216-34-DDC, IM4208-2-DDC, IM4216-2-DDC, IM4232-2-DDC and IM4248-2-DDC Power
Network Connection
Serial Port Connection
Opengear Classic RJ45 Pinout (Option -X0)
Cisco Rolled (Cyclades) RJ45 Pinout (Option -X1)
Cisco RJ45 Pinout (Option -X2)
USB Port Connection
Fitting Cellular SIM and Antennas
ACM5004-G/G-I and ACM5504-5-G-I SIM
ACM5004-G/G-I/GV and ACM5504-5-G-I Antenna
Im42Xx-2-DAC-X2-G and Im42Xx-2-DAC-X0-G
External USB Cellular Modems
Digital I/O and Environmental Sensors
System Configuration
Management Console Connection
Connected Computer Set up
Browser Connection
Administrator Password
Set up New Administrator
Network IP Address
Ipv6 Configuration
Dynamic DNS (DDNS) Configuration
System Firewall - Service Access
Communications Software
SDT Connector
Putty
Sshterm
Management Network Configuration
Enable the Management LAN
Configure the DHCP Server
Select Failover or Broadband Oob
Aggregating the Network Ports
Wireless LAN
Static Routes
Configure Serial Ports
Common Settings
Console Server Mode
SDT Mode
Device (RPC, UPS, EMD) Mode
Terminal Server Mode
Serial Bridging Mode
Syslog
NMEA Streaming
Serial Port, Host, Device & User Configuration
Add/ Edit Users
Set up New Group
Set up New Users
Authentication
Network Hosts
Trusted Networks
Serial Port Cascading
Automatically Generate and Upload SSH Keys
Manually Generate and Upload SSH Keys
Configure the Slaves and Their Serial Ports
Managing the Slaves
Serial Port Redirection (Portshare)
Managed Devices
Ipsec VPN
Enable the VPN Gateway
Openvpn
Enable the Openvpn
Configure as Server or Client
Windows Openvpn Client and Server Set up
Pptp Vpn
Enable the PPTP VPN Server
Add a PPTP User
Set up a Remote PPTP Client
Call Home
Set up Call Home Candidate
Accept Call Home Candidate as Managed Console Server on CMS
Calling Home to a Generic Central SSH Server
FIREWALL, FAILOVER & Oob ACCESS
Dialup Modem Connection
Oob Dial-In Access
Configure Dial-In PPP
Using SDT Connector Client
Set up Windows XP/ 2003/Vista/7 Client
Set up Earlier Windows Clients
Set up Linux Clients
Dial-Out Access
Always-On Dial-Out
Failover Dial-Out
Oob Broadband Ethernet Access
Broadband Ethernet Failover
Cellular Modem Connection
Connect to the GSM HSUPA/UMTS Carrier Network
Connect to the CDMA EV-DO Carrier Network
Verify Cellular Connection
Cellular Operation
Oob Access Set up
Cellular Failover Setup
Cellular Routing
Cellular CSD Dial-In Setup
Firewall & Forwarding
Configuring Network Forwarding and IP Masquerading
Configuring Client Devices
Port / Protocol Forwarding
Firewall Rules
Ssh Tunnels & Sdt Connector
Configuring for SSH Tunneling to Hosts
SDT Connector Client Configuration
SDT Connector Client Installation
Configuring a New Gateway in the SDT Connector Client
Auto-Configure SDT Connector Client with the User's Access Privileges
Make an SDT Connection through the Gateway to a Host
Manually Adding Hosts to the SDT Connector Gateway
Manually Adding New Services to the New Hosts
Adding a Client Program to be Started for the New Service
Dial in Configuration
SDT Connector to Management Console
SDT Connector - Telnet or SSH Connect to Serially Attached Devices
Using SDT Connector for Out-Of-Band Connection to the Gateway
Importing (and Exporting) Preferences
SDT Connector Public Key Authentication
Setting up SDT for Remote Desktop Access
Enable Remote Desktop on the Target Windows Computer to be Accessed
Configure the Remote Desktop Connection Client
SDT SSH Tunnel for VNC
Install and Configure the VNC Server on the Computer to be Accessed
Install, Configure and Connect the VNC Viewer
Using SDT to IP Connect to Hosts that Are Serially Attached to the Gateway
Establish a PPP Connection between the Host COM Port and Console Server
Set up SDT Serial Ports on Console Server
Set up SDT Connector to Ssh Port Forward over the Console Server Serial Port
SSH Tunneling Using Other SSH Clients (E.g. Putty)
Alerts, Automated Response and Logging
Configure Auto-Response
Check Conditions
Environmental
Alarms and Digital Inputs
UPS / Power Supply
UPS Status
Serial Login/Logout
ICMP Ping
Cellular Data
Custom Check
SMS Command
Trigger Actions
Send Email
Send SMS
Perform RPC Action
Run Custom Script
Send SNMP Trap
Send Nagios Event
Resolve Actions
Configure SMTP, SMS, SNMP And/Or Nagios Service for Alert Notifications
Send Email Alerts
Send SMS Alerts
Send SNMP Trap Alerts
Send Nagios Event Alerts
Logging
Log Storage
Serial Port Logging
Network TCP and UDP Port Logging
Auto-Response Event Logging
Power Device Logging
Power, Environment & Digital I/O
Remote Power Control (RPC)
RPC Connection
RPC Access Privileges and Alerts
User Power Management
RPC Status
Uninterruptible Power Supply Control (UPS)
Managed UPS Connections
Remote UPS Management
Controlling UPS Powered Computers
UPS Alerts
UPS Status
Overview of Network UPS Tools (NUT)
Environmental Monitoring
Connecting the EMD and Its Sensors
Connecting Sensors to ACM5000 and Acm5500S
Adding Emds and Configuring the Sensors
Environmental Alerts
Environmental Status
Digital I/O Ports
Digital I/O Output Configuration
Digital I/O Input Configuration
High Voltage Outputs
Authentication
Authentication Configuration
Local Authentication
TACACS Authentication
RADIUS Authentication
LDAP Authentication
RADIUS/TACACS User Configuration
Group Support with Remote Authentication
Remote Groups with RADIUS Authentication
Remote Groups with LDAP Authentication
Idle Timeout
Kerberos Authentication
Authentication Testing
PAM (Pluggable Authentication Modules)
SSL Certificate
Nagios Integration
Nagios Overview
Central Management and Setting up SDT for Nagios
Set up Central Nagios Server
Set up Distributed Opengear Console Servers
Set up SDT for Nagios on the Central Nagios Server
Set up the Clients
Configuring Nagios Distributed Monitoring
Enable Nagios on the Console Server
Enable NRPE Monitoring
Enable NSCA Monitoring
Configure Selected Serial Ports for Nagios Monitoring
Configure Selected Network Hosts for Nagios Monitoring
Configure the Upstream Nagios Monitoring Host
Advanced Distributed Monitoring Configuration
Sample Nagios Configuration
Basic Nagios Plug-Ins
Additional Plug-Ins
Number of Supported Devices
Distributed Monitoring Usage Scenarios
System Management
System Administration and Reset
Upgrade Firmware
Configure Date and Time
Configuration Backup
Delayed Configuration Commit
FIPS Mode
Status Reports
Port Access and Active Users
Statistics
Support Reports
Syslog
Dashboard
Configuring the Dashboard
Creating Custom Widgets for the Dashboard
Management
Device Management
Port and Host Logs
Terminal Connection
Web Terminal
SDT Connector Access
Power Management
Configuration from the Command Line
Accessing Config from the Command Line
Serial Port Configuration
Adding and Removing Users
Adding and Removing User Groups
Authentication
Network Hosts
Trusted Networks
Cascaded Ports
UPS Connections
RPC Connections
Environmental
Managed Devices
Port Log
Alerts
Smtp & Sms
Snmp
Administration
IP Settings
Date & Time Settings
Dial-In Settings
DHCP Server
Services
Nagios
Advanced Configuration
Custom Scripting
Custom Script to Run When Booting
Running Custom Scripts When Alerts Are Triggered
Example Script - Power Cycling on Pattern Match
Example Script - Multiple Email Notifications on each Alert
Deleting Configuration Values from the CLI
Power Cycle any Device Upon a Ping Request Failure
Running Custom Scripts When a Configurator Is Invoked
Backing-Up the Configuration and Restoring Using a Local USB Stick
Backing-Up the Configuration Off-Box
Advanced Portmanager
Portmanager Commands
External Scripts and Alerts
Raw Access to Serial Ports
Access to Serial Ports
Accessing the Console/Modem Port
IP- Filtering
SNMP Status Reporting
Retrieving Status Information Using SNMP
Check Firewall Rules
Enable SNMP Service
Etc/Config/Snmpd.conf
Adding Multiple Remote SNMP Managers
Advertisement
Quick Links
1
Im4208-2, Im4216-2, Im4232-2, Im4248-2 and Im4216-34 Kit Components
Download this manual
User Manual
ACM5000 & ACM5500 RIM Gateways
IM4000 & IM4200 DCIM Managers
CM4000 DCIM Console Servers
SD4000 Secure Device Server
Rev: 4.5
th
April 16
2012
1
Advanced Console Server & RIM Gateway User Manual
Table of
Contents
Previous
Page
Next
Page
1
2
3
4
5
Advertisement
Table of Contents
Need help?
Do you have a question about the ACM5000 and is the answer not in the manual?
Ask a question
Questions and answers
Related Manuals for Opengear ACM5000
Server Opengear IM4000 User Manual
(216 pages)
Server Opengear SD4000 User Manual
Secure device server (159 pages)
Gateway Opengear ACM5504-5-GS-I Quick Start Manual
(4 pages)
Gateway Opengear ACM5504-5-GV-I Quick Start Manual
(4 pages)
Gateway Opengear ACM5500 User Manual
(335 pages)
Gateway Opengear ACM7004-5-LMx Quick Start Manual
(4 pages)
Gateway Opengear ACM7008-2-LMx series Quick Start Manual
(4 pages)
Gateway Opengear ACM7004-2-LA Quick Start Manual
(4 pages)
Gateway Opengear ACM5004-GS Quick Start Manual
(4 pages)
Gateway Opengear ACM7004-2-LMA Quick Start Manual
(4 pages)
Gateway Opengear ACM7004-5 Quick Start Manual
Remote site gateway (3 pages)
Gateway Opengear IM4200 User Manual
(335 pages)
This manual is also suitable for:
Cm4000
Sd4000
Acm5500
Im4000
Im4200
Table of Contents
Save PDF
Print
Rename the bookmark
Delete bookmark?
Delete from my manuals?
Login
Sign In
OR
Sign in with Facebook
Sign in with Google
Upload manual
Upload from disk
Upload from URL


Need help?
Do you have a question about the ACM5000 and is the answer not in the manual?
Questions and answers