Table of Contents
Advertisement
Quick Links
Advertisement
Table of Contents

Related Manuals for Sirius Satellite Radio SDD2ELEMIC58


Summary of Contents for Sirius Satellite Radio SDD2ELEMIC58
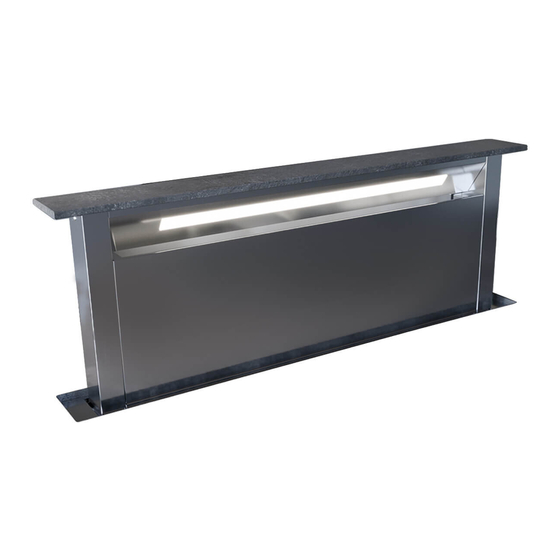
- Page 1 Congratulations on your purchase! Thank you for choosing a Sirius product. SDD2ELEMIC INTEGRATED DOWNDRAFT INSTALLATION INSTRUCTIONS FOR SEM 71 & SEM 81 motors SDD2ELEMIC58 EAN #9351116005375 SDD2ELEMIC88 EAN #9351116005382 SDD2ELEMIC118 EAN #9351116005399...
- Page 2 SDD2ELEMIC INTEGRATED DOWNDRAFT RANGEHOOD INSTALLATION GUIDE...
-
Page 3: Table Of Contents
SDD2ELEMIC INTEGRATED DOWNDRAFT RANGEHOOD INSTALLATION GUIDE BEFORE YOU INSTALL - DUCTING INFORMATION TO THE ATTENTION OF THE USER INSTALLATION GUIDELINES APPLIANCE DIAGRAMS PRE-INSTALLATION CHECKS INSTALLING THE RANGEHOOD FOR SEM 71 AND SEM 81 200MM SIDE OR BOTTOM VENTING FOR SEM 71, AND SEM 81 200MM FRONT OR REAR VENTING DUCTING FROM MOTOR TO VENT SEM 8 ONLY) ELECTRICAL CONNECTION... -
Page 4: Before You Install - Ducting Information
SDD2ELEMIC INTEGRATED DOWNDRAFT RANGEHOOD INSTALLATION GUIDE BEFORE YOU INSTALL - DUCTING INFORMATION Sirius warranty covers only Sirius product. If you choose to install a non-Sirius branded accessory such as flexible ducting, Sirius will only warrant the rangehood and motor. If installation is found to be the cause of failure or issue then charges will apply for service and parts. -
Page 5: To The Attention Of The User
SDD2ELEMIC INTEGRATED DOWNDRAFT RANGEHOOD INSTALLATION GUIDE INSTALLATION GUIDELINES FOR TO THE ATTENTION OF THE USER ELECTRIC HOB This rangehood is designed to be ducted to outside Minimum 20mm to 60mm maximum distance the house. between liner of downdraft and edge of hob. WARNING INSTALLATION GUIDELINES FOR GAS COOKTOP APPLICATIONS... -
Page 6: Appliance Diagrams
SDD2ELEMIC INTEGRATED DOWNDRAFT RANGEHOOD INSTALLATION GUIDE APPLIANCE DIAGRAMS... -
Page 7: Pre-Installation Checks
SDD2ELEMIC INTEGRATED DOWNDRAFT RANGEHOOD INSTALLATION GUIDE NOTE Check PARTS LIST on page 31-33 for all included parts prior to discarding packaging. PRE-INSTALLATION CHECKS Plug the main control box into a 10 amp GPO and connect the motor by removing the 4 screws on the black section of the control box. -
Page 8: Installing The Rangehood
SDD2ELEMIC INTEGRATED DOWNDRAFT RANGEHOOD INSTALLATION GUIDE INSTALLING THE RANGEHOOD STEP 1: Refer to cutout dimensions required per unit as they NOTE vary for each unit. Certain installations will require ducting 1. Before making the cutout, check that there are no provisions to be completed prior to this stage. - Page 9 SDD2ELEMIC INTEGRATED DOWNDRAFT RANGEHOOD INSTALLATION GUIDE (Fig. 1a) NB: Remove only red parts (Fig. 1b) 880mm downdraft - 837mm x 100mm 1180mm downdraft - 1137mm x 100mm (Fig. 2) Internal Support Frame Assembly 4. Take the accessories supplied in the package (A-B-C-D see Fig 5) (Fig.
- Page 10 SDD2ELEMIC INTEGRATED DOWNDRAFT RANGEHOOD INSTALLATION GUIDE Slot the two corresponding part A with B and C with D together (fig 4). (Fig. 4) 5. Measure the desired length these two sections need to be in correspondence with the internal cabinetry (Fig.
- Page 11 SDD2ELEMIC INTEGRATED DOWNDRAFT RANGEHOOD INSTALLATION GUIDE Line up the edges of the of the two sections of frame with the benchtop cutout and secure in place as per (Fig. 7), (Fig. 8) & (Fig. 9). Note: The screws put in place in (Fig. 6) cannot sit inside the width of the benchtop cutout as they will obstruct the downdraft body when lowered into place.
- Page 12 SDD2ELEMIC INTEGRATED DOWNDRAFT RANGEHOOD INSTALLATION GUIDE Support and Height Adjustable Brackets (Fig. 10) These brackets are fixed in between the horizontal length brackets and are put into position as per (Fig.11) Insert one at either end ensuring that the slotted holes and the round holes correspond with the horizontal bracket allowances.
- Page 13 SDD2ELEMIC INTEGRATED DOWNDRAFT RANGEHOOD INSTALLATION GUIDE Support and Height Adjustable Brackets (Fig. 10) Remove the 200mm Diameter Front Section by removing the screws securing it in place. If not using this outlet for ducting, replace with the solid flat cover plate (SPS-75059000082) and fix back in place. If ducting from this outlet, the connection can be put back on once the downdraft is in its set position.
- Page 14 SDD2ELEMIC INTEGRATED DOWNDRAFT RANGEHOOD INSTALLATION GUIDE Adjusting the height of the benchtop insert section The height of the downdraft insert can be adjusted up and down to ensure a seamless flush finish with the benchtop. Using a Phillips head screwdriver, adjust the threaded screws up or down to according to the desired thickness of the insert.
- Page 15 SDD2ELEMIC INTEGRATED DOWNDRAFT RANGEHOOD INSTALLATION GUIDE Note: Any of the screws on the body of the downdraft can be used to secure these brackets in place. (Fig. 17) Having verified the correct position and stability of the product, proceed to glue the additional surface on the top of the downdraft.
- Page 16 SDD2ELEMIC INTEGRATED DOWNDRAFT RANGEHOOD INSTALLATION GUIDE (Fig. 20) INSTALLATION INSTRUCTIONS SIDE OR BOTTOM VENTING Components list at rear of Installation Guide STEP 1A: STEP 2A: 1. Remove front adapter plate (Part D). (Fig. 4) 1. Remove side or bottom cover plate (Part C). (Fig.
- Page 17 SDD2ELEMIC INTEGRATED DOWNDRAFT RANGEHOOD INSTALLATION GUIDE STEP 4A: Ducting to SEM 71 motor (200mm ducting) This step covers ducting for SDD2 L EMIC 880 and 1180 models. For SEM 81 motor with SDD2ELEMIC 880/1180 - 200mm option only. 1B: Connect a duct expander (Part ‘H’) to rectangular to round adapter (Part ‘A’), then connect length of ducting (Part ‘K.2’) to the 200mm outlet.
-
Page 18: For Sem 71 And Sem
SDD2ELEMIC INTEGRATED DOWNDRAFT RANGEHOOD INSTALLATION GUIDE INSTALLATION INSTRUCTIONS FOR SEM 71, SEM 81 FRONT OR REAR VENTING STEP 1B: If venting from front, check to see if front adaptor plate (Part ‘D’) is attached. Remove & replace with cover plate •... - Page 19 SDD2ELEMIC INTEGRATED SDD2ELEMIC INTEGRATED DOWNDRAFT RANGEHOOD DOWNDRAFT RANGEHOOD INSTALLATION GUIDE INSTALLATION GUIDE STEP 2B: 1. Use 200mm ducting (Part ‘K.2’) for SDD2ELEMIC 880 and 1180 versions. 2. The ducting fits directly onto the collar on the front adaptor plate (Part ‘D’). 3.
-
Page 20: Ducting From Motor To Vent Sem 8 Only)
DUCTING FROM MOTOR TO WALL VENT: (SEM 81) 1. Run the length of ducting to the motor. (Additional lengths of ducting can be attached using an additional internal connector pieces.) NOTE: No connector required as it connects directly to the collar of the motor. 2. - Page 21 SDD2ELEMIC INTEGRATED SDD2ELEMIC INTEGRATED DOWNDRAFT RANGEHOOD DOWNDRAFT RANGEHOOD INSTALLATION GUIDE INSTALLATION GUIDE ELECTRICAL CONNECTION DANGER NOTE If the rangehood presents any anomaly, This appliance complies with the European disconnect the appliance or remove the Directives 2006/95/EC (Low Voltage fuse corresponding to the appliance Directive) and 2004/108/EC (Electromagnetic power disconnecting line.
-
Page 22: How The Rangehood Works
SDD2ELEMIC INTEGRATED DOWNDRAFT RANGEHOOD INSTALLATION GUIDE HOW THE RANGEHOOD WORKS Light On/Off Decrease fan Fan speed Increase fan 10 min shut-off speed indicators speed timer Light ON/OFF key Automatic turn off: After 4 hours of continuous working from the The light switches on and off only when the carriage last setup, the appliance turns off and closes is fully OPEN. - Page 23 SDD2ELEMIC INTEGRATED DOWNDRAFT RANGEHOOD INSTALLATION GUIDE...
- Page 24 SDD2ELEMIC INTEGRATED DOWNDRAFT RANGEHOOD INSTALLATION GUIDE...
- Page 25 SDD2ELEMIC INTEGRATED DOWNDRAFT RANGEHOOD INSTALLATION GUIDE...
- Page 26 SDD2ELEMIC INTEGRATED DOWNDRAFT RANGEHOOD INSTALLATION GUIDE...
-
Page 27: Cleaning The Rangehood
SDD2ELEMIC INTEGRATED DOWNDRAFT RANGEHOOD INSTALLATION GUIDE CLEANING THE RANGEHOOD Careful maintenance ensures proper operation and good performances over time. CAUTION The hood must be disconnected from the electrical network, both by unplugging the appliance from the socket and activating the magnetic circuit breaker (safety cut-out), before removing the metal grease filters. -
Page 28: Troubleshooting
TROUBLESHOOTING PROBLEM SOLUTION Check that: • There is not a power outage. • A specific speed has actually been selected. The rangehood • The 6 pin connection is inserted properly. does not work. • The red reset key, found over the electrical system box, is pushed. •... -
Page 29: Replacing The Light
SDD2ELEMIC INTEGRATED SDD2ELEMIC INTEGRATED DOWNDRAFT RANGEHOOD DOWNDRAFT RANGEHOOD INSTALLATION GUIDE INSTALLATION GUIDE REPLACING THE LIGHT 1. Lift the unit, then press the red button on the power transformer - cutting power to the unit. 2. Using an appropriate tool, remove the LED bar from its seat, disconnect it electronically throught the appropriate connector then replace it with a LED bar with same characteristics. - Page 30 AFTER SALES SERVICE Any maintenance operation on your appliance should NOTE be carried out by: • Either Arisit Pty Ltd; When calling, please mention the appliance • Or a qualified professional technician, authorized details: Production date, (Fig. 9A), Type (Fig. 9B) for that brand if out of warranty.
-
Page 31: Parts List
SDD2ELEMIC INTEGRATED DOWNDRAFT RANGEHOOD INSTALLATION GUIDE PARTS LIST RECTANGULAR TO ROUND DUCTING ADAPTOR SPS-81020 BOTTOM/SIDE COVER COLLAR SPS-51070102735 BOTTOM/SIDE EXIT PLATE SPS-20059000094 FRONT/REAR VENT ADAPTOR SPS-20059120071 FRONT/REAR VENT COVER PLATE SPS-75059000082 UPRIGHT FIXING BRACKETS SPS-77002002999 UNIVERSAL RING CLAMP URC25-215 150MM TO 200MM DUCT EXPANDER GDR 150/200 200MM DIAMETER CONNECTOR PIECE GDC-200... - Page 32 SDD2ELEMIC INTEGRATED DOWNDRAFT RANGEHOOD INSTALLATION GUIDE PARTS LIST - INCLUDED PIECES PART A PART B Rectangular to round ducting adaptor Bottom/side cover collar SPS-81020 SPS-51070102735 PART C PART D Bottom/side exit connector Front/rear vent adaptor SPS-20059000094 SPS-20059120071 PART E PART F Front/rear vent cover plate Upright fixing brackets SPS-75059000082...
- Page 33 SDD2ELEMIC INTEGRATED DOWNDRAFT RANGEHOOD INSTALLATION GUIDE PARTS LIST - OPTIONAL PIECES To be purchased separately PART G PART H Universal ring clamp 150mm to 200mm Duct expander URC25-215/325 GDR 150/200 Part K.2 PART J 200mm diameter connector piece Semi rigid aluminium ducting 200mm GDC-200 or SRPRO 30/200...
-
Page 34: Wiring Diagram
SDD2ELEMIC INTEGRATED DOWNDRAFT RANGEHOOD INSTALLATION GUIDE WIRING DIAGRAMS... -
Page 35: Warranty Information
SDD2ELEMIC INTEGRATED DOWNDRAFT RANGEHOOD INSTALLATION GUIDE WARRANTY INFORMATION Dear Customer, Thank you for choosing this Sirius Rangehood. We are sure that it will provide you with many years of excellent service. At Arisit Pty Limited we are dedicated to ensuring that our customers receive the best possible after-sales care. - Page 36 Your Warranty Register now to qualify. Terms & Conditions This warranty will not apply where: cost of delivery to the nearest Service The fault is caused by accident, Division or travel costs for a technician or misuse, an infestation of insect Authorised Service Agent shall be for the These Terms and Conditions apply only to and or vermin, fire, flood or the use...
Need help?
Do you have a question about the SDD2ELEMIC58 and is the answer not in the manual?
Questions and answers