Table of Contents
Advertisement
Quick Links
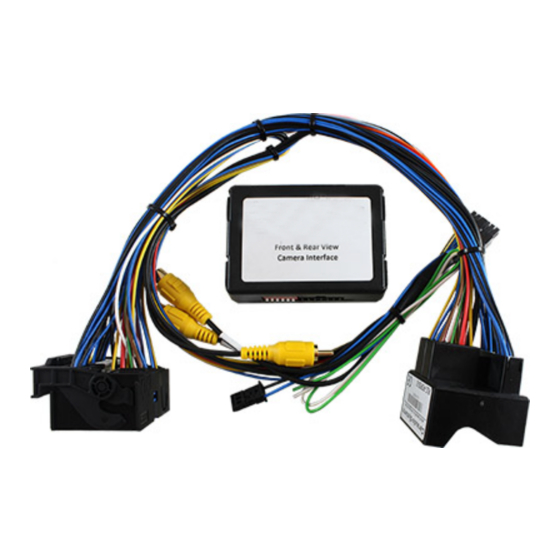
r.LiNK-Interface
E09PO28003
Rear and front camera input
incl. video-in-motion
compatible with Porsche vehicles with
PCM 3 and PCM 3.1 navigation systems
Product features
• Plug and play interface
• Integrated into the vehicle infotainment
• Rear-view camera input (+ coding)
• Front camera input
• Rear-view and front camera power (+12V max. 1A)
• Video-in-motion
• Automatic switching to rear-view camera input
• Optionally coding of ParkAssistant to retrofit factory PDC
Version 24.10.2018
Advertisement
Table of Contents

Subscribe to Our Youtube Channel
Related Manuals for Setma r.LiNK-Interface E09PO28003


Summary of Contents for Setma r.LiNK-Interface E09PO28003
- Page 1 r.LiNK-Interface E09PO28003 Rear and front camera input incl. video-in-motion compatible with Porsche vehicles with PCM 3 and PCM 3.1 navigation systems Product features • Plug and play interface • Integrated into the vehicle infotainment • Rear-view camera input (+ coding) •...
-
Page 2: Table Of Contents
Contents 1. Prior to installation 1.1. Delivery contents 1.2. Check compatibility of vehicle and accessories 1.3. Setting the Dip-switches of the Interface-Box RLC-M40-2 1.4. Pin-assignments 2. Connection schema 3. Installation 3.1. Interconnecting interface-Box, harness and factory head unit 3.2. Connections to after market rear-view camera 3.3. -
Page 3: Prior To Installation
1. Prior to installation Read the manual prior to installation. Technical knowledge is necessary for installation. The place of installation must be free of moisture and away from heat sources. 1.1. Delivery contents Take down the SW-version and HW-version of the interface boxes, and store this manual for support purposes. -
Page 4: Setting The Dip-Switches Of The Interface-Box Rlc-M40-2
1.3. Setting the dip switches of the interface-box RLC-M40-2 Vehicle/ navigation Dip 1 Dip 2 Dip 3 Dip 4 Dip 5 Dip 6 PCM 3 with video-in-motion activated PCM 3 with video-in-motion deactivated PCM 3.1 with video-in-motion activated PCM 3.1 with video-in-motion deactivated Note: Dip switch functions of the interface-box RLC-M40-2 Dip 1 –... -
Page 5: Connection Schema
2. Connection schema Version 24.10.2018... -
Page 6: Installation
3. Installation Switch off ignition and disconnect the vehicle’s battery! If according to factory rules disconnecting the battery has to be avoided, it is usually sufficient to put the vehicle in sleep-mode. In case the sleep-mode does not show success, disconnect the battery with a resistor lead. -
Page 7: Connections To After Market Rear-View Camera
Connect female Quadlock connector of harness RLC-POR03-2 to the male Quadlock connector of the head unit. 3.2. Connections to after market rear-view camera Connect the video RCA of the rear-view camera to the female RCA connector with the label „Rear-view camera“ of RLC-POR03-2 harness. Connect the green cable of harness RLC-POR03 to the camera power supply (+12V max 1A). -
Page 8: Connections To Front Camera
3.4. Connections to front camera Connect the video RCA of the front camera to the female RCA connector with the label „Front-view camera“ of RLC-POR03-2 harness. Connect the white cable of harness RLC-POR03-2 to the camera power supply (+12V max 1A). The white cable is high when reverse gear is engaged (if ignition is off, too). The power will be deactivated from a speed of 20 km/h. -
Page 9: Coding Of The Camera Function
4. Coding of the camera function 4.1. Coding of the rear-view camera (only PCM3.1) HASH KEY/MODE BACK ACCEPT HANG UP Steering-wheel buttons left Steering-wheel buttons right It is necessary to code the rear-view camera input of the PCM 3.1 to use it for an after- market rear-view camera. -
Page 10: Optionally Coding Of Parkassistant To Retrofit Factory Pdc (Only Pcm3.1)
4.2. Optionally coding of ParkAssistant to retrofit factory PDC (only PCM3.1) HASH KEY/MODE BACK ACCEPT HANG UP Steering-wheel buttons left Steering-wheel buttons right It is necessary to code the ParkAssistant of the PCM 3.1 to retrofit factory PDC. 1. Turn on ignition 2. -
Page 11: Alternatively Coding And Decoding Of Rear-View Camera And Parkassistant
4.3. Alternatively coding and decoding of rear-view camera and ParkAssistant (e.g. if steering-wheel buttons not existing, only PCM3.1) BACK Alternatively to coding by steering-wheel buttons the coding and decoding of rear-view camera and ParkAssistant can be done by Dip 5 in conjunction with dip 3 and 4 of interface- box RLC-M40-2. -
Page 12: Coding And Decoding Of Rear-View Camera (Only Porsche Cayenne With Pcm3)
4.4. Coding and decoding of rear-view camera (only Porsche Cayenne with PCM3) The rear-view camera coding and decoding can be done by Dip 5 in conjunction with dip 3 of interface-box RLC-M40-2. Function Dip 3 Rear-view camera Coding Decoding Dip 5 Activation of the coding/decoding process 5 sec. = start Default setting 1.
Need help?
Do you have a question about the r.LiNK-Interface E09PO28003 and is the answer not in the manual?
Questions and answers