
Related Manuals for Unverferth PARKER 705


Summary of Contents for Unverferth PARKER 705
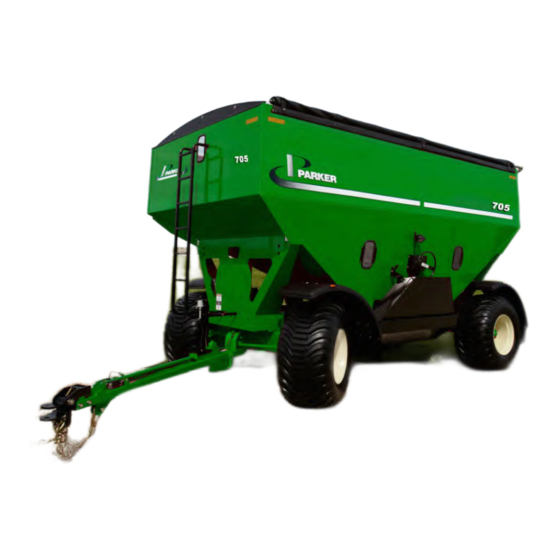
- Page 1 Grain Handling GRAIN WAGON MODEL 705 Serial Number B33450100 & Higher Part No. 301159...
- Page 2 705 GRAIN WAGON — Introduction Foreword This symbol identifies important safety messages. When you see it, read the message that follows and be alert to the possibility of personal injury. Remember, safety instructions stated in this manual are for your protection. Read them carefully and fol- low them closely when working around or using this machine.
- Page 3 • Model number • Serial number All products manufactured by Unverferth Mfg. Co., Inc. are warranted to be free from material and work- manship defects for one full year from time of consumer delivery. Your local dealer will gladly assist you with any warranty questions.
-
Page 4: Table Of Contents
705 GRAIN WAGON — Introduction Table of Contents Section I Safety General Hazard Information ....................... 1-2 Safety Decals ..........................1-3 Following Safety Instructions ..................... 1-4 Before Servicing ......................... 1-4 Before Operating ........................1-5 During Operation ........................1-5 Before Transporting ........................1-6 During Transport ......................... - Page 5 705 GRAIN WAGON — Introduction Table of Contents Section III Operation Tandem Operation ........................3-2 Chute ............................3-3 Weather Guard Tarp Operation ....................3-4 Section IV Maintenance Seasonal Storage ........................4-2 Electrical Schematics ......................... 4-3 Brake System - Brake Shoe Adjustment .................. 4-4 13”...
- Page 6 705 GRAIN WAGON — Introduction Table of Contents Section V Parts Tongue ............................5-2 Running Gear Components ......................5-4 Brake Components ........................5-7 13” Brake Components ......................5-8 Wheels and Tires ........................5-10 Dual Wheels (Optional) ......................5-11 Fender Components ......................... 5-12 Fender Light Components ......................
-
Page 7: Safety
705 GRAIN WAGON — Safety SECTION I Safety General Hazard Information ....................... 1-2 Safety Decals ..........................1-3 Following Safety Instructions ..................... 1-4 Before Servicing ......................... 1-4 Before Operating ........................1-5 During Operation ........................1-5 Before Transporting ........................1-6 During Transport ......................... 1-6 Pressurized Oil ........................... -
Page 8: General Hazard Information
It is true that the designer, the manufacturer, and the safety engineer can help; and they will help, but their combined efforts can be wiped out by a single careless act of the operator. It is said that, “the best kind of a safety device is a careful operator.” We, at Unverferth Mfg. -
Page 9: Safety Decals
705 GRAIN WAGON — Safety Safety Decals REPLACE LOST, DAMAGED, PAINTED, OR UNREADABLE DECALS IMMEDIATELY. IF • PARTS THAT HAVE DECALS ARE REPLACED, ALSO MAKE SURE TO INSTALL NEW DECALS. THESE DECALS INFORM AND REMIND THE OPERATOR WITH OPERATIONAL INFORMATION AND SAFETY MESSAGES. 94754 9008720 9008714... -
Page 10: Following Safety Instructions
705 GRAIN WAGON — Safety Following Safety Instructions • Read and understand this operator’s manual before operating. • All machinery should be operated only by trained and authorized personnel. • To prevent machine damage, use only attachments and service parts approved by the manufac- turer. -
Page 11: Before Operating
705 GRAIN WAGON — Safety Before Operating • Do not stand between towing vehicle and implement during hitching. • Always make certain everyone and everything is clear of the machine before beginning operation. • Verify that all safety shields are in place and properly secured. •... -
Page 12: Before Transporting
705 GRAIN WAGON — Safety Before Transporting • Secure transport chains to towing vehicle before transporting. DO NOT transport without chains. • Check for proper function of all available transport lights. Make sure that all reflectors are clean and in place on machine. Make sure the SMV emblem and SIS decals are visible to approaching traffic. -
Page 13: Pressurized Oil
705 GRAIN WAGON — Safety Pressurized Oil • Relieve pressure before loosening any hydraulic fittings or servicing hydraulic system. • Use a piece of cardboard or wood to detect leaks of hydraulic fluid under pressure. Correct hy- draulic leaks immediately. •... -
Page 14: Preparing For Emergencies
705 GRAIN WAGON — Safety Preparing for Emergencies • Keep a first aid kit and properly rated fire extinguisher nearby. • Keep emergency numbers for fire, rescue, and poison control personnel near the phone. Wearing Protective Equipment • Wear clothing and personal protective equipment appropriate for the job. •... -
Page 15: Set Up
705 GRAIN WAGON — Set Up Section II Set Up Set Up Checklist ..........................2-2 SMV Emblem & SIS Decals ...................... 2-3 Important Checkpoints - Tires and Wheels ................2-4 Important Checkpoints - Tongue and Wheel Alignment ............2-6 Hitch ............................2-7 Transport Chain .......................... -
Page 16: Set Up Checklist
705 GRAIN WAGON — Set Up Set Up Checklist After the wagon has been completely assembled, use the following checklist and inspect the wagon. Check off each item as it is found satisfactory or after proper adjustment is made. o Torque wheel nuts and check tire pressure as specified in MAINTENANCE section. o Tires are inflated to specified air pressure, located in the MAINTENANCE section. -
Page 17: Smv Emblem & Sis Decals
705 GRAIN WAGON — Set Up SMV Emblem & SIS Decals Before the wagon is used the reflective surface of the SMV must face rearward. This may re- quire removal of film protecting the reflective surface or removing and reinstallation of the SMV. -
Page 18: Important Check Points Tires And Wheels
705 GRAIN WAGON — Set Up Important Check Points Tires and Wheels 1. Check tire pressures and maintain at recommended values listed in this manual. • IMPROPERLY TORQUED WHEEL NUTS/BOLTS CAN CAUSE A LOSS OF IMPLEMENT CONTROL AND MACHINE DAMAGE. WHEEL NUTS/BOLTS MUST BE CHECKED REGU- LARLY. - Page 19 705 GRAIN WAGON — Set Up Important Check Points (continued) 4. Wheel hubs (check grease after first season of use.) NOTE: The bearings are pressure packed with grease. An empty hub cavity does not indicate a lack of grease. It is not beneficial to fill the cavity. 5.
-
Page 20: Important Checkpoints - Tongue And Wheel Alignment
705 GRAIN WAGON — Set Up Important Check Points (continued) Tongue and Wheel Alignment Please refer to the following information for specific tongue/wheel alignment. If the tongue does not pull perpendicular to the front axle, the grain wagon can “dog-track”. 1. -
Page 21: Hitch
705 GRAIN WAGON — Set Up Hitch The standard hitch pin size for your grain wagon is 1 1/4”. • Failure to use the correct size hitch pin can cause premature failure of hitch clevis and tractor drawbar. Transport Chain ALWAYS USE TRANSPORT CHAIN WHEN TRANSPORTING IMPLEMENTS. - Page 22 705 GRAIN WAGON — Set Up Steering Axle Stop Adjustment Turn wheels both directions on level ground and adjust axle stop bolts for 1 - 1 1/2” clear- ance between inside tire edge and nearest frame.
-
Page 23: Dual Wheels
705 GRAIN WAGON — Set Up Dual Wheels Raise axle and block adequately for wheel and tire removal. 1. Install inside wheel over ten existing wheel studs (3/4 UNF). 2. Install male/female wheel nuts to secure inside wheel. For torque information please refer to the wheel torque page of this manual. - Page 24 705 GRAIN WAGON — Set Up Brake System • HIGH-PRESSURE FLUIDS CAN PENETRATE THE SKIN AND CAUSE SERIOUS INJURY OR DEATH. SEEK MEDICAL TREATMENT IMMEDIATELY IF INJURED BY HIGH-PRESSURE FLUIDS. USE CARDBOARD OR WOOD TO DETECT LEAKS IN THE HYDRAULIC SYSTEM. •...
- Page 25 705 GRAIN WAGON — Set Up Brake System (continued) Brake Bleeding Use ONLY quality DOT-3 heavy-duty brake fluid. If pressure bleeding equipment is available, follow the manufacturer’s instructions in bleed- ing the system. Manual Bleeding Fill master cylinder with fluid. Bleed rear brakes first (farthest from master cylinder). Loosen the bleeder screw located in wheel cylinder one turn.
-
Page 26: Electrical Hook-Up
If your tractor does not have this type of receptacle, an SAE J-560 seven-point socket can be purchased from your Unverferth dealer (order Part #92824). The wiring schematic for this cart complies with ASABE Standards. -
Page 27: Adjustable Chute
705 GRAIN WAGON — Set Up Adjustable Chute Your grain wagon features an adjustable-height unloading chute. The adjustment bolt is lo- cated under the door area of the grain wagon. When the bolt is turned in (clockwise), the unloading height of the chute increases. When the bolt is turned out (counter-clockwise), the chute height is lowered. -
Page 28: Fender Installation - Optional
705 GRAIN WAGON — Set Up Fender Installation - Optional • EYE PROTECTION AND OTHER APPROPRIATE PERSONAL PROTECTIVE EQUIPMENT MUST BE WORN WHILE SERVICING IMPLEMENT. KEEP HANDS CLEAR OF PINCH POINT AREAS • NOTE: All capscrews and nuts which tighten directly against the plastic fenders must have a flat washer to provide adequate surface bearing. - Page 29 705 GRAIN WAGON — Set Up Fender Installation - Optional (continued) Rear Fenders 2. Position rear fenders over top arms and secure with capscrews, fender washers and lock nuts. 3. Assemble mud flaps and bottom arms (RH & LH) to rear fenders as shown with capscrews, fender washers, and lock nuts.
- Page 30 705 GRAIN WAGON — Set Up Fender Installation - Optional (continued) Front Fenders 4. Bolt front top arms to frame with capscrews and flange nuts. 5. Use the fender mount plate (300672B) for mounting the front fender to the top arms on the standard tire fender kit.
- Page 31 705 GRAIN WAGON — Set Up Fender Installation - Optional (continued) Front Fenders 6. Mount tube to frame brackets with flange bolts and flange nuts. Refer to previous page for bolt and bracket locations. Assemble tube to rear of FIG. 2-24 bracket as shown.
- Page 32 705 GRAIN WAGON — Set Up Fender Installation - Optional (continued) 8. Bolt front fenders to tube with 3/8 x 2 1/2 capscrews, fender washers and lock nuts in top holes. 9. Assemble mud flaps and back plates to front fenders with 3/8 x 1 capscrews, fender washers and lock nuts in bottom holes.
- Page 33 705 GRAIN WAGON — Set Up Fender Installation - Optional (continued) Fenders for 425, 445, 455, 460 Tires Sizes Use these hole locations when using Tire Sizes. Use outer holes for 425, 445, 455, 460 Tires. FIG. 2-29 2-19...
- Page 34 705 GRAIN WAGON — Set Up Fender Installation for Wide Fenders - Optional (continued) Fenders for 560, 600 & Dual Tire Sizes Use these hole locations when using larger tires sizes (560, 600 & Duals) for clearance pur- poses. FIG. 2-31 Front Mount Mount tube as shown on rear side of bracket.
- Page 35 705 GRAIN WAGON — Set Up Fender Installation - Optional (continued) • EYE PROTECTION AND OTHER APPROPRIATE PERSONAL PROTECTIVE EQUIPMENT MUST BE WORN WHILE SERVICING IMPLEMENT. Fender Light Installation - Optional 1. Center mounting bezel in molded fender relief. FIG. 2-1 Once located, use mounting bezel as a tem- plate and drill two 3/16”...
- Page 36 705 GRAIN WAGON — Set Up Fender Installation - Optional (continued) Fender Light Installation - Optional 3. Assemble mounting bezel to fender using pro- FIG. 2-4 vided hardware. Position light terminals over 1 1/16” diameter hole and push light into mount- ing bezel for a snap fit, see figure 2-4.
- Page 37 705 GRAIN WAGON — Set Up Fender Installation - Optional (continued) Fender Light Installation - Optional (continued) 4. Locate front and rear fender harness center Front fender harness break-out leads over main harness leads on the running gear center pull tube and connect the same color wires.
- Page 38 705 GRAIN WAGON — Set Up Fender Installation - Optional (continued) Wiring (Where Applicable) 6. Install perimeter wiring harness and connect to main harness. Crimp light wires to harness connec- tors, see Fig. 2-9. Assemble lights to fenders, with ground eyelets on mounting bolts. 7.
-
Page 39: Weather Guard Tarp Installation - Optional
705 GRAIN WAGON — Set Up Weather Guard Tarp Installation - Optional FALLING OBJECTS CAN CAUSE SERIOUS INJURY OR DEATH. DO NOT WORK UNDER • THE MACHINE AT ANY TIME WHILE BEING HOISTED. BE SURE ALL LIFTING DEVICES AND SUPPORTS ARE RATED FOR THE LOADS BEING HOISTED. THESE ASSEMBLY INSTRUCTIONS WILL REQUIRE SAFE LIFTING DEVICES UP TO 250 LBS. - Page 40 705 GRAIN WAGON — Set Up Weather Guard Tarp Installation - Optional (continued) 3. Assemble the bow brackets and latch plates: Models Using Bow Brackets - 300977B Assemble bow brackets (300977B) and Fig. 2-3 latch plate to the right side panel or side board with torx head screw (9005312) and flange nut (91263).
- Page 41 705 GRAIN WAGON — Set Up Weather Guard Tarp Installation - Optional (continued) Secure latch plate to front of panel with LATCH eyebolt (9004548) and two flange nuts PLATE (91263). See Figure 2-5. The latch plates are divided in the center of the wagon with pre punched holes for ease of assembly.
- Page 42 705 GRAIN WAGON — Set Up Weather Guard Tarp Installation - Optional (continued) NOTE: Ensure countersunk capscrews (902703- 046) are flush with the top of bow weldment Countersunk Capscrew (301209B). See Figure 2-8. (902703-046) 6. Tighten all hardware. Tarp Bow (301209B) Fig.
- Page 43 705 GRAIN WAGON — Set Up Weather Guard Tarp Installation - Optional (continued) 7. Attach the cable assemblies (9005707) to the rear end cap holes, see FIG. 2-10. Run ca- bles over the top of the bows (301209B - SN B37690100 &...
- Page 44 705 GRAIN WAGON — Set Up Weather Guard Tarp Installation - Optional (continued) 8. (2-person operation) On a clean floor, lay the tarp out flat with the raw edge of the hems and pockets down and the exterior side facing up. 9.
- Page 45 705 GRAIN WAGON — Set Up Weather Guard Tarp Installation - Optional (continued) 11. Insert knotted stretch rope (221722) through flat washer (9405-074), plastic tube (221668) and end plug (9004947). Place these items as an assembly into front end of 2” roll tube weld- 2”...
- Page 46 705 GRAIN WAGON — Set Up Weather Guard Tarp Installation - Optional (continued) Hand Crank Handle Fig. 2-18 15. Locate the bracket just above the box fold line, centered on the box. Using self-tapping screws (96972) mount bracket to box and se- cure using flange nut (91263).
-
Page 47: Unloading Side Reversal
705 GRAIN WAGON — Set Up Unloading Side Reversal - Optional • FALLING OBJECTS CAN CAUSE SERIOUS INJURY OR DEATH. DO NOT WORK UNDER THE MACHINE AT ANY TIME WHILE BEING HOISTED. BE SURE ALL LIFTING DEVICES AND SUPPORTS ARE RATED FOR THE LOADS BEING HOISTED. THESE ASSEMBLY INSTRUCTIONS WILL REQUIRE SAFE LIFTING DEVICES UP TO 4,000 LBS. - Page 48 705 GRAIN WAGON — Set Up Notes 2-34...
- Page 49 705 GRAIN WAGON — Operation Section III Operation Tandem Operation ........................3-2 Chute ............................3-3 Weather Guard Tarp Operation ....................3-4...
- Page 50 705 GRAIN WAGON — Operation Tandem Operation When pulling wagons in the tandem option, please do the following: 1. Connect the electrical cord. 2. Hook up the safety chain on the lead wagon that is sized for the total load. 4.
-
Page 51: Chute
705 GRAIN WAGON — Operation Chute The operator should check to assure the chute is in the transport position and in the latch prior to transporting. Adjust the rubber bumper so there is adequate pressure on the latch so it will not unlatch when being pulled. Adjust rubber bumper for... -
Page 52: Weather Guard Tarp Operation
705 GRAIN WAGON — Operation Weather Guard Tarp • TO PREVENT PERSONAL INJURY OR DEATH, DO NOT ALLOW ANYONE ON A CLOSED TARP. TARP SYSTEM IS NOT DESIGNED TO SUPPORT A PERSON. • FALLING OBJECTS CAN CAUSE SERIOUS INJURY OR DEATH. REMOVE ACCUMULATED WATER/SNOW/ICE OR ANY OTHER OBJECTS FROM TARP BEFORE OPENING TARP. • Do not open or close tarp while moving or in high wind conditions. Damage to the tarp may occur. - Page 53 705 GRAIN WAGON — Operation Weather Guard Tarp (continued) Procedure 1. Using both hands, carefully remove crank from holder. 2. Roll tarp to the desired location, choosing either a fully open or fully closed position. 3. To close the tarp, roll the main tarp tube clockwise up under the latch plate. Next, bring the crank handle down perpendicular to the ground.
- Page 54 705 GRAIN WAGON — Operation Notes...
-
Page 55: Maintenance
705 GRAIN WAGON — Maintenance SECTION IV Maintenance Seasonal Storage ........................4-2 Electrical Schematics ......................... 4-3 Brake System - Brake Shoe Adjustment .................. 4-4 13” Surge Brake Information ....................4-5 Brake System - Troubleshooting Guide ..................4-7 Tarp - Troubleshooting Guide ....................4-8 Tarp - Inspection and Maintenance .................. -
Page 56: Seasonal Storage
705 GRAIN WAGON — Maintenance Seasonal Storage Your wagon is an important investment. Spend a little time to protect it from destructive rust and corrosion, You will be repaid in longer service life and better performance. Do the following before placing the wagon in storage: 1. -
Page 57: Electrical Schematics
705 GRAIN WAGON — Maintenance Electrical Schematics The following schematics comply with ANSI/ASABE Standards for tractors. NOTE: Wiring specifications may be different for older tractor models. Consult your tractor operator’s manual or dealer for proper wiring and installation. -
Page 58: Brake System - Brake Shoe Adjustment
705 GRAIN WAGON — Maintenance Brake System Brake Shoe Adjustment FALLING OBJECTS CAN CAUSE SERIOUS INJURY OR DEATH. DO NOT WORK UNDER THE • MACHINE AT ANY TIME WHILE BEING HOISTED. BE SURE ALL LIFTING DEVICES AND SUP- PORTS ARE RATED FOR THE LOADS BEING HOISTED. THESE ASSEMBLY INSTRUCTIONS WILL REQUIRE SAFE LIFTING DEVICES UP TO 12,000 LBS. -
Page 59: 13" Surge Brake Information
705 GRAIN WAGON — Maintenance 13” Surge Brake Information Brake Shoe Centering (2 Person Operation ~ 15 to 20 Minutes Per Brake Assembly) Master Cylinder Cover WHEN WORKING AROUND THE MA- • CHINE, BE SURE IT IS SECURELY BLOCKED; FAILURE TO DO SO COULD RESULT IN TIPPING OR MOVEMENT OF MACHINE, CAUSING SEVERE BODILY HARM. - Page 60 705 GRAIN WAGON — Maintenance 13” Surge Brake Information (continued) 3. Spin tire in direction of forward travel of the Fig. 5 wagon. While tire is spinning, increase the brakes using the shoe adjustment star wheel until full contact of brakes can be heard (Fig. 5). 4.
-
Page 61: Brake System - Troubleshooting Guide
705 GRAIN WAGON — Maintenance Brake System - Troubleshooting Guide SYMPTOM REMEDY BRAKES DRAGGING/LOCK-UP Flush brake system Disassemble slave cylinders inside brake clusters. Clean cylinder and cylinder walls. Reassemble and adjust. Install new brake fluid. BRAKE DRUMS HOT/ONE OR MORE Re-adjust brakes. -
Page 62: Tarp - Troubleshooting Guide
705 GRAIN WAGON — Maintenance Tarp - Troubleshooting Guide PROBABLE CAUSE CORRECTION 1. Bows may be bent or adjusted too low. 2. Missing or loose ridge strap. Re- Tarp sags in middle areas place or retighten. 3. U-joint may need to be adjusted on splined shaft to provide more ten- sion. -
Page 63: Wheels & Tires
705 GRAIN WAGON — Maintenance Wheels and Tires Wheel Nut Torque Requirements • IMPROPERLY TORQUED WHEEL NUTS/BOLTS CAN CAUSE A LOSS OF IMPLEMENT CONTROL AND MACHINE DAMAGE. TORQUE WHEEL NUTS/BOLTS TO VALUES IN TABLE. CHECK TORQUE BEFORE USE, AFTER ONE HOUR OF UNLOADED USE OR AFTER FIRST LOAD, AND EACH LOAD UNTIL WHEEL NUTS/BOLTS MAINTAIN TORQUE VALUE. -
Page 64: Tire Pressure
705 GRAIN WAGON — Maintenance Wheels and Tires (continued) Tire Pressure • The following is to be used as a general guide for tire inflation and figures can vary depending on the specific tire size used. It is important that tires are inspected after unit is loaded. Start with pressure indicated by your tire size and bushel capacity. -
Page 65: Complete Torque Chart
705 GRAIN WAGON — Maintenance Complete Torque Chart Capscrews - Grade 5 NOTE: • Grade 5 capscrews can be identified by three radial dashes on the head. • For wheel torque requirements, refer to Wheels and Tires. • Tighten U-bolts evenly and equally to have the same number of threads exposed on each end. FOOT NEWTON SIZE... -
Page 66: Brake Line Fittings
705 GRAIN WAGON — Maintenance Brake Line Fittings – Torque and Installation INVERTED FLARE 1. Lubricate threads and assemble to fitting body. Nut should be turned hand tight. 2. Tighten assembly with wrench until a solid feel- ing is encountered. From that point, apply a one-sixth turn. - Page 67 705 GRAIN WAGON — Parts SECTION V Parts Tongue ............................5-2 Running Gear Components ......................5-4 Brake Components ........................5-7 13” Brake Components ......................5-8 Wheels and Tires ........................5-10 Dual Wheels (Optional) ......................5-11 Fender Components ......................... 5-12 Fender Light Components ......................5-14 Gravity Box..........................
-
Page 68: Tongue
705 GRAIN WAGON — Parts Tongue Please visit www.unverferth.com/parts/ for the most current parts listing. NOTE: The cap O-ring should be lubricated with brake fluid prior to hand tightening. Hand tighten ONLY! ITEM DESCRIPTION PART NO. QTY. NOTES Tongue Assembly =Green=... - Page 69 705 GRAIN WAGON — Parts Tongue Please visit www.unverferth.com/parts/ for the most current parts listing. ITEM DESCRIPTION PART NO. QTY. NOTES Brace Bracket 300082B Grommet, Snap Bushing 9001815 Capscrew, 5/16-18UNC x 1/2 9390-026 Grade 5 Capscrew, 5/16-18UNC x 3/4 9390-028...
-
Page 70: Running Gear Components
705 GRAIN WAGON — Parts Running Gear... -
Page 71: Running Gear Components
705 GRAIN WAGON — Parts Running Gear ITEM DESCRIPTION PART NO. NOTES Hub Sub Assembly =Green= 220416G Includes Items 2,3,4 Hub Sub Assembly =Red= 220416R Bearing Cup #453A 4.25" OD 92461 Drive-In Stud Bolt 3/4-16UNF x 2 1/2 92457 Bearing Cup #33462 4 5/8"... - Page 72 705 GRAIN WAGON — Parts Running Gear (continued) ITEM DESCRIPTION PART NO. NOTES Tongue Pivot Bolt 1 1/4-7UNC x 9 1/2 9001782 Heavy Hex Jam Nut 1 3/4-5UNC w/Set Screw 9005290 Set Screw 3/8-16UNC Grease Zerk 1/4-28 91160 Thrust Bearing 2” 92433 Brake Cluster LH 93670...
-
Page 73: Brake Components
705 GRAIN WAGON — Parts Brake Components ITEM DESCRIPTION PART NO. QTY. NOTES Inverted Flare Cross 300184 Brake Line, 45” Bundyweld 300472 Bleeder Hose, 5/16 Dia. x 3/16 Dia. x 10 300480 Brake Hose, 42” 9005636 Rubber Grommet 9005653 Bundyweld Tube, 3/16 Dia. x 139 9006923 Bundyweld Tube, 3/16 Dia. -
Page 74: 13" Brake Components
705 GRAIN WAGON — Parts 13” Brake Components... - Page 75 705 GRAIN WAGON — Parts 13” Brake Components ITEM DESCRIPTION PART NO. QTY. NOTES RH Cluster Complete 93669 LH Cluster Complete 93670 Wheel Cylinder Repair Kit 91646 Back Plate Assembly 91609 Front Brake Shoe Assembly 91610 Front Shoe Lever 91611 Rear Brake Shoe Assembly 91612 Wheel Cylinder Assembly - Right...
-
Page 76: Wheels And Tires
705 GRAIN WAGON — Parts Wheels and Tires TIRES For questions regard- ing new tire warranty, please contact your local original equipment tire dealer. Used tires carry no warranty. ITEM DESCRIPTION PART NO. QTY. NOTES Wheel & Tire Assembly 17514 455/65R22.5 - Used Wheel &... -
Page 77: Dual Wheels (Optional)
705 GRAIN WAGON — Parts Dual Wheels (Optional) ITEM DESCRIPTION PART NO. QTY. NOTES Stud Bolt, 3/4-16 UNF x 2 1/2 92457 Existing Wheel & Tire Assembly 9002752/96285 315/80R22.5 (Used) Wheel Only 9002752 9 x 22.5 Wheel Nut, Inner 9001980 Wheel Nut, Outer 9001981 Valve Stem... -
Page 78: Fender Components
705 GRAIN WAGON — Parts Fender Components 5-12... -
Page 79: Fender Light Components
705 GRAIN WAGON — Parts Fender Components ITEM DESCRIPTION PART NO. NOTES Standard Tire Fender Kit =Black= 301086B 220725B For Standard Tires Back Fender Plate =Black= 220877B For Wide Tires Film, Paint Protection 220890 For Standard & Wide Tires 221259 For Standard Tires Front Fender 221261... -
Page 80: Fender Light Components
705 GRAIN WAGON — Parts Fender Light Components For Standard & Wide Tires 5-14... - Page 81 705 GRAIN WAGON — Parts Fender Light Components For Standard & Wide Tires ITEM DESCRIPTION PART NO. NOTES Decal, Important Instructions 251027 Cable Tie, 6” Long 9000106 Butt Connector, 14-16 GA. 9000166 Fender Light Harness 9006184 Amber LED Light 9006333 Pigtail Harness 9006334 Bezel Light Mount...
-
Page 82: Gravity Box
705 GRAIN WAGON — Parts Gravity Box 5-16... - Page 83 705 GRAIN WAGON — Parts Gravity Box ITEM DESCRIPTION PART NO. NOTES Ladder Bracket =Black= 220287B Ladder Weldment, 81” Long =Black= 222013B Window Molding 271951 Window Bracket =Black= 250461B Brake Cover Weldment =Black= 301207B Trailer Connector Holder 9001968 Large Flange Screw, 5/16-18UNC x 3/4 91256 Flange Screw, 3/8-16UNC x 1 Gr.5 91262...
-
Page 84: Door Wheel With Gear Reduction
705 GRAIN WAGON — Parts Door Wheel with Gear Reduction 5-18... - Page 85 705 GRAIN WAGON — Parts Door Wheel with Gear Reduction ITEM DESCRIPTION PART NO. NOTES Door Wheel w/Gear Reduction 222059 Incl. Items 1-20, 25, 26 Door Wheel Assembly 220060B Capscrew, 3/8-16 UNC x 2 9390-059 Lock Washer, 3/8 9404-021 Hex Nut, 3/8-16 UNC 9394-006 Plate 222062B...
-
Page 86: Decals
705 GRAIN WAGON — Parts Decals 75 MM BLACK TEXT ON WHITE BACKGROUND SCORE LINE PREMASK REQUIRED WHITE BACKGROUND LOCATED FILM 75 MM BLACK TEXT ON WHITE BACKGROUND SCORE LINE PREMASK REQUIRED WHITE BACKGROUND /8" PART NUMBER LOCATED ON BACKING FILM 75 MM BLACK TEXT ON WHITE BACKGROUND SCORE LINE... -
Page 87: Touch-Up Paint
705 GRAIN WAGON — Parts Decals ITEM DESCRIPTION PART NO. NOTES Decal, Door Open 9001898 Decal, Tongue Pivot 9002187 Red Reflector - 2 x 9 9003126 Amber Reflector - 2 x 9 9003127 Decal, No Riders 9003476 Decal, Stripe 9004175 Decal, Parker 9004172 Decal, 705... -
Page 88: Kick Back Chute And Smv Components
705 GRAIN WAGON — Parts Kick Back Chute and SMV Components 5-22... - Page 89 705 GRAIN WAGON — Parts Kick Back Chute and SMV Components ITEM DESCRIPTION PART NO. NOTES Kick Back Chute Weldment =Black= 222180B Latch Bushing 301081 Chute Weldment =Black= 301082B Manual Holder 900552 Capscrew, 1/4-20UNC x 3/4 9390-003 Grade 5 Capscrew, 1/4-20UNC x 2 1/4 9390-010 Grade 5 Capscrew, 1/2-13UNC x 1...
-
Page 90: Chute And Latch Components
705 GRAIN WAGON — Parts Chute and Latch Components 5-24... - Page 91 705 GRAIN WAGON — Parts Chute and Latch Components ITEM DESCRIPTION PART NO. NOTES Door Weldment =Black= 220020B Door Rack Bar =Black= 220033B Refer to “Door Wheel with Gear Door Lift Assembly 222059 Reduction” in this Section for Parts Deflector Plate =Black= 273687B Deflector 301035...
-
Page 92: Electrical Components
705 GRAIN WAGON — Parts Electrical Components 5-26... - Page 93 705 GRAIN WAGON — Parts Electrical Components ITEM DESCRIPTION PART NO. QTY. NOTES Bracket - Socket 221527B Front Wire Harness 218” 9006979 Harness - Rear, Wagon 9006699 Harness - Chute 9006330 Light Assembly 9500801 Large Flange Screw, 5/16-18UNC x 3/4 Gr.5 91256 Large Flange Nut, 5/16-18UNC Gr.5 91257...
-
Page 94: Weather Guard Tarp Components - Optional
705 GRAIN WAGON — Parts Weather Guard Tarp Components - Optional ITEM DESCRIPTION PART NO. NOTES Tarp Kit w/End Caps 221637 Capscrew, 3/8-16UNC x 4 1/2 TA0-907131-0 Grade 5 Roll Tube Weldment 221577 Fixed Tube Weldment 221580 Pipe - 132" 221582 5-28... - Page 95 705 GRAIN WAGON — Parts Weather Guard Tarp Components - Optional ITEM DESCRIPTION PART NO. NOTES Plate - Latch 90" (Front) 221780 Plate - Latch 90" (Rear) 221781 Tube Crank Holder Weldment 220579B Bungee Cord 3/8” Dia. x 156” 221721 Plug, 7/16 9005727 Tarp Handle Weldment...
- Page 96 MANUALS\\301159///June 2014-0//July 2020-1//July 2020-2//September 2021-3...
Need help?
Do you have a question about the PARKER 705 and is the answer not in the manual?
Questions and answers