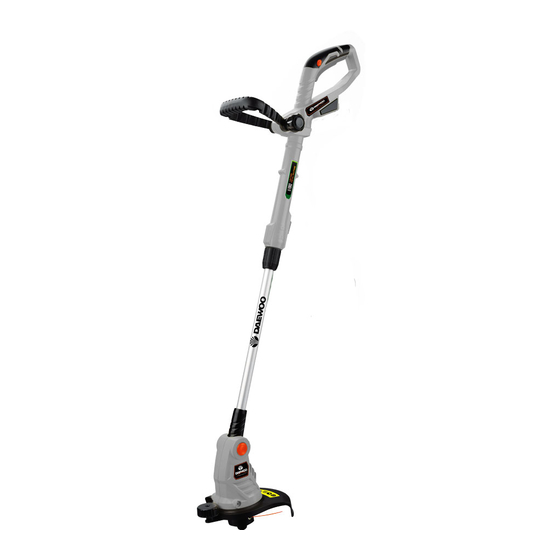
Summary of Contents for Daewoo DALGT18-1
- Page 1 DALGT18-1 Lithium Grass Trimmer USER'S MANUAL www.daewoopowerproducts.com Manufactured under license of Daewoo International Corporation, Korea...
-
Page 2: Table Of Contents
INDEX 1. USE AND TAKING CARE OF YOUR POWER TOOL ................7 2. INTENDED USE AND COMPONENTS OF THE GRASS TRIMMER ............. 10 3. TECHNICAL DATA ..........................11 4. BEFORE USE ............................12 5. OPERATION ............................13 6. TRANSPORTATION ..........................15 7. - Page 6 BEFORE YOU START USING THE MACHINE READ THOROUGHLYTHISMANUAL. Keep this documentforfuture reference. WARNING! Read all safety warnings marked with a symbol and all operating safety instruc- tions. To limit the risk of re, electric shock and injury while using the device, follow all operating safety instructions and tips provided below.
-
Page 7: Use And Taking Care Of Your Power Tool
b) lt is necessary to predict steps, watch and keep common sense when using power tools. Do not operate power tools when you are tired, under in uence of drugs, medicine or alcohol. A moment of inattention while operating a power tool may result in serious personal injury. c) Use personal protective equipment (PPE). - Page 8 protected against release with original devices intended for this purpose. k) Store power tools in a dry, dust and water-protected place. l) Carry your power tool in its original packaging to provide protection against mechanical damage. m) Keep handles and grip surfaces clean and free from oil and grease. Secure grip and control over the tool in unexpected circumstances are impossible if handles and grip surfaces are slippery.
- Page 9 injury to the user and damage to the device. 20. Disconnect the battery when the trimmer is not used, when it is being relocated, and before any works on it (such as adjustment or cleaning). 21. Always make sure ventilation opening sare free of dirt. 22.
-
Page 10: Intended Use And Components Of The Grass Trimmer
b) Do not disassemble the charger. c) The charger is designed exclusively for indoor use. It must not be exposed to water or moisture. d) Charge only in an ambient temperature between 15-25 degrees. e) Do not insert metal objects of anykind into the charger. Residual risk Despite its intrinsically sale design, there is sorne residual risk to the device, which can be elimina- ted solely by the user. -
Page 11: Technical Data
DEVICE COMPONENTS: The numbering of de vice elements refers to the drawing on pages 3-5 of the instruction manual: Fig.A Fig.D 1. Battery* 16. Charger* 2. On/off switch 17. Adapter* 3. Main handle 18. Battery level indicator button* 4. Safety button 19. -
Page 12: Before Use
tions, such as maintenance of the electric tool and work tools, assurance of proper hand temperatu- re, or determination of the sequence of work operations. The declared total vibrations and declared noise emissions were measured in accordance with a standard test method and may be used fortool comparison. The declared total vibrations and noise emissions can be used in preliminary exposure assessment. -
Page 13: Operation
Moving the trimmer head 1. Pressthe release button (7) (see Fig. F). 2. Rotatethe telescopicshaft (9) by 180º, to set the trimmer head (11) in the vertical trimming position (orfor edge trimming), and release the button to lockt he head in place. Manual adjustment of the trimmer line NOTE: Disconned the battery before adjusting the ne. -
Page 14: Transportation
1. Switch the trimmer off and wait for all parts to stop moving. 2. Remove the battery. 3. Remove the spool holder (15) from the trimmer. To do this, hold the outer part of the spool holder base (23) and press the spool holder release buttons (26) with the other hand at the same time. Rotate the spool holder as indicated by the REMOVE arrow (see Fig.11, page 5). -
Page 15: Troubleshooting Guide
7. TROUBLESHOOTING GUIDE PROBLEM POSSIBLE CAUSE REMEDY The grass trimmer does not The grass trimmer does not Check the battery status, recharge or replace with a new one work. work. when necessary. When the problem persists hand over the tool for repair at a service workshop. - Page 17 Part name Part name Outset Self-tapping screw Discover Spring MOW-ET Protect the steel wire Tighten the pushbutton N0E-15ET Spring Self-tapping screw Left and right rod housing Left and right handle case YOM- Lock the pushbutton Resistance Protective shield The Blade Body contact piece YFT47- Self-tapping screw...
-
Page 18: Warranty
WARRANTY CARD Product model Date of sale Company Serial number Client's signature Username The product is in good conditions and fully complete. Read and agree the terms of the warranty. GUARANTEE The warranty period starts from the date of sale of the products and covers 2 years for all power products. During the warranty period, free failures caused due to the use of poor-quality materials in the production and manufacturer workmanship admitted fault are removed. - Page 19 Manufactured under license of Daewoo International Corporation, Korea...


Need help?
Do you have a question about the DALGT18-1 and is the answer not in the manual?
Questions and answers