Kostal PIKO CI Operating Manual
Solar inverter 30/50/60 kw
Hide thumbs
Also See for PIKO CI:
- Short manual (80 pages) ,
- Quick start manual (12 pages) ,
- Operating manual (141 pages)
Table of Contents
Advertisement
Quick Links
Advertisement
Table of Contents

Related Manuals for Kostal PIKO CI


Summary of Contents for Kostal PIKO CI
- Page 1 PIKO CI Solar inverter 30/50/60 kW Operating manual...
- Page 2 All names, trademarks, product names and other designations used in this manual may be legally pro- tected even if not indicated as such (e.g. as a trademark). KOSTAL Solar Electric GmbH assumes no li- ability for their free usage. The illustrations and texts have been compiled with great care. However, the possibility of errors cannot be ruled out.
-
Page 3: Table Of Contents
Types of communication ..................... Communication via LAN ...................... Communication via RS485 ....................3.10 Communication via WiFi ...................... 3.11 Connecting the KOSTAL Smart Energy Meter ..............3.12 Connecting central grid and system protection..............3.13 Connecting ripple control receiver ..................3.14 Closing the inverter...................... - Page 4 Connecting inverters with KOSTAL PIKO CI app ..............Logging in as an installer ..................... KOSTAL PIKO CI app - menu structure................KOSTAL PIKO CI app - menu description ................100 System monitoring ......................112 The log data ........................113 Retrieving log data....................... 114 The KOSTAL Solar Portal ....................
-
Page 5: General Information
1.6 Proper use ........................11 1.7 EU Declaration of Conformity ..................12 1.8 Notes in this manual......................13 1.9 Important safety instructions ................... 15 1.10 Navigation in the document..................... 18 1.11 Labels on the device ....................... 19 © 2022 KOSTAL Solar Electric GmbH... -
Page 6: Contact
General information 1.1 Contact Thank you for choosing a device from KOSTAL Solar Electric GmbH. If you have any technical questions, please call our service hotline: ■ Germany and other countries (language: German, English): +49 (0)761 477 44-222 ■ Switzerland: +41 32 5800 225 ■... -
Page 7: About This Manual
Activities that may only be carried out by an electrician are marked separately. Pay particular attention to the information regarding safe usage. KOSTAL Solar Electric GmbH assumes no liability for damages arising from the non-ob- servance of this manual. -
Page 8: Target Group
■ Only carry out activities for which you have been qualified and instructed. ■ Observe the references to electricians in this manual. © 2022 KOSTAL Solar Electric GmbH... -
Page 9: Exclusion Of Liability
Factory settings may only be changed by qualified electrical installers or persons with at least comparable or higher technical qualifications, e.g. trades professionals, technicians or engineers. When doing so, all requirements are to be observed. © 2022 KOSTAL Solar Electric GmbH... -
Page 10: Open Source Licence
GPL and/or LGPL. For more details on this and a list of the Open Source software used and the associated li- cence texts, go to the Licences section on the website (Webserver) under Licences. © 2022 KOSTAL Solar Electric GmbH... -
Page 11: Proper Use
The inverter may therefore only be used for its intended purpose. All components fitted on the inverter or in the system must satisfy the standards and guidelines that apply in the country of installation. © 2022 KOSTAL Solar Electric GmbH... -
Page 12: Eu Declaration Of Conformity
General information 1.7 EU Declaration of Conformity KOSTAL Solar Electric GmbH hereby declares that the devices described in this document complies with the basic requirements and other relevant conditions of the directives listed below. ■ Directive 2014/30/EU (on the harmonisation of the laws of the Member States relating to electromagnetic compatibility (EMC)) ■... -
Page 13: Notes In This Manual
These must be followed at all times. The information notes also point out that failure to observe instructions may result in damage to property or financial damages. Warning symbols Danger © 2022 KOSTAL Solar Electric GmbH... - Page 14 Danger due to electrical shock and discharge Danger due to burns Symbols within the information notes The symbol indicates activities that may only be carried out by an electrician. Information or tip Important information Damage to property possible © 2022 KOSTAL Solar Electric GmbH...
-
Page 15: Important Safety Instructions
Wear suitable protective equipment during all work on the product. CAUTION Danger of burns from hot housing parts Housing parts can become hot during operation. Touching hot housing parts can cause burns. ■ During operation, only touch the inverter's housing cover. © 2022 KOSTAL Solar Electric GmbH... - Page 16 Work that could affect the electrical power system of the relevant energy supply com- pany at the site of the solar power feed-in may only be carried out by qualified electri- cians expressly authorised (licensed) by the energy supply company. This includes changes to the factory-preset parameters. © 2022 KOSTAL Solar Electric GmbH...
- Page 17 Cost saving by using a type A RCD A type A RCD ≥ 300 mA can be used on the AC side as a residual current device (RCD). Set the compatibility with a type A RCD in the Webserver. © 2022 KOSTAL Solar Electric GmbH...
-
Page 18: Navigation In The Document
To simplify navigation through this document, it contains clickable areas. The table of contents takes you to the specified chapter in one click. You can navigate to the referenced points in the document within the instruction text using the cross-references. © 2022 KOSTAL Solar Electric GmbH... -
Page 19: Labels On The Device
Danger due to electrical shock and discharge Danger due to burns Danger notice Danger due to electrical shock and discharge. Wait five minutes (discharge time of the capacitors) after shutdown 5 min Additional earth connection Observe and read operating manual © 2022 KOSTAL Solar Electric GmbH... - Page 20 General information Symbol Explanation Device may not be disposed of with household waste. Observe the local application of disposal requirements. CE marking The product satisfies the applicable EU requirements. © 2022 KOSTAL Solar Electric GmbH...
-
Page 21: Device And System Description
Device and system description 2. Device and system description 2.1 System overview......................22 2.2 Device overview ......................23 2.3 Functional overview......................26 © 2022 KOSTAL Solar Electric GmbH... -
Page 22: System Overview
Device and system description 2.1 System overview PV strings PIKO CI 30 / 50 or 60 inverter AC line circuit breaker Energy meter Distributor Public grid Communication connection (optional) Router, PC connection Internet © 2022 KOSTAL Solar Electric GmbH... -
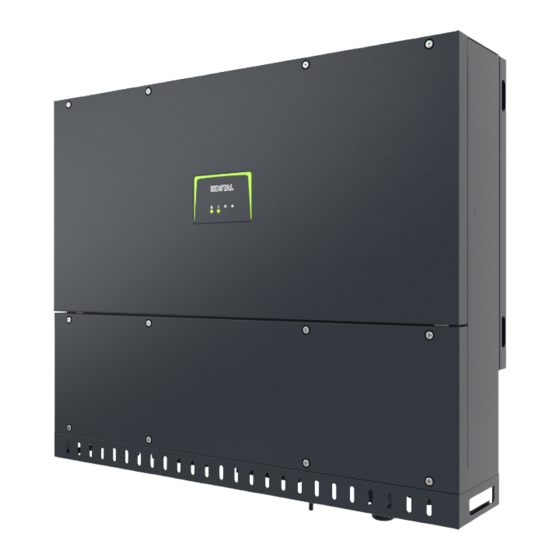
Page 23: Device Overview
WiFi antenna COM1 connection panel (communication module) COM2 connection panel (RS485, LAN, digital inputs) Connection for mains cable Connections for PV modules Additional PE connection (outside) Cover for COM2 connection panel Cover for grid connection © 2022 KOSTAL Solar Electric GmbH... - Page 24 WiFi antenna COM1 connection panel (communication module) COM2 connection panel (RS485, LAN, digital inputs) Cable opening for mains cable DC switch Connections for PV modules Additional PE connection (outside) Cover for COM2 connection panel © 2022 KOSTAL Solar Electric GmbH...
- Page 25 Device and system description Status LED The status LED provides information about the operational status of the inverter. For more information: Event codes, Page 125. Status of PV modules Status of grid Status of communication Warning message © 2022 KOSTAL Solar Electric GmbH...
-
Page 26: Functional Overview
Three-phase alternating current The PIKO CI inverters generate three-phase alternating current and, with their high output power, are optimised for use in medium and large PV systems. This makes them suitable for solar power plants, electricity farms and similar applications. The inverters can be oper- ated in TT, TN-C, TN-S and TN-C-S grids. - Page 27 App functions The KOSTAL PIKO CI app, which is available free of charge, provides a graphical user inter- face. The app is used to commission and configure the inverter and to display its status: ■...
- Page 28 Device and system description KOSTAL Solar Portal The KOSTAL Solar Portal allows operation of the inverters to be monitored via the Internet. This protects your investment in a PV system against yield losses, e.g. through active e-mail alerts if events occur.
- Page 29 Event codes, Page 125. Service concept For service purposes the event codes can be read out via the KOSTAL PIKO CI app or the KOSTAL Solar Portal. Your installer or service partner can then decide what action to take before on-site deployment. In this way, multiple on-site deployment can be avoided.
- Page 30 Just enter the system data and individual customer data and receive a recommendation for a KOSTAL solar inverter tailored to the planned solar system. All KOSTAL solar inverters are considered for this. In addition, the customer's electricity consumption is considered and the possible self-consumption and potential self-sufficiency quotas are displayed using standard load profiles.
-
Page 31: Installation
3.8 Communication via LAN....................49 3.9 Communication via RS485....................51 3.10 Communication via WiFi....................53 3.11 Connecting the KOSTAL Smart Energy Meter ..............54 3.12 Connecting central grid and system protection ............... 61 3.13 Connecting ripple control receiver ................... 63 3.14 Closing the inverter ...................... -
Page 32: Transport And Storage
Do not tip the inverter onto its side. Avoid tilted positions. ■ Only place the inverter down on its back. ■ Do not place the inverter down on its side or on the top. © 2022 KOSTAL Solar Electric GmbH... -
Page 33: Scope Of Delivery
Plug seals for routing communication cables with 3 plugs Plug connector for communication interface 12× core end sleeves for communication cables WiFi antenna Removal tool for DC plug connectors DC plug connector (each DC input: 1× plug, socket) Short manual © 2022 KOSTAL Solar Electric GmbH... -
Page 34: Installation
Protect the inverter from coarse soiling, e.g. leaves. Protect the inverter against dust, contamination and ammonia gases. Rooms and areas containing livestock are not permitted as installation sites. Do not install the inverter in potentially explosive areas. © 2022 KOSTAL Solar Electric GmbH... - Page 35 Install the inverter vertically. Tilted position up to 15° is permitted. Maintain minimum distances and the necessary clearance. The inverter makes noise during operation. Install inverter in such a way that people are not disturbed by operation noises. © 2022 KOSTAL Solar Electric GmbH...
- Page 36 The inverter must be easily accessible and the status LED must be easy to read. Install the inverter out of reach of children or other unauthorised persons. Lay cables with UV protection or use UV-resistant cables. © 2022 KOSTAL Solar Electric GmbH...
- Page 37 For installation, use retaining bolts that are suitable for the base, the weight of the inverter and the ambient conditions. Requirement of retaining bolts: Ø 12 mm, 8.8, A2-70 Installation dimensions with bracket PIKO CI 30 = 500 1000 PIKO CI 50/60 = 600 1000 (mm)
- Page 38 The values given are minimum distances. Increase the distances if the thermal conditions in the installation environment require it, e.g. in case of unfavourable ventilation or strong sunlight. PIKO CI 30/50/60 PIKO CI 30 PIKO CI 50/60 © 2022 KOSTAL Solar Electric GmbH...
- Page 39 Do not lift or transport the inverter alone. Involve at least one or two other persons to avoid injury. ■ Make sure that the inverter is correctly seated and cannot slip off the bracket. ■ Install the lock screw. © 2022 KOSTAL Solar Electric GmbH...
-
Page 40: Electrical Connection
Connections for PV modules Communication connections AC connection Line circuit breaker Energy meter (e.g. KOSTAL Smart Energy Meter) Public grid IMPORTANT INFORMATION Make sure that the phases of the AC terminal and in the mains supply match. This product may generate a direct current in the outer protective earthing conductor. If protective residual current devices (RCD) or residual current monitoring devices (RCM) are used, only type B ≥ 300 mA RCDs or RCMs are permitted on the AC side. - Page 41 10 - 25 mm² 24 - 32 mm 50 / 60 30 - 50 mm² 25 - 40 mm Additional PE connection PIKO CI Wire cross-section ≥ 16 mm² 50 / 60 ≥ 35 mm² © 2022 KOSTAL Solar Electric GmbH...
- Page 42 PIKO CI 30 10 - 25 mm² 22 - 32 mm PIKO CI 50/60 30 - 50 mm² 35 - 40 mm L1+2 mm M5 = PIKO CI 30 M8 = PIKO CI 50/60 © 2022 KOSTAL Solar Electric GmbH...
- Page 43 The 4-wire AC connection (3L/PE without N) is only possible in symmetrical networks. 1,5 Nm 8 Nm 12 Nm 3 Nm PIKO CI 30 = 3 Nm PIKO CI 50/60 = 12 Nm 5 Nm PIKO CI 30: Attach connection cover to AC connection and screw it tight.
- Page 44 Installation In countries in which a second PE connection is required, connect this at the marked place on the housing (outside). ✔ Mains cable connected © 2022 KOSTAL Solar Electric GmbH...
-
Page 45: Overview Of Communication Connections
RS485/Modbus interface B (input, data –) RS485/Modbus interface A (input, data +) RS485/Modbus interface B (output, data –) RS485/Modbus interface A (output, data +) RJ45 terminal – LAN connection 1 – LAN connection 2 © 2022 KOSTAL Solar Electric GmbH... -
Page 46: Mounting Wifi Antenna
Installation 3.6 Mounting WiFi antenna Remove protective cap from connection thread on inverter. Screw the supplied WiFi antenna onto the stud bolt. Tightening torque: 3 Nm ✔ WiFi antenna mounted. © 2022 KOSTAL Solar Electric GmbH... -
Page 47: Types Of Communication
Installation 3.7 Types of communication The PIKO CI inverter has interfaces for LAN, RS485 Modbus and WiFi. There are therefore various possibilities for networking one or more inverters with each other and controlling them. You can also combine different types of connections with each other. In a solar power... - Page 48 At a later date, there are also plans for a connection from inverter to inverter. Via WiFi, one or more inverters can be integrated into the local WLAN network, e.g. via a router or hub. Communication via WiFi, Page 53 © 2022 KOSTAL Solar Electric GmbH...
-
Page 49: Communication Via Lan
Connect LAN/Ethernet cable to the computer or router. INFO After commissioning, the settings for the Ethernet connection can still be configured in the KOSTAL PIKO CI app. This includes, for example, the setting for IP mode, in which acquisition of an automatic IP address can be set. - Page 50 Installation The inverter is set as Master LAN or slave using the KOSTAL PIKO CI app on each inverter. To do this, go to Settings > Communication settings > Master/Slave set- tings > Master/Slave settings and then select Master LAN or Slave. The master forwards data to the slave inverters.
-
Page 51: Communication Via Rs485
Fit RS485 cable to the supplied plug (RS485 x in) and plug it into the interface in the COM2 connection panel. RS485 out is used to continue the network connection to further inverters. Connect RS485 cable to external device (e.g. data logger). © 2022 KOSTAL Solar Electric GmbH... - Page 52 This includes, for example, setting the transmission speed. The inverter is set as Master LAN or slave using the KOSTAL PIKO CI app on each inverter. To do this, go to Settings > Communication settings > Master/Slave set- tings >...
-
Page 53: Communication Via Wifi
3.10 Communication via WiFi Connecting inverters via WiFi WiFi settings After commissioning, the WiFi settings in the KOSTAL PIKO CI app must be con- figured in each inverter. INFO If you have forgotten the WLAN password, you can reset it to the default value 12345678 using the reset button under the cover for COM2. -
Page 54: Connecting The Kostal Smart Energy Meter
In addition, the KOSTAL Smart Energy Meter can send data to the KOSTAL Solar Portal. To do this, the KOSTAL Smart Energy Meter must be set up in addition to the PIKO CI in the same system in the KOSTAL Solar Portal. - Page 55 Risk of death due to electrical shock and discharge! De-energise all devices and secure them against being switched on again. Install the KOSTAL Smart Energy Meter as shown in the illustrations at the grid con- nection point in the house grid.
- Page 56 Connect the other end of the Ethernet cable to the router. Establish a LAN connection from the KOSTAL Smart Energy Meter to the router. In this variant, the KOSTAL Smart Energy Meter works as a slave and sends data to the inverter.
- Page 57 Installation The IP address of the KOSTAL Smart Energy Meter can be set in the KOSTAL PIKO CI app under Settings > Power adaptation/controls > Energy management > IP address of energy meter. A power limitation of the grid feed-in (e.g. to 70%) must be entered in watts on the Master inverter.
- Page 58 Risk of death due to electrical shock and discharge! De-energise all devices and secure them against being switched on again. Install the KOSTAL Smart Energy Meter as shown in the illustrations at the grid con- nection point in the house grid.
- Page 59 In this variant, the KOSTAL Smart Energy Meter works as a slave and sends data to the inverter. In the KOSTAL Smart Energy Meter, select the KOSTAL PIKO CI for the RS485 A in- terface. Please refer to the operating manual of the KOSTAL Smart Energy Meter.
- Page 60 Installation The use and installation position of the KOSTAL Smart Energy Meter (KSEM) must be set in the KOSTAL PIKO CI app on the Master inverter. This can be set under Settings > Inverter settings > Power adaptation/controls > Energy management > Power limitation function > KSEM and Settings > Inverter settings >...
-
Page 61: Connecting Central Grid And System Protection
Switch closed: Feed-in Switch open: Feed-in prevented Activate grid and system protection via KOSTAL PIKO CI app. Central grid and system protection is required in some countries. This monitors the voltage and frequency in the grid and in the event of a fault, shuts down the photovoltaic systems by means of a circuit breaker. - Page 62 COM2 connection panel Communication interface Plug connector After commissioning, the function must be activated in each inverter via the KOSTAL PIKO CI app. This can be activated under Settings > Basic settings > External shutdown > ON. ✔ Inverter set up for grid and system protection function.
-
Page 63: Connecting Ripple Control Receiver
Ask your energy supply company or installer what application rule applies to you or whether there is an alternative (e.g. smart meter) better suited to you. If a ripple control receiver is already connected to another KOSTAL inverter in your home network, you can use the control signals of this ripple control receiver. - Page 64 Connect plug connector on inverter to communication interface in COM2 connection panel. Open the KOSTAL PIKO CI app and connect to the inverter to which the ripple control receiver is connected. Activate the ripple control receiver in the KOSTAL PIKO CI app under Settings > In- verter settings >...
-
Page 65: Closing The Inverter
Check the fit of connected wires and braids. Remove any foreign objects (tools, wire cuttings, etc.) from the inverter. Mount the cover and screw it tight. Mount the cover on the PIKO CI 50 / 60 and screw it tight (1.5 Nm). © 2022 KOSTAL Solar Electric GmbH... -
Page 66: Connecting Pv Modules
Installation 3.15 Connecting PV modules Possible PV modules Connectable solar modules When selecting the PV modules to be connected to PIKO CI series inverters, note the fol- lowing: ■ Only connect PV modules according to IEC 61730 Class A. ■... - Page 67 Please note the following points before connecting the PV modules: ■ Our planning tool KOSTAL Solar Plan should be used to optimally configure the solar modules and achieve the highest possible yields. ■ Check the planning and the wiring of the modules for plausibility.
- Page 68 Failure to observe these requirements will render any warranty, guarantee or other liability offered by the manufacturer null and void. Preparing PV connector The PIKO CI inverters use Helios H4 plug connectors from Amphenol. ■ During installation, it is essential that the current specifications of the manufacturer are observed.
- Page 69 Make sure that the maximum input current (I ) per MPPT DCmax and the maximum DC current per DC input (I ) are not exceeded in the process: Stringmax © 2022 KOSTAL Solar Electric GmbH...
- Page 70 ≤ 1100 V ≤ DC 2-4: 39 A ≤ 18 A ≤ DC 6-8: 39 A ≤ DC 9-11: 39 A ≤ DC 12-14: 39 A DC connection assignment for PIKO CI 30 with article number 10534223 PIKO CI Connected PV MPP trackers strings Used DC input 1…6...
- Page 71 12, 13, 14 With 3 DC strings connected, I ≤ 13 A per DC input. Stringmax If 2 DC strings are connected to the PIKO CI 50, then I must be ≤ 13 A per DC in- Stringmax put. The following tables apply to article numbers: ■...
- Page 72 ≤ DC 2-4: 33 A ≤ 14 A ≤ DC 6-8: 33 A ≤ DC 9-11: 33 A ≤ DC 12-14: 33 A DC connection assignment for PIKO CI 30 with article number 10523267 PIKO CI Connected PV MPP trackers strings Used DC input 1…6...
- Page 73 12, 13, 14 With 3 DC strings connected, I ≤ 11 A per DC input. Stringmax If 2 DC strings are connected to the PIKO CI 50, then I must be ≤ 11 A per DC in- Stringmax put. Connecting PV modules to the inverter The DC cables of the solar modules must not be connected to the inverter under load.
- Page 74 Keep the protective caps of the PV connections for future use. Fit plug connectors of the individual PV strings into the DC inputs PV+ and PV- in pairs until they engage tangibly and audibly. ✔ The PV modules are connected. © 2022 KOSTAL Solar Electric GmbH...
-
Page 75: Initial Commissioning
3.16 Initial commissioning Commissioning and setting the necessary operating parameters is undertaken wirelessly using the KOSTAL PIKO CI app and a tablet or your smartphone. Installing KOSTAL PIKO CI app Download the app from the Apple App Store or Google Play Store onto your tablet or smartphone. - Page 76 INFO The installation process may vary depending upon the software version of the inverter. Information about the menus: KOSTAL PIKO CI app - menu structure, Page 95 In the app, select the Settings page. ➔ On the Settings page, the app shows you various menus where you can configure settings.
- Page 77 The following settings still need to be configured after initial commissioning: ■ Inverter settings made by the installer ■ Prescribed settings for grid feed-in by the energy supply company ■ Change the password or update the inverter software. © 2022 KOSTAL Solar Electric GmbH...
-
Page 78: Operation And Operating The Device
4.1 Switching on the inverter....................79 4.2 Switching off the inverter....................81 4.3 De-energising the inverter ....................82 4.4 Operational statuses of inverter ..................85 4.5 Status LEDs........................86 4.6 Status display via app ..................... 88 © 2022 KOSTAL Solar Electric GmbH... -
Page 79: Switching On The Inverter
Move the DC switch on the inverter to ON. INFO As soon as one of the two DC switches on the PIKO CI 50/60 is set to ON, the inverter starts up. The DC switch SW1 switches the DC inputs DC2-8. - Page 80 Operation and operating the device INFO When the inverter is commissioned for the first time, it goes into the Off (Shutdown) status. When this happens, first carry out initial commissioning. ✔ The inverter is in operation. © 2022 KOSTAL Solar Electric GmbH...
-
Page 81: Switching Off The Inverter
To switch off the inverter, carry out the following steps: Switch off line circuit breaker. Switch the DC switch on the inverter to OFF. ✔ The inverter is switched off. The inverter remains energised and monitoring is still performed. © 2022 KOSTAL Solar Electric GmbH... -
Page 82: Energising The Inverter
Disconnecting DC cables The inverter must first be de-energised on the AC side. Then all DC connections on the in- verter can be disconnected. You will need the disassembly tool supplied with the device. © 2022 KOSTAL Solar Electric GmbH... - Page 83 1.5 mm. Remove plug from the socket. Ensure that the disconnected DC cables are protected against both weather (rain) and unauthorized access. Check that all connections on the inverter are voltage-free. © 2022 KOSTAL Solar Electric GmbH...
- Page 84 Wait at least 10 minutes before carrying out any further work on the inverter so that the capacitors contained in it can discharge. ✔ The inverter is isolated on the DC side and voltage-free. © 2022 KOSTAL Solar Electric GmbH...
-
Page 85: Operational Statuses Of Inverter
The inverter is switched off due to a switch- off command or an error that has occurred. As soon as the inverter receives a power-up command or the error is corrected, the in- verter switches to the Standby status. © 2022 KOSTAL Solar Electric GmbH... -
Page 86: Status Leds
4.5 Status LEDs The LEDs on the front indicate the current operational status. Further status information can be read with the help of the KOSTAL PIKO CI app or via the KOSTAL Solar Portal. Measures to rectify events can be found in the chapter Event codes, Page 125. - Page 87 Operation and operating the device Meaning State Description Communication No connection active or no communication Flashes The inverter is communicating with another device. Fault No fault Lights up or A fault has occurred flashes © 2022 KOSTAL Solar Electric GmbH...
-
Page 88: Status Display Via App
Operation and operating the device 4.6 Status display via app The smartphone app KOSTAL PIKO CI displays the current operational status, the power output and the current measuring values from inverter operation. INFO The user interface in the app depends on the installed firmware (FW) and version of the app used and may differ from the description here. -
Page 89: Kostal Piko Ci App
KOSTAL PIKO CI App 5. KOSTAL PIKO CI App 5.1 KOSTAL PIKO CI App..................... 90 5.2 Installation of the KOSTAL PIKO CI app ................91 5.3 Connecting inverters with KOSTAL PIKO CI app ............. 92 5.4 Logging in as an installer....................94 5.5 KOSTAL PIKO CI app - menu structure ................ -
Page 90: Kostal Piko Ci App
KOSTAL PIKO CI App 5.1 KOSTAL PIKO CI App The KOSTAL PIKO CI app, which is available free of charge, provides a graphical user inter- face. The app is used to commission and configure the inverter and to display its status: ■... -
Page 91: Installation Of The Kostal Piko Ci App
KOSTAL PIKO CI App 5.2 Installation of the KOSTAL PIKO CI app KOSTAL PIKO CI App Download the app from the Apple App Store or Google Play Store onto your tablet or smartphone and install it. © 2022 KOSTAL Solar Electric GmbH... -
Page 92: Connecting Inverters With Kostal Piko Ci App
KOSTAL PIKO CI App 5.3 Connecting inverters with KOSTAL PIKO CI The app is opened and launched via a smartphone or tablet. To do this, the smartphone or tablet must be within range of the inverter's WiFi wireless network. Turn on the WiFi/WLAN function on your tablet or smartphone. - Page 93 KOSTAL PIKO CI App Select the inverter to establish the connection. ✔ When the app displays the message Connect, the inverter is connected. © 2022 KOSTAL Solar Electric GmbH...
-
Page 94: Logging In As An Installer
This password should be changed after the initial commissioning. ✔ You are now logged in as an installer. Configuring settings Now configure the settings of the inverter as required. © 2022 KOSTAL Solar Electric GmbH... -
Page 95: Kostal Piko Ci App - Menu Structure
KOSTAL PIKO CI App 5.5 KOSTAL PIKO CI app - menu structure Deviations due to software versions are possible. Event messages Level 1 Event messages information Generation Level 1 Day/month/year energy Basic settings Level 1 Basic information Type Serial number... - Page 96 DNS server 2 RS485 settings Baud rate Data bit Stop bit Parity bit Terminating resistor Modbus address Master/slave settings Master/slave settings Inverter settings Level 1 Level 2 Level 3 Time setting Synchronize inverter time © 2022 KOSTAL Solar Electric GmbH...
- Page 97 Max. grid start voltage (V) Min. grid start voltage (V) Max. grid start frequency (Hz) Min. grid start frequency (Hz) Moving average Power adaptation/con- Active power control P(U) regulation trols P(F) regulation Power gradient (%/s) © 2022 KOSTAL Solar Electric GmbH...
- Page 98 Total consumption L1-3 inverter output Total inverter output Ripple control receiver Activate ripple control receiver (RCR) RCR active power (%) RCR reactive power (%) / power factor cos phi Other settings Isolated network detection © 2022 KOSTAL Solar Electric GmbH...
- Page 99 = Fault Ride Through) Negative sequence K factor Monitoring of supply voltage Undervoltage ride through (V) UVRT Overvoltage ride through (V) OVRT Grid support mode Limited grid support (%) Irregular voltage change (%) Overvoltage protection monitoring © 2022 KOSTAL Solar Electric GmbH...
-
Page 100: Kostal Piko Ci App - Menu Description
KOSTAL PIKO CI App 5.6 KOSTAL PIKO CI app - menu description The following menus are available to the user in the KOSTAL PIKO CI app. Parameter Explanation START Connect the smartphone/tablet to the inverter's WLAN. DOWNLOAD UPDATE FILES Download the update files from the server. These are stored on the smartphone/tablet in the KOSTAL PIKO CI folder. - Page 101 Grid frequency Output frequency of the alternating current currently be- ing generated Active power Measuring value of the active power currently being gen- erated Reactive power Measuring value of the reactive power currently being generated © 2022 KOSTAL Solar Electric GmbH...
- Page 102 Event messages information Display of events in the inverter. Further information about the events and possible error rectification: Event codes, Page 125. Generation Parameter Explanation Day/month/year energy Indication of energy generated in diagram form for day/ month/year. © 2022 KOSTAL Solar Electric GmbH...
- Page 103 Export log data (event messages/generation data/con- figuration data of the inverter) Retrieving log Export generation data data, Page 114. These are stored in the root directory Export configuration on the smartphone. Configuration import Import configuration data of inverter. © 2022 KOSTAL Solar Electric GmbH...
- Page 104 KOSTAL PIKO CI App About Explanation App version Version of the KOSTAL PIKO CI app. © 2022 KOSTAL Solar Electric GmbH...
- Page 105 DNS servers must be entered. DNS server 1 Enter the IP address of the DNS server (Domain Name System) DNS server 2 Enter the IP address of the backup DNS server (Domain Name System) © 2022 KOSTAL Solar Electric GmbH...
- Page 106 Master/slave settings Select whether the inverter should act as a master (LAN or RS485) or slave. If set as master inverter, information or setting parameters (e.g. during power reduction) are sent to the slave inverters. © 2022 KOSTAL Solar Electric GmbH...
- Page 107 Set undervoltage protection limit value Overfrequency switch-off time Set overfrequency switch-off time x time (s) Underfrequency switch-off Set underfrequency shut-off time time x time (s) Overvoltage switch-off time x Set overvoltage switch-off time time (s) © 2022 KOSTAL Solar Electric GmbH...
- Page 108 Maximum feed-in capa- Set the inverter's maximum active power city (W) Maximum active power Setting for maximum output power of the inverter Reactive power control Reactive power control © 2022 KOSTAL Solar Electric GmbH...
- Page 109 Energy management Power limitation Power limitation function Deactivated: No energy meter connected to the in- verter. KSEM: A KOSTAL Smart Energy Meter is connected to the inverter. Sensor position Installation position of energy meter (grid connection point or consumer) Connecting the KOSTAL Smart Energy Meter, Page 54...
- Page 110 Dynamic grid support (FRT = Fault Ride Through) Positive sequence K Settings for uninterrupted cycling through grid faults factor FRT (Fault Ride Through) Negative sequence K factor Monitoring of supply voltage Undervoltage ride through (V) UVRT © 2022 KOSTAL Solar Electric GmbH...
- Page 111 Other settings Explanation Overvoltage ride through (V) OVRT Grid support mode Limited grid support (%) Irregular voltage change Overvoltage protection monit- Activate/deactivate monitoring of the internal overvoltage oring protection modules (SPD - Surge Protective Device). © 2022 KOSTAL Solar Electric GmbH...
-
Page 112: System Monitoring
System monitoring 6. System monitoring 6.1 The log data........................113 6.2 Retrieving log data ......................114 6.3 The KOSTAL Solar Portal....................116 © 2022 KOSTAL Solar Electric GmbH... -
Page 113: The Log Data
The inverter is equipped with a data logger, which regularly records data from the system. The log data can be used for the following purposes: ■ Check operating characteristics of the system ■ Determine and analyse errors ■ Download and graphically depict yield data © 2022 KOSTAL Solar Electric GmbH... -
Page 114: Retrieving Log Data
Event messages ■ Generation data ■ Inverter configuration data In the KOSTAL PIKO CI app, go to Settings > Basic settings > Export event mes- sages. KOSTAL PIKO CI app - menu structure, Page 95 Confirm the download. ✔ The log data can be saved to a computer and displayed and further processed with any common spreadsheet program (e.g. - Page 115 System monitoring Option 2: Transfer log data to the KOSTAL Solar Portal and display it With a solar portal it is possible to monitor the PV system and performance data via the In- ternet. The KOSTAL Solar Portal has the following functions, which, however, may differ depend- ing upon the portal: ■...
-
Page 116: The Kostal Solar Portal
The inverter sends the PV system's yield data and event messages to the KOSTAL Solar Portal via the Internet. The information is stored in the KOSTAL Solar Portal. You can view and call up this inform- ation via the Internet. -
Page 117: Maintenance
7.1 During operation ......................118 7.2 Maintenance and cleaning ....................119 7.3 Housing cleaning ......................120 7.4 Fan ..........................121 7.5 Replacing PV fuses ......................122 7.6 Updating software......................123 7.7 Event codes........................125 © 2022 KOSTAL Solar Electric GmbH... -
Page 118: During Operation
For proper operation in a larger solar system, the normal measures of regular system monit- oring are fully sufficient. In particular, tracking the energy obtained via data loggers, the KOSTAL Solar Portal or en- ergy meters will quickly indicate irregularities. Events during operation are also logged. -
Page 119: Maintenance And Cleaning
Use maintenance lists in which the work undertaken is logged. If no maintenance work is carried out, this will result in an exclusion of warranty (see 'Exclu- sion of warranty' in our service and warranty conditions). © 2022 KOSTAL Solar Electric GmbH... -
Page 120: Housing Cleaning
Only clean the housing with a damp cloth. Do not use any harsh cleaning agents. Do not use devices that produce a spray or water jet. In particular, check the condition of the ventilation ducts and the function of the fans. © 2022 KOSTAL Solar Electric GmbH... -
Page 121: Fan
Do not use compressed air, vacuum the inverter's ventilation ducts instead. ■ Remove detritus consisting of leaves, dust, insects, etc., especially in the vicinity of the ventilation ducts. ■ For example, use an industrial vacuum cleaner and vacuum the ventilation ducts and immediate surroundings. © 2022 KOSTAL Solar Electric GmbH... -
Page 122: Replacing Pv Fuses
Maintenance 7.5 Replacing PV fuses The PV fuses in the PIKO CI 50/60 can be replaced. If an event prompting this is displayed, the inverter must be disconnected from the grid on the DC and AC sides. PIKO CI 50/60 inverter: PV fuses... -
Page 123: Updating Software
KOSTAL PIKO CI app. Procedure Use a smartphone or tablet with the KOSTAL PIKO CI app installed. Proceed as follows: Launch the KOSTAL PIKO CI app on the smartphone/tablet that you are using for commissioning. - Page 124 Check the version of the software in the app under Settings > Basic settings. Firmware version: Shows the safety firmware version, e.g. 3001 for PIKO CI 30 or 600101 for PIKO CI 50/60. Internal code: Shows the control board (CB) firmware version, e.g. 010808 = V1.8.8 Communication board version: Shows the communication board (CSB) firmware version, e.g.
-
Page 125: Event Codes
Operational statuses and error causes are reported as a combination of LED display and event code. The event code is shown in the KOSTAL PIKO CI app or in the KOSTAL Solar Portal. Determine the type of event using the table below ( Event messages, Page 126). - Page 126 WLAN / WiFi / RS485 communication PV normal 30001 Grid overvoltage 30002 Grid undervoltage 30003 Grid missing 30004 Grid overfrequency 30005 Grid underfrequency 30006 PV overvoltage 30007 PV insulation fault 30008 Leakage current error © 2022 KOSTAL Solar Electric GmbH...
- Page 127 Reverse polarity strings 30023 System error 30024 Fan blocked 30025 DC link unbalance 30026 Overvoltage of intermediate circuit 30027 Internal communication error 30028 Software incompatible 30029 EEPROM error 30030 Persistent warning 30031 Inverter error © 2022 KOSTAL Solar Electric GmbH...
- Page 128 PV modules preset protection value drops. No action is required. of the inverter. If the intensity of sunlight is high, check for short circuits, open circuits, etc. in the PV strings. © 2022 KOSTAL Solar Electric GmbH...
- Page 129 KOSTAL PIKO CI app. Weak PV irradiation PV strings have been Check whether the PV string is covered for a long time.
- Page 130 If the error still occurs, contact your support team. Check the communication settings in the KOSTAL PIKO CI app. Meter connection lost Communication con- Check whether the communication nection to energy meter line between the master inverter and...
-
Page 131: Technical Information
Technical information 8. Technical information 8.1 Technical data ........................ 132 8.2 Block diagrams ....................... 135 © 2022 KOSTAL Solar Electric GmbH... -
Page 132: Technical Data
Max. input current (Idc,max) per MPPT - DC1-3: 40.5 | DC1-3: 39 DC4-6: DC1-3: 39 DC4-6: from article number: PIKO CI 30: 10534223, DC4-6: 40.5 39 | DC7-8: 26 | 39 | DC7-9: 39 | PIKO CI 50: 10534084, PIKO CI 60:... - Page 133 Type 2 Degree of contamination Environmental category (outdoor installation) Environmental category (indoor installation) UV resistance AC cable diameter (min-max) 22…32 35…50 AC cable cross-section (min-max) mm² 10…25 35…50 PV cable cross-section (min-max) mm² 4…6 © 2022 KOSTAL Solar Electric GmbH...
- Page 134 CEI0-16 2019, CEI0-21 2019 >11,08kW, UK G99/1-4 LV, IRR-DCC MV 2015, IEC61727/62116 Measured under rated output at an ambient temperature of 23 °C. In the case of an unfavourable string connection or higher ambient temperature, the noise emission may be higher. © 2022 KOSTAL Solar Electric GmbH...
-
Page 135: Block Diagrams
Technical information 8.2 Block diagrams Block diagram for PIKO CI 30 DC inputs for PV modules DC fuses Integrated overvoltage protection (DC side) Electronic DC disconnection device EMC filter (DC side) DC regulator Intermediate circuit Inverter bridge circuit Grid monitoring and shutdown... - Page 136 Technical information Block diagram for PIKO CI 50 DC inputs for PV modules DC fuses Integrated overvoltage protection (DC side) Electronic DC disconnection device EMC filter (DC side) DC regulator Intermediate circuit Inverter bridge circuit Grid monitoring and shutdown EMC filter (AC side)
- Page 137 Technical information Block diagram for PIKO CI 60 DC inputs for PV modules DC fuses Integrated overvoltage protection (DC side) Electronic DC disconnection device EMC filter (DC side) DC regulator Intermediate circuit Inverter bridge circuit Grid monitoring and shutdown EMC filter (AC side)
-
Page 138: Accessories
Accessories 9. Accessories 9.1 KOSTAL Solar Portal....................... 139 9.2 KOSTAL Solar App ......................140 © 2022 KOSTAL Solar Electric GmbH... -
Page 139: Kostal Solar Portal
Accessories 9.1 KOSTAL Solar Portal The KOSTAL Solar Portal allows operation of the inverters to be monitored via the Internet. This protects your investment in a PV system against yield losses, e.g. through active e-mail alerts if events occur. Registering for the KOSTAL Solar Portal is free of charge at www.kostal-solar-portal.com. -
Page 140: Kostal Solar App
To set up and use the app, you will need access to the KOSTAL Solar Portal and to have an inverter set up there. To log in to the app, you will need to use the same access data as for the KOSTAL Solar Portal. -
Page 141: Appendix
Appendix 10. Appendix 10.1 Type plate........................142 10.2 Warranty and service ...................... 144 10.3 Handover to the operator....................145 10.4 Decommissioning and disposal..................146 © 2022 KOSTAL Solar Electric GmbH... -
Page 142: Type Plate
Serial number Information on DC inputs: ■ Input voltage range ■ Max. input voltage ■ Max. input current (PV modules per DC group) ■ Max. short-circuit current (PV modules, per DC group) ■ Overvoltage category © 2022 KOSTAL Solar Electric GmbH... - Page 143 Power factor adjustment range ■ Overvoltage category Protective class in accordance with IEC 62103, protection class, ambient temper- ature range, overvoltage category, requirements with which the integrated grid monitoring complies Warning symbols CE mark © 2022 KOSTAL Solar Electric GmbH...
-
Page 144: Warranty And Service
■ Spain, Portugal (language: Spanish, English): +34 961 824 927 Spare parts If spare parts or accessories are required for troubleshooting, use only original spare parts and accessories manufactured and/or approved by the manufacturer. © 2022 KOSTAL Solar Electric GmbH... -
Page 145: Handover To The Operator
As the installer and commissioning engineer, have the operator confirm the proper han- dover with their signature. As the operator, have the installer and commissioning engineer confirm that the installation of the inverter and the PV system is safe and complies with standards with their signature. © 2022 KOSTAL Solar Electric GmbH... -
Page 146: Decommissioning And Disposal
De-energise device and secure against being switched on again. De-energising the inverter, Page 82 PIKO CI 50/60: Open the lower cover of the inverter. Loosen terminals and cable glands. Remove all DC cables, AC cables and communication cables. PIKO CI 50/60: Close the inverter cover. - Page 147 www.kostal-solar-electric.com...
Need help?
Do you have a question about the PIKO CI and is the answer not in the manual?
Questions and answers