
Subscribe to Our Youtube Channel
Related Manuals for Kostal PIKO 3.0


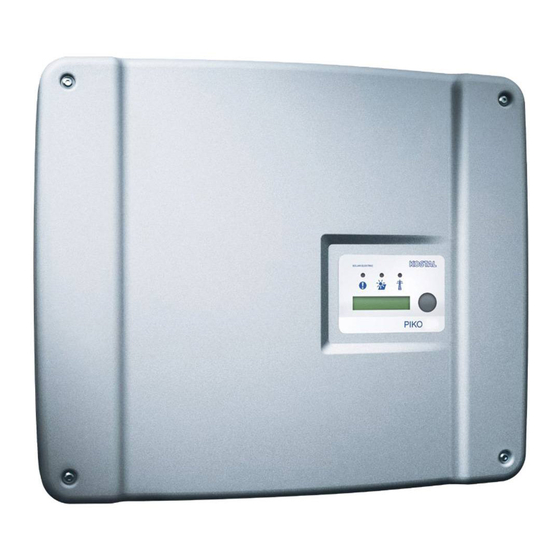
Summary of Contents for Kostal PIKO 3.0
- Page 1 Installation and Operating Manual Smart User Manual connections. PIKO-Inverter 3.0 | 3.6 | 4.2 | 5.5 | 8.3 | 10.1...
- Page 2 General note on non-sexist language KOSTAL is aware of the importance of language with regard to the equality of women and men and always makes an effort to reflect this in the documentation. Nevertheless, for the sake of readability we are unable to use non-gender-specific terms throughout and have used the masculine form as a rule.
-
Page 3: Table Of Contents
Contents Contents Notes on this manual ............5 Proper use . -
Page 5: Notes On This Manual
This manual is an integral part of the product. It only Inappropriate use can be hazardous and lead to injury applies to solar inverters PIKO from KOSTAL Solar or even death of the user or third parties. Material Electric GmbH. Retain this manual and pass it onto the damage to the unit and other equipment can also new owner in the event of a new operating company. -
Page 6: Safety Instructions
3 Safety instructions Safety instructions Improper handling during installation and while Opening the unit operating inverters can cause potentially fatal situations Only a qualified electrician may open and perform work due to electrical shock. on the unit. Furthermore, non-observance of this manual could Fatal voltages are produced in the inverter cause burns or even fires due to the potentially high during operation. -
Page 7: Unit And System Description
4.2/5.5/8.3/10.1 combine the stability and durability of large central inverters with the high efficiency of transformerless string inverters. The single-phase inverters PIKO 3.0/3.6 use the modern and fail-safe phase-shifting procedure to monitor the grid. To improve efficiency, PIKO 4.2/5.5/8.3/10.1 use only... - Page 8 4 Unit and system description Fig. 4: System illustration of a grid-connected photovoltaic system PV string 1 AC mains cable PV string 2 and 3 (optional) Single-phase or 3-phase AC line circuit breaker Inverter (for layout, see table 1, page 13) Electronic DC load break switch Feed meter Inputs...
- Page 9 4 Unit and system description Reactive power control Photovoltaic module Note: The information in this section applies only to systems in Germany. Inverter In accordance with the German Federal Electricity Production Feed Consumption Association BDEW's medium-voltage regulations, Grid meter meter meter since April 2011 grid operators can demand the feed-in of inductive or capacitive reactive power with a...
-
Page 10: Installation
5 Installation Scope of delivery Installation The packaging contains: DANGER — 1 inverter (1) Risk of death due to electrical shock! — 1 wall mount (not for replacement devices) (2) When performing any work on the inverter and feed — 1 GD containing operating instructions (3) cables: —... - Page 11 – Bear in mind that the inverter may produce noise during operation, which may be considered annoying in living quarters. Fig. 7: Installing the inverter (top: PIKO 3.0/3.6/4.2/5.5, bottom: PIKO 8.3/10.1) Required space for cooling Outer dimensions of the inverter •...
-
Page 12: Electrical Connection
• Press the blind plug and the sealing ring out of the screw connection from the inside towards the Fig. 10: Laying the mains cable outside using a screwdriver or similar implement. AC terminal (5-pole; for PIKO 3.0/3.6: 3-pole) Detach the sealing ring from the blind plug. Mains cable Sealing ring... -
Page 13: Connecting The Dc Side
5 Installation • Screw the union nut with inner sealing ring and plug L1 L2 L3 N PE tightly onto the cable screw connection. Note: The cable connection seals the housing against moisture and also relieves tension on the cable to ensure it is not pulled out of the terminals by its own weight. - Page 14 5 Installation • Guide the crimped contacts from behind into the plug or socket insulation until they engage. Ensure that the parts matching the plug-in connector couplings are used on the inverter. Observe the polarity of the cables. • Pull gently on the cable in order to check whether the metal part has engaged.
- Page 15 5 Installation • Insert the PV string plugs until they engage in the corresponding counterparts on the inverter (figure 17). Fig. 18: Inputs 1 and 2 connected in parallel (PIKO 3.6/4.2) DC bridges PV string 1 PV string 2 Fig. 17: Connecting the PV string •...
-
Page 16: Setting The Country Of Use
5 Installation 5.5 Setting the country of use • Set the DIP switch as appropriate for the country of use according to table 3. Prior to initial commissioning, the country in which the inverter is used must be specified. This is necessary so Country Switch setting Default language... -
Page 17: Connecting Communication Components With Communication Board I
5 Installation 5.5.2 Communication board II Overview of the communications options In terms of communication options, four different After commissioning, a prompt to select the country situations are taken into account. setting appears in the display (4). 1. Inverter configuration. 2. - Page 18 5 Installation Alternatively, you can connect the inverters to each other via the RS485 interface and then only need to connect one of the inverters via Ethernet (figure 25). With this type of connection, the web server of the inverter connected via the Ethernet also displays the current output data of the other inverters.
- Page 19 5 Installation Make sure that the access point name is set correctly. Version b) with two or more inverters To do this, use the "GSM-Link" configuration tool (see To transfer data from several inverters to a solar portal section Installing GSM modem). via modem, first connect the inverter to a switch/hub A detailed description can be found on our website and via an Ethernet cable.
- Page 20 5 Installation Version a) Inverter with DSL connection to the Version b) with an integrated modem Internet An inverter connected to the telephone network by an To ensure the inverter can actually be accessed via the analogue modem can only be contacted by a Internet, several requirements must be met.
- Page 21 5 Installation Overview of the communications interfaces terminal adapter. To use the RJ11 interface, you will require a modem, available as an accessory. • Insert the plug of the telephone cable into the corresponding socket (2 figure 31). Connecting an Ethernet cable and/or telephone line to the cable terminal Instead of the RJ45 and RJ11 sockets, you can use the six-pole screw terminal to connect the Ethernet cable...
- Page 22 — The SIM card must be activated before installation. • Download the "GSM-Link" software from our website www.kostal-solar-electric.com from the "Service => Download" area or use the CD supplied. • Switch the inverter off for at least 5 minutes.
- Page 23 5 Installation • In the GSM area, enter the data (APN, user name and password) of the SIM card in the corresponding fields and confirm by selecting "Write new settings". • Switch the inverter off for at least 5 minutes. •...
-
Page 24: Connecting Communication Components With Communication Board Ii
5 Installation If a value in minutes is stated in the "last connection to The inverter is equipped with two Ethernet interfaces portal" field, there is a connection to the solar portal. (RJ45 sockets) for this purpose. The computer must also be equipped with this type of interface. - Page 25 5 Installation To do so, a) the inverter must be connected to a DSL router or to a network with Internet access or b) the inverter must have an integrated analogue modem or wireless modem (GSM, available as an accessory). Version a) requires a DSL connection.
- Page 26 5 Installation Version b) Version a) Inverter with DSL connection to the Internet To transfer the data of several inverters to a solar portal with a modem, connect the inverter via the Ethernet. To ensure the inverter can actually be accessed via the You will only need one modem: the inverter with the Internet, several requirements must be met.
- Page 27 5 Installation Version b) with an integrated modem Overview of the communications interfaces An inverter connected to the telephone network by an analogue modem can only be contacted by a computer when the computer establishes the connection via an analogue telephone connection or via the analogue connection of a telecommunications system (dial-in connection, see figure 44).
- Page 28 5 Installation Connecting the telephone cable • Enter the PIN number on the "Settings" page in the "GSM PIN" field. The RJ11 socket is used to connect the inverter to an analogue telephone jack or to an ISDN line with a terminal adapter.
- Page 29 5 Installation • Enter the serial number or IP address of the inverter • Check the current modem status on the "Info page" in the "Host/IP address" field (note: enter the letter S and the inverter's serial number, for example http://S12345FD323456.) •...
-
Page 30: Installing Accessories With Communication Board I
5 Installation Note: To end the data transfer, see chapter 8.5 Overview of the accessory interfaces (page 52). • Check that the connection is OK. • Enter the words "go online" in the "Portal-Code" field. • Confirm by clicking on "adopt". •... - Page 31 5 Installation Note: While the second inverter will not be displayed in Terminal Designation Description the solar portal, its energy yield is included in the first RS485 A RS485 A inverter's data (in total). RS485 B RS485 B When using the S0 input, the analogue inputs Aln3 and Ground for RS485 Aln4 are inactive.
- Page 32 5 Installation RS485 Fig. 55: Connecting the ripple control receiver for 100% inverters with Ethernet connections Master inverter Fig. 57: Connecting the ripple control receiver to the Additional inverters inverter Ethernet cable Switch/hub Ripple control receiver 5-conductor connection at analogue-in Ripple control receiver Connecting RS485 Grid...
- Page 33 5 Installation It is possible to mix inverters with and without DIP ATTENTION switch for the RS485 configuration. The potential The communication board may be damaged by connection scope and the DIP switch setting required electrostatic discharge. are illustrated in Table 7. •...
-
Page 34: Installing Accessories With Communication Board Ii
5 Installation 5.9 Installing accessories with Internal consumption: The switch output functions as a potential-free NO contact. It closes when the set communication board II conditions are fulfilled (see section ‹Setting the If available, now install accessories such as sensors or conditions for switching on devices (internal ripple control receiver. - Page 35 5 Installation Connecting analogue sensors Connecting a ripple control receiver for active power control The inverter features four analogue inputs to which you can connect, for example, temperature and irradiation Note: The information in this section applies only to sensors or wind sensors. The additional measured data systems in Germany.
-
Page 36: Closing The Housing
5 Installation Note: If you have the necessary expertise, you can connect the inverter to a serial interface (RS232 or RS485 USB) of your computer via a signal level converter. For this type of connection, however, only the current performance data can be accessed. The integrated web server and the stored log data are not available. -
Page 37: Commissioning And De-Commissioning
6 Commissioning and de-commissioning Commissioning and de-commissioning 6.1 Switching on the inverter If the green LED does not light up, the input voltage or the power may be too low or a fault has occurred (see For the initial commissioning, sufficient solar irradiation the chapter "Fault correction"). - Page 38 6 Commissioning and de-commissioning 6.2.2 Configuring settings • Click on the "Settings" link. The "Settings" page is displayed. Fig. 68: Main page of the web server (the number of inputs- and outputs displayed may vary depending on unit type). Fig. 69: Settings page Setting Description S-no.
- Page 39 6 Commissioning and de-commissioning Changing the saving interval Setting Description When selecting the saving interval, you have the option Network Configuration of the inverter network interface (Ethernet) of a 15-minute or 60-minute period between the saving procedures. The internal memory can store the data for Public line Only required when using an analogue modem (optional accessory) and an analogue...
- Page 40 6 Commissioning and de-commissioning The run time is ended and not continued again if the inverter has not produced any current for three hours. This normally happens after sunset. • You can enter you own values in the “power limit”, “stable positive deviation from the limit”...
- Page 41 6 Commissioning and de-commissioning Fig. 72: Communication board I: Fig. 74: Communication board I: Network settings with Auto IP Network settings with manual network configuration for external router) Auto-IP / DHCP, external DSL router, subnet mask: 255.255.255.0, external router Inverter with an integrated modem (analogue or GSM) – Auto IP/DHCP Inverter 1 –...
- Page 42 6 Commissioning and de-commissioning Note: The factory default setting of the DNS server 6.2.3 Checking sensors and modem address is 145.253.2.203, and it provides the • On the main page of the web server, click on the link alternative name resolution in the Internet. Do not "info page".
-
Page 43: Handover To The Operator
6 Commissioning and de-commissioning • Check whether the modem has been detected 6.2.5 Disconnecting (analogue modem) or whether adequate reception • Close the browser window to disconnect from the quality – at least two bars – is displayed (GSM web server of the inverter. modem). -
Page 44: Servicing/Maintenance
• Allow the unit to cool down. Wait five minutes until the condensers of the inverter have discharged. • Ensure that all connections are de-energised. 6.5 Servicing/maintenance Fig. 79: Removing the fan (PIKO 3.0/3.6/4.2/5.5) DANGER Fan cable Risk of death due to improperly performed work! -
Page 45: Disassembly And Disposal
6.6 Disassembly and disposal You can now clean the fan: To disassemble the inverter, proceed as follows: • PIKO 3.0/3.6/4.2/5.5: Loosen the screws (4 in fig. DANGER 79) and carefully remove the fan grille and the fan. PIKO 8.3/10.1: Loosen the screws (3 in fig. 80) and Risk of death due to electrical shock! carefully remove the fan plate. -
Page 46: Inverter Operating Characteristics
7 Inverter operating characteristics Inverter operating Note: The contact sensor responds to the touch of a finger. Do not press the contact sensor forcefully. characteristics 7.2 Determine the operating status The inverter will work automatically after commissioning, meaning that regular operation is not (operating LEDs) necessary. -
Page 47: Displaying Operating Values And Changing Settings (Communication Board I)
7 Inverter operating characteristics 7.4 Displaying operating values and The following data can be accessed in the "settings" submenu: changing settings (communication — Language board I) — IP address The user menu is activated through the round contact sensor on the right next to the display. —... -
Page 48: Displaying Operating Values And Changing Settings (Communication Board Ii)
7 Inverter operating characteristics 7.5 Displaying operating values and The following data can be accessed in the "settings" submenu: changing settings (communication — Language board II) — IP address The user menu is activated by pressing any key to the right of the display. -
Page 49: Fault Displays
7 Inverter operating characteristics If the fuse has tripped, notify the installer; if there is a Provide the following information: power failure, simply wait until the mains operator has — Device type and serial number. You will find this corrected the problem. information on the type plate on the exterior of the If the fault lasts only a short time (mains fault, excess housing. -
Page 50: System Monitoring
8 System monitoring System monitoring Also observe the descriptions about communication a network or through a web portal. The basic settings and accessories in chapter 6.2 from page 37 on. and accessing options on the integrated web server are identical in all cases. The inverter regularly records performance data, for example, the voltage generated by the photovoltaic Note: The inverter data are stored in the device only for... -
Page 51: Downloading Log Data
PIKO Master Control (PMC). displayed. You can download this free of charge from our website www.kostal-solar-electric.com Note: Our visualisation software is in continual development. Visit our Internet site from time to time to check whether a new software version is available. -
Page 52: End Data Transfer To A Solar Portal
AC2 U output voltage of the respective phase* (1, 2 each time. AC3 U and 3) in V For the single-phase feed-in inverters PIKO 3.0/3.6 the AC1 I AC current: AC2 I output current of the respective phase* (1, 2 and... -
Page 53: Appendix
9 Appendix Appendix 9.1 Technical data PIKO Unit 10.1 Input side (DC part) Max. DC output 3200 3800 4400 5800 8700 11000 Nominal DC output 2950 3450 4000 5250 8000 9650 Number of DC inputs/MPP trackers 1 / 1 2 / 2 2 / 2 3 / 3 2 / 2... - Page 54 9 Appendix PIKO Unit 10.1 Safety Monitoring Via automatic disconnection device with single-phase or 3-phase grid monitoring (according to DIN VDE 0126-1-1:2006-02) Protection class Protection class 1 Type of protection IP 55 DC reverse polarity protection Yes (through short circuit diode) Ground monitoring Insulation monitoring Operator protection...
-
Page 55: Block Diagram
System control with MPP trackers Display and communication Grid monitoring and shutdown 3-phase AC output (for PIKO 3.0/3.6 single-phase: L / N / PE) Power supply unit Inverter bridge PV string (1 to 3, depending on model) Electronic DC load break switch... -
Page 56: Type Plate
You will find this information on the type plate Hanferstraße 6 – D-79108 Freiburg on the exterior of the housing. +49 (0) 477 44-222 www.kostal-solar-electric.com If parts are required, use only genuine replacement parts. XXXXXXXX DC input: UMPP = XXX…XXX V, UMAX = XXX V, IMAX = XX.X A... -
Page 57: Index
Index Index Medium-voltage regulations ........9 Modem (analogue, GSM) ........42 AC cable cross-section ...........12 Active power control .......9, 31, 35, 40 Network cable ..........17, 24 Air humidity .............11 Network settings ............ 38 Alarm output ..........30, 34, 39 Auto IP ..............40 Opening the housing .......... - Page 58 78280 Guyancourt France Téléphone: +33 1 61 38 - 4117 Fax: +33 1 61 38 - 3940 KOSTAL Solar Electric Hellas . . . 47 Steliou Kazantzidi st., P.O. Box: 60080 1st building – 2nd entrance 55535, Pilea, Thessaloniki Greece /...
Need help?
Do you have a question about the PIKO 3.0 and is the answer not in the manual?
Questions and answers