Table of Contents
Advertisement
Quick Links
Assembly Instructions & User's Manual
for
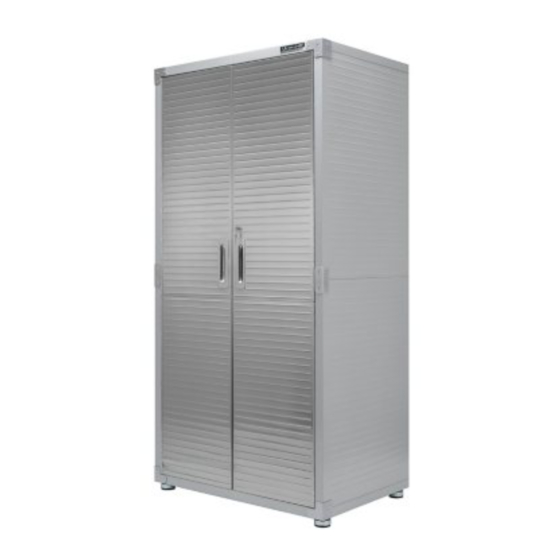
Member's Mark 2-Door Tall Storage Cabinet
Item Number: 990116614
Model Number: 20801B
Customer Assistance (spare/replacement parts): 1- (800) 323-5565
or Email: Support@SevilleClassics.com
THIS ASSEMBLY MANUAL CONTAINS IMPORTANT SAFETY INFORMATION.
PLEASE READ AND KEEP FOR FUTURE REFERENCE.
1 page
Advertisement
Table of Contents

Subscribe to Our Youtube Channel
Related Manuals for Member's Mark 20801B


Summary of Contents for Member's Mark 20801B
- Page 1 Assembly Instructions & User’s Manual Member’s Mark 2-Door Tall Storage Cabinet Item Number: 990116614 Model Number: 20801B Customer Assistance (spare/replacement parts): 1- (800) 323-5565 or Email: Support@SevilleClassics.com THIS ASSEMBLY MANUAL CONTAINS IMPORTANT SAFETY INFORMATION. PLEASE READ AND KEEP FOR FUTURE REFERENCE.
-
Page 2: Table Of Contents
· Table of Contents Quality Statement……………………………………………………………………………..3 Important Safety Information……………………………………………………………………………… Before Assembly…………………………………………………………………………………… Care & Use…………………………………………………………………………………………….. Package Contents……………………………………………………………………………… 4 Package Contents……………………………………………………………………………… 5 Package Contents……………………………………………………………………………… 6 Product Information………………………………………………………………………………………… Components……………………………………………………………………………………. 8 Components……………………………………………………………………………………. 9 Components……………………………………………………………………………………. 9 Hardware……………………………………………………………………………………………….. Tools………………………………………………………………………………………………………. Step 1 – Step 3……………………………………………………………………………………………. Step 4 – Step 7……………………………………………………………………………………………. Step 8 –... -
Page 3: Quality Statement
· Quality Statement · Important Safety Information Please read all instructions carefully before assembling this product. Where applicable, and for your safety, assembly by two adults is strongly recommended. Use only vendor-supplied hardware to assemble this item. Using unauthorized ... -
Page 4: Package Contents
4 page Includes Engineered · Package Contents Nylon Anchors for quick assembly 4 page... -
Page 5: Package Contents
“Quick assembly” Includes Engineered Nylon Anchors for quick 5 page... -
Page 6: Package Contents
(#1-A) Left Side Panel (#2-A) Right Side Panel (#6-A) Left Door (#7-A) Right Door 6 page... -
Page 7: Product Information
· Contents Quantity Quantity Description Description Component Component (pcs) (pcs) (#1-A1) Left Side - Upper Panel Left Foot Frame Left Side - Bottom Panel (#1-A2) Right Foot Frame Side Panel Reinforcement (#1-A3) (#19) Handle Connection Part Right Side - Upper Panel (#2-A1) (#21) Screwdriver... -
Page 8: Components
· Components Left Side - Upper Panel Left Side - Bottom Panel Side Panel Reinforcement Connection Part Part No. (#1-A1) Part No.(#1-A2) Part No. (#1-A3) Qty : 1 pc Qty : 1 pc Qty : 2 pcs Right Side - Upper Panel Right Side - Bottom Panel Top Panel Part No. -
Page 9: Components
· Components Bottom Back Panel Middle Back Panel Leveling Feet Part No.(#10) Part No. (#9) Part No.(#6-1) Qty : 1 pc Qty : 2 pcs Qty : 4 pcs Corner Protection - A Corner Protection - B Middle Corner Protection Part No. -
Page 10: Hardware
· Hardware Screw F (M4 x 8L) Screw G (M4 x 30L) Screw K (M5 x 10L) Part No.(#41) Part No.(#42) Part No.(#52) Qty : 82 pcs Qty : 12 pcs Qty : 8 pcs Screw L (M4 x 6L) Screw N (M4 x 10L) Engineered Nylon Anchor Part No. -
Page 11: Step 1 - Step 3
· Step 1 – Step 3 TIP: A magnetic screwdriver is included for your convenience. If using a power screwdriver, keep toruqe setting on LOW during assembly. WARNING: Some parts may have sharp edges. To avoid injury, wearing gloves is recommended during assembly. -
Page 12: Step 4 - Step 7
· Step 4 – Step 7 Step 4: Install Right Door (#7-A) Repeat Step 3, use (#7-A1) Right Door - Upper Panel, (#7-A2) Right Door - Bottom Panel, (#6- A3) Door Panel Connection Part. Use 1 pc of (#41) Screw F to tighten the touching sides, use 4 pcs of (#41) Screw F to tighten from the top touching side, and 4 pcs (#52) Screw K to tighten from outside edge. -
Page 13: Step 8 - Step 10
· Step 8 – Step 10 Step 8: Install Back Panels (#8, #9 and #10) 1) Attach (#10) Bottom Back Panel onto both (#1-A2 and #2-A2) bottom of Left and Right Side Panels and (#4) Bottom Panel. Line up screw holes and use 10 pcs of (#41) Screw F in each corner hole to tighten. -
Page 14: Step 11 - Step 13
· Step 11 – Step 13 Step 11: Install Magnet (#23) Place (#23) Magnet onto (#3) Top Panel and (#4) Bottom Panel facing the front, use 4 pcs of (#41) Screw F to tighten. Install Middle Shelves (#5) Step 12: 1) Decide the height for each (#5) Middle Shelf. -
Page 15: Step 14 - Step 15
· Step 14 – Step 15 Step 14: Install Handle (#19) Attach 2pcs of (#19) Handle to the Door Upper Panel, use 8 pcs of (#54) Screw N to tighten. Step 15: Install Mounting Strap (#60) 1) Remove 1 pc of (#41) Screw F from the back corner protection. -
Page 16: Caution
· Caution Recommend using TWO people to assemble the cabinet. · Troubleshooting Problem Possible Cause Prevention / Solution Not level Surface not level Adjust leveling feet Loosen screws, Doors do not align Screws not adjusted moving up and down · Care &... - Page 17 Distributed by Sam’s West Inc. 2101 SE Simple Savings Dr. Bentonville, Arkansas 72716-0745 Made in Taiwan Need Assistance? Visit us at: samsclub.com/membersmarkhelp 17 page...
Need help?
Do you have a question about the 20801B and is the answer not in the manual?
Questions and answers