Table of Contents
Advertisement
Quick Links
Assembly Instructions & User's Manual
for
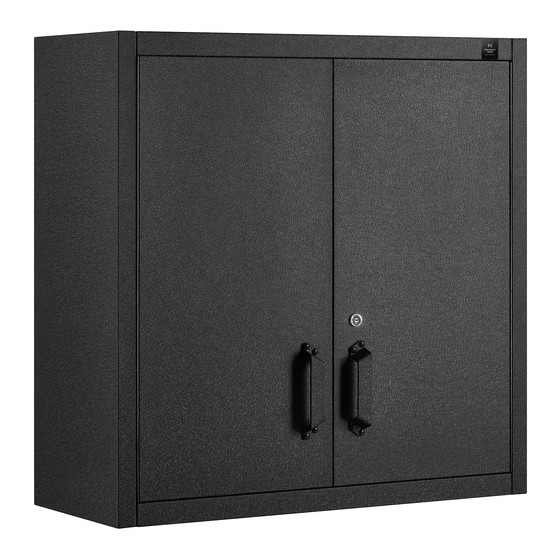
Member's Mark 2-Door Wall Cabinet
Item Number: 990116647
Model Number: 20805B
Customer Assistance (spare/replacement parts): 1- (800) 323-5565
or Email: Support@SevilleClassics.com
THIS ASSEMBLY MANUAL CONTAINS IMPORTANT SAFETY INFORMATION.
PLEASE READ AND KEEP FOR FUTURE REFERENCE.
1 page
Advertisement
Table of Contents

Summary of Contents for Member's Mark 20805B
- Page 1 Assembly Instructions & User’s Manual Member’s Mark 2-Door Wall Cabinet Item Number: 990116647 Model Number: 20805B Customer Assistance (spare/replacement parts): 1- (800) 323-5565 or Email: Support@SevilleClassics.com THIS ASSEMBLY MANUAL CONTAINS IMPORTANT SAFETY INFORMATION. PLEASE READ AND KEEP FOR FUTURE REFERENCE.
-
Page 2: Table Of Contents
· Table of Contents Quality Statement……………………………………………………………………………..3 Important Safety Information………………………………………………………………………………… Before Assembly…………………………………………………………………………………… Care & Use…………………………………………………………………………………………….. Package Contents……………………………………………………………………………… 4 Package Contents……………………………………………………………………………… 5 Product Information……………………………………………………………………………………………… Components……………………………………………………………………………………. 5 Components……………………………………………………………………………………. 6 Hardware……………………………………………………………………………………………….. Hardware……………………………………………………………………………………………….. Tools………………………………………………………………………………………………………. Step 1 – Step 2……………………………………………………………………………………………. Step 3 – Step 5……………………………………………………………………………………………. Step 6 – Step 8……………………………………………………………………………………………. Installation Guide ……………………………………………………………………………………………. -
Page 3: Quality Statement
· Quality Statement · Important Safety Information Please read all instructions carefully before assembling this product. Where applicable, and for your safety, assembly by two adults is strongly recommended. Use only vendor-supplied hardware to assemble this item. Using unauthorized hardware could jeopardize the structural integrity of the item. -
Page 4: Package Contents
· Package Contents #55-A 4 page... -
Page 5: Package Contents
· Contents Quantity Quantity Component Description Description Component (pcs) (pcs) (#1) LEFT PANEL (#19) HANDLE (#2) RIGHT PANEL (#23) MAGNET (#3) (#34) HOOK TOP PANEL (#4) BOTTOM PANEL (#22) (#5) MIDDLE LAYER PANEL (#21) SCREW DRIVER (#7) UPPER BACK PANEL (#15) SCREW B (M4 x 8L) (#8) -
Page 6: Components
· Components UPPER BACK PANEL LEFT DOOR RIGHT DOOR Part No.(#8) Part No.(#9) Part No. (#10) Qty : 1 pc Qty : 1 pc Qty : 1 pc WALL-HANGING BRACKET HANDLE MAGNET Part No. (#11) Part No. (#19) Part No. (#23) Qty : 2 pcs Qty : 2 pcs Qty : 2 pcs... -
Page 7: Step 1 - Step 2
· Step 1 – Step 2 Step 1: Install the Right Panel (#2) onto the Top Panel (#3) Attach the Right Panel (#2) to the Top Panel Back (#3). Line up screw holes, use Screw Driver (#21) and 3pcs of Screw A (#41) to tighten. Front Do not fully tighten any of the screws until all Note:... -
Page 8: Step 3 - Step 5
· Step 3 – Step 5 Step 3: Install the Upper Back Panel (#7) and Bottom Back Panel (#8) First place the Bottom Back Panel (#8) onto the Left Panel (#1), Right Panel (#2) and Bottom Panel (#4). Then, attach the Upper Back Panel (#7) onto the Left Panel (#1), Right Panel (#2) and Bottom Back Panel (#8). -
Page 9: Step 6 - Step 8
· Step 6 – Step 8 Step 6: Install the Left Door Panel (#9) Attach the Left Door Panel (#9) to the unit. Line up screw holes, use Screw Driver (#21) and 5 pcs of Screw B (#15) to tighten. Step 7: Install the Right Door Panel (#10) Attach the Right Door Panel (#10) to the unit. -
Page 10: Installation Guide
Installation Guide for the WALL HANGING BRACKET of the 2-Door Wall Cabinet (Model No. 20805B) Use the Installation Guide on pages 10 and 12 to secure the two Wall-Hanging Brackets (#11) to the wall. Lift the wall cabinet up and hook (located on the back panels) over the Wall-Hanging Brackets. Assure all hooks are securely over both cabinet up and hook (located on the back panels) over the Wall-Hanging Brackets. -
Page 11: Installation Guide
*Drill a small hole (1/8" diameter) at both stud locations to assure that the hanging Plastic Anchor (#59) is secured. D. To find the rest of the screw holes to fasten the Wall-Hanging Brackets (#10), please refer to the accompanying shop drawing. Place the shop drawing on the wall and align the holes in the drawing with those already drilled in the wall. -
Page 12: Installation Guide
· View of Back Panel for Wall Cabinet 将 Close-up view of how the Wall-Hanging Brackets fit with the Back Panel View of Wall Cabinet shows 6 flat hooks 6 flat hooks on the back of the cabinet. that allow the Cabinet to hang on two Wall-hanging Brackets. -
Page 13: Caution
· Caution Recommend using TWO people to assemble the cabinet. · Troubleshooting Problem Possible Cause Prevention / Solution Loosen screws, moving up and Doors do not align Screws not adjusted down, then tighten screws. · Care & Use Instructions Care Use a soft, clean cloth that will not scratch the surface when cleaning. - Page 14 Distributed by Sam’s West Inc. 2101 SE Simple Savings Dr. Bentonville, Arkansas 72716-0745 Made in Taiwan Need Assistance? Visit us at: samsclub.com/membersmarkhelp 14 page...


Need help?
Do you have a question about the 20805B and is the answer not in the manual?
Questions and answers