
Related Manuals for CAMION ICE MASTER E Series


Summary of Contents for CAMION ICE MASTER E Series
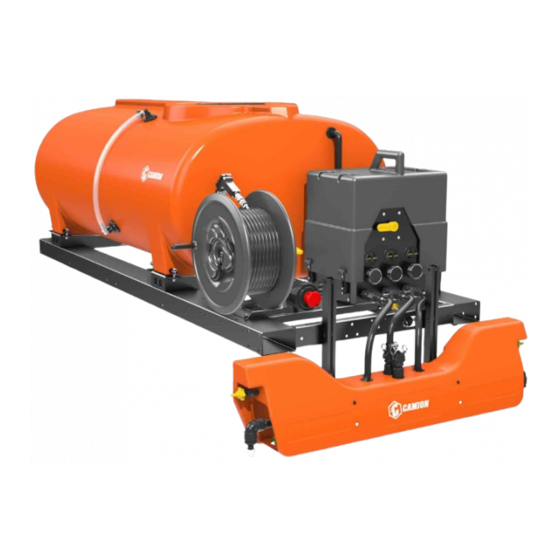
- Page 1 ICE MASTER E-SERIES ® OWNER’S MANUAL Product Codes: IME250, IME300 IME500 Version 1.7 Copyright © Enduraplas. All Rights Reserved.
-
Page 2: Table Of Contents
English CONTENTS INTRODUCTION WARNINGS 4 & 5 GETTING STARTED 6 - 15 CALIBRATING 16 & 17 MAINTAINING 18 & 19 TROUBLESHOOTING 20 & 21 PARTS BREAKDOWNS - E-SERIES 22 - 37 WARRANTY 38 - 42 Ice Master E-Series ®... -
Page 3: Introduction
English INTRODUCTION Congratulations! You now own an Camion™ sprayer. Durable design and construction assure you a lifetime of extreme performance. No sprayer is tougher. No sprayer will last longer. Take a look through this owner’s manual to learn how the pros use their Camion™... -
Page 4: Warnings ! 4
English WARNINGS 1. Do not exceed vehicle manufacturers loading, towing or lifting specifications and regulations. 2. Ensure tank is firmly secured in an appropriate manner. 3. Use caution at all times, particularly when driving on rough terrain. 4. Comply with chemical manufacturers safety requirements and all relevant legislations. - Page 5 English 13. No modifications and/or alterations may be made to this sprayer. Any such modifications not only void the sprayer warranty but can make the unit dangerous to anyone operating the pump. 14. Always inspect hoses and piping to avoid burst injuries. 15.
-
Page 6: Getting Started
English GETTING STARTED Setting-up the Sprayer 1) Wind the hose reel handle into place. 2) If you ordered the optional hitch mount boom for your Ice Master® E-Series unit, you can mount it to the hitch on your pickup. 3) If you wish to mount a boom to the frame of unit, add the bolts and plastic washers to each of the boom brackets. - Page 7 English GETTING STARTED Setting-up the Sprayer 5) Feed the wire harness through the hole in the back of the metal box. 6) Connect the cables to the pumps. Make sure to plug in the correct connectors to the corresponding pumps as shown in this image.
- Page 8 English GETTING STARTED Setting-up the Sprayer 9) Hook up the power cables to your battery terminals. Watch Instruction Videos: www.youtube.com Discover More Helpful Tips: www.IceControlTraining.com Ice Master E-Series ®...
- Page 9 English GETTING STARTED Connecting the Boom 1) Slide the boom on to the quick attach brackets. 2) Tighten the hardware making sure the square neck on the carriage bolt is fully inserted through the slot. 3) Take the hose, connect it to its fitting, and tighten it using the camlock.
- Page 10 English GETTING STARTED Operating the Sprayer 1) You will need to complete a liquid re- circulation test before using the sprayer. Start by filling the tank at least 1/4 full of water. 2) Make sure the cam lock caps are on your right, left, and center boom ports.
- Page 11 English GETTING STARTED Operating the Sprayer 5) Switch on all three pumps, using the solenoid controller. 6) Once the pumps are running, check that water is recirculating freely back into the tank. Once liquid is circulating back into the tank, your re-circulation test is complete.
- Page 12 English GETTING STARTED Operating the Sprayer Pro Tip: When you are spraying using all three pumps, you will be outputting approximately 10 gallons per minute. 8) If you wish to fill the tank from an external source, hook up your fill hose to the external fill valve and make sure the valve is open.
- Page 13 English GETTING STARTED Operating the Sprayer 11) Unscrew the cap and remove the filter for cleaning. 12) To drain your tank, remove the cam-lock cap on the front of the frame and open the valve. This will completely drain the tank as the hose is fed from the bottom sump in the tank.
- Page 14 English GETTING STARTED Installing the Sprayer 1) The two openings at the front of the frame allow you to move the unit using fork points. 2) When loading your sprayer, we recommend placing a block of wood between your sprayer and the front of the bed of your truck.
- Page 15 English GETTING STARTED Installing the Sprayer 5) If you purchased the optional storage stand, you can attach the legs with the pin system supplied. Version 1.7...
-
Page 16: Calibrating 16
English CALIBRATING Note: Always double check your application rates. The rate/acre listed is only based off the center section (not the two side nozzles) Ice Master E-Series ®... - Page 17 English GPM = Gallons Per Minute GPA = Gallons Per Acre GAL/1000 FT = Gallons Per 1000 Square Feet W = Nozzle spacing Gallons Per Minute Formula: GPA x MPH x W (per nozzle) 5,940 Gallons Per Minute Formula: GAL/1000FT x MPH x W (per nozzle) Gallons Per Acre Formula: 5,940 x GPM (per nozzle) MPH x W...
-
Page 18: Maintaining 18
English MAINTAINING Keeping your sprayer in good condition will help you lengthen the life of the sprayer. Everyone knows a well maintained piece of equipment ensures a longer life span. Sprayer maintenance can seem a huge task if you don’t have the right tools. - Page 19 English If required If damaged Every 250 operating hours o once a year After the first 5 operating hours Weekly or every 40 operating hours At the end of work and/or daily Before starting work Version 1.7...
-
Page 20: Troubleshooting 20
English TROUBLESHOOTING CONDITION CAUSE REMEDY Pump will not 1) Air leak on suction 1) Tighten/replace prime plumbing fittings & hose 2) Blocked/Restricted clamps. Verify suction intake hose hoses are in good 3) Filter cap condition disengaged 2) Remove blockage 3) Filter gasket from suction line, damaged/missing ensure line is not... - Page 21 English CONDITION CAUSE REMEDY Pressure gauge 1) Plugged with debris 1) Un-thread, check not registering and clean pressure gauge Hand gun loses 1) Debris in hose or 1) Un-thread nozzle pressure nozzle tip and clean 2) Pump losing prime 2) See Remedy for 3) Pump pressure ‘Pump will not prime dropping/fluctuating...
-
Page 22: Parts Breakdowns - E-Series
OVERVIEW View D View A View B View C B C D Ice Master E-Series ®... - Page 23 DETAIL VIEW A View A View B Version 1.7...
- Page 24 DETAIL VIEW B View A View B Ice Master E-Series ®...
- Page 25 DETAIL VIEW C View C Version 1.7...
- Page 26 DETAIL VIEW D View D Ice Master E-Series ®...
- Page 27 PARTS LIST ITEM NO. PART # DESCRIPTION QTY. AZFPM0300 300-400Gal FIre/ProMaster Frame AZKB0005SS 23.75" Stainless Steel Adj. Boom Bracket THD00300OE 300 Gal Sump Tank CFLP16HV 16 inch Hypro Lid Hinged AVB355 STBBS35 Lg Baffle Ball CPA0100 Ice Master Base Mount Hose Reel IMSC1004 Ice Master Pump Box E-Series CBBF235...
- Page 28 OVERVIEW IMSC1004 Ice Master E-Series ®...
- Page 29 OVERVIEW View B View A View C A B C Version 1.7...
- Page 30 DETAIL VIEW A View A Ice Master E-Series ®...
- Page 31 DETAIL VIEW B View B 21 37 Version 1.7...
- Page 32 DETAIL VIEW C View C Ice Master E-Series ®...
- Page 33 PARTS LIST ITEM NO. Part # DESCRIPTION QTY. CSLC354 CSLC355 Electric Deicing Pump Box CSLC356 AVPC01 Pump Engine Cover CEWCIM04 IM Wire Harness-E Series AZKF0022 Flexible Rubber T-Handle Draw Latch APD07G060PQB 7 GPM 60PSI, Bypass, 1/2" Quick Attach APD05G060P 5 GPM 60 PSI QA Pump CPPDD006 5900 Series 1/2"...
- Page 34 PARTS LIST ITEM NO. Part # DESCRIPTION QTY. CLUESB020004 .75 IN EPDM Hose Return to Tank CLUESB020002 .5 IN EPDM Hose 2-way valve to Hose Reel CLUESB020002 .5 IN EPDM Hose 2-way valve to Boom Supply CLUESB020002 .5" EPDM Hose Center pump to Center Boom CLUESB020002 .5"...
- Page 35 DETAIL VIEW HOSE REEL ITEM NO. PART # DESCRIPTION QTY. AMAH01GY HR030/050 REEL ONLY CFCC003 Clamp for 1/2" Hose CPLF01 Heavy Duty Spray Gun STAL16-viton seals CFRB06 1/4-3/8 BSP FEMALE ELBOW CFRB07 STAINLESS PIPE 3/8 THREAD BOTH ENDS CFRB08 3/8 X 1/4 BALL BEARING SWIVEL CFRB09 1/4 MALE THREAD X 1/2 HOSE BARB CFRH03C...
- Page 36 OVERVIEW Ice Master E-Series ®...
- Page 37 DETAIL VIEW A ITEM NO. Part # DESCRIPTION QTY. AZFPM005 IMS4-6 Stainless boom bracket AMICS001 Poly Shroud For Deicing Boom AZFPM020 1" x 17-3/4" Poly Pipe For Deicing Boom AZFPM022 1" x 14-13/16" Poly Pipe For Deicing Boom AZFPM021 1" x 6-1/4" Poly Pipe For Deicing Boom CBCR100 1"...
-
Page 38: Warranty
English WARRANTY • • • • • • • • Ice Master E-Series ®... - Page 39 English WARRANTY Version 1.7...
- Page 40 English ACTIVATE YOUR 10-YEAR WARRANTY How to Activate To double your 5-year tank warranty, visit www.camionsystems.com/warranty/ and register this product. Watch Instruction Videos: www.youtube.com Discover More Helpful Tips: www.IceControlTraining.com Ice Master E-Series ®...
- Page 41 English Watch Instruction Videos: www.youtube.com Discover More Helpful Tips: www.IceControlTraining.com Version 1.7...
- Page 42 CAMION ® by Enduraplas 1 (877) 265-9929 cs@camionsystems.com www.camionsystems.com 113 1st Street, Neche ND 58265, USA Discover More Helpful Tips: www.IceControlTraining.com Copyright © Enduraplas. All Rights Reserved.