Table of Contents
Advertisement
Quick Links
Advertisement
Table of Contents

Subscribe to Our Youtube Channel
Related Manuals for Kathrein UFT 671si


Summary of Contents for Kathrein UFT 671si
- Page 1 Operating manual - englisch - DVB-T Receiver UFT 671si...
-
Page 2: Preface
You have chosen DVB-T, a TV standard which, even in combination with an adapted indoor antenna such as Kathrein‘s BZD-series, will provide you with optimum reception, with no ghosting or any of the other disadvantages of conventional TV viewing. If you will not be watching the television for a longer period, you should disconnect your equipment from the power supply to save energy. -
Page 3: Table Of Contents
CONTENTS ............................. 2 Preface ........................ 2 Important Information ..........................3 Contents ........................5 Safety Instructions ........................6 Receiver Features ......................7 Connection and Set-Up ........................ 7 Antenna Connection ........................7 TV Connection ........................7 Dolby connection ..................7 IR Receiver (Accessory, not supplied) .................. - Page 4 CONTENTS ............................ 24 Timers ......................24 Manual Timer Setting ......................25 Automatic Timer Setting ......................25 Deleting a Timer Event ........................26 Installation menu ........................27 User Preferences ........................28 Output Settings ........................29 Regional Settings ......................... 30 Language Settings ........................
-
Page 5: Safety Instructions
SAFETY INSTRUCTIONS... -
Page 6: Receiver Features
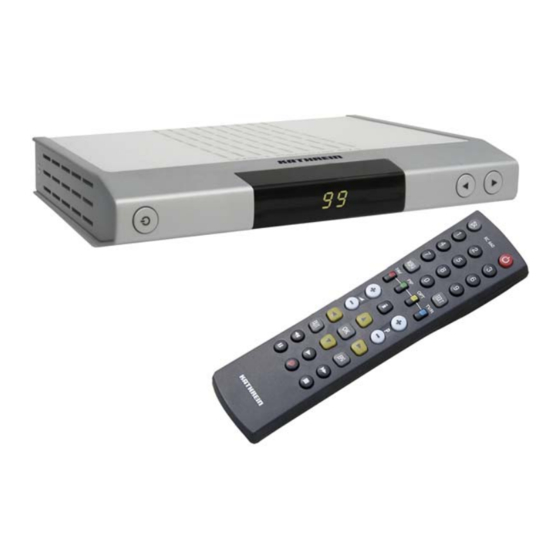
RECEIVER FEATURES The UFT 671si receiver is suitable for the reception of FTA digital terrestrial TV and radio programmes. In addition to the high video and audio quality, the receiver also impresses with its modern housing design. It is equipped with an optical audio output for connection to a Dolby digital system that you can use to bring cinema sound to your living room. -
Page 7: Connection And Set-Up
5 Volt supply (such as the Kathrein BZD 30). TV CONNECTION Connect the UFT 671si (TV Scart socket) and the TV set using a Scart cable. If your TV has a stereo feature, you can receive the sound in stereo via the Scart connection. -
Page 8: Inserting Batteries Into The Remote Control
CONNECTION AND SET-UP INSERTING BATTERIES INTO THE REMOTE CONTROL Remove the cover on the rear of the remote control. Insert the two supplied batteries into the remote control. Ensure correct polarity of the batteries; the + and – markings are indicated inside the battery compartment. Slide the cover back into the housing until it locks in place. -
Page 9: Views And Connections
VIEWS AND CONNECTIONS FRONTAL VIEW Power/Standby button Channel select buttons Channel display REAR VIEW VHF-/UHF input socket Scart connection for TV set Scart connection for external recorder (DVR/VCR) Mains power cable SIDE VIEW RJ 11 interface for connection of infra-red receiver and null modem cable Optical S/PDIF connection for Dolby Digital system... -
Page 10: Remote Control
REMOTE CONTROL REMOTE CONTROL FUNCTION BUTTONS The button symbols presented here can also be found in the description of the operating steps. Mute on/off Off mode (Stand-by) (Green) To enter channel Select channel list numbers or menu in favourite lists parameters management Open main menu... -
Page 11: First Installation
FIRST INSTALLATION Before using your unit for the fi rst time, read the “Safety Instructions” and “Connection and Setup” sections. The “Connection Diagram” section provides a sample confi guration. Do not connect the unit to the mains until all installation work has been properly carried out. - Page 12 FIRST INSTALLATION Select your country using the buttons. Then select “Time Zone Selection” using the buttons. Using the buttons, select your time zone (“0” = UMTC (formerly Greenwich Mean Time GMT), “+1” = Central European winter time, “+2” = Central European summer time). If the “Automatic”...
- Page 13 FIRST INSTALLATION Press the button to start the channel search. The following display appears: After completion of the search, you will see the following message: Complete the fi rst installation by pressing the button twice. The receiver automatically jumps to the fi...
-
Page 14: Operation
OPERATION USING THE REMOTE CONTROL Press the button to confi rm menu settings or to access lower menu levels. Change the settings line by line and confi rm your entry by pressing the button. Press the button to quit the menu or to switch from a submenu to the next highest menu level. -
Page 15: Banner
OPERATION Select the required channel using the buttons and press the button. Note: To be able to open a different channel list or favourite channel list using the button, you must select the required list on the “Channel Lists” menu (see “Channel Lists” section). BANNER When you switch channels the following information is displayed on-screen: - Currently selected channel list... -
Page 16: Electronic Programme Guide (Epg)
OPERATION ELECTRONIC PROGRAMME GUIDE (EPG) Press the button to open the electronic programme guide. The following display appears (example): C u r r e n t l y Sorts programmes by Shows a programme s e l e c t e d preview for the currently Day of week with c h a n n e l... -
Page 17: Programme Preview
OPERATION Pay attention to the bar at the bottom of the on-screen display! This provides hints on what to do next. You can page through the additional information using the buttons (if there is more than one page). You can copy the selected programme to the timer by pressing the button (red dot) and quit the additional information by pressing the button or the... -
Page 18: Timer Programming From Epg
OPERATION TIMER PROGRAMMING FROM EPG With this receiver you can copy a programme directly from the EPG, the programme preview, or the additional information, to the timer by pressing the button (red dot). The following display appears (example): The receiver copies the data available from the EPG directly to the information for programming the timer. -
Page 19: Main Menu
MAIN MENU OPENING THE MAIN MENU (MENU BUTTON) Press the button to open the main menu. Select the required sub-menu using the buttons and press the button. You can open sub-menus directly using the related button on the number pad. Seven sub-menus are available, as detailed below: 1) Channel Lists Here you can defi... -
Page 20: Channel Lists
CHANNEL LISTS On this menu you can defi ne which channel list you want to be able to open directly on the TV screen by pressing the button. Pay attention to the bar at the bottom of the on-screen display! This provides hints on what to do next. -
Page 21: Channel Lists Management
CHANNEL LISTS MANAGEMENT On this menu you can delete channels from the “All TV” and “All Radio” lists or change the sorting of the channels in the related list to suit your requirements. Open the list to be edited by pressing button (blue). -
Page 22: Favourite Lists
FAVOURITE LISTS On this menu you can allocate channels from the “TV Channels”, “Radio Channels” lists to the six favourite channel lists and also delete channels added. Change between the “TV Channels” and “Radio Channels” lists by pressing the button (green). You can select/page through the six favourite channel lists available by pressing the button (blue). -
Page 23: Moving/Sorting A Channel
FAVOURITE LISTS MOVING/SORTING A CHANNEL Open the list to be edited by pressing the button (blue). Change between the left and right column using the buttons. Select the channel to be moved using the buttons, or the number pad. Press the Pay attention to the button (“>”... -
Page 24: Timers
TIMERS Press the button to open the main menu. Select the “Timers” menu using the buttons and press the button. The following display appears (see example below): Note: As in the majority of cases, VPS data are not transmitted in the digital satellite signal, you must programme your external recorder identically to the receiver. -
Page 25: Automatic Timer Setting
TIMERS AUTOMATIC TIMER SETTING You can copy the data for the timer directly from the EPG (see “Operation” section, “Timer Programming From EPG”). DELETING A TIMER EVENT To delete a timer event, select the timer line to be deleted using the buttons and then press button (red). -
Page 26: Installation Menu
INSTALLATION MENU Press the button to open the main menu. Select the Installation & Settings menu using buttons and press the button. The following display appears: Seven sub-menus are available, as detailed below: 1) User Preferences Defi nition of the user-defi ned display settings 2) Output Settings Defi... -
Page 27: User Preferences
INSTALLATION MENU USER PREFERENCES Select the line you want to change using the buttons. Make the changes using the buttons. Colour Theme (on-screen displays): You can choose between the following settings: Blue, Green, Red and Magenta Transparency (on-screen displays): You can choose between the following settings: None, Low, Normal and High Banner Timeout: You can choose between the following settings: 1 second in second steps up to 10 seconds Subtitling Method:... -
Page 28: Output Settings
INSTALLATION MENU OUTPUT SETTINGS Select the line you want to change using the buttons. Make the changes using the buttons. Video Format: Select the type of video signal at the Scart socket here. Select the signal that your TV set can process. Refer to the operating instructions for your television set! You can choose between the following settings: RGB (Red/Green/Blue signal), S-Video (luminance/ chrominance) and CVBS (Colour Video Baseband Signal) -
Page 29: Regional Settings
INSTALLATION MENU VCR Output: Select the type of signal that is to be output on the VCR Scart socket. Either S-Video (luminance/chrominance) or CVBS (Colour Video Baseband Signal) Refer to the operating instructions for your external recorder! For system reasons you can only change this setting if the video To quit the menu and save the changes, press the... -
Page 30: Language Settings
INSTALLATION MENU LANGUAGE SETTINGS Select the line you want to change using the buttons. Make the changes using the buttons. Menu Language: Select the required language for the menus. Subtitling Language 1: Select here the language required for the subtitles. Subtitling Language 2: Select here the language required for the second language if subtitles are broadcast in several languages. -
Page 31: Access Control
INSTALLATION MENU ACCESS CONTROL Select the required sub-menu using the buttons and press the button. The following display appears: CHANNEL LOCK First select the required list with the channels to be locked using the button (green) or the button (red). Select the channel to be locked using the buttons. -
Page 32: Change Pin
INSTALLATION MENU CHANGE PIN Enter the old PIN using the number pad (factory setting: “0000”). The receiver automatically jumps to the “New PIN” fi eld. Enter the new PIN (four digits) using the number pad and confi rm the new PIN in the “Confi... -
Page 33: Menu Lock
INSTALLATION MENU MENU LOCK On this menu you can lock the “Installation & Settings menu” against unauthorised access. Select the required setting (On/Off) using the buttons. It is then only possible to access the Installation & Settings menu by entering the PIN. To quit the menu and save the changes, press the button. -
Page 34: Tv Reception & Channel Search
INSTALLATION MENU TV RECEPTION & CHANNEL SEARCH Select the required sub-menu using the buttons and press the button. The following display appears: SIGNAL RECEPTION On this menu you can see the signal strength and signal quality of the channel currently selected. On this menu you can also switch on and off the active power supply for your DVB-T antenna (5-V power supply). -
Page 35: Antenna Power
INSTALLATION MENU ANTENNA POWER On this menu you can switch on and off the active power supply for your DVB-T antenna (5-V power supply) and in “Power for active antenna in standby” select whether the active power supply for the antenna is also to be maintained in standby mode (if the DVB-T signal is looped through to a second receiver). -
Page 36: Channel Search
INSTALLATION MENU CHANNEL SEARCH After you have selected the “Complete Channel Search” submenu and pressed the button, the search of all the channels starts: After completion of the search, you will see the following display: The channels are saved by pressing the button and the normal TV image is displayed. -
Page 37: Update & Factory Settings
INSTALLATION MENU Make the settings for the manual channel search here. Select the line you want to change using buttons. Make the changes using the buttons or the number pad. Frequency or Channel: Select here the required channel or enter the required frequency using the number pad. Update of Channel List: Using the buttons enter the type of update required (“Add channels”, “Replace channels”... -
Page 38: Factory Settings
INSTALLATION MENU FACTORY SETTINGS Here you can reset all the settings to the pre-programmed factory settings. All your personal settings are deleted (favourite lists, channel sort, etc.)! Select “Yes” using the buttons and confi rm the reset by pressing the button. -
Page 39: System Information
SYSTEM INFORMATION Press the button to open the main menu. Select “System Information” using the buttons and press the button. The following display appears: Here, among other aspects, you can see the current version of the software in the receiver under “Software Version”. -
Page 40: Software Update
Updating requires a PC and a software cable (RJ 11 to Sub-D 9-pin)! If there is a new software release for your DVB-T receiver you can download it from: http://www.kathrein.de (Service → Software und Download → Receiver) The website also provides information and tips on software updating via the receiver’s RJ 11 data interface. -
Page 41: Functions And Technical Data
FUNCTIONS AND TECHNICAL DATA Reception of FTA digital terrestrial TV and radio programmes Tuner with loop-through output 1000 channel memory positions Menu-guided fi rst installation Electronic programme guide (EPG) with short programme descriptions ¹ 8 timers; can also be programmed with the EPG Software download via PC (RS 232/RJ 11) 6 favourite channel lists Automatic date and time generation via DVB data stream... -
Page 42: Technical Data
FUNCTIONS AND TECHNICAL DATA TECHNICAL DATA Type UFT 671si Order no./colour 20210092/Silver RF properties Input frequency range 174-230 and 470-862 Loop through range 47-862 Channel bandwidth 7/8, automatic switch-over Modulation type COFDM 2k, 8k Mapping QPSK, 16 QAM, 64 QAM... -
Page 43: Connection Diagram
CONNECTION DIAGRAM... - Page 44 Internet: http://www.kathrein.de KATHREIN-Werke KG • Anton-Kathrein-Straße 1 – 3 P.O. Box 100 444 • 83004 Rosenheim GERMANY...
Need help?
Do you have a question about the UFT 671si and is the answer not in the manual?
Questions and answers