Advertisement
Advertisement
Table of Contents

Related Manuals for DAXYS Bandicoot


Summary of Contents for DAXYS Bandicoot
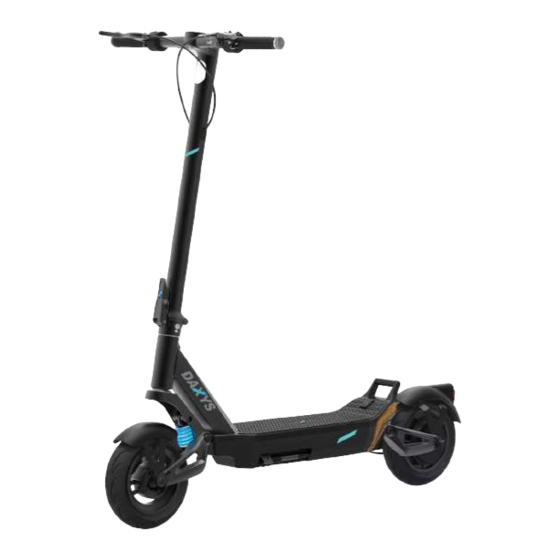
- Page 1 Daxys Bandicoot Kickscooter USER MANUAL v1.0...
- Page 2 USER MANUAL Please read this manual very carefully before using the product. The manual contains important instructions for the safe use and longevity of your bike.
-
Page 3: Table Of Contents
CONTENTS Unboxing ............................2 Operation ............................7 Display ..........................12 Battery Info ...............................13 General Safety ..........................Maintenance ..............................15 Troubleshooting ..........................19 FAQs .............................22 Warranty ............................24... -
Page 4: Unboxing
UNBOXING Warning Incorrect assembly, maintenance, or use of your Daxys scooter can cause component or performance failure, loss of control, serious injury, or death. Even if you’re an experienced scooter rider, you must read and understand the entire manual and any documentation provided for subcomponents or accessories before riding. In the event of a malfunc- tion of any of the components during set up or use, please discontinue set up or use and contact our support team. - Page 5 Unfolding 1. The first step is to unfold your Daxys Bandicoot Kickscooter. To do so, ensure the hook is not clipped into the rear foot rest. If it is, push down on the stem and unhook it from the rear foot rest.
- Page 6 Attach handlebar 1. Connect the male connection cable coming out of the handlebar into the female cable coming out of the front stem. Make sure the pins are aligned. 2. Make sure the male port and the female port are aligned properly. Insert the handlebar at the top of the front stem and tighten into place with the hex screw provided.
- Page 7 Perform test 1. Locate the power button on the right side of the handlebar and press it for 3 seconds to power on the scooter. You should now be able to see the display powered on. Keep the scooter elevated on the stool or bench, as the testing will involve spinning both wheels.
- Page 8 7. Next, grab an air pump and locate the air valve on the front tire. Remove the safety cap and attach the pump tube to the tire valve. Turn on the air pump and read the PSI measure - the ideal tire pressure for the Bandicoot is 45PSI.
-
Page 9: Operation
OPERATION Warning Incorrect assembly, maintenance, or use of your Daxys scooter can cause component or performance failure, loss of control, serious injury, or death. Even if you’re an experienced scooter rider, you must read and understand the entire manual and any documentation provided for subcomponents or accessories before riding. In the event of a malfunc- tion of any of the components during set up or use, please discontinue set up or use and contact our support team. - Page 10 1. First, ensure the two parts of the charger are connected securely. The wall AC plug should be connected to the charger box. The connection between the cable and box should feel firm with no wobble or play. 2. Next, locate the charging port cap on your scooter and open it to find the charging port. Locate the round connec- tor on one end of the charger, this is the end you must insert in the charging port.
- Page 11 How to brake The Daxys Bandicoot Kickscooter has two different types of brakes. The regen brake which allows you to capture energy from brakeing and recharge your battery, and the dual drum brake. The regen brake will allow you to have a smoother and more efficient stop. To use it, press on the left hand side thumb throttle.
- Page 12 Folding 1. To fold, begin by locating the safety button and press it to unlock the folding lever. 2. Grab the folding latch, and pull it down to fold the stem. Make sure to keep one hand on the stem at all times as it will drop down instantly after the folding latch is released.
- Page 13 Handlebar features 1. Display 2. Accelerator throttle (right-hand side of the handlebar) 3. Accelerator throttle- Power button-Gear change 4. Accelerator throttle- light signal 5. E-brake throttle (left side of the handlebar) 6. E-brake throttle- left turning signal 7.E-brake throttle- right turning signal...
-
Page 14: Display
DISPLAY Warning Incorrect assembly, maintenance, or use of your Daxys scooter can cause component or performance failure, loss of control, serious injury, or death. Even if you’re an experienced scooter rider, you must read and understand the entire manual and any documentation provided for subcomponents or accessories before riding. In the event of a malfunc- tion of any of the components during set up or use, please discontinue set up or use and contact our support team. -
Page 15: Battery Info
BATTERY INFO Warning Incorrect assembly, maintenance, or use of your Daxys scooter can cause component or performance failure, loss of control, serious injury, or death. Even if you’re an experienced scooter rider, you must read and understand the entire manual and any documentation provided for subcomponents or accessories before riding. In the event of a malfunc- tion of any of the components during set up or use, please discontinue set up or use and contact our support team. -
Page 16: General Safety
We always recommend starting slow and getting used to the scooter before riding for longer distances. Daxys Scooters are designed to be used and operated by adults and should not be used by anyone younger than 18 years of age. Should the rider have any disabilities or impairments (visual, hearing, language, seizure, etc), please consult your physician before any ride or purchase of an electric scooter. -
Page 17: Maintenance
We recommend doing maintenance to your scooter every 6 months to make sure all of the components are working properly. Below you can find the steps to perform a basic maintenance of your Daxys Bandicoot Kickscooter. However, if you need additional information or help, please contact our support team directly through email support@pan- mi.com.au... - Page 18 Tire pressure Let’s get started with a tire pressure check, which will allow you to see the tire pressure of your tires. The ideal tire pressure for Apollo scooters is 45PSI. It is important to keep you tires at the correct pressure for a better riding experience and to avoid getting a flat tire.
- Page 19 Suspension lubrication Similar to the bearings, the suspension must also be lubricated. The constant movement of the suspension causes friction and may result in noises or squeaking sounds. Ensure the suspension is clean before lubricating. Spray the lubricant inside the spring and on the travel shaft of the spring located inside the coil.
- Page 20 Screw Tightening Use the included allen key to tighten the screws highlighted on the following graphics. Your scooter motor creates vibrations when you ride it, which may cause the screws on your scooter to loosen over time. We recommend checking your screws every few months to make sure they remain tight. You can use a medium strength headlocker adhesive to further improve their stability.
-
Page 21: Troubleshooting
TROUBLESHOOTING Warning Incorrect assembly, maintenance, or use of your Daxys scooter can cause component or performance failure, loss of control, serious injury, or death. Even if you’re an experienced scooter rider, you must read and understand the entire manual and any documentation provided for subcomponents or accessories before riding. In the event of a malfunc- tion of any of the components during set up or use, please discontinue set up or use and contact our support team. - Page 22 Failure displays / Error Codes If a malfunction occurs while using your then one of the following failure display codes will appear on the screen: BRAKE ERROR COMMUNICATION ERROR THE THROTTLE ERROR F1 is reported when the E3 will show the error in power F2 is reported when the power-on self-test fails.
- Page 23 UNDER VOLTAGE PROTECTION OVER CURRENT PROTECTION OVER VOLTAGE PROTECTION If E5 is reported continuously, check If E4 error is reported continuously, it If E6 is reported the battery voltage is too whether is considered to be hardware fault of high. the battery voltage is too low (Below controller.
-
Page 24: Faqs
Avoid Exposure to Water and Humidity You must avoid exposing your scooter to water and humidity. Daxys scooters are not waterproof and are not designed for extreme or prolonged exposure to water or humidity. Operating your scooter in rain or wet conditions can cause component or performance failure, loss of control, serious injury, or death. -
Page 25: Warranty
WARRANTY: DOA: Complete replacement 12 Month Warranty*: All returns accepted excluding items that have received physical damage by the owner/end-user Warranty does not apply to any: a) Damage caused by nature or acts of God, for example, lightning strikes, tornadoes and the like; b) Negligent or incorrect use of the product;...
Need help?
Do you have a question about the Bandicoot and is the answer not in the manual?
Questions and answers