Table of Contents
Advertisement
Quick Links
Advertisement
Table of Contents

Related Manuals for DAXYS LIZARD


Summary of Contents for DAXYS LIZARD
- Page 1 LIZARD Electric City Bike USER MANUAL v1.0...
- Page 2 LIZARD USER MANUAL Please read this manual very carefully before using the product. The manual contains important instructions for the safe use and longevity of your bike.
-
Page 3: Table Of Contents
Guide to Electric Pedal Assistance Modes ..................... 20 Your eBike Keys............................. 20 Maintenance Tyres ................................21 Cleaning Your e bike ........................... 21 Troubleshooting ............................22 F.A.Q’s ................................23 Warranty ................................ 24 Technical Support Contact information ......................25 DAXYS LIZARD - USER MANUAL... -
Page 4: Riding Introduction
RIDING INTRODUCTION Do not use the product before carefully reading the instructions and understanding the performance of the product; Before cycling, check whether the brakes work. When braking, please brake rear first and then front. Pay attention to the brake tightness. If the brake is too loose, use an Allen wrench to tighten it. Pay attention to increase the braking distance when riding in rain and snow. -
Page 5: Statement Of Responsibility
Please read this manual carefully before using the product and operate in accordance with it. Otherwise, the company will not be responsible for product damage or personal and property losses caused by improper and wrong use. DAXYS LIZARD - USER MANUAL... -
Page 6: Before You Ride
BEFORE YOU RIDE Perform Regular checks and maintenance as outlined below... -
Page 7: Battery Disposal
• Batteries must be disposed of in accordance with the relevant national environmental protection regulations. • Return batteries to a recycling facility, or an authorized Daxys dealer. • In case of uncertainty contact Daxys customer service department. DAXYS LIZARD - USER MANUAL... -
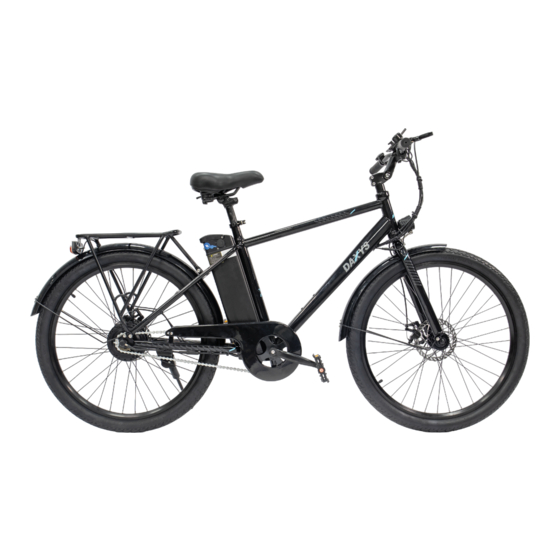
Page 8: Meet Your Bike
MEET YOUR BIKE: 1. Stem 14. Wheel Rim 2. Controller 15. Pedal 3. Electronic display 16. Sprocket 4. Brake lever 17. Battery 5. Controller and brake cables 18. Seat adjustment quick release 6. Handle 19. Chain 7. Handlebar 20. Gear cassette 8. -
Page 9: Display Guide
8. Headlight (ON if visible) 9. Odograph (ODO), Trip distance (TRIP), Current voltage (VOL), Running current (CUR), Remaining mileage (RM), Single ride time (TM) 10. Numerical value for selected indicator (no. 9) 11. Mile / Km indicator DAXYS LIZARD - USER MANUAL... -
Page 10: Handlebar Guide
HANDLEBAR GUIDE: 9. Electronic display 1. Handlebar 10. Option - (down) / Cruise mode button 2. Bell 11. Option + (up) / Headlight button 3. Handlebar grip 12. Menu / On Off button 4. Front brake lever 13. Back brake handle 5. -
Page 11: Product Specifications
AC 100-240V, 50/60 Hz, 2 A MAX Output DC 5.0-60V 0.001-4.5A 84W MAX Battery parameters Battery type 18650 Lithium ion power battery Battery volume 7.5Ah Battery rated voltage Under-voltage protection value Over-current protection value 15±1 A Charging time 3-4h DAXYS LIZARD - USER MANUAL... - Page 12 Parameter Value Electrical Specifications Motor mode moped Motor type 26”/36V/High speed gear / spoke wheel motor Motor rated power 250W (Standard) Product Features Instrument display Multi-functional LCD screen Front lighting Brakes front and rear disc brakes Tyre style Pneumatic tyre Tyre size specification 26x2.125 Air nozzle:...
-
Page 13: Assembly Instructions
ASSEMBLY INSTRUCTIONS: 1. UNBOXING & TOOLS 1. Unpack your new Daxys Wolf eBike. 2. Have the tools and parts ready. 3.Remove packing materials. 4. Remove front wheel. * Be careful not to scratch the paint *Be careful not to cut the tyre... - Page 14 2. HANDLEBAR INSTALLATION 1. Loosen screws A and B. 2. Rotate the handlebar riser 180° until it’s perfectly perpendicular *To confirm that the fork is in the right position, check if the brake pads are to the bike axis and loosen the height adjust bolt. on the same side of the bike.
- Page 15 3. Remove the protective plastic cap then put the wheel on and insert the 4.Tighten using the front wheel screw. front wheel pin. 5. Secure with the quick release. 6. Flip the bike in the normal position. DAXYS LIZARD - USER MANUAL...
- Page 16 4. BRAKE ADJUSTMENT 1. Spin the wheel and listen for rubbing sounds. 2. Loosen A, B with the hex key and adjust brake pads. 3. Spin the wheel to check. 4. Tighten A, B. 5. BATTERY REMOVAL 1. Unlock the battery using the keys (see page 20) 2.
- Page 17 3. Screw in “R” and “L” pedals in the motion shown on the 4. Attach the rear mudguard to the hub sockets. plastic caps, then tighten with the provided multi-tool. 5. Insert and adjust saddle height. 6. Secure with the quick release. DAXYS LIZARD - USER MANUAL...
-
Page 18: Charging The Battery
CHARGING THE BATTERY: Using the charger and Battery guide, charging indicators, level indicators etc. 1. Connect the charger to the battery charging port first. 2. Plug in a power source 3. Check if the LED is RED. If the LED is GREEN, unplug from power source and repeat steps 1. and 2. 4. -
Page 19: Battery And Charger Information
Plug your eBike charger directly into a wall outlet instead for best results. If required to use an extension cord, use the shortest length possible, and always check the specs so ensure it can handle your charger’s requirements. DAXYS LIZARD - USER MANUAL... -
Page 20: Operating Your Bike
OPERATING YOUR BIKE: Display, Buttons, Power on, gears, brakes etc. 1. Display function Speed display, Power indicator, Failure indication, Odograph, Trip distance. 2. Control and setting functions Power switch control, Wheel diameter setting, Maximum speed setting, Idle automatic sleep setting, Back-light brightness setting, Voltage rating setting etc. - Page 21 Wheel diameter(Unit: inch),Number of magnets, Liquid crystal brightness etc. (See Page 19). Note: Due to ongoing product upgrades, it is possible that some icons and menu items will be different from the above specifications, but will not affect normal usage. DAXYS LIZARD - USER MANUAL...
-
Page 22: Guide To Electric Pedal Assistance Modes
GUIDE TO ELECTRIC PEDAL ASSISTANCE MODES: Walk mode - motor powered, no pedaling required, max speed 6 km/h (Long press key on the controller. To exit either squeeze the brakes, or long press again) PAS 0 - no motor assistance PAS 1 - motor assisted, max speed 15 km/h (motor only). -
Page 23: Tyres
Next take chain lube and apply a slow but steady stream to the inside of the chain as you rotate the cranks until the whole chain got lubed. DAXYS LIZARD - USER MANUAL... -
Page 24: Troubleshooting
TROUBLESHOOTING: Troubleshooting information, fault codes, etc Quick troubleshooting steps: Electronic display error code guide 1. Make a note of the event description; 2. Switch off the system; Status code (decimal) Meaning 3. Visually check for any obvious cause; Battery under-voltage 4. -
Page 25: F.a.q's
First please check that the battery is charged, and it functions (for example turn on headlight) ; if the battery is in working conditions, then check if the battery and other wires are properly connected. If it’s still not working, then consult the dealer and after-sale for support. DAXYS LIZARD - USER MANUAL... -
Page 26: Warranty
WARRANTY: DOA: Complete replacement 12 Month Warranty*: All returns accepted excluding items that have received physical damage by the owner/end-user Warranty does not apply to any: a) Damage caused by nature or acts of God, for example, lightning strikes, tornadoes and the like; b) Negligent or incorrect use of the product;... -
Page 27: Technical Support Contact Information
TECHNICAL SUPPORT: Please contact your seller for details on authorized service centers. DAXYS LIZARD - USER MANUAL...
Need help?
Do you have a question about the LIZARD and is the answer not in the manual?
Questions and answers