Table of Contents
Advertisement
Quick Links
Advertisement
Table of Contents

Related Manuals for D-D The Aquarium Solution KH Manager


Summary of Contents for D-D The Aquarium Solution KH Manager
- Page 1 KH MANAGER INSTRUCTION MANUAL V1.0...
-
Page 2: Table Of Contents
POSITIONING THE UNIT CONNECTING THE TUBING DOWNLOADING THE APP STARTING THE APP AND CREATING AN ACCOUNT CONNECTING THE KH MANAGER TO THE CLOUD DIRECT BLUETOOTH CONNECTION TO THE KH MANAGER STARTING THE KH MANAGER IN APP STEP BY STEP GUIDE... - Page 3 CALIBRATING THE KH BUFFER SOLUTION PUMP (KH SOLUTION IN) CALIBRATING THE KH TEST PUMP (KH REAGENT IN) CALIBRATING THE KH RESETTING THE CALIBRATION ON THE KH MANAGER MANUALLY RUNNING THE PUMP HEADS RUNNING THE SALTWATER AND KH BUFFER SOLUTION PUMPS...
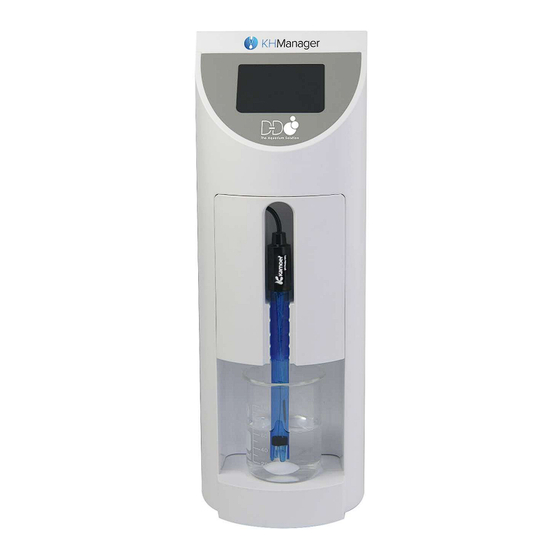
- Page 4 PRODUCT INFORMATION INTRODUCTION KH Manager is a specialised, app controlled, stand-alone device, which automatically samples, tests and maintains the KH level your aquarium water. This new unit has been developed in partnership between D-D and Kamoer for the European market, the KH Manager combines Kamoer’s experience in the manufacture of high precision medical grade dosing equipment, with D-D's knowledge and understanding of the specific requirements for control of the alkalinity within a modern reef aquarium.
-
Page 5: Unpacking
Once opened, please inspect the product for any visible damage and check all parts are included. If any defects are found when unpacking, please contact your retailer immediately. Box Contents Quick start guide KH Manager unit pH Probe Glass sample beaker ... -
Page 6: Display Screen
INSTALLATION POSITIONING THE UNIT The KH Manager is self-priming and can be placed above or below the water level. When there is big difference between the unit and the water height/reagent bottles, siphoning may occur. To avoid siphoning it should be placed in a position ensuring that the height difference is within 0.5m. -
Page 7: Downloading The App
If the KH Manager is only being used for monitoring and not for the automatic dosing of a KH buffer solution the black hose (KH Solution IN) and blue hose (KH Solution OUT) will not need to be connected or used. -
Page 8: Connecting The Kh Manager To The Cloud
CONNECTING THE KH MANAGER TO THE CLOUD For full access to all the features of the KH manager it will need to be connected to a home router and registered on your Kamoer Remote account. This will allow you to take advantage of the data logging, notifications, and the ability to access the unit remotely. -
Page 9: Starting The Kh Manager
Access to this step-by-step guide is also available by selecting the ‘settings’ icon from the bottom right, when in the control pages for the KH Manager, and then ‘Guide’ once in the settings page. Information on calibrating specific components is described below section ‘CALIBRATION’, the unit must be calibrated properly before use. -
Page 10: Mixing The Kh Test Reagent
When the KH Test Reagent has been mixed, log in to the Kamoer Remote app and tap on the device icon for your KH Manager. The ‘Status page’ for the device should be displayed, if not tap on the status icon in the bottom left, on this page it will show the volume trackers for the reagents. Tap on the tile titled ‘KH Test Reagent’... -
Page 11: Performing A Test
Please note: if the KH Manager is set to run automatic plans it will disable these plans when you enter the ‘Maintain’ heading to perform this check, a pop up will appear on screen to confirm, select ‘Go’ to continue or ‘Cancel’ to exit. After you exit the maintenance page automatic testing will be resumed as before. -
Page 12: Performing A Manual Test
KH and pH with either ‘Keep KH’ or ‘Tank Volume’ below. If ‘Keep KH’ is displayed with ‘OFF’ to the right of it the KH Manager will not add KH buffer solution after the test, if ‘Tank Volume’... -
Page 13: Performing An Automatic Test
KH and pH with either ‘Keep KH’ or ‘Tank Volume’ below. If ‘Keep KH’ is displayed with ‘OFF’ to the right of it the KH Manager will not add KH buffer solution after the test, if ‘Tank Volume’... - Page 14 As default the KH Manager is set with a test sample volume of 50ml, this volume is large enough to provide accurate results without using excessive KH test reagent per test cycle. It is however possible...
-
Page 15: Data Logging And Monitoring
‘Testing Plans : OFF’ or ‘Testing Plans : ON’. When ‘OFF’ all the programming will remain stored but the machine will not run, if ‘ON’ the programs will be active and the KH Manager will test as set. To switch between on and off tap on the toggle switch to the right, when the toggle is highlighted it will switch to on and when grey it will be off. -
Page 16: Setting The Reagent And Waste Water Monitoring
To enter the status page for your device, log in to the Kamoer Remote app and tap on the device icon for your KH Manager. The status page should be displayed, if not tap on the ‘Status’ icon in the bottom left corner. -
Page 17: Automatic Kh Buffer Dosing
To turn automatic dosing on or off, first log in to the Kamoer Remote app and tap on the device icon for your KH Manager. The status page should be displayed, if not tap on the ‘Status’ icon in the bottom left corner. -
Page 18: Setting Auto Add Mode
KH buffer, choose ‘Use “KH Carer” to add’. This will take you to the settings page for dosing using the KH Manager, at the top ‘Auto Add’ or ‘Custom Plans’ will be displayed. If ‘Custom Plans’ is shown, tap on the blue downwards facing arrow at the end of the heading and select ‘Auto Add’... -
Page 19: Add Kh Interval
5 times (1ml + 1ml + 1ml + 1ml + 1ml = 5ml), the goal will be to spread this out between the last test and the next test. The KH Manager will take approximately 25-30 minutes to perform a complete test cycle so there are 5 hours 30 minutes (330 minutes) to complete the dosing as it is testing every 6 hours. -
Page 20: Setting The Plan
KH buffer, choose ‘Use “KH Carer” to add’. This will take you to the settings page for dosing using the KH Manager, at the top ‘Auto Add’ or ‘Custom Plans’ will be displayed. If ‘Auto Add’ is shown, tap on the blue downwards facing arrow at the end of the heading and select ‘Custom Plans’... -
Page 21: Setting The Adjustment Parameters
‘Done’ and ‘Save’ in the top right corner to save and exit. Method: This is used to determine if you would like the KH Manager to use an amount or percentage proportion when making the adjustments to the dosing schedule, this adjustment can be made to effect a single dose on the schedule or multiple doses to spread and reduce the change in addition. -
Page 22: Calibrating The Kh Manager
Please note: if the KH Manager is set to run automatic plans it will disable these plans when you enter the ‘Maintain’ heading, a pop up will appear on screen to confirm, select ‘Go’ to continue or ‘Cancel’... -
Page 23: Calibrating The Saltwater Pump (Tank Water In)
Switch the scales to read in grams by depressing the mode (M) button until ‘g’ is shown. Remove the glass beaker from the KH Manager and empty out any liquid, then place the empty glass beaker on the scales. -
Page 24: Calibrating The Kh Buffer Solution Pump (Kh Solution In)
Put the glass beaker back on the scales, make sure the minus weight is still displayed before placing the beaker. This will give you the weight of the water minus the glass beaker. Enter the weight given on the scales into the app. The specific gravity of the water will need to be known to complete this step. -
Page 25: Calibrating The Kh Test Pump (Kh Reagent In)
Test Pump’ from the advanced list. A warning will be displayed in the app confirming that you want to proceed, tap ‘Still do it’ to continue or ‘OK’ to cancel. Remove the glass beaker, pH probe and plastic cover from the front of the KH Manager to expose the tubes. ... -
Page 26: Calibrating The Kh
CALIBRATING THE KH An offset can be calibrated into the KH Manager if the end test results given are believed to be incorrect for some reason, i.e. if the test results from the machine are 7.6dKH but the KH is known to be 7.8dKH. -
Page 27: Manually Running The Pump Heads
MANUALLY RUNNING THE PUMP HEADS Each pump head built on to the KH Manager can be set to run manually, this can be used to test the operation, bleed air from the tubes or confirm the calibration for the saltwater and KH buffer solution pump heads. -
Page 28: Emptying Liquid From The Pump Heads And Tubes
As default the serial number for the unit is used as the name. To change this log into the Kamoer Remote app and tap on the devise icon for your KH Manager. Go to the settings icon in the bottom right, when the settings page is displayed select ‘Name’... -
Page 29: Factory Settings Reset
It is possible to clear any altered settings on the KH Manager to restore it to factory default. To do this log into the Kamoer Remote app and tap on the device icon for your KH Manager then go to the settings icon in the bottom right. - Page 30 Should any defect in material or workmanship be found within 12 months of the date of purchase D-D The Aquarium Solution Ltd undertakes to repair, or at our discretion replace the defective part free of charge.
Need help?
Do you have a question about the KH Manager and is the answer not in the manual?
Questions and answers