Sign In
Upload
Download
Table of Contents
Contents
Add to my manuals
Delete from my manuals
Share
URL of this page:
HTML Link:
Bookmark this page
Add
Manual will be automatically added to "My Manuals"
Print this page
×
Bookmark added
×
Added to my manuals
Manuals
Brands
Edwards Manuals
Water Pump
nES EX Series
Instruction manual
Edwards nES EX Series Instruction Manual
Single stage rotary vane pump
Hide thumbs
1
2
3
4
Table Of Contents
5
6
7
8
9
10
11
12
13
14
15
16
17
18
19
20
21
22
23
24
25
26
27
28
29
30
31
32
33
34
35
36
37
38
39
40
41
42
43
44
45
46
47
48
49
50
51
52
53
54
55
56
57
58
59
60
61
62
63
64
65
66
67
68
69
70
71
72
73
74
75
76
77
78
79
80
81
82
83
84
85
86
87
88
89
90
91
92
93
94
95
96
page
of
96
Go
/
96
Contents
Table of Contents
Bookmarks
Table of Contents
Table of Contents
Safety
Key to the Symbols
Description
Principle of Operation
Inside the Pump (Process Gas)
Outside the Pump
Ignition Temperatures of Gases/Vapours that Can be Present
Potential Ignition Sources
Protective Measures
Technical Data
Technical Characteristics Nes40Ex
Table 1 Technical Characteristics Nes40Ex
Technical Characteristics Nes65Ex
Table 2 Technical Characteristics Nes65Ex
Technical Characteristics Nes100Ex
Table 3 Technical Characteristics Nes100Ex
Technical Characteristics Nes200Ex
Table 4 Technical Characteristics Nes200Ex
Technical Characteristics Nes300Ex
Table 5 Technical Characteristics Nes300Ex
Technical Data Nes630Ex
Table 6 Technical Data Nes630Ex
Figure 1 Dimensional Drawing Nes40Ex
Figure 2 Dimensional Drawing Nes65Ex
Figure 3 Dimensional Drawing Nes100Ex
Figure 4 Dimensional Drawing Nes200Ex
Figure 5 Dimensional Drawing Nes300Ex
Figure 6 Dimensional Drawing Nes630Ex
Figure 7 Pumping Speed Nes40Ex
Figure 8 Pumping Speed Nes65Ex
Figure 9 Pumping Speed Nes100Ex
Figure 10 Pumping Speed Nes200Ex
Figure 11 Pumping Speed Nes300Ex
Figure 12 Pumping Speed Nes630Ex
Ordering Information
Table 7 Ordering Information ATEX Category II Pumps
Table 8 Ordering Information Bare Shaft Pump
Accessories
Nes Single Stage Ex Series and Booster Combinations
Table 9 Connections
Table 10 Accessories
Spare Parts
Lubricants
Table 11 Spare Parts
Table 12 Lubricant
Transport and Storing
Transport and Packaging
Mounting Orientation
Storage
Installation
Connection to the System
Intake Side
Exhaust Side
Electrical Connections
Motor Protection Device
Figure 13 Wiring
Temperature Sensor PT100
Oil Level Switch
Over Pressure Sensor
Associated Electrical Equipment
Figure 14 Pump System Overview
Figure 15 Decision Diagram
Figure 16 Wiring Diagram
Figure 17 Example of Electrical Diagram
Figure 18 Example of Electrical Diagram
Start the Pump
Operation
Pumping of Non-Condensible Gases
Pumping of Condensible Gases and Vapours
Shut down
Ultimate Pump Pressure
Maintenance
Safety Information
Spare Parts
Maintenance Intervals
Service at Edwards Vacuum Service Technology Centre
Table 13 Maintenance Schedule
Maintenance Work
Checking the Oil Level
Checking the Oil Condition
Observe the Safety Regulations
Oil Change
Replacing the Exhaust Filters
The Pumps: Nes40Ex, Nes65Ex, Nes100
Figure 19 Exhaust Filter Replacement: Nes40Ex, Nes65Ex, Nes100
Obey the Safety Regulations
Nes200Ex
Figure 20 Nes40Ex, Nes65Ex and Nes100Ex Earth Continuity Check
Figure 21 Replace the Exhaust Filters
Nes300Ex
Figure 22 Nes200Ex Earth Continuity Check
Earthing Continuity Test
Nes300Ex
Figure 23 Nes300Ex Earth Continuity Check
Checking the Float Valve
Figure 24 Test Earth Continuity
Cleaning the Intake Port Dirt Trap
Checking the Isolation Valve
Cleaning the Gas Ballast Air Filter
Cooling Coil Cleaning (Air Cooled Pumps)
Check and Re-Tighten the V-Belts on Nes630Ex
Tension Meter
Figure 25 Using the Tension Meter
Lubricating the Bearings
Table 14 Tension Values with Goodyear Tension Meter
Table 15 Tension Values with PIX Tension Meter
Table 16 Amount of Grease Per Bearing
Replacement of Electrical Motor
Procedure for Checking the Ignition Prevention System
Motor Installation (for Bare Shaft Non-ATEX Pumps)
Motor Installation Instructions
Figure 26 Nes100Ex Motor Coupling Half Position
Motor Installation Instructions for Nes200Ex Pump
Figure 27 Nes300Ex Motor Coupling Half Position
Figure 28 Drain the Oil from the Pump
Figure 29 Remove the Pump Coupling Housing
Figure 30 Coupling Housing Removal
Figure 31 Proper Orientation
Figure 32 Turbine Support Spacing
Figure 33 Tighten Assembly
Figure 34 Reassemble
Electrical Connections
Figure 35 Replace Pump Cover
Fault Finding
Table 17 Fault Finding
Spare Parts
Figure 36 Nes40 Ex ATEX CAT 2 Spares Parts
Table 18 Nes40 Ex ATEX CAT 2 Maintenance Kit
Table 19 Nes40 Ex ATEX CAT 2 Repair Kit
Figure 37 Nes65 Ex ATEX CAT 2 Spares Parts
Table 20 Nes65 Ex ATEX CAT 2 Maintenance Kit
Table 21 Nes65 Ex ATEX CAT 2 Repair Kit
Figure 38 Nes100 Ex ATEX CAT 2 Spares Parts
Table 22 Nes100 Ex ATEX CAT 2 Maintenance Kit
Table 23 Nes100 Ex ATEX CAT 2 Repair Kit
Figure 39 Nes200 Ex ATEX CAT 2 Spares Parts
Table 24 Nes200 Ex ATEX CAT 2 Maintenance Kit
Table 25 Nes200 Ex ATEX CAT 2 Repair Kit
Figure 40 Nes300 Ex ATEX CAT 2 Spares Parts (1 of 3)
Table 26 Nes300 Ex ATEX CAT 2 Maintenance Kit
Table 27 Nes300 Ex ATEX CAT 2 Repair Kit
Advertisement
Quick Links
Download this manual
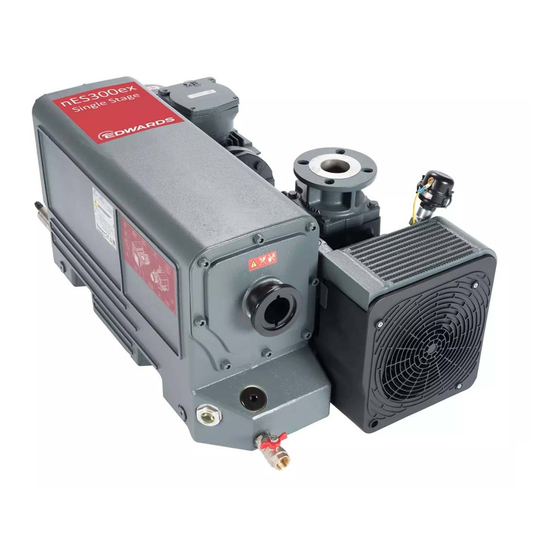
nES SINGLE STAGE EX SERIES
ROTARY VANE PUMPS
INSTRUCTION MANUAL
Publication Number: A351-18-880
Issue: A
Original Instructions
edwardsvacuum.com
Table of
Contents
Previous
Page
Next
Page
1
2
3
4
5
Advertisement
Table of Contents
Need help?
Do you have a question about the nES EX Series and is the answer not in the manual?
Ask a question
Questions and answers
Related Manuals for Edwards nES EX Series
Water Pump Edwards nES Series Instruction Manual
Stage rotary vane pumps (56 pages)
Water Pump Edwards nES40 Instruction Manual
Stage rotary vane pumps (56 pages)
Water Pump Edwards nES65 Instruction Manual
Stage rotary vane pumps (56 pages)
Water Pump Edwards nES100 Instruction Manual
Stage rotary vane pumps (56 pages)
Water Pump Edwards nES300 Instruction Manual
Stage rotary vane pumps (56 pages)
Water Pump Edwards nES630 Instruction Manual
Stage rotary vane pumps (56 pages)
Water Pump Edwards nES40A Instruction Manual
(40 pages)
Water Pump Edwards nES40ex Instruction Manual
Single stage rotary vane pump (96 pages)
Water Pump Edwards nEXT nEXT85 Instruction Manual
Turbomolecular pumps (112 pages)
Water Pump Edwards nEXT85 Original Instructions Manual
Service tool kit (28 pages)
Water Pump Edwards nEXT240 Instruction Manual
Turbomolecular pumps (81 pages)
Water Pump Edwards nEXT Instruction Manual
Vibration isolator turbomolecular pumps (20 pages)
Water Pump Edwards nEXT300 Instruction Manual
Turbomolecular pump (108 pages)
Water Pump Edwards nEXT200200 Instruction Manual
Mechanical turbomolecular pumps (100 pages)
Water Pump Edwards nEXT730 Instruction Manual
Turbomolecular pumps (137 pages)
Water Pump Edwards T-Station nEXT300D CF100 Instruction Manual
(48 pages)
This manual is also suitable for:
Nes40ex
Nes65ex
Nes100ex
Nes200ex
Nes300ex
Nes630ex
...
Show all
A35118940
A35318940
A35418940
A35518940
A35618940
A35818940
A35118986
A35318986
A35418986
A35518986
A35618986
Table of Contents
Print
Rename the bookmark
Delete bookmark?
Delete from my manuals?
Login
Sign In
OR
Sign in with Facebook
Sign in with Google
Upload manual
Upload from disk
Upload from URL


Need help?
Do you have a question about the nES EX Series and is the answer not in the manual?
Questions and answers