Table of Contents
Advertisement
Quick Links
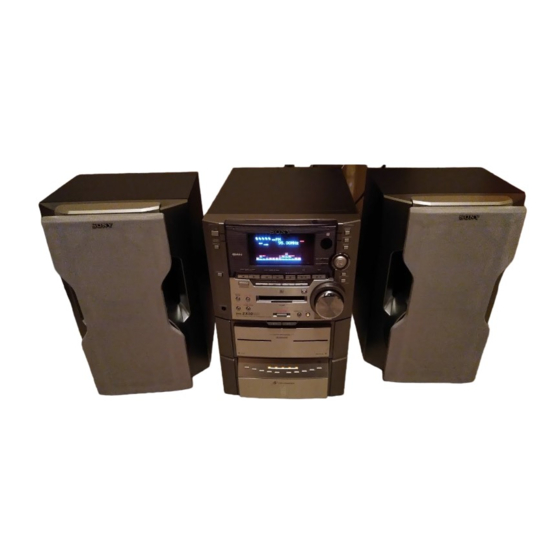
4-229-972-12(1)
M ini H i-Fi
Com pone nt
Syst e m
Operating Instructions
Ow ner's Record
The model and serial numbers are located on the rear panel. Record the serial number in the
space provided below. Refer to them whenever you call upon your Sony dealer regarding this
product.
Model No.
_______________
Serial No. _______________
DHC-ZX50MD
©2000 Sony Corporation
Downloaded from:
https://www.usersmanualguide.com/
Advertisement
Table of Contents

Related Manuals for Sony DHC-ZX50MD


Summary of Contents for Sony DHC-ZX50MD
- Page 1 Operating Instructions Ow ner’s Record The model and serial numbers are located on the rear panel. Record the serial number in the space provided below. Refer to them whenever you call upon your Sony dealer regarding this product. Model No.
- Page 2 IN NO EVENT SHALL SELLER BE LIABLE registered mark. FOR ANY DIRECT, INCIDENTAL OR NERGY ® Partner, CONSEQUENTIAL DAMAGES OF ANY Sony Corporation has determined NATURE, OR LOSSES OR EXPENSES that this product meets the RESULTING FROM ANY DEFECTIVE NERGY ® guidelines for PRODUCT OR THE USE OF ANY PRODUCT.
-
Page 3: Table Of Contents
Table of Contents Ge t t ing St a rt e d Re c ording on a n M D Step 1: Hooking up the system ....5 Before you start recording ....... 37 Step 2: Setting the time ......7 Recording your favorite CD tracks .. - Page 4 T a ble of Cont e nt s (c ont inue d) Sound Adjust m e nt Adjusting the sound ........ 69 Selecting the preset audio effect file ..70 Changing the spectrum analyzer display 71 Selecting surround effects ....... 72 Controlling the graphic equalizer ....
-
Page 5: Ge T T Ing St A Rt E D
Ge t t ing St a rt e d Step 1: Hooking up the system Follow steps 1 through 4 of the following procedure to hook up your system using the supplied cords and accessories. AM loop antenna FM antenna Front speaker (Right) Front speaker (Left) N ot e... - Page 6 St e p 1 : H ook ing up t he syst e m For models with a voltage selector, set (c ont inue d) VOLTAGE SELECTOR to the position of your local power line voltage. Connect the FM/AM antennas. Set up the AM loop antenna, then VOLTAGE SELECTOR...
-
Page 7: Step 2: Setting The Time
T o a t t a c h t he front spe a k e r pa ds Step 2: Setting the time Attach the supplied front speaker pads to the bottom of the speakers to stabilize the speakers and prevent them from slipping. You must set the time before using the timer functions. - Page 8 St e p 2 : Se t t ing t he t im e T o c ha nge t he t im e (c ont inue d) The previous explanation shows you how to set the time while the power is off. To change the time while the power is on, do the following: Move the multi stick toward v or V 1 Press MODE SELECT repeatedly to select “Set...
-
Page 9: Step 3: Presetting Radio Stations
Step 3: Presetting radio Press MODE SELECT repeatedly to select “Set Up Mode”, then press PUSH stations ENTER. Move the multi stick toward b or B You can preset a total of 30 stations (20 for FM and 10 for AM). repeatedly to select “TUNER Set Up ?”, then press PUSH ENTER. - Page 10 St e p 3 : Pre se t t ing ra dio T o c ha nge t he AM t uning st a t ions (c ont inue d) int e rva l (Ex c e pt for t he Europe a n m ode l) T o t une in a st a t ion w it h a w e a k The AM tuning interval is factory-preset to 9 kHz signa l...
-
Page 11: Saving The Power In Standby Mode
T ips Saving the power in • ?/1 indicator and timer indicator (when the timer is set) light even in the Power Saving Mode. standby mode • The timer functions in the Power Saving Mode. N ot e s (N ort h Am e ric a n a nd Europe a n •... -
Page 12: Ba Sic Ope Ra T Ions
Ba sic Ope ra t ions Press one of the A 1~5 buttons and Playing a CD place a CD on the disc tray. — N orm a l Pla y If a disc is not placed properly, it will not be recognized. - Page 13 T ips Do this • Pressing CD NX when the power is off Press x. Stop play automatically turns the power on and starts CD Press CD NX (or X on the Pause playback if there is a CD in the tray (One Touch remote).
-
Page 14: Recording A Cd On An Md With High Speed
Recording a CD on an When “PUSH ENTER!” flashes, press PUSH ENTER. M D with High Speed Recording starts. During high speed recording, you cannot listen to the playback –– CD-M D H igh-Spe e d Sync hro sound. When the recording is completed, the Re c ording CD player and the MD deck stop automatically. -
Page 15: Synchro Recording
N ot e s Synchro Recording • You cannot record over existing material during CD-MD High-Speed Synchro Recording. The MD deck automatically starts recording from the end of The SYNC REC button lets you record on an MD the existing material. or a tape easily. - Page 16 Sync hro Re c ording (c ont inue d) T ips • When recording to and from a tape, the playback operations vary depending on the direction of the tape. Press SYNC REC repeatedly to select • When recoding a TEXT-CD, the CD TEXT information (except for the disc title) is the recording mode you want, then automatically recorded (see page 50).
-
Page 17: Playing An Md
Press MD NX (or MD N on the Playing an M D remote). — N orm a l Pla y Playback starts. Track number . > (Power) Playing time Do this Press x. Stop play Press MD NX (or X on the Pause remote). -
Page 18: Playing A Tape
Press A A or A B and insert a recorded Playing a tape tape in deck A or B. Insert with the side you want to play You can use any type of tape, TYPE I (normal), facing forward. TYPE II (CrO ), or TYPE IV (metal), since the deck automatically detects the tape type. - Page 19 T ips Press TAPE A (or TAPE B) N. • Pressing TAPE A (or TAPE B) N or n when the Press TAPE A (or TAPE B) n to play the power is off automatically turns the power on and starts tape playback if there is a tape in the deck reverse side.
-
Page 20: Listening To The Radio
Pla ying a t a pe (c ont inue d) Listening to the radio — Pre se t Tuning N ot e s • During relay play or cycle play, the deck stops automatically after repeating the sequence five Preset radio stations in the tuner’s memory first times. - Page 21 T ips Press TUNER/BAND repeatedly to • Pressing TUNER/BAND when the power is off select FM or AM. automatically turns the power on and tunes to the last received station (One Touch Play). When the system is in the Power Saving Mode, the One Press .
-
Page 22: Recording From The Radio On An Md
Recording from the Press TUNER/BAND repeatedly to select FM or AM. radio on an M D Press . or > repeatedly to tune in You can make an analog recording from the radio a preset station. on an MD. If you use a partially recorded MD, Preset number recording starts after the recorded tracks. -
Page 23: Recording From The Radio On A Tape
Recording from the Press TUNER/BAND repeatedly to select FM or AM. radio on a tape Press . or > repeatedly to tune in You can record the radio program on a tape by a preset station. calling up a preset station. You can use TYPE I Preset number (normal) or TYPE II (CrO ) tapes. - Page 24 Re c ording from t he ra dio on a t a pe (c ont inue d) T o st op re c ording Press x. T o c a nc e l t he m e nu ope ra t ion Press MODE SELECT.
-
Page 25: List E Ning T O A Cd
List e ning t o a CD Using the CD display Press DISPLAY. Each time you press the button during normal playback or when playback is stopped, the display changes as follows: You can check the remaining time of the current During norm a l pla yba c k track or that of the CD. -
Page 26: Playing The Cd Tracks Repeatedly
Move the multi stick toward b or B Playing the CD tracks repeatedly to select “Repeat Set Up ?”, repeatedly then press PUSH ENTER. –– Re pe a t Pla y Move the multi stick toward b or B repeatedly to select “Repeat 1” or This function lets you repeat a single CD or all “Repeat All”, then press PUSH CDs in Normal Play, Shuffle Play, and Program... -
Page 27: Playing The Cd Tracks In Random Order
Move the multi stick toward b or B Playing the CD tracks in repeatedly to select “Play Mode Set random order Up ?”, then press PUSH ENTER. –– Shuffle Pla y Move the multi stick toward b or B repeatedly to select “All Shuf” or You can play all the tracks on one CD or all CDs “1 Shuffle”, then press PUSH ENTER. -
Page 28: Programming The Cd Tracks
Move the multi stick toward b or B Programming the CD repeatedly to select “CD Set Up ?”, then tracks press PUSH ENTER. –– Progra m Pla y Move the multi stick toward b or B repeatedly to select “Program Set ?”, You can make a program of up to 25 steps from then press PUSH ENTER. - Page 29 T o c a nc e l t he m e nu ope ra t ion T o c le a r a de sire d st e p from t he progra m Press MODE SELECT. 1 Press FUNCTION repeatedly until “CD” T o c a nc e l Progra m Pla y appears in the display.
- Page 30 Progra m m ing t he CD t ra c k s (c ont inue d) T ips • You can make a program using the “Play Mode Set Up ?” menu. Select “Play Mode Set Up ?” in step 4, then move the multi stick toward b or B repeatedly to select “Program”...
-
Page 31: List E Ning T O A N M D
List e ning t o a n M D Using the M D display Press FUNCTION repeatedly until “MD” appears in the display. Press DISPLAY. You can check the total number of tracks, the total Each time you press the button during playing time, and the remaining time of the MD. -
Page 32: Playing The Md Tracks Repeatedly
U sing t he M D displa y (c ont inue d) Playing the M D tracks repeatedly T ips • To check the disc titles, press SCROLL on the –– Re pe a t Pla y remote while playback is stopped. To check the track titles, press SCROLL while playing. -
Page 33: Playing The Md Tracks In Random Order
Move the multi stick toward b or B Playing the M D tracks in repeatedly to select “Repeat Set Up ?”, random order then press PUSH ENTER. –– Shuffle Pla y Move the multi stick toward b or B repeatedly to select “Repeat 1” or You can play all the tracks on an MD in random “Repeat All”, then press PUSH order. -
Page 34: Programming The Md Tracks
Pla ying t he M D t ra c k s in ra ndom Programming the M D orde r (c ont inue d) tracks Move the multi stick toward b or B –– Progra m Pla y repeatedly to select “Play Mode Set Up ?”, then press PUSH ENTER. - Page 35 T o c a nc e l Progra m Pla y Move the multi stick toward b or B 1 Press FUNCTION repeatedly until “MD” repeatedly to select the desired track. appears in the display. 2 While in stop mode, press MODE SELECT Track number repeatedly to select “Set Up Mode”, then press PUSH ENTER.
- Page 36 Progra m m ing t he M D t ra c k s T ips (c ont inue d) • You can make a program using the “Play Mode Set Up ?” menu. Select “Play Mode Set Up ?” in step 4, then move the multi stick toward b or B repeatedly T o c le a r a de sire d st e p from t he to select “Program”...
-
Page 37: Re C Ording On A N M D
Re c ording on a n M D N ot e s on M D t ra c k num be rs Before you start • On an MD, the track number (track sequence), track start and end point information, etc., are recorded in recording the TOC* area independent of the sound information. -
Page 38: Recording Your Favorite Cd Tracks
Move the multi stick toward b or B Recording your favorite repeatedly to select “Program Set ?”, CD tracks then press PUSH ENTER. — CD-M D Sync hro Re c ording Move the multi stick toward v or V repeatedly to select a CD. You can record tracks from all the CDs in the If you want to program all the tracks on a CD order you want using Synchro Recording feature. -
Page 39: Recording On An Md Manually
Recording on an M D Press SYNC REC repeatedly to select “CD t MD”, then press PUSH manually ENTER. The MD deck stands by for recording and the CD is in pause for playback. The system automatically locates the end of any recorded portion of an MD and starts recording If you use an MD with tracks already from that point. -
Page 40: Long Play Recording
Re c ording on a n M D m a nua lly Long Play recording (c ont inue d) In addition to normal stereo recording, this system Press MD REC MODE repeatedly to has two long time modes: LP2 and LP4. When select the recording mode you want. -
Page 41: Making A Space Between Tracks
T o re t urn t o t he st e re o re c ording M aking a space Select “STEREO” in step 1. between tracks T o c a nc e l LP St a m p func t ion “LP:”... - Page 42 M a k ing a spa c e be t w e e n t ra c k s Move the multi stick toward b or B 3 se c onds long (c ont inue d) repeatedly to select “S. Space On”, then press PUSH ENTER.
-
Page 43: Starting Recording With 6 Seconds Of
Starting recording with Insert a recordable MD. 6 seconds of prestored Press FUNCTION repeatedly until the source (e.g., TUNER) you want to audio data record appears in the display. — T im e M a c hine Re c ording Press MD REC. -
Page 44: Marking Track Numbers
M arking track numbers While in recording pause, press MODE SELECT repeatedly to select “Set Up Mode”, then press PUSH ENTER. The track numbers can be marked as follows: • Mark the track numbers automatically. Move the multi stick toward b or B When you record from this system’s CD repeatedly to select “MD Set Up ?”, (digital recording) or during level-synchro... - Page 45 T o c ha nge t he t rigge r le ve l for M arking track numbers at a Le ve l Sync hro Re c ording specific point while recording Follow the procedure below to change the signal —...
-
Page 46: Adjusting The Recording Level
Move the multi stick toward b or B Adjusting the recording repeatedly to select “MD Edit ?”, then level press PUSH ENTER. Move the multi stick toward b or B You can adjust the recording level when the recorded sound is too soft or too strong. You can repeatedly to select “REC Setup ?”, adjust and save the recording level for each then press PUSH ENTER. -
Page 47: Edit Ing A N M D
Edit ing a n M D Before editing Before you start editing To edit the MD, the MD deck requires the following conditions: You can edit the recorded tracks on an MD. By using the editing functions, you can create a new •... -
Page 48: Labelling An Md
Labelling an M D Press FUNCTION repeatedly until “MD” appears in the display. — N a m e Func t ion To label a disc, press x to stop playing the disc. To label a track, press ./> repeatedly You can create titles for your recorded MDs and until the desired track number appears. - Page 49 T o c opy disc or t ra c k t it le Repeat steps 3 through 5 to complete You can copy a labelled disc or a track title to use it the entire title. as a title for another disc or for a track title within a disc.
- Page 50 La be lling a n M D (c ont inue d) T o e ra se a ll t he t it le s in a disc 1 Press FUNCTION repeatedly until “MD” appears in the display. T o c he c k t he t it le s 2 While MD is stopped, press MODE SELECT To check the disc titles, press SCROLL on the repeatedly to select “Set Up Mode”, then press...
-
Page 51: Erasing Recordings
Multi stick Erasing recordings (Power) PUSH ENTER — Era se Func t ion The MD deck lets you erase unwanted tracks quickly and easily. You can restore the contents to the condition before erasing (unerase) by using the Undo function. Check carefully the portion to be erased, as you cannot undo an edit after performing any additional edits. - Page 52 Era sing re c ordings (c ont inue d) To erase all the tracks You can erase the entire MD contents (all titles and tracks) all at once. Move the multi stick toward b or B repeatedly until the track you want to Multi stick erase appears, then press PUSH (Power)
- Page 53 To erase a portion of a track Move the multi stick toward b or B (A-B Erase Function) repeatedly to select “All Erase ?”, then press PUSH ENTER. You can specify a portion within a track and erase “All Erase??” appears. the portion easily.
- Page 54 Era sing re c ordings (c ont inue d) Repeat step 7 until point A is played correctly. Press FUNCTION repeatedly until Press PUSH ENTER if point A is “MD” appears in the display. correct. “Point B set” flashes and playback for setting Press MODE SELECT repeatedly to the end point of the portion to be erased select “Set Up Mode”, then press PUSH...
-
Page 55: Moving Recorded Tracks
M oving recorded tracks Press FUNCTION repeatedly until “MD” appears in the display. — M ove Func t ion Press MODE SELECT repeatedly to Using the Move Function, you can change the select “Set Up Mode”, then press PUSH order of any track on the disc. When you move ENTER. -
Page 56: Dividing Recorded Tracks
M oving re c orde d t ra c k s Dividing recorded tracks (c ont inue d) –– Divide Func t ion Press PUSH ENTER. “Complete!” appears for a few seconds and You can use Divide Function to add track the selected track moves to the selected numbers to multiple tracks that are recorded as position. - Page 57 Press FUNCTION repeatedly until Press PUSH ENTER again when you “MD” appears in the display. find the point where you want to divide the track. Press MODE SELECT repeatedly to “Complete!” appears for a few seconds and the newly created track begins playing. The select “Set Up Mode”, then press PUSH first track will have the original title while ENTER.
-
Page 58: Combining Recorded Tracks
Combining recorded Press FUNCTION repeatedly until “MD” appears in the display. tracks Press MODE SELECT repeatedly to — Com bine Func t ion select “Set Up Mode”, then press PUSH ENTER. You can combine 2 tracks into a single track. The total number of tracks decreases by one and Move the multi stick toward b or B all tracks following the combined ones are... -
Page 59: Undoing The Last Edit
T o c a nc e l Undoing the last edit Press x. — U ndo Func t ion T o c a nc e l t he m e nu ope ra t ion Press MODE SELECT. This function lets you cancel the last edit (except T o undo t he Com bine Func t ion for S.F Edit) and restore the contents of the MD to Use the Undo Function immediately after you... - Page 60 U ndoing t he la st e dit (c ont inue d) Press PUSH ENTER again. “Complete!” appears for a few seconds and the contents of the MD are restored to the Press FUNCTION repeatedly until condition before the edit. “MD”...
-
Page 61: Changing The Recording Level After Recording
Changing the overall Changing the recording recording level level after recording — S.F Edit Press FUNCTION repeatedly until “MD” appears in the display. You can change the volume of the recorded tracks Press MODE SELECT repeatedly to using S.F (Scale Factor) Edit. The original track is recorded over at the new recording level. - Page 62 Cha nging t he re c ording le ve l Fade-in and Fade-out a ft e r re c ording (c ont inue d) Recording Press PUSH ENTER. Press FUNCTION repeatedly until The deck starts recording over the existing “MD” appears in the display. track.
- Page 63 Press PUSH ENTER. “S.F Edit OK?” appears in the display. Press PUSH ENTER. The deck starts recording over the existing track. “S.F Edit: **%” appears while the track is being recorded. An amount of time that is roughly equal to or longer than the playback time of the track is required when recording over the track.
-
Page 64: Recording On A Tape Manually
Re c ording on a T a pe Recording on a tape Insert a recordable tape into deck B. manually Press FUNCTION repeatedly until the source you want to record appears. You can record from a CD, MD, tape, or radio as •... -
Page 65: Recording A Cd By Specifying Track Order
Recording a CD by Press TAPE REC PAUSE/START. Recording starts. specifying track order Start playing the source to be recorded. — Progra m Edit Press You can record tracks from all the CDs in the Stop recording order you want. When programming, make sure the playing time for each side do not exceed the Pause recording TAPE REC PAUSE/START. - Page 66 Re c ording a CD by spe c ifying To program additional tracks to be t ra c k orde r (c ont inue d) recorded on side A, repeat steps 6 through 8. Place a CD and insert a recordable tape Skip step 6 to select tracks from the same into deck B.
- Page 67 T o c a nc e l Progra m Edit Move the multi stick toward b or B 1 Press FUNCTION repeatedly until “CD” repeatedly to select “1 Way” to record appears in the display. on one side, or “Cycle” (or “Relay”) to 2 While in stop mode, press MODE SELECT record on both sides, then press PUSH repeatedly to select “Set Up Mode”, then press...
- Page 68 Re c ording a CD by spe c ifying t ra c k orde r (c ont inue d) Selecting tape length automatically —T a pe Se le c t Edit You can check for the suitable tape length when recording from a CD.
-
Page 69: Sound Adjust M E Nt Adjusting The Sound
Sound Adjust m e nt T o re inforc e low e r ba ss sound Adjusting the sound (V -GROOV E) Press V-GROOVE. The lower bass frequency of You can reinforce the bass and create a more the music you are listening to is powerfully reinforced, DBFB is automatically set to full powerful sound. -
Page 70: Selecting The Preset Audio Effect File
M usic m e nu opt ions Selecting the preset Effect audio effect file ROCK Standard music sources JAZZ The audio effect file menu lets you select the DANCE sound characteristic according to the sound you SOUL are listening to. ORIENTAL Soundtracks and special listening ACTION... -
Page 71: Changing The Spectrum Analyzer Display
Move the multi stick toward b or B Changing the spectrum repeatedly to select the effect you analyzer display desire, then press PUSH ENTER. Each time you move the multi stick toward b or B, the display changes as follows: You can enjoy changing the display while listening to the music. -
Page 72: Selecting Surround Effects
T ip Selecting surround If you want to memorize the effect, store it into a personal file (see “Creating a personal audio effect effects file” on page 74). N ot e You can enjoy surround effects. When you choose other sound effects, the surround effects will be canceled. -
Page 73: Controlling The Graphic Equalizer
Move the multi stick toward b or B Controlling the graphic repeatedly to select “Equalizer equalizer Control”, then press PUSH ENTER. Move the multi stick toward b or B You can control the sound by raising or lowering the levels of specific frequency ranges. repeatedly to select a frequency band Before operation, first select the audio effect you (5 steps). -
Page 74: Creating A Personal Audio Effect File
Move the multi stick toward b or B Creating a personal repeatedly to select “P File Memory”, audio effect file then press PUSH ENTER. The personal file number appears in the — Pe rsona l file display. You can create a personal file of audio patterns (surround effect and graphic equalizer) and store them in the memory of the unit. -
Page 75: Ot He R Fe A T Ure S
Ot he r Fe a t ure s T o c he c k t he RDS inform a t ion Using the Radio Data Each time you press DISPLAY, the display changes as follows: System (RDS) Station name* (For Europe a n m ode l only) Frequency What is the Radio Data Program type*... - Page 76 U sing t he Ra dio Da t a Syst e m List of progra m t ype s (PT Y ) (RDS) (c ont inue d) NEWS Press FUNCTION repeatedly until News programs. “TUNER” appears in the display. AFFAIRS Topical programs that expand on current news.
-
Page 77: Labelling A Preset Radio Station
CHILDREN Labelling a preset radio Programs for the young. SOCIAL station Programs about people and the things that affect them. You can label each preset radio station with up to RELIGION 9 characters (Station Name). The station name Programs of religious contents. appears when you tune in the station. - Page 78 La be lling a pre se t ra dio st a t ion T ip (c ont inue d) You can label each preset station using the “TUNER Set Up ?” menu. 1 Follow steps 1 through 2 on page 77. Press NAME EDIT/ CHARACTER 2 Press MODE SELECT repeatedly to select “Set Up Mode”, then press PUSH ENTER.
-
Page 79: Falling Asleep To Music
Falling asleep to music Waking up to music — Sle e p T im e r — Da ily T im e r You can let the system turn off at a preset time, so You can wake up to music at a preset time every you can sleep to the music. - Page 80 Wa k ing up t o m usic (c ont inue d) Set the time to stop playback following step 7. Adjust the volume. Move the multi stick toward b or B repeatedly to select the music source Press MODE SELECT repeatedly to you want.
-
Page 81: Timer-Recording Radio Programs
T o c a nc e l t he t im e r ope ra t ion Timer-recording radio 1 Press MODE SELECT repeatedly to select “Set Up Mode”, then press PUSH ENTER. programs 2 Move the multi stick toward b or B repeatedly to select “Timer Set Up ?”, then press PUSH ENTER. - Page 82 T im e r-re c ording ra dio progra m s Set the time to stop recording following (c ont inue d) step 7. Move the multi stick toward b or B When recording on an MD, move the repeatedly to select “Timer Set Up ?”, multi stick toward b or B repeatedly to then press PUSH ENTER.
- Page 83 T o c a nc e l t he t im e r ope ra t ion 1 Press MODE SELECT repeatedly to select “Set Up Mode”, then press PUSH ENTER. 2 Move the multi stick toward b or B repeatedly to select “Timer Set Up ?”, then press PUSH ENTER.
-
Page 84: Opt Iona L C Om Pone Nt S
Opt iona l c om pone nt s , Connect a digital cable (optical, Connecting a digital optional). component 1Remove the OPTICAL IN cover of the jack. (U .S.A. m ode l only) You can connect a digital component using a digital cable (optical, optional). -
Page 85: Connecting An Analog Component
Connecting an analog Connecting a super component woofer speaker To enhance your system, you can connect optional You can connect an optional super woofer components. Analog sound from the connected speaker. component is recorded as an analog signal on an To super woofer MD or a tape. -
Page 86: Connecting Headphones
Connecting headphones Connecting a microphone You can connect headphones to PHONES jack. No sound will come out of the speakers. (Asia n m ode l only) You can connect an optional microphone to the (Power) MIC jack. Adjust the microphone volume by turning MIC VOL. -
Page 87: Connecting External Antennas
AM antenna Connecting external Connect a 6- to 15- meter insulated wire to the antennas AM antenna terminal. Leave the supplied AM loop antenna connected. Connect the external antenna to improve the J a c k t ype A reception. Refer to the instructions of each Insulated wire (not supplied) component. -
Page 88: Addit Iona L I Nform A T Ion
• When you move the system, take out any discs. If you have any questions or problems concerning your stereo system, please consult your nearest Sony dealer. Downloaded from: https://www.usersmanualguide.com/... - Page 89 T o sa ve a t a pe pe rm a ne nt ly Cle a ning t he t a pe he a ds To prevent a tape from being accidentally recorded Clean the tape heads after every 10 hours of use. over, break off the cassette tab from side A or B as When the tape heads become dirty;...
-
Page 90: System Limitations Of Mds
T ra c k num be rs c a nnot be m a rk e d System limitations of When “L-SYNC” (page 44) lights in the display window during analog recording, the track numbers M Ds may not be marked at the beginning of the track: •... -
Page 91: Troubleshooting
The remote does not function. Should any problem persist, consult your nearest • There is an obstacle between the remote and Sony dealer. the system. • The remote is not pointing in the direction of General the system’s sensor. - Page 92 T rouble shoot ing (c ont inue d) M D Deck The display shows a code made up of Speakers three or five letters and a message. • This system has the Self-Diagnostic function Sound comes from one channel or (see “Self-diagnosis Display”...
- Page 93 Tape Deck Tuner The tape does not record. Severe hum or noise (“TUNED” or “STEREO” flashes in the display). • No tape in the cassette holder. • Adjust the antenna. • The tab has been removed from the cassette (see “To save a tape permanently” on page •...
-
Page 94: Self-Diagnosis Display
Turn on the digital component. E0001 / MEMORY NG The component has internal problems. p Consult your nearest Sony dealer. E0101 / LASER NG There is a problem with the laser pickup. p The laser pickup may be damaged. Consult your nearest Sony dealer. -
Page 95: Md Messages
Incomplete! M D M essages Adjustment of the recording level after recording or Fade-in and Fade-out procedures have failed since the unit was either subject to One of the following messages may appear or vibration or there is a damaged or dirty disc in flash in the display window during operation. - Page 96 M D M e ssa ge s (c ont inue d) S.F Edit! You attempted to perform other operations during S.F Edit (adjusting the recording level after recording, Fade-in and Fade-out). You cannot perform other operations during S.F Edit. S.F Edit NOW You pressed ?/1 during S.F Edit (adjusting the recording level after recording, Fade-in and Fade-out).
-
Page 97: Specifications
Frequency response 40 – 13,000 Hz (±3 dB), Continuous RMS power output (reference) (DOLBY NR OFF) using Sony TYPE I cassette 150 + 150 watts 40 – 14,000 Hz (±3 dB), (6 ohms at 1 kHz, using Sony TYPE II cassette... - Page 98 Spe c ific a t ions (c ont inue d) Ge ne ra l Power requirements U.S.A. model: 120 V AC, 60 Hz European model: 230 V AC, 50/60 Hz T une r se c t ion Australian and New Zealand models: FM stereo, FM/AM superheterodyne tuner 230 –...
-
Page 99: Parts Identification For The Remote
T APE Parts Identification for Remote Function Button(s) the remote TAPE A N Starts playback. TAPE B N Each time you press this button, You can also operate the system with the supplied the tape reverses direction. remote. Pauses recording. *: You can operate with the remote only. -
Page 100: Items In "Sound Mode" And "Set Up Mode
Items in “Sound M ode” and “Set Up M ode” The numbers in parenthesis denotes the page number for the item. Sound Mode Effect OnpOff/OffpOn (70) File Select (70, 74) P File Memory (74) Equalizer Control (73) Cinema Space (72) Mode End •... - Page 101 Set Up Mode Set Up Mode TAPE Set Up ? CD Set Up ? Repeat Set Up ? (26) Direction Set Up ? (18, 23, 64, 66) Play Mode Set Up ? (27, 30) DOLBY NR Set Up ? (16, 19, 24, 65) CD Edit Start ? (68) Mode End Program Set ? (28, 38, 66)
-
Page 102: Index
Recording Index a CD 14, 15, 38, 39, 64 Labelling an MD 64 an MD 48 a radio program 22 a preset radio station 77 a tape 39 Level Sync Recording 44 CD-MD High-Speed Listening to the radio 20 Adjusting Synchro Recording 14 Long Play Recording 40 the parameter of cinema... - Page 103 Downloaded from: https://www.usersmanualguide.com/...
- Page 104 Sony Corporation Printed in Malaysia Downloaded from: https://www.usersmanualguide.com/...
- Page 105 This file has been downloaded from: www.UsersManualGuide.com User Manual and User Guide for many equipments like mobile phones, photo cameras, monther board, monitors, software, tv, dvd, and othes.. Manual users, user manuals, user guide manual, owners manual, instruction manual, manual owner, manual owner's, manual guide, manual operation, operating manual, user's manual, operating instructions, manual operators, manual operator, manual product, documentation manual, user maintenance, brochure, user reference, pdf manual Downloaded from:...
Need help?
Do you have a question about the DHC-ZX50MD and is the answer not in the manual?
Questions and answers