
Related Manuals for Sony DHC-AZ1D


Summary of Contents for Sony DHC-AZ1D
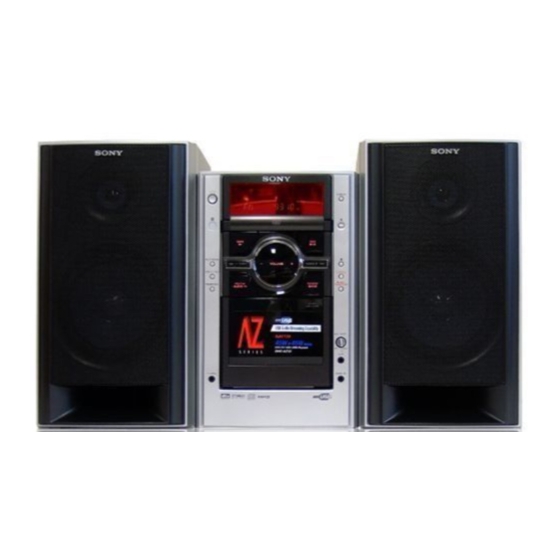
- Page 1 2-681-031-11(1) Display Side Hi-Fi Component System Operating Instructions DHC-AZ1D ©2006 Sony Corporation...
- Page 2 Note on power cord plug shapes WARNING (Saudi Arabian model only) To reduce the risk of fire or electric For AC 220 V wall sockets: shock, do not expose this apparatus to Make the appropriate voltage setting on the rain or moisture. system.
-
Page 3: Table Of Contents
Table of Contents How to use this manual......5 Tape – Recording Playable discs.......... 5 Recording your favorite CD tracks on a Getting Started tape ..........30 — CD-TAPE Synchro Recording Hooking up the system......8 Recording on a tape manually ....31 Setting the clock........ - Page 4 Optional Components Controlling the TV with the remote..40 Using the THEATRE SYNC function........... 41 Hooking up optional components ..42 Listening to audio from a connected component ........43 Enjoying the 5.1 channel sound with the optional amplifier ......43 Recording audio from a connected component ........
-
Page 5: How To Use This Manual
How to use this manual Playable discs You can play back the following discs on this • This manual mainly explains operations using system. Other discs cannot be played back. the remote, but the same operations can also be performed using the buttons on the unit having the same or similar names. - Page 6 Region code of DVDs you can Notes about CD-R/CD-RW/ play on this system DVD-R/DVD-RW (Video mode)/ DVD+R/DVD+RW Your system has a region code printed on the back of the unit and will only play DVDs labeled • In some cases, CD-Rs, CD-RWs, DVD-Rs, with identical region code.
- Page 7 Note on DualDiscs A DualDisc is a two sided disc product which mates DVD recorded material on one side with digital audio material on the other side. However, since the audio material side does not conform to the Compact Disc (CD) standard, playback on this product is not guaranteed.
-
Page 8: Getting Started
Getting Started Hooking up the system Perform the following procedures 1 to 6 to hook up your system using the supplied cords and accessories. The terminals on the rear side vary depending on the country model. Be sure to check the connection procedure. - Page 9 1 Connect the speakers. Plug type C Insert only the Connect the right and left speaker cords to AM loop antenna stripped portion* the SPEAKER jacks as shown below. Insert only the stripped portion Gray/Solid (3) Black/Stripe (#) Extend the FM lead antenna horizontally 2 Connect the FM and AM antennas.
- Page 10 Connection B (For Russian model) When connecting a video deck Connect the TV and the video deck using video and Connect the t INPUT jack of your TV audio cords (not supplied) as shown below. to the T LINE-TV jack with the SCART cord (not supplied).
- Page 11 6 (Asian models only) Inserting two R6 (size AA) Set the color system to PAL or NTSC batteries into the remote depending on the color system of your The color system is factory set to NTSC for region code 3 models, and PAL for other region code models.
-
Page 12: Setting The Clock
Setting the clock Selecting a language Use buttons on the remote for the operation. You can change the on-screen display language. Press ?/1 to turn on the system. Turn on your TV and select the video input. Press CLOCK/TIMER SET. Press ?/1 to turn on the system. -
Page 13: Disc - Play
Playing a disc Disc – Play — Normal Play/Shuffle Play Loading a disc Use buttons on the unit for the operation. Before playing a DVD, VIDEO CD or JPEG turn on your TV and select the video input. Press Z. Depending on the DVD or VIDEO CD, some Place a disc with the label side up on operations may be different or restricted. - Page 14 Other operations Notes • Depending on the DVD or VIDEO CD, some Do this operations may be restricted. Stop play Press x. • Maximum number of albums on a disc: 100 (The Press X (or DVD NX on the Pause maximum number of MP3 audio tracks or JPEG unit).
-
Page 15: Playing Dvds Using The Menu
Notes Playing DVDs using the • You cannot perform Resume Play during Shuffle Play or Program Play. menu • This function may not work properly with some discs. • Depending on where you stop the disc, the system may not resume playback from exactly the same point. -
Page 16: Playing Video Cds With Pbc Functions (Ver. 2.0)
To cancel playback with PBC Playing VIDEO CDs with functions PBC functions (Ver. 2.0) Press x twice to cancel Resume Play (page 14). — PBC Play Press MENU repeatedly until “PBC Off” appears. Press H (or DVD NX on the unit). Playback starts from the selected track. -
Page 17: Playing Repeatedly
Using the on-screen display Playing repeatedly Press REPEAT repeatedly during play. — Repeat Play Each time you press the button, the setting changes cyclically as follows: • Off: does not play repeatedly. You can play all the tracks/files or a single track/ •... -
Page 18: Creating Your Own Program
Other operations Creating your own Do this program Cancel Program Play Press PLAY MODE repeatedly in stop mode until “Continue” appears. — Program Play Clear a programmed Press M/m/</, step repeatedly to select a step number, then press CLEAR You can make a program of up to 12 steps. in stop mode. -
Page 19: Using The On-Screen Display To
Searching for a particular Using the on-screen point using the time code display to search — Time Search Press SEARCH. The Search Display appears. You can search for a chapter (DVD) and track Press M or m repeatedly to select (VIDEO CD, CD). -
Page 20: Disc - Various Functions
• For VIDEO CDs and CDs, the setting returns to “Stereo” when you turn off the system or open the Disc – Various functions disc tray. • During DVD playback, the sound may change Changing the sound/ automatically. subtitle/angle Displaying the audio information of the disc (DVD only) Changing the sound... -
Page 21: Changing The Language
Displaying the subtitles (DVD Changing the language only) — Language With DVDs on which multilingual subtitles are recorded, you can change the subtitle language while playing a DVD, or turn the subtitles on or Press DISPLAY in stop mode. off whenever you want. The Setup Display appears. -
Page 22: Adjusting The Image And Audio Settings
Note Adjusting the image and Depending on the DVD, “4:3 Letter Box” may be selected automatically instead of “4:3 Pan Scan” or audio settings vice versa. x VCD Color Sys (Asian models only) — AV Select the color system when you play a VIDEO CD. - Page 23 Note x INTERLACE (default setting) For Asian models, you can change the color system of Select this setting when your TV does not accept this unit according to the connected TV (page 11). progressive signals or your TV is connected to LINE-TV jack or VIDEO OUT jack.
-
Page 24: Restricting Disc Playback
Enter or re-enter your 4-digit password Restricting disc playback using the number buttons, then press ENTER. — Rating (Parental Control) The lock icon is closed and the Parental Control setting is completed. If you make a mistake entering your password, press CLEAR before you press Limiting playback by children ENTER and input the correct number. -
Page 25: System Setup Item List
Playing the disc for which System setup item list Parental Control is set When you press DISPLAY, the following Insert the disc and press DVD (or settings are displayed. FUNCTION + or – repeatedly) to switch The default settings are underlined. the function to DVD. - Page 26 Rating (page 24) Password Rating 3 PG 4 PG 13 7 NC 17 Reset (page 49) Reset The default setting varies, depending on the country model. Asian models only...
-
Page 27: Tuner
Press PRESET + or – repeatedly to select the desired preset number. Tuner Press ENTER. Presetting radio stations “COMPLETE” appears. Repeat steps 1 through 5 to store other You can preset up to 20 FM stations and 10 AM stations. stations. -
Page 28: Listening To The Radio
To change the AM tuning interval Listening to the radio (except for Russian and Saudi Arabian models) You can listen to a radio station either by The AM tuning interval is factory-preset to selecting a preset station, or by manually tuning 9 kHz (or 10 kHz for some areas). -
Page 29: Manual Tuning
Listening to non-preset radio station — Manual Tuning Press TUNER/BAND repeatedly to select “FM” or “AM.” Press TUNING + or – repeatedly to tune in the desired station. To cut the sound Press MUTING. Press MUTING again or VOLUME + to restore sound. -
Page 30: Tape - Play
Tape – Play Tape – Recording Loading a tape Recording your favorite CD tracks on a tape Press Z PUSH OPEN/CLOSE on the unit. — CD-TAPE Synchro Recording Load a recorded/recordable tape into You can record a whole CD on a tape. the cassette holder. -
Page 31: Recording On A Tape Manually
To perform Synchro Recording Recording on a tape from a desired track manually You can select the first track in Synchro Recording. — Manual Recording After performing steps 1 to 4, press . or > repeatedly to select the desired track You can record just the portions you like from a number. -
Page 32: Sound Adjustment
Singing along Sound Adjustment You can sing along with a disc by connecting an Selecting the sound effect optional microphone. Press PRESET EQ repeatedly to select the Adjusting the microphone preset you desire. The preset name appears in the display. Use buttons on the unit for the operation. - Page 33 Mixing and recording sounds You can “mix” sounds by playing one of the components and singing or speaking into a microphone (not supplied). The mixed sound can be recorded on a tape. Use buttons on the unit for the operation. Prepare the source you want to mix.
-
Page 34: Timer
Waking up to music Timer — Play Timer Falling asleep to music You can wake up to music at a preset time. Make — Sleep Timer sure you have set the clock (see “Setting the clock” (page 12)). You can set the system to turn off after a certain Use buttons on the remote for the operation. -
Page 35: Timer Recording Radio Programs
Other operations Timer recording radio Do this programs Check the setting Press CLOCK/TIMER SELECT. > Press — Rec Timer repeatedly until “PLAY SEL” appears, then press You can record a preset radio station from a ENTER. specified time. Change the setting Start over from step 1. -
Page 36: Display
Other operations Do this Display Check the setting Press CLOCK/TIMER Turning off the display SELECT. > Press repeatedly until “REC SEL” — Power Saving Mode appears, then press ENTER. The clock display can be turned off to minimize Change the setting Start over from step 1. -
Page 37: Viewing Information About The Disc In The Display
x When you press DISPLAY in stop mode Viewing information Total title/track number of the disc and total t Clock playing time of the current disc about the disc in the display (for a few seconds) t Effect status (for display a few seconds) These are not displayed during Shuffle Play or... -
Page 38: Viewing Information About The Disc In The On-Screen Display
Viewing information Viewing the tuner about the disc in the information in the display on-screen display Press DISPLAY while listening to the radio. Each time you press the button, the display You can check the playing time and remaining changes cyclically as follows: time of the current title, chapter or track. -
Page 39: Optional Personal Computer
Notes • Operation is not guaranteed for all the recommended Optional Personal Computer computer environments mentioned above. • Operation is not guaranteed in personally Connecting a personal constructed PCs or operating systems. • Operation is not guaranteed in environments computer to the system upgraded to the other operating systems. -
Page 40: Listening To Audio Files On A Personal Computer
Connect the system to the computer with the supplied USB cable (see You can use the following buttons on the remote page 39). to operate a Sony TV. Start up the computer. Press Wait for the OS to start up properly. -
Page 41: Using The Theatre Sync Function
Notes Using the THEATRE SYNC • This function is only for SONY TV series, however, some TV products may also not work. function • If this function does not work, change the transmit time. The transmit time varies depending on the TV. -
Page 42: Hooking Up Optional Components
Hooking up optional components To enhance your system, you can connect optional components. Refer to the operating instructions provided with each component. Asian model is used for illustration purpose. Optional analog component Amplifier or MD deck From the audio output jack To the digital input jack of the of the connected digital component... -
Page 43: Listening To Audio From A Connected Component
Listening to audio from a Enjoying the 5.1 channel connected component sound with the optional amplifier Use buttons on the unit for the operation. Connect audio cords. Connect a digital optical cord. See “Hooking up optional components” See “Hooking up optional components” (page 42). -
Page 44: Recording Audio From A Connected Component
Recording audio from a Recording on a connected connected component component Connect audio cords. Connect a digital optical cord. See “Hooking up optional components” See “Hooking up optional components” (page 42). (page 42). Start recording manually. Press DVD (or FUNCTION + or – repeatedly) to switch the function to See “Recording on a tape manually”... -
Page 45: Troubleshooting
– “Timer recording radio programs” (page 35) If the problem persists after doing all of the There is no sound. above, consult your nearest Sony dealer. • Press VOLUME +. Note that if service personnel changes some • Make sure the headphones are not connected. - Page 46 The disc tray does not open and “LOCKED” the auto pause signal. appears. You cannot perform some functions such as • Contact your Sony dealer or local authorized Sony Stop, Search, Slow-motion Play, Repeat Play, service facility. Shuffle Play or Program Play.
- Page 47 • For Russian model, when connecting your TV and The JPEG image file cannot be played. LINE-TV jack of this system using a • The data CD is not recorded in JPEG format that SCART cable (not supplied), make sure that the conforms to ISO9660 Level 1/Level 2 or Joliet.
- Page 48 • Press ?/1 to turn off the system and remove any cords as possible. tapes from the cassette holder. Then disconnect • Consult your nearest Sony dealer if the supplied the power cord and reconnect it. Then press ?/1 AM antenna has come off the plastic stand.
- Page 49 Personal computer If the system still does not operate properly after performing There is no sound. the above measures, reset the • Connect the personal computer properly. system as follows: • Adjust computer volume and that of music playback software (see “Listening to audio files Use buttons on the unit for the operation.
-
Page 50: Messages
Messages One of the following messages may appear or flash in the display during operation. DVD/VIDEO CD/CD/MP3/JPEG CAN’T PLAY • A disc that cannot be played was inserted. • A disc with an unsupported Region code was inserted. NO DISC There is no disc in the unit. -
Page 51: Additional Information
• Use caution when placing the unit or speakers on If you have any questions or problems concerning your surfaces that have been specially treated (with wax, system, please consult your nearest Sony dealer. oil, polish, etc.) as staining or discoloration of the surface may result. - Page 52 Notes on discs When using a tape longer than 90 minutes • Before playing, clean the disc with a cleaning cloth. Wipe the disc from the center out. The tape is very elastic. Do not change the tape operations such as play, stop, and fast-winding •...
-
Page 53: Specifications
DIN power output (rated): 40 + 40 watts Frequency response 40 – 13,000 Hz, using (6 ohms at 1 kHz, DIN) Sony TYPE I cassette Continuous RMS power output (reference): Wow and flutter ±0.15% W.Peak (IEC) 50 + 50 watts 0.1% W.RMS (NAB) -
Page 54: Glossary
Speaker Glossary Speaker system 2-way, bass-reflex type, magnetically shielded type Speaker units Album Woofer: 13 cm, cone type Section of a music piece on a data CD Tweeter: 4 cm, cone type containing MP3 audio tracks or JPEG image Nominal impedance 6 ohms files. - Page 55 Index (CD) / Video Index (VIDEO CD) A disc that contains up to 8 hours of moving A number that divides a track into sections to pictures even though its diameter is the same as easily locate the point you want on a VIDEO CD a CD.
- Page 56 Playback Control (PBC) Title Signals encoded on VIDEO CDs (Version 2.0) The longest sections of a picture or a music to control playback. By using menu screens piece on a DVD; a movie, etc., for a picture recorded on VIDEO CDs with PBC functions, piece on video software;...
-
Page 57: List Of Button Locations And Reference Pages
List of button locations and reference pages How to use this page Illustration number Use this page to find the location of buttons and other TUNER/BAND qa (27, 28, 31) parts of the system that are mentioned in the text. Name of button/part Reference page Main unit... - Page 58 Remote control ALPHABETICAL ORDER BUTTON DESCRIPTIONS ?/1 (on/standby) 1 (10, 34, 49) A – O P – Z TV ?/1 1 (40) ANGLE 5 (21) PLAY MODE qg (14, 18) SLOW/SLOW y 8 (14) AUDIO 4 (20, 32) PRESET + wk (27, 28) M (fast forward) 9 (14, 30) CLEAR ef (18, 19, 24) PRESET –...
- Page 60 Sony Corporation Printed in China...
Need help?
Do you have a question about the DHC-AZ1D and is the answer not in the manual?
Questions and answers