
Related Manuals for Rotenso RFV Series


Summary of Contents for Rotenso RFV Series
- Page 1 S E R I E S INDOOR UNIT INSTALLATION & USER’S MANUAL MODELS: Wall Mounted Ceiling Cassette Floor-Ceiling Duct www.rotenso.com...
- Page 2 Applied models: External appearance Cooling capacity External appearance Cooling capacity Compact four-way cassette unit Four-way cassette unit 5600W 7100W 8000W 2200W 9000W 2800W 10000W 3600W 11200W 4500W 12500W 14000W 16000W Standard ESP ducted unit and Short ducted unit High ESP ducted unit 7.1kW~ 9.0kW 7100W 2200W...
- Page 3 Round-way cassette unit Two-way cassette unit 5600W 7100W 8000W 4500W 5600W 9000W 7100W 10000W 8000W 11200W 12500W 14000W 16000W Thank you for choosing our company products! Air conditioning facilities are valuable products. In order to protect your legitimate rights and interests, please make sure that the installations are done by professional technicians.
-
Page 4: Table Of Contents
Contents 1 Safety instructions 2 Air conditioner part name and functions 3 Use instructions 4 Installation 5 Service and maintenance... -
Page 5: Safety Instructions
Safety instructions 1. Before use, please read this Manual carefully, and correctly operate according to this Manual. 2. Special attention shall be paid to the meanings of the following two logos: Warning: It means that disoperation may cause casualties or serious damage. Attention: It means that disoperation may cause personal injuries or property damages. - Page 6 Safety instructions ! Warning ! Please contact our authorized service center for installation. Improper installation may result in water leakage, electric shocks, fires and other accidents. Never put sticks or other objects into the air inlet and outlet. ...
-
Page 7: Air Conditioner Part Name And Functions
Air conditioner part name and functions 2-1 Four-way cassette type Figure 2.1 2-2 Short ducted type Figure 2.2... - Page 8 Air conditioner part name and functions 2-3 Standard static pressure ducted type and High static pressure ducted type 7.1kW~9.0kW Figure 2.3 2-4 Full fresh air unit 14.0kW and High static pressure ducted type 10.0kW~15.0kW Figure 2.4...
- Page 9 Air conditioner part name and functions 2-5 Full fresh air type 22.4kW、 28.0kW and High static pressure ducted type 20.0kW~ 28.0kW Figure 2.5 2-6 Full fresh air type 45.0kW、 56.0kW and High static pressure ducted type 45.0kW~ 56.0kW Figure 2.6...
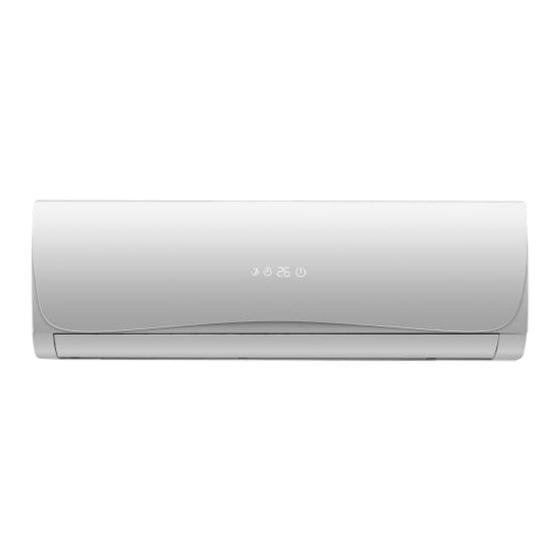
- Page 10 Air conditioner part name and functions 2-7 Wall-mounted type Figure 2.7 2-8 Floor-ceiling type Figure 2.8...
- Page 11 Air conditioner part name and functions 2-9 One-way cassette type Figure 2.9 2-10 Two-way cassette type Figure 2.10...
- Page 12 Air conditioner part name and functions 2-12 Round-way cassette type Figure 2.11...
-
Page 13: Use Instructions
Use instructions 3-1 Use of remote controller The frequency conversion Wall-mounted type (standard), Floor-ceiling type (standard), Four-way cassette type (standard), Round-way cassette type (standard), Full fresh air type (optional) and ducted type (optional) have the remote controller use (Specifications: smart universal type) introduced as follows: “HVAC No.2”... - Page 14 Use instructions Temperature addition Mode Increase the setting temperature. Select modes, including automatic, cooling, dehumidification, fan and heating mode. Temperature reduction Decrease the setting temperature. Fan speed + Increase fan speed in one gear. Highest wind speed will swich to the “ON/OFF”...
- Page 15 Use instructions 1)The remote controller is equipped with 15 buttons, and the LCD is newly maded. All the icons are kept in touch with the touch-screen remote controller. 2) At the first power on, the LCD of the remote controller displays all the icons first and then enters the standby state, displaying only the clock 12:00 and the light icon.
- Page 16 Use instructions (4) Temperature addition ▲ ① Temperature setting: when pressing this key, the setting temperature will be added by 1. The temperature of centigrade model will be added progressively by "16℃, 17℃, ……, 31℃, 32℃ ". The temperature of fahrenheit model will be added progressively by "61℉, 62℉, ……, 89℉, 90℉".
- Page 17 Use instructions (11) ECON ① The remote controller is no ECON by default, and the ECON key will not work in automatic mode, dehumidification mode and fan mode. ② Pressing this key in the cooling or heating mode, the ECON mode switches between opening and closing.
- Page 18 Use instructions 2) When the first time entering the interface or pressing the temperature addition or reduction key, the address display flickers for 3 seconds and then does not flicker. 3) Press the ON / OFF key to enter the sending state and send the address setting code. ③...
- Page 19 Use instructions 3-2 Use of remote controller The frequency conversion Wall-mounted type (standard), Floor-ceiling type (standard), Four-way cassette type (standard), Round-way cassette type (standard), Full fresh air type (optional) and ducted type (optional) have the remote controller use (Specifications: smart universal type) introduced as follows: “HVAC No.5”...
- Page 20 Use instructions 1) The remote controller is equipped with 11 buttons, and the LCD is newly made. 2) At the first power on, the LCD of the remote controller displays all the icons first and then enters the standby state, displaying only the mode icon. 3)...
- Page 21 Use instructions (5) Up and down swinging (External pendulum wind) ① Pressing this key in the dehumidification mode, the external pendulum wind is forced to close. ② Pressing this key in the other modes, the external pendulum switches by "swing, fixed wind, swing"...
- Page 22 Use instructions or turn on the lamplight. Decide whether to have this function according to the actual model. (13) Lock ① There is no lock by default. Pressing Sleep key 3S, the lock function switches between opening and closing. ② When it is locked, the remote controller does not work except the lock key. (14)...
- Page 23 Use instructions ! Attention ! Never use new and old batteries together. The remote controller should have its batteries taken out when idle for long. In general conditions, the dry batteries meeting the JIS or IES standard can have the service life of 6-12 months, but if beyond the service time or not meeting the above specifications, the dry batteries may be subject to leakage and may even disable the remote controller operations.
- Page 24 Use instructions 2) Press the" TEMP+ "and " TEMP- " Button for 3s simultaneously to lock this button. At this time, It will display the locking icon in LCD. Deactivate this button, and press the "TEMP+" and "TEMP-" Button again simultaneously. “TIMER”...
- Page 25 Use instructions 2) The fourth bit ON of the DIP switch indicates it is With Power Failure Memory function, and the fourth bit OFF indicates it is Without Power Failure Memory function. The factory dials to the OFF state. 3-4 Air direction adjustment According to the characteristics of cold air sinking and hot air rising, please adjust the air-out direction of the air guide in time of cooling and heating to improve the cooling and heating effects.
- Page 26 Use instructions ③In the cooling operation ④In the heating operation To have the whole room better cooled, please To have the whole room better heated, please adjust the air guide to the horizontal air-out state. adjust the air guide to the downward air-out state. !...
- Page 27 Use instructions 3-5 Optimal operation Pay attention to the following items to ensure the optimal operation of the system with the specific operation methods referring to the corresponding contents. 1) Adjust the airflow direction appropriately to avoid directly blowing the persons in the room. In time of cooling operation, please adjust the air guide to the horizontal air-out state in order to have the whole room better cooled;...
-
Page 28: Installation
Installation 4-1 User instructions 1) The user should provide the qualified power supply (with the voltage within 90%-110% of the rated value) consistent with the nameplate label of this air conditioner. 2) The power supply line should be equipped with such protection devices as leakage protector or air switch with the capacity 15 times greater than the maximum current value of the air conditioner. -
Page 29: Service And Maintenance
Service and maintenance 5-1 Confirmation before operation 1) Confirm whether the grounding line is broken or shedding. 2) Confirm whether the air dust filter is mounted. 3) Turn on the power switch 12 hours before running. 5-2 Maintenance instructions Before the repair and maintenance, the air conditioner must be shut down with the power plug disconnected. - Page 30 Service and maintenance 5-2-3 After use seasons 1) Please “disconnect” the air conditioner power and pull out the power plug. After shutdown, the air conditioner will consume the power of about 5W. For safety and energy saving, please pull out the power plug during non-use seasons. 2) Please properly clean, maintain and mount the air filter and other parts.
- Page 32 INSTALLER STAMP www.rotenso.com...
Need help?
Do you have a question about the RFV Series and is the answer not in the manual?
Questions and answers