Renishaw NC4 Installation And Maintenance Manual
Non-contact tool setting system
Hide thumbs
Also See for NC4:
- Installation and maintenance manual (112 pages) ,
- Installation manual (54 pages) ,
- Cleaning instructions manual (16 pages)

Related Manuals for Renishaw NC4


Summary of Contents for Renishaw NC4
- Page 1 Installation and maintenance guide H-2000-5230-02-A NC4 non-contact tool setting system...
- Page 2 Patents product described herein without obligation to notify any person of such changes. Features of the NC4 non-contact tool setting system and related products are subject to the following patents and patent applications: CN 1339040A...
- Page 3 This guide is also available in electronic format on the mini-CD in the pocket inside the back cover. To view this guide, insert the mini- CD into the CD drive of your PC and follow the on-screen instructions. This file can also be printed if required. Ce guide est disponible en français en format électronique sur mini-CD dans la pochette à...
- Page 4 89/336/EEC Electromagnetic compatibility 73/23/EEC Low voltage Information to user (FCC Section 15.21) The user is cautioned that any changes or modifications not expressly approved by Renishaw plc or authorised representative could void the user’s authority to operate the equipment.
- Page 5 1 mW. Do not expose skin to the laser beam for longer than is absolutely essential. Instruct The NC4 is classified as a Class 2 laser product all operators about the hazards of direct eye as defined by International standard IEC contact, or long skin exposure, with the 60825-1:1993 + A1:1997 + A2: 2001.
- Page 6 Laser warning labels Laser ‘On’ and probe status LED (see “Probe status LED function” on page 8 for details). Label B Label A NOTE: Labels A and B are fitted to the transmitter unit only. Label A Label B Except for deviations pursuant to Laser Notice No.
- Page 7 Location of the laser aperture Access panel identification markings, denoting system range (see “Access panel identification markings” on page 7 for details). Laser aperture Caution symbol (for an explanation, see below) CAUTION SYMBOL CAUTION – LASER SAFETY The caution symbol on the access panel denotes The access panel is to be removed for service the following: purposes only using the special tool supplied.
- Page 8 Class 3R. Before carrying out servicing procedures on the NC4 system, switch off electrical power. Training Installation, user and service personnel should receive training in the operation and use of laser...
-
Page 9: Table Of Contents
Contents General Introduction ..........................4 Guidelines for good practice ....................4 How to install and configure the NC4 system ............... 5 Parts checklist ........................6 Access panel identification markings ................... 7 Probe status LED function ....................8 Dimensions Transmitter and receiver ...................... 10 Machining details for a typical mounting ................ - Page 10 Power loss and restoration ....................33 Setting the air pressure ....................... 34 Software – installation and routines ..................35 System set-up and alignment Setting up the NC4 ......................36 Aligning the NC4 ......................... 36 Using a voltmeter ........................ 37 Using the set-up tool ......................38 System alignment tolerances ....................
- Page 11 Air regulator unit ........................71 Parts lists NC4 separate assemblies ....................73 NC4 separate unit kits ......................74 NC4 fixed unit assembly and kit ..................75 NC4 accessories ......................... 76 Air supply accessories ......................78 Cable and conduit accessories ................... 79 Interface accessories ......................
-
Page 12: General
Guidelines for good practice stream of clean air. Approximately once a month, inspect the optics for contamination. The NC4 is a precision device and must be The service interval may be extended or handled with care. reduced dependent upon experience. -
Page 13: How To Install And Configure The Nc4 System
General The vent at the bottom of the NC4 must be Switch on the air supply to the NC4 system left uncovered to allow reliable operation of and set the air pressure (see “Setting the air the passive seal. pressure” on page 34). -
Page 14: Parts Checklist
Digital voltmeter Air supply NC4 set-up tool The NC4 requires a clean, dry air supply to ISO 8573-1:Air quality of class 1.7.2. If this is not achievable a filter/regulator will be required (see “Parts list – air supply accessories” on page 78). -
Page 15: Access Panel Identification Markings
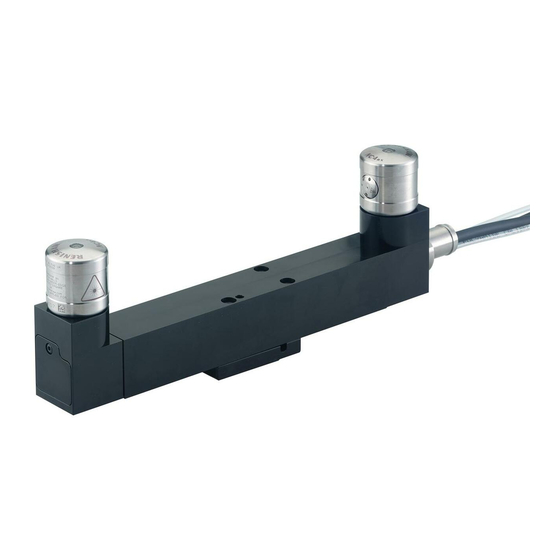
Type Transmitter Receiver engraving engraving The access panel of each NC4 transmitter and F300 receiver unit is engraved with two or more circles. These denote the minimum and maximum Separate system separation distance between the NC4 transmitter and receiver units. -
Page 16: Probe Status Led Function
The probe status LEDs will rapidly flash code The probe status LEDs on the transmitter and which is used by the NC4 set-up tool. receiver units indicate the status of the probe to the user. The LEDs mimic each other. - Page 17 The probe status LEDs can be used for If the laser beam is clear and the LEDs are either diagnostic purposes as the NC4 constantly amber or flashing amber/green, this indicates checks itself for signal and indicates the state of that servicing is required.
-
Page 18: Dimensions Transmitter And Receiver
Dimensions – transmitter and receiver Dimensions in mm (in) Ø30 (Ø1.18) (1.38) (0.75) 5.4 (0.21) 24 (0.95) across flats Ø26 (Ø1.02) A = Mounting holes, 2 off, M3 x 0.5 P x (0.3) 8 mm (0.32 in) deep B = Dowel holes, 2 off, Ø2 mm x 4.0 (0.16) 8 mm (0.32 in) deep 1.0 (0.039) -
Page 19: Machining Details For A Typical Mounting
Dimensions – machining details for a typical mounting Dimensions in mm (in) 9.5 (0.37) 9.5 (0.37) 7.5 (0.30) 2 × Ø3.5 (0.14) Ø13.5 (0.53) 2 × Ø2.0 (0.08) (0.04) (0.16) (0.12) (0.16) (0.04) (0.30) Ø6.2 (0.24) Ø6.2 (0.24) -
Page 20: Fixed System
Dimensions – fixed system Dimensions in mm (in) 5 (8.89) - parate (1.58) (2.36) 300 (11.81) Ø30 Ø30 (Ø1.18) (Ø1.18) 225 (8.89) (1.73) (4.72) (4.09) Position of the 18 (0.71) adjuster pack is set 70 (2.76) on installation 194 (7.64) Extent of permissible movement of the adjuster pack... -
Page 21: Nc4 Set-Up Tool
Dimensions – NC4 set-up tool Dimensions in mm (in) R = 18.75 (R = 0.74) 21.25 (0.84) 33.5 (1.32) (0.43) 37.5 (1.48) -
Page 22: Specification
Specification c i l ° ° – ° ° ) f f e f i > o i l c i t Ø . e l Ø ) t f t t i... -
Page 23: Performance
Performance NC4 typical repeatability Repeatability is dependent upon the separation and mounting. Typical repeatability = ±0.25 µm, 2σ at 0.2 m separation. Specified repeatability = ±1 µm, 2σ at 1 m separation. NOTE: The trend line is calculated from the... -
Page 24: Transmitter / Receiver Separation Vs Minimum Tool Diameter
Performance Transmitter / receiver separation vs minimum tool diameter Note that the minimum tool diameter values listed in this table are typical values. They are provided for guidance purposes only.. -
Page 25: Nc4 Set-Up Tool
NC4 set-up tool Introduction NC4 set-up tool The NC4 set-up tool is a battery operated device that is used to provide the operator with a visual indication of the signal strength at the NC4 receiver unit. The signal strength is viewed by the operator on a numerical display. - Page 26 NC4 set-up tool Typically, this specification can be provided by a Battery Part number cell containing Lithium Thionyl Chloride (3.6 V). manufacturer This is recommended for maximum battery life. A Ecocel TC-4511, TC-4521, TC-4531 Lithium Thionyl Chloride (3.6 V) battery will last...
-
Page 27: Installation
Installation Introduction Best practices The air supply to the NC4 must conform to ISO Where possible, tap into the air supply that 8573-1 air quality of class 1.7.2 and be moisture- exits the machine air supply filter / regulator free. If the air quality cannot be guaranteed, an unit. -
Page 28: Air Assembly Kit
After you have finished installing the air If the compressed air source is suspected of assembly kit, you should install either the NC4 being contaminated (e.g. if it is direct from the fixed system or the separate system. -
Page 29: Fixed System
Cut to length if necessary. WARNING: Before starting to install the Before routing the air pipes, fit a Ø3 mm-to- NC4 system, ensure the machine is safe Ø4 mm straight adaptor pneumatic fitting to work on. Switch off machine power when and a Ø4 mm blanking plug to the free end... - Page 30 Installation – fixed system (step 4 refers) Ø4 mm blanking plug Ø3 mm-to-Ø4 mm straight adaptor Ø3 mm air pipe (from NC4 unit) Fixing screws Finger clamps Gland Gland nut multi-insert Conduit insert Conduit Securing screw M10 or M12 (item not supplied)
- Page 31 Installation – fixed system Place the NC4 system on the adjuster pack 13. Fit conduit clamps to secure the conduit in and attach the finger clamps with the fixing position on the table of the machine. This screws. will ensure that loads are not transferred to the NC4 system when the machine Route the conduit through the machine.
-
Page 32: Separate System
(step 11 refers) NOTE: The sequence of operations required to install a separate NC4 system may differ from Choose a suitable position for securing the the sequence described here, depending on the NC4 transmitter and receiver mounting environment in which the system is being brackets. - Page 33 Installation – separate system Typical mounting details Single-plate adjuster pack 3-plate adjuster pack 4 holes M4 × 0.7 P × 2 holes M4 × 0.7 P × 10 mm deep (minimum) 10 mm deep (minimum) Ø30 (Ø1.18) Ø30 (Ø1.18) (0.04) 38 min.
- Page 34 Installation – separate system (step 4 refers) Ø4 mm blanking plug Ø3 mm-to-Ø4 mm straight adaptor Ø3 mm air pipe (from NC4 unit) NC4 unit (steps 5 and 6 refer) Mounting plate A M3 holding screws...
- Page 35 Installation – separate system (step 7 refers) 3-plate adjuster Single-plate pack adjuster pack Mounting plate B Mounting plate C 1 mm spacer plate (used to raise the adjuster pack if required) (see Parts list for details) Typical mounting bracket...
- Page 36 M3 holding screws. debris. Feed the cable and air pipe through Fit the Ø3 mm air pipe to the air inlet of NC4 mounting plates B and C. unit. Fit the 3 mm-to-4 mm straight adaptor Lay the conduit in the machine to check the pneumatic fitting and blanking plug to the length.
- Page 37 NOTE: The radius of the conduit bend should be greater than 120 mm (4.72 in). 13. Repeat steps 4 to 12 for the other NC4 unit. Feed the air pipe and cable through the 14. Route the cables to the electrical cabinet, cable gland and conduit.
- Page 38 Connect the air pipes to the outlet of the air After you have finished installing the NC4 filter / regulator unit using the tee fittings separate system you should install the NCi-4 and pneumatic adaptor fittings as interface.
- Page 39 CNC control cabinet. Where possible, locate the unit away from potential sources of interference such as transformers and motor controllers. The interface processes signals from the NC4 and converts them into a voltage-free solid state relay (SSR) output. This is transmitted to the CNC machine control, which responds to the probe inputs.
-
Page 40: Nci-4 Interface
Installation – NCi-4 interface NC4 wiring details The colour and intended function of each of the wires from the NC4 transmitter and receiver units are described below. NC4 Tx unit NC4 Rx unit Wire colour Function Wire colour Function Green... -
Page 41: Applying Electrical Power To The Interface
If electrical power to the NCi-4 interface is lost and then subsequently restored when the NC4 WARNING: Before switching on system is in a normal operating mode, the NC4 electrical power, ensure the machine is powers down and then powers up again without safe to work on. -
Page 42: Setting The Air Pressure
0.5 bar (7 psi). Check that the profile of the laser beam is circular. Outlet NOTE: If the air supply pressure varies while the machine is operating, the air pressure to the NC4 system may need to be increased to allow for this pressure fluctuation. -
Page 43: Software - Installation And Routines
Renishaw plc. They are described in the data sheet “Probe software for machine tools” , Renishaw part number H-2000-2289 (see www.renishaw.com ). Example programs for high-speed broken tool detection of solid tools are available for a wide range of machine controller types. -
Page 44: System Set-Up And Alignment
NCi-4 interface in tool setting mode. is within the recommended tolerances detailed in “Alignment tolerances” on page 39. Either a voltmeter or an NC4 set-up tool are used to provide an indication of the signal strength The beam alignment macro described in the received at the receiver unit. -
Page 45: Using A Voltmeter
System set-up and alignment – general Using a voltmeter NCi-4 interface A standard voltmeter, that is within calibration, may be used for setting up and aligning the NC4 system. Position the voltmeter next to the receiver unit. Connect a wire between terminal CN2-1 on the NCi-4 interface and one of the voltmeter probes. -
Page 46: Using The Set-Up Tool
Set-up mode, i.e. when the NC set- up switch (SW1-2) is set to ‘On’. Check that the NC4 receiver unit is clean and free of swarf. Push the set-up tool onto the top of the receiver unit and rotate it so that the display is facing you. -
Page 47: System Alignment Tolerances
System alignment tolerances Alignment tolerances The tolerances to which a tool can be set are dependent on the parallelism of the laser beam to the machine axes. Tool setting applications Spindle axis Over a span of 100 mm (3.94 in), the following alignment accuracies are easily achievable: Beam Radial... -
Page 48: Separate System
/ machine table so that the laser beam is centred with Ensure that air is supplied to the NC4 and is the target cross hairs. at the correct pressure. 10. Manually traverse the target / transmitter so... - Page 49 Set-up and alignment – separate system 3-plate adjuster pack Pitch and Pitch and Limits of adjustment height adjuster height adjuster Rotation ±7 degrees Translation ±2.5 mm Translation holding Height ±2.5 mm screws (×2) Translation Pitch ±5 degrees adjuster Rotation holding A 3 mm A/F hexagonal key is Rotation screws (×2)
- Page 50 Set-up and alignment – separate system Printed copies of the target are provided at the back of this guide. Remove one of them from the Target position 2 guide. Target position 1...
- Page 51 Set-up and alignment – separate system 11. Adjust the rotation and pitch of the This ensures that the receiver unit is transmitter unit so that the laser beam is parallel / perpendicular to the machine axis. repositioned on the cross hairs. 17.
- Page 52 Set-up and alignment – separate system Start by moving the receiver unit, as this NOTE: If the set-up tool is used, ignore the defines the effective beam path. If possible, reading on the display. A false reading is use a dial test indicator on the receiver shown when the NC set-up mode is housing to control the correction.
-
Page 53: Fixed System
Do this as follows: The NC4 fixed system is supplied with the transmitter and receiver units correctly set up. Aligning to the X/Y axes After installing the system you will need to align (a) On the adjuster pack, slacken the two the system as described in this section. - Page 54 Set-up and alignment – fixed system The receiver unit Rotation holding holding screws and screw adjusters are identical to those on the Pitch holding transmitter unit screw Pitch adjuster Rotation holding screw Receiver unit Transmitter unit Rotation adjusters Rotation adjusters Adjuster pack (for details see the figure on page 47)
- Page 55 Section on A-A Switch on electrical power to the NCi-4 interface. Z-axis locking screw (×2) Z-axis Ensure that air is supplied to the NC4 and is adjustment X and Y-axis at the correct pressure. screw (×2) locking screws (×4) At the transmitter and receiver units, slacken the rotation and pitch holding screws.
- Page 56 Set-up and alignment – fixed system On the NCi-4, set switch SW1-2 (NC set-up) 10. Check that the laser beam is not obstructed. to ‘On’. On the NCi-4, set switch SW1-2 (NC set-up) to ‘Off’. Adjust the rotation and pitch of the receiver unit until the maximum signal is obtained on Check that: the voltmeter or set-up tool.
-
Page 57: Troubleshooting
Troubleshooting Fault Rectification action NC4 fails to turn on (Tx and Rx status LEDs are not lit) Faulty connections. Check that the wiring connections are correct. Wrong supply voltage. Check the supply voltage to the NCi-4 interface. Blown fuse. Check the connections for a short circuit. - Page 58 Fault Rectification action Poor repeatability / spurious readings (cont’d) Electrical interference. Ensure that the NC4 cables are not routed alongside cables carrying high current. Ensure the earth wire is connected to the interface. Minimise temperature changes. Increase the frequency of Thermal growth of the machine calibration.
- Page 59 Brackets loose. Check and tighten the brackets as appropriate. Tool change repeatability poor. Check repeatability of the NC4 without performing a tool change. Poorly regulated power supply. Ensure that the power supply is correctly regulated. Coolant drips or mist.
- Page 60 Troubleshooting Fault Rectification action Voltage is outside the 1.0 V to 7.0 V range when in Set-up mode (cont’d) Air pressure is set incorrectly. Reset the air pressure (see “Setting the air pressure” on page 34). An object is blocking the beam. Ensure that the laser beam is unobstructed.
- Page 61 This may occur if the system was not set up and aligned correctly (see “System set up and alignment” on page 36). Probe status LED is red No air supply to the NC4. Check the air supply. Damaged air pipes. Ensure the air pipes are not damaged or kinked.
- Page 62 Fault Rectification action Tx or Rx lens is dirty or the air hole is blocked Air supply to NC4 does not conform Connect the air supply upstream of the oil mist lubricator or to ISO 8573-1: Air quality of class auto shut-off valve.
- Page 63 Rectification action NC4 set-up tool does not power up Faulty connection. Check that the NC4 set-up tool is clean and free from swarf. Check that the spring-loaded contact springs on the underside of the tool are clean and are not damaged.
-
Page 64: Maintenance Introduction
Maintenance Introduction The NC4 unit requires minimal maintenance as it has been designed to operate as a permanent fixture on a CNC machining centre where it is subject to an environment of hot metal chips and coolant. Only the maintenance routines described in this guide should be undertaken. -
Page 65: Air Regulator Unit
Maintenance – air regulator unit Checking the liquid level Air pressure adjusting knob Regularly check the level of the accumulated liquid in each of the filter bowls. It is important Pull up knob Push down that the level is kept below the filter element. before setting knob to lock pressure... -
Page 66: Nc4 Set-Up Tool
Maintenance – NC4 set-up tool Replacing the battery Slide the top cover forward by hand to expose the battery. Remove the battery. Carefully fit a new battery. Refer to the markings on the circuit board for correct Top cover orientation. -
Page 67: Servicing Cleaning The Optics
2 × wrapped polyester swabs (RS No. 408-1794) Cleaning the NC4 Cleaning the optics If the air to the NC4 becomes contaminated, the transmitter and receiver units may require cleaning. CAUTION – LASER SAFETY Contamination will cause the system to stay in a The access panel of an NC4 transmitter triggered state. - Page 68 Servicing – cleaning the optics Pin spanner Access panel Rotate cleaning tool (approximately 70 to 80 degrees) Cleaning tool Insert cleaning tool...
- Page 69 70 to 80 degrees until the passive seal is clear of the optic glass. Remove the air supply from the NC4 by setting the pressure regulator to 0 bar. Purge the air supply for approximately one minute to clear the lines.
- Page 70 33). 12. Spray the clean air spray into the housing to remove all traces of solvent. Restore the air supply to the NC4 and adjust the pressure (see “Setting the air 13. Visually inspect for debris around the pressure”...
- Page 71 Servicing – cleaning the optics If an air line to an NC4 unit on a separate system has been replaced, the NC4 may need to be realigned (see “Setting-up and aligning a separate system” on page 40). If realignment is not necessary, set switch SW1-2 (NC set-up) on the NCi-4 interface to ‘On’.
-
Page 72: Nc4 Fixed System
Switch off the electrical power to the NCi-4 The following procedures are suitable for the interface. transmitter and receiver units. Remove the air supply from the NC4 by Disassembling setting the pressure regulator to 0 bar. Remove the two M4 rotation holding screws. - Page 73 Servicing – NC4 fixed system M4 rotation holding screw (2 off) Disc spring (2 off) Disc spring Plain washer (2 off) showing correct orientation when fitted NC4 transmitter or receiver unit Approx. Push fit/release 100 mm Mounting block pneumatic fitting...
- Page 74 Remove the NC4 fixed system housing from With the conduit gland dismantled, ensure the adjuster pack. that the NC4 unit can extend out of the fixed system housing by the same distance as Remove the four M3 cover plate screws and noted previously (approximately 100 mm cover plate to gain access to the air pipe.
- Page 75 Servicing – NC4 fixed system Secure the fixed system housing to the adjuster pack. Fit the mounting block to the NC4 unit and secure with the two M3 holding screws Refit the NC4 unit into the fixed system housing, taking care not to damage or kink the cable and air pipe.
- Page 76 Unbolt the NC4 unit from the mounting bracket. Disassemble and reassemble the PassiveSeal of one NC4 unit at a time. This will avoid mixing up Using the pin spanner, unscrew and remove the seals and access panels. the access panel.
-
Page 77: Passiveseal
Servicing – PassiveSeal Orientation tool Access panel Insert orientation tool PassiveSeal assembly Spring Orientation tool PassiveSeal Diaphragm assembly clamp Locking cover PassiveSeal flats... - Page 78 (see “Applying electrical power to panel. the interface” on page 33). Refit the access panel and tighten to 2 Nm Restore the air supply to the NC4 and (1.48 lb.ft). adjust the pressure (see “Setting the air pressure” on page 34).
-
Page 79: Air Regulator Unit
Servicing – air regulator unit Removing and refitting filter elements Regularly inspect the filter elements. They should be replaced when dirty or wet and at least once each year. Do this as follows: Air pressure Switch off the air supply. regulator filter bowl Unscrew the filter bowl by hand. - Page 80 Switch on the air supply and set the pressure as described in “Setting the air pressure” on page 34. NOTE: Items shown within dotted boxes A and B are included in the air filter service kit obtainable from Renishaw (see the parts lists on page 78).
-
Page 81: Parts Lists Nc4 Separate Assemblies
Parts list – NC4 separate assemblies t t i s t i e i l × , e l l l a – e i l – e i l – e i l – e i l – e i l... -
Page 82: Nc4 Separate Unit Kits
Parts list – NC4 separate unit kits e i l × . e l t i k l i f × × c i t t t i c i t t t i c i t t t i , t i ×... -
Page 83: Nc4 Fixed Unit Assembly And Kit
Parts list – NC4 fixed unit assembly and kit e i l × , e l l l a e i l × , e l l i f × × c i t t t i c i t... -
Page 84: Nc4 Accessories
Parts list – NC4 accessories . t i e i l × , e l . y l o l l . y l o l l – – – . y l o l l – – . t i e i l ×... - Page 85 Parts list – NC4 accessories (continued) i f ( – –...
-
Page 86: Air Supply Accessories
Parts list – air supply accessories t i k Ø t t i t t i t i k Ø t t i Ø l i o Ø t t i t i f c i t t t i t i f c i t t t i... -
Page 87: Cable And Conduit Accessories
Parts list – cable and conduit accessories i f ( t t i t t i . f f x i f p i l p i l p i l p i l... -
Page 88: Interface Accessories
Parts list – interface accessories l i a , s l... -
Page 89: Publications And Warning Sign Accessories
Parts list – publications and warning sign accessories l l a i l l , y t l l a s i l l l a i l l... -
Page 90: Software Accessories
Parts list – software accessories t i k l l o t i k l l o t i k l l o t i k l l o t i k l l o t i k l l o t i k e l l t i k... - Page 91 Parts list – software accessories (continued) t i k e l l t i k l l o t i k l l o...
- Page 92 TARGET TO AID ALIGNMENT TARGET TO AID ALIGNMENT TARGET TO AID ALIGNMENT TARGET TO AID ALIGNMENT...
- Page 93 Renishaw plc +44 (0)1453 524524 New Mills, Wotton-under-Edge, +44 (0)1453 524901 Gloucestershire, GL12 8JR uk@renishaw.com United Kingdom www.renishaw.com For worldwide contact details, please visit our main website at www.renishaw.com/contact *H-2000-5230-02-A*...
Need help?
Do you have a question about the NC4 and is the answer not in the manual?
Questions and answers