
Subscribe to Our Youtube Channel
Related Manuals for domi LGMF1595


Summary of Contents for domi LGMF1595
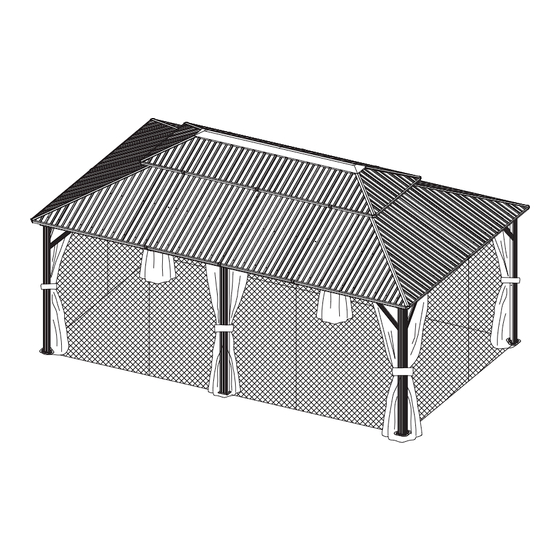
- Page 1 12'×20' Metal Patio Gazebo ASSEMBLY MANUAL MODEL#: LGMF1595 Missing part? Damaged? Contact us via email at domiservice01@outlook.com © Copyright 2022-2024 domi LLC. I All Rights Reserved.
- Page 2 U s e b o l t s t o s e c u r e t h e f r a me t o t h e g r o u n d t o a g a i n s t t h e s t r o n g w i n d . !...
- Page 5 Pole Beam Beam Beam Beam Beam Beam Corner Roof Bar Roof Bar Corner Roof Bar Connector Solidfying Bar Solidfying Bar Solidfying Bar Finishing Bar Finishing Bar Finishing Bar...
- Page 6 Finishing Bar Finishing Bar Finishing Finishing Finishing Bar Finishing Bar Finishing Bar Finishing Bar Finishing Bar Finishing Bar Finishing Bar Roof Panel Roof Panel Roof Panel Roof Panel Roof Panel Roof Panel...
- Page 7 Roof Panel Roof Panel Roof Panel Roof Panel Roof Panel Roof Panel Roof Panel Roof Panel Roof Panel Roof Panel Roof Panel Roof Panel Roof Panel Roof Panel Roof Panel Roof Panel...
- Page 8 Roof Panel Roof Panel Roof Panel Roof Panel Roof Panel Roof Panel Roof Panel Net Frame Net Frame Net Frame Net Frame Base Base Joint Cover Joint Cover Corner Corner Inside Roof Union Bar Solidifying Bar Solidifying Bar Connector Outside Roof J-Hook Bracket Bracket...
- Page 9 Joint Cover Bracket Bracket Bracket Hook Spacer Bracket Corner Cover Mosquito Solid Sidewall Finishing End Finishing End Sidewall (need to buy extra) Mosquito Solid Sidewall Plastic Bracket Plastic Bracket Sidewall (need to buy extra) Plastic Bracket Plastic Bracket Plastic Bracket...
- Page 10 (1) Attach 2 Part #B1 to Part #A with 4 Bolts #8. (2) Attach 2 Part #B2 to Part #A with 4 Bolts #6. (3) Attach Part #B to Part #A with 3 Bolts #8. (4) Repeat the above procedures to assemble the other 3 Part #A.
- Page 11 (1) Attach 2 Part #B1 to Part #A1 with 4 Bolts #8. (2) Attach Part #B3 to Part #A1 with 4 Bolts #8. (3) Repeat the above procedures to assemble another Part #A1.
- Page 12 (2) Insert the other side of (1) Insert Part #C2 into Part #C1 Part #C2 into Part #C and and secure with 3 Bolts #8. secure with 3 Bolts #8. (4) Insert Part #X into the beam (3) Connect Part #C1 and and secure with 1 Bolt #8.
- Page 13 (1) Insert Part #C2 into Part #D, (2) Insert the other side of and secure with 3 Bolts #8. Part #C2 into Part #D2 and secure with 3 Bolts #8. (4) Insert Part #X into the beam and secure with 1 Bolt #8. (3) Connect Part #D and Part #D2 through Part #C2.
- Page 14 (1) Insert Part #C2 into Part #D2, (2) Insert the other side of and secure with 3 Bolts #8. Part #C2 into Part #D1 and secure with 3 Bolts #8. (4) Insert Part #X into the beam and secure with 1 Bolt #8. (3) Connect Part #D2 and Part #D1 through Part #C2.
- Page 15 (1) Connect Part #C and #D to Part #A with 8 Bolts #4. (From Outside) (2) Repeat the above procedures to assemble the other 3 corners. Please don't tighten all bolts.
- Page 16 (1) Connect Part #C and #D to Part #A with 4 Bolts #8. (From Inside) Repeat the above procedures to assemble the other 3 corners. Please don't tighten all bolts.
- Page 17 (1) Connect Part #A1 to the middle of Part #D2 with 5 Bolts #8. Repeat the above procedures to assemble the opposite side. Please don't tighten all bolts.
- Page 18 (1) Affix Part #R and Part #R1 to the frame with 8 Bolts #8. Repeat the above procedures to assemble the other 3 corners. Please don't tighten all bolts.
- Page 19 (1) Cover the corner with Part #X1. (2) Secure with 2 Self-tapping Screws #3. (from top to bottom) (3) Secure with 2 Self-tapping Screws #3. (from bottom to top) Repeat the above procedures to assemble the other 3 corners. Tighten all bolts.
- Page 20 Assemble the 4 Corner Roof Bars: (1) Connect Part #E1 and Part #E with 2 Bolts #8 . (2) Attach Part #U to Part #E with Bolt #8 . (3) Repeat the above procedures to assemble the other 3 corner roof bars.
- Page 21 Please have a freestanding ladder ready at the center of the gazebo. (1) Place 4 Part #E1 on the 4 corners of Part #S. Secure with 8 Bolts #8. (from bottom to top) ATTENTION: You can also finish this step on the ground and then lift 4 corner roof bars Outside View and inside roof connector to the top together.
- Page 22 (1) Attach Part #U1 to Part #E2 with Bolt #7 . (2) Repeat the above procedures to assemble the other 5 roof bars.
- Page 23 (1) Attach Part #U4 to Part #E2 with Bolt #7 . (2) Repeat the above procedures to assemble another roof bar.
- Page 24 (1) Place Part #E2 on part #S. Secure with Bolt #8 (from bottom to top). Outside View Inside View (2) Connect Part #E2 and Part A1 with part #U4. Secure with 2 Bolts #8. (3) Repeat the above procedures to assemble the opposite side.
- Page 25 (1) Place Part #E2 on Part #S. Secure with Bolt #8 (from bottom to top). Outside View Inside View (2) Connect Part #E2 and the Assembled Beam (C&C1) with part #U1. Secure with 2 Bolts #8. (3) Repeat the above procedures to assemble the opposite side.
- Page 26 (1) Place Part #E2 on Part #S. Secure with Bolts #8 (from bottom to top). Outside View Inside View (2) Connect Part #E2 and the Assembled Beam (D1&D2&D) with part #U1. Secure with 2 Bolts #8. (3) Repeat the above procedures to assemble the opposite side.
- Page 27 Secure 5 Part #T to Part #S and Part #S1. (From bottom to top) ATTENTION: The holes of Part #S and Part #S1 need to be aligned, on the same vertical line.
- Page 28 (1) Insert Part #U3 into Part #G1 (2) Insert 2 Part #U3 into Part #G1 and secure with Blot #8. and secure with 2 Blots #8. Inside View (3) Attach Part #G1 and Part #U3 to Part #E2 with Blot #7. (5) Attach Part #G1 and (4) Attach Part #G1 and Part #U3 to Part #E2...
- Page 29 Inside View (1) Attach Part #G and Part #U3 to Part #E2 with Bolt #8 Outside View (2) Repeat the above procedures to assemble the opposite side.
- Page 30 (2) Attach 2 Part #F and Part #U3 to Part #E2 with Blot #7 and Blot #8. Outside View...
- Page 31 Outside View (1) Insert Part #U2 into Part #F and Part #G. (2) Secure with 2 Bolts #8. (3) Secure them to Part #E with Bolt #8. (4) Repeat the above procedures to assemble the other 3 sides.
- Page 32 (1) Connect Part #J1 and Part #Q1 with 1 Bolt #7 and 1 Nut #5. (2) Connect Part #J3 and Part #Q3 with 2 Bolts #7 and 2 Nuts #5. (3) Connect Part #J3 and Part #Q3 with 2 Bolts #7 and 2 Nuts #5. (4) Connect Part #J2 and Part #Q2 with 1 Bolt #7 and 1 Nut #5.
- Page 33 Inside View (1) Place the Assembled J1 & Q1, J2 & Q2 and J3 & Q3 on Part #E2, securing with 3 Bolts #8. (2) Repeat the above procedures to assemble the opposite side.
- Page 34 (1) Connect Part #J and Part #Q with 2 Bolts #7 and 2 Nuts #5. (2) Place the Assembled Part #J & #Q on Part #E2, securing with 1 Bolt #8. Inside View (3) Repeat the above procedures to assemble the opposite side.
- Page 35 (1) Place Part #J and Part #J1 on Part #E; put on Part #X3 and secure with Self-tapping Screw #2. Inside View (2) Repeat the above procedures to assemble the other 3 corners.
- Page 36 Cover Part #Z, #Z1 & #Z2 to Roof Panels. Section View...
- Page 37 Cover Part #Z, #Z3 & #Z4 to Roof Panels. Section View...
- Page 38 ATTENTION: The bigger roof panel need to cover the smaller one. (1) Insert Part #N1 and Part #N2 (2) Insert Part #N5 and Part #N4 into the frame; attach Part #H1 into the frame; attach Part #H2 to Part #E2, securing with Bolt #8. to Part #E, securing with Bolt #8.
- Page 39 (1) Insert 4 Part #N3 into the frame. When installing Part #H1/H2 & Part #H3, you should unscrew the bolt that have not been tightened.
- Page 40 (1) Place Part #H1 (2) Place 2 Part #H3 and Part #H3 on on Part #E2; put on Part #E2; put on Part #X2 and secure Part #X2 and with Bolt #8. secure with Bolt #8. (3) Place Part #H3 and Part #H2 on Part #E2;...
- Page 41 ATTENTION: The bigger roof panel need to cover the smaller one. (1) Insert Part #L1 and (2) Insert Part #L4 and Part #L2 into the frame. Part #L3 into the frame. (3) Attach Part #H to Part #E2, securing with Bolt #8. (4) Repeat the above procedures to assemble the opposite side.
- Page 42 (1) Place Part #H and Part #H2 on Part #E1; put on Part #X3 and secure with Self-tapping Screw #2. Outside View (2) Repeat the above procedures to assemble the other 3 corners.
- Page 43 Cover Part #Z to Roof Panels Section View...
- Page 44 Cover Part #Z to Roof Panels...
- Page 45 Cover Part #Z to Roof Panels...
- Page 46 Part #W should be inserted between roof panels and solidifying bar or beams, then secure with bolts and nuts.
- Page 47 ATTENTION: The bigger roof panel need to cover the smaller one. (1) Insert Part #P1, Part #P2 (2) Insert Part #P12, Part #P11 and Part #P3 into the frame. and Part #P10 into the frame. (3) Place 4 Part #W between roof panels and solidifying bars.
- Page 48 ATTENTION: The bigger roof panel need to cover the smaller one. (1) Insert Part #P4 and Part #P5 into the frame. (2) Insert Part #P9 and Part #P8 into the frame. (3)Place 8 Part #W between roof panels and solidifying bars.
- Page 49 ATTENTION: The bigger roof panel need to cover the smaller one. (1) Insert Part #P6 into the frame. (3) Place 4 Part #W between roof panels and solidifying bars. Then secure with 4 Bolts #12 and 4 Nuts #5; Place 1 Part #W between roof panels and Part #E2.
- Page 50 ATTENTION: The bigger roof panel need to cover the smaller one. (1) Insert Part #M1 and (2) Insert Part #M8 and Part #M2 into the frame. Part #M7 into the frame. (3) Place 6 Part #W between roof panels and beams. Then secure with 6 Bolts #10 and 6 Nuts #5.
- Page 51 ATTENTION: The bigger roof panel need to cover the smaller one. (1) Insert Part #M3 into the frame. (2) Insert Part #M6 into the frame. (3) Place 4 Part #W between roof panels and solidifying bars. Then secure with 4 Bolts #12 and 4 Nuts #5.
- Page 52 ATTENTION: The bigger roof panel need to cover the smaller one. (1) Insert Part #M4 and Part #M5 into the frame. (2) Place 4 Part #W between roof panels and solidifying bars. Then secure with 4 Bolts #12 and 4 Nuts #5; Place 1 Part #W between roof panels and Part #E2.
- Page 53 Place Part #W between roof panels and Part #E2. Then secure with Bolt #11 and Nut #5. Repeat the above procedures to assemble the other 3 sides.
- Page 54 (1) Place Part #K4 and Part #K5 on Part #E2; Put on Part #X2 and secure with Bolt #8. (2) Place Part #K2 on Part #K4 (3) Place Part #K3 on Part #K5 and Part #E2; Put on Part #X2 and Part #E2;...
- Page 55 (1) Attach Part #K and Part #K1 to the frame; Put on Part #X2 and secure with Bolt #8. (2) Repeat the above procedures to assemble the opposite side.
- Page 56 (1) Place Part #K3 and Part #K on Part #E; Put on Part #X3 and secure with Self-tapping Screw #2. (2) Repeat the above procedures to assemble the other 3 corners.
- Page 57 (1) Attach roof panels to finishing bars with 4 Self-tapping Screws #3. (2) Repeat the above procedures to assemble the opposite side.
- Page 58 (1) Attach roof panels to finishing bars with 2 Self-tapping Screws #3. (2) Repeat the above procedures to assemble the opposite side.
- Page 59 How to Put the 152 Hooks into the Double-track Package contains 76 hooks, another 76 Hooks For Sidewall 76 Hooks For Curtains 76 hooks need to be purchased separately Double-track 7 Hooks × 2 Rows 7 Hooks × 2 Rows 10 Hooks ×...
- Page 60 (1) Place 7 hooks on each slot of the Sidewall Track(C1&C). (2) Install Part #T1 at the joint of Part C&C1 with Bolt #8. Double-track (3) Repeat the above procedures to assemble the opposite side.
- Page 61 (1) Place 7 hooks on each slot of the Sidewall Track(D&D1). (2) Place 10 hooks on each slot of the Sidewall Track(D2). (3) Install Part #T1 at the middle of Part #D&D1&D2 with Bolt #8. Double-track (4) Repeat the above procedures to assemble the opposite side.
- Page 62 Hang up Mosquito Sidewalls to Inside Track...
- Page 63 Hang up Solid Sidewalls to Outside Track...
- Page 64 R E S O P T C O M F O R T I N Y O N R O W N B A C K Y A R D A t d o m i o u t d o o r l i v i n g , w e b e l i e v e i n o u r p r o d u c t s . T h a t ’...
Need help?
Do you have a question about the LGMF1595 and is the answer not in the manual?
Questions and answers