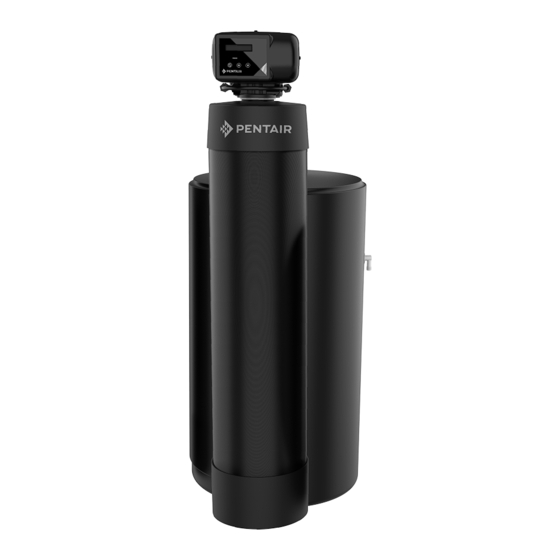
Pentair WATER SOFTENING SYSTEM 1.0 Installation And Service Manual

Pentair WATER SOFTENING SYSTEM 1.0 Installation And Service Manual

Hide thumbs Also See for WATER SOFTENING SYSTEM 1.0:

Advertisement

Quick Links

WHOLE HOUSE WATER SOFTENING SYSTEMS
INSTALLATION AND SERVICE MANUAL
pentair.com/homewater
WHOLE HOUSE WATER SOFTENING SYSTEM • 1

Advertisement

Table of Contents
loading

Summary of Contents for Pentair WATER SOFTENING SYSTEM 1.0

  • Page 1 WHOLE HOUSE WATER SOFTENING SYSTEMS INSTALLATION AND SERVICE MANUAL pentair.com/homewater WHOLE HOUSE WATER SOFTENING SYSTEM • 1...
  • Page 2: Table Of Contents

    “jumper wire” to bridge the equipment and re-establish the contiguous conductive nature of the plumbing before using this Pentair system. Failure to do so can result in errant electricity from improperly grounded appliances or potential galvanic activity in the plumbing system, which could increase the risk of fire or injury...
  • Page 3: Application Limitations

    APPLICATION LIMITATIONS • This system may be applied on municipality or well water systems. On hardness levels of 60 grains and higher, the system may not achieve a hardness of less than 1 grain, due to high Total Dissolved Solids (some bleed through is possible). Bleed through can also be caused by sodium levels higher than 1000 ppm.
  • Page 4: System Information

    RATE SERVICE FLOW RATE (GRAINS/LB. OF SETTING SETTING SETTING (GAL/MIN) RATE (GAL/MIN) SALT) (GRAINS) (GRAINS) (GRAINS) PENTAIR WATER 16,660 24,593 30,726 10.0 4272 SOFTENING SYSTEM @ 3.9 LBS @ 7.9 LBS @ 15.8 LBS PENTAIR WATER 24,990 36,889 46,089 11.8...
  • Page 5: Maintenance Requirements

    MAINTENANCE REQUIRMENTS SALT RECOMMENDATIONS Two kinds of salt are recommended for water softeners: 1. Block Salt: Water softener block salt is reasonably priced, low in impurities and will not cake in the salt container. Block Salt is pressed into the shape of a cattle block. 2.
  • Page 6: Installation Instructions

    INSTALLATION INSTRUCTIONS 1. SAFETY PRECAUTIONS • To prevent accident or injury, do not hoist the unit over your shoulder. Use a hand truck to transport the unit. Notice Do not lay the unit on its side during transportation and/or installation. •...
  • Page 7 INSTALLATION INSTRUCTIONS CONTINUED 5. TURN OFF THE WATER AND DRAIN THE PLUMBING • Turn off the water at the meter or the pressure tank. • Drain all the pipes. Do not sweat the pipes with water in them; steam will damage plastic parts in the valve.
  • Page 8 • In some homes, metal piping may serve as a ground connection for the home electrical system. Installing a Pentair Softener with its nonmetallic valve body will interrupt the ground connection. Whenever a system is installed on metallic plumbing, we recommend you use grounding pipe clamps and a ground cable to maintain continuity of the ground connection from the inlet to the outlet pipe.
  • Page 9 Special Attention for situations where a Filter and a Softener are installed together: When a whole house filter and a softener are installed side by side, the preferred approach is to run a sepa- rate drain line from each unit all the way to the point of termination. If this is not done, there is the potential for drain water from the filter to back feed through the softener and overfill the brine tank, especially when drain lines are run overhead.
  • Page 10: Control Information

    CONTROL INFORMATION POWER ON LED A green LED is ON when power is applied to the control and the microprocessor is operating properly. SERVICE REQUIRED If the message “For Service Call” or “Service Required” displays in the window of the control without showing the time of day, the control valve has encountered a problem, such as failure to reach the proper position during regeneration.
  • Page 11: Start Up Instructions

    QUICK START GUIDE: SYSTEM START-UP INSTRUCTIONS 1. Connect the unit to the existing plumbing (Facing the front of the system, the INLET is on the LEFT –the OUTLET is on the RIGHT) Notice The bypass is only hand tightened at the factory and must be fully tightened and checked for leaks by installer.
  • Page 12 QUICK START GUIDE: SYSTEM START-UP INSTRUCTIONS CONTINUED 8. Optional advanced menu: Press the SCROLL button to advance to the next setting. The control will then display “Go to ADVANCED menu? No” If you want to view the advanced settings, press the UP or DOWN arrow, change to “YES” and press the SCROLL button (Default settings on ADVANCED MENU will not need to be changed for most applications).
  • Page 13 QUICK START GUIDE: SYSTEM START-UP INSTRUCTIONS CONTINUED 14. Return to the Home Screen and then advance back to refill: Press the SCROLL button to advance to the home position. The control will display the home screen, press the scroll button 2 times. The 10 second Countdown will begin and the cycle will start again. Wait for the motor to stop at cycle 1, then advance by pressing scroll button 1 time.
  • Page 14: Programing The Control

    HOW TO CONTROL THE INSTALLER’S LEVEL KEY BUTTONS: SCROLL BUTTON UP ARROW POWER POWER DOWN ARROW begin, verify that the control is in the Service Mode. Time of Day GL Remaining • Press the DOWN ARROW and hold it for 5 seconds; the control will display: System Check •...
  • Page 15 3. SALT LEVEL The control will display: Salt Level: Med • Press the UP or DOWN ARROW to select Low, Medium, or High. Medium is a good setting for most circumstances. For small families and low hardness, Low will provide greater salt efficiency. For large families and high hardness, High will provide the most capacity.
  • Page 16 ADVANCED MENU 1. RESET AVERAGE The control will display: Reset Average No • If you want to reset the average daily volume, press the UP or DOWN ARROW to select YES. • If YES is selected, the control will reset the average volume per day to 25% of the capacity. Press the SCROLL BUTTON to advance to the next setting.
  • Page 17 ADVANCED MENU CONTINUED 4. DAYS OVERRIDE The control will display: Override: OFF • Press the UP or DOWN ARROW to set the number of days between regenerations. The setting range is OFF to 30 days. Notice In most situations with a meter equipped valve, override can remain “OFF”. Set a number if days if you wish to have the system regenerated periodically regardless of water use.
  • Page 18 HOW TO PROGRAM THE END USER’S LEVEL To began, verify that the control is in the Service Mode: Time of Day GL Remaining Press the SCROLL BUTTON to advance to the next setting. The following settings are available in the End User’s Level: 1.
  • Page 19: Understanding The Diagnostic Level

    UNDERSTANDING THE DIAGNOSTIC LEVEL To begin, verify that the control is in the Service Mode. Time of Day GL Remaining • Press the UP ARROW and hold it for 5 seconds; the control will display: Regen _ Days Ago The control is now in the Diagnostic Level. Use the SCROLL BUTTON to advance to each diagnostic. If no button is pressed within 5 minutes, the display will return to the Service Mode.
  • Page 20: Sanitizing The Softener

    SANITIZING THE SOFTENER Notice The unit may be sanitized with or without salt in the brine tank. After the installation is complete, the following procedure can be used to sanitize the water conditioner: 1. Mix a 3/4 cup of common (unscented) 5.25% household bleach with 1 quart of water. Pour this solution into the brine well.
  • Page 21: Exploded Views And Parts Lists

    VALVE EXPLODED VIEW WHOLE HOUSE WATER SOFTENING SYSTEM • 21...
  • Page 22 VALVE PARTS LIST ITEM QUANTITY PART # DESCRIPTION 70793 3/4” NPTF TO 1/2” I.D. HOSE MALE DRAIN ELBOW 75053 BACKWASH FLOW CONTROL 2.5 GPM (UNIT SIZE 1.0 & 1.5) 72175 BACKWASH FLOW CONTROL 3.5 GPM (UNIT SIZE 2.0) 72678 SCREW 1/4-20 X 1-1/4 LG HEX WASHER HD 71083 VALVE BODY COVER 70658...
  • Page 23 CONTROL EXPLODED VIEW WHOLE HOUSE WATER SOFTENING SYSTEM • 23...
  • Page 24 CONTROL PARTS LIST ITEM QUANTITY PART # DESCRIPTION 39497 FRONT COVER ASSY, PENTAIR ROTARY 38751 BOARD ASSY SOFTENER WITH 2 LINE DISPLAY 70618 SCREW #4-24 X 3/8 LG SELF-THREADING 72519 FLOW METER SENSOR CABLE NGC 72134 HEYCO BUSHING, SR 5P-4...
  • Page 25 BYPASS VALVE EXPLODED VIEW AND PARTS LIST BYPASS VALVE ASSEMBLY PART NUMBER 72668 ITEM QUANTITY PART # DESCRIPTION 72599 SCREW 6X32X1/2 TYPE 72580 BYPASS END CAP 541 13328 017 O-RING 8730 72584 RETAINING RING VS-15 71161 568-363 NUT, BYPASS VALVE 71162 568-364 RING, NUT RETAINER 71110...
  • Page 26 QUANTITY PART # DESCRIPTION 38571 BRINE TANK BLACK 18X33 ASSY 38946 10” PENTAIR PRINTED TANK COLLAR 1.0 & 1.5 38947 12” PENTAIR PRINTED TANK COLLAR 2.0 38256 10 X 44 TANK BLACK W/BASE 1.0 38257 10 X 54 TANK BLACK W/BASE 1.5 38258 12 X 48 TANK BLACK W/BASE 2.0...
  • Page 27 Tank Size DIM A DIM B DIM C 10-1/4 in 10x44 46 in 51 in 10-1/4 in 55-7/8 in 61-1/4 in 10x54 55-1/4 in 12x48 12 in 50 in 3 in 8 3/4 in 14 1/2 in 4 3/4 in Ø...
  • Page 28: Troubleshooting Guide

    TROUBLESHOOTING GUIDE SYMPTOM CAUSE SOLUTION 1. Hard (untreated) 1. Open bypass valve. 1. Close the bypass valve. water to service 2. Refer to SYMPTOM #9. 2. Loss of resin. 3. Wait for the regeneration to complete. 3. The valve is in regeneration. 4.
  • Page 29 TROUBLESHOOTING GUIDE CONTINUED SYMPTOM CAUSE SOLUTION 3. The valve fails to 1. Low operating pressure. 1. Verify the operating pressure (20 psi min.). draw brine 2. The injector is plugged. 2. Clean the injector. 3. The injector filter is plugged. 3.
  • Page 30 TROUBLESHOOTING GUIDE CONTINUED SYMPTOM CAUSE SOLUTION 7. The unit uses too 1. Excessive water in the brine tank. 1. Refer to SYMPTOM #5. much salt 2. The unit regenerates too frequently. 2. Check the hardness, salt, reserve capacity and calendar override settings.
  • Page 31: Performance Data Sheet

    PERFORMANCE DATA SHEET Pentair Whole House Water Softening System Pentair Water Softening Pentair Water Softening Pentair Water Softening Model System 1.5 System 1.0 System 2.0 Rated Service Flow (gpm) 10.0 11.8 14.5 Pressure Drop at Rated Service Flow Rate (psi 16,660 @3.9 lbs of salt...
  • Page 32 2361 Mason Ave. | Suite 100 | Daytona Beach, FL 32117 | United States P: 877.842.1635 | Technical Services: 877.842.1635 | pentair.com © 2022 Pentair. All indicated Pentair trademarks and logos are property of Pentair. Third party registered and unregistered trademarks and logos are the property of their respective owners.

This manual is also suitable for:

Water softening system 1.5Water softening system 2.0

Table of Contents