Breville Smart Oven Pizzaiolo Manual
- Instruction book (16 pages) ,
- Instruction book (56 pages)
Advertisement
Components

- Active Deck
The stone deck is designed to move forward and down when you are opening the door; this system makes loading and unloading the pizza easy, while achieving ultimate performance. - Ventilation Slots
- Pizza Pan with removable handle
- Pizza Peel
- Manual Mode alternate interface magnet

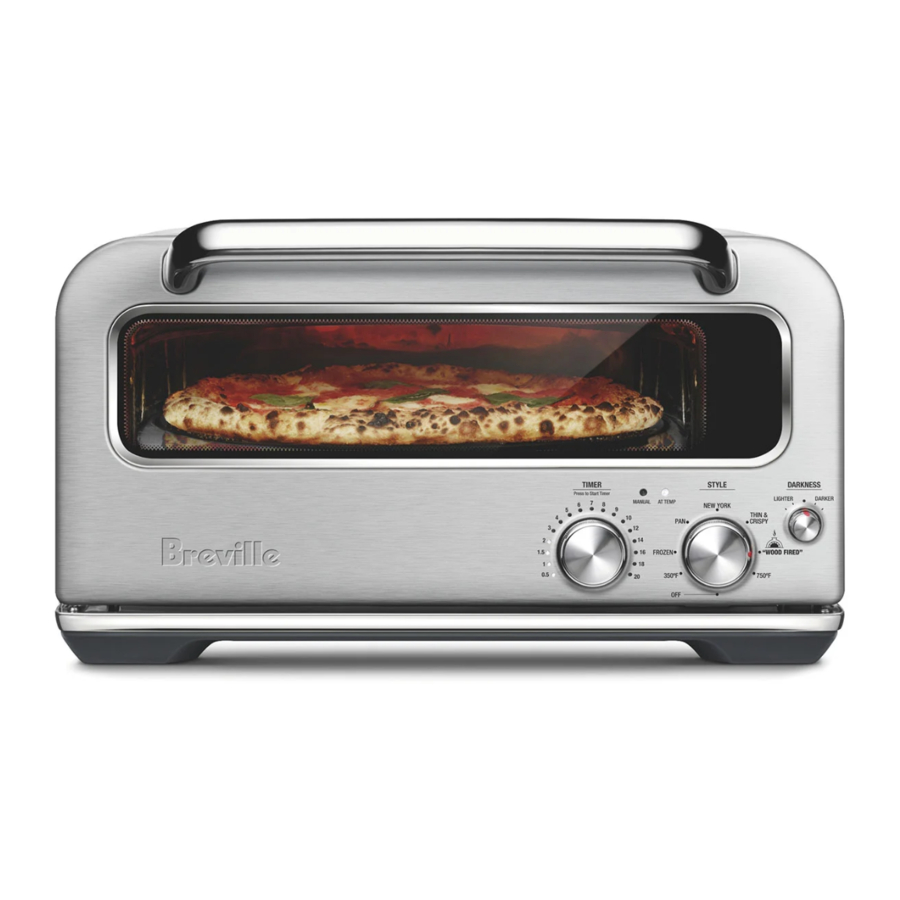
- TIME dial
Ensure to press this dial to start the timer countdown. - STYLE dial
- DARKNESS dial
- The char/darkness on the top of the pizza can be adjusted using the DARKNESS dial.
- The dial allows you to increase or decrease the temperature of the oven.
- Centre position is default. Turn the dial clockwise to increase the temperature and counter-clockwise to decrease it.
- MANUAL MODE light Indicates when you are in Manual Mode. For further explanation, refer to the 'Manual Mode' section.
- AT TEMPERATURE light
Light will flash during the initial preheating of the oven or if the oven has fallen outside of the desired temperature for cooking (do not cook when flashing). When the oven has reached the desired temperature, the AT TEMPERATURE light will turn on.
Functions
BEFORE FIRST USE
In order to remove any protective substances on the heating elements, it is necessary to run the oven empty for 20 minutes. Ensure the area is well ventilated as the oven may emit vapours. These vapours are safe and are not detrimental to the performance of the oven.
- Remove and safely discard any packing material, promotional labels and tape from the oven.
- Remove the stone deck from its packaging. Gently wipe the deck with a damp cloth. Dry thoroughly and place the stone deck in the oven cavity.
- Wipe the interior of the oven with a soft, damp sponge.
- Place the oven on a flat, dry surface. Ensure there is a minimum distance of 10cm of space on both sides of the oven and 6" (15cm) above.
- Unwind the power cord completely and insert the power plug into a grounded power outlet.
- The oven alert will sound, and the TIME dial lights will illuminate and then turn off.
- Turn the STYLE dial clockwise until the indicator reaches the 400°C function.
- Let the oven run for 20 minutes.
- The oven is now ready to use.
- Refer to seasoning the pan section for instructions for first use of pan. .
OPERATING YOUR BREVILLE OVEN
Due to the extremely high temperatures being achieved, please ensure to place the oven in a well-ventilated area, as it will emit smoke when cooking.
- Insert the stone deck into the pizza oven cavity.
- Turn the STYLE dial to the desired setting.
- The TIME dial lights will illuminate with the recommended time specific to the setting. The time can be adjusted by turning the time dial.
- The AT TEMPERATURE light will flash to indicate that the oven is preheating.
- Allow the oven to preheat until the AT TEMPERATURE light stops flashing and stays on. The preheating time can vary between 10–20 minutes depending on the selected preset.
- Use the pizza peel to place the pizza directly on the stone deck. Do not use the peel when using the pizza pan.
- Close the oven door. If using the pizza pan be sure to remove the handle first.
- Press the TIME dial to start the countdown timer.
- At the end of the cooking cycle, the oven alert will sound, and the TIME dial lights will flash and then go out.
- Remove your pizza and enjoy. .

Always ensure that the stone deck is in place when the oven is on.
NOTE
When you intend to transport the product; remove the pizza deck from inside the oven and pack separately to avoid breakage.
NOTE
Make sure the oven is preheated before placing the pizza in the cavity. If cooking multiple pizzas, wait until the AT TEMPERATURE light turns solid on before loading your next pizza.
NOTE
For high temperature cooking functions, we recommend you monitor and stay close to the oven as your food can quickly become overdone and eventually ignite.
See Troubleshooting for more information.
After cooking, allow the oven to cool completely before unplugging from the wall. Fans will continue to run to cool the sensitive electronics. These fans will automatically turn off when the temperatures are at an acceptable level.
TIME
Timer to alert you when your pizza is ready. The recommended time will illuminate depending on the selected pizza style but can be adjusted before or during cooking to suit your preference. Push dial to start timer. The countdown cycle can be stopped at any time by turning the dial down to zero.
PIZZA STYLE
400°C
Extremely intense heat. Ideal for cooking charred vegetables.
Note that the cooking time can vary depending on the type of vegetable being cooked.
WOOD FIRED
Achieve authentic
Neapolitan pizza results at home! Extremely high heat. Expect a cooked but malleable crust with distinct blisters and charring (leopard spotting).

This product does not utilize any wood or wood by-product. The term "Wood Fired" refers to the specific heat performance characteristics of this oven that replicate that of a wood fired brick oven..
THIN & CRISPY
This dough is rolled out thinly which gives the pizza a crisp result. The toppings should be right to the edge and the sauce can be spread to the very outside of the pizza.

THICK CRUST
This heat profile has been designed to work best with a less-hydrated, larger dough ball that will form a fluffy yet sturdy foundation, enabling you to be generous with toppings.

The pizza should be cooked directly on the stone deck and toppings & crust should be evenly browned.
PAN
Amazing crunchy base, fluffy dough and plenty of toppings with sauce almost to the edge. The ultimate pizza indulgence. This setting requires the use of the pan provided with your pizza oven.

FROZEN
Great frozen pizza results.
160°C
Looking for a quick, simple snack? – Top your favourite flat bread or wrap with some simple pizza toppings and cook for 8 to 10 minutes on this low-temperature oven function.
DARKNESS
If you prefer your pizza with a darker crust, this can be achieved thanks to the DARKNESS dial that allows you to adjust the temperature in your pizza oven.
The centre position is the default. Turn the dial clockwise to increase the temperature and counter clockwise to decrease it.
ELEMENT IQ
The Breville Pizzaiolo oven features Element IQ®, a cooking technology that adjusts what heating elements are on, and the power of each of the heating elements to achieve the optimum cooking performance.
Each of the oven's functions is pre-set with our recommended power distribution, deck and top temperatures and cooking time, that are based on recipes and testing.
Depending on the recipe, amount of food and your personal taste, these can be adjusted with the use of the DARKNESS and TIME dials.
MANUAL MODE FUNCTION
Manual Mode is an alternative mode of operation that allows you to individually control deck and top temperatures, and to adjust the power distribution of the top heaters. This enables you to fully customize how the oven functions.
For better use of the Manual Mode, the alternate interface magnet provided with the pizza oven should be placed on the front of the interface to indicate what temperatures you have set and what heaters you are using.
To set the oven to Manual Mode
- Press and hold the TIME/DECK TEMP dial.
- Turn the STYLE/TOP TEMP dial from OFF to 160°C.
- Release the TIME/DECK TEMP dial.
- The Manual Mode light will flash three times and then stay on.


When the Manual Mode is selected, the control dial situated on the far right will allow you to choose the heat distribution in each top element, in order to achieve different food results.
If selecting the setting on the far left, the inner & outer top elements will have a similar heat distribution to allow an even cooking result. This setting is ideal if cooking a style of pizza that requires that both the toppings and the crust to be cooked evenly.
By turning the dial from left to right, you will allow the heat to be more and more directed toward the outer and away from the inner top elements.
If selecting the setting on the far right, the outside top element will have a higher heat distribution than the inside top element. This setting is ideal if cooking a Neapolitan style pizza which requires higher heat in the crust, to achieve leopard-spotting, or if cooking with delicate ingredients.

When using Manual Mode, refer to the table below for suggested times and temperature ranges depending on the style of pizza being cooked:
| PIZZA | TIME mins | DECK TEMP | TOP TEMP | TOP CONTROL |
NEAPOLITAN (Wood Fired) (Wood Fired) | 2 mins | 370-400°C | 370 - 400°C |  |
| THIN & CRISPY | 7 mins | 295-325°C | 220-250°C |  |
| THICK CRUST | 9 mins | 295-325°C | 235-265°C | |
| PAN PIZZA | 18 mins | 325-355°C | 205-235°C | |
| FROZEN | 12 mins | 220-250°C | 190-220°C |  |
NOTE
The deck and top temperatures affect each other, so there are limitations on the possible combinations.
To return to pre-set mode, simply turn the STYLE dial to OFF and then turn back on to select desired function.
Hints & Tips
HOW TO MAKE A NEAPOLITAN PIZZA DOUGH
- Add flour, yeast and salt to the bowl of a bench mixer. Stir to combine. Add the water and knead on low speed until the dough is smooth and elastic, 10 minutes.
- Cover with plastic wrap and proof until doubled in size 45–60 minutes.
- Divide dough into ~240g pieces. Using lightly floured hands, shape each piece into a smooth ball.
- Lightly dust two baking trays with semolina mix and place the dough balls on the trays, leaving 10cm between the balls. Lightly oil the top of each ball then thoroughly wrap each tray with plastic wrap.
Refrigerate for at least 6 hours or up to 4 days. - Let dough stand, still wrapped, at room temperature for 1 hour before use. Create a generous mound of semolina mix on a clean work surface. Use a bench scraper (or a spatula) to lift out one dough ball and place on top of the mound. Keep the remaining dough covered until ready to use.
- Working with one dough ball at a time, coat dough in the a mix of flour and semolina.
- Transfer to a lightly floured work surface, gently press out dough from the centre into a 15cm circle, leaving a 2cm border around the edge. Gently stretch dough into a 25–30cm circle.
NOTE
The dough can be hard to shape if it has not rested long enough or is still too cold.
If the dough snaps back when shaping, let it rest for a further 15–30 minutes under a damp cloth. It will make the dough easier to manage.
TIP
If having difficulty stretching the dough, place the floured dough on the top of an upside-down bowl, then gently stretch the dough down the sides.
TIP
The dough can also be kneaded by hand or by using a food processor. Dough is ready when it is possible to stretch a very thin (almost transparent) piece without tearing.
TIP
Extra pizza dough can be frozen for up to one month in airtight containers or zip-lock bags. Thaw pizza dough overnight in the refrigerator before using.
HOW TO USE THE PEEL
When cooking pizzas that do not require the use of the pan, it is essential to cook your pizza directly on the deck. This requires the use of the pizza peel to transfer your pizza into the oven.
- Ensure that the oven is already preheated before placing the dough on the pizza peel.
- Sprinkle a small amount (approximately ½ tsp) of flour and semolina mix (half and half) over the surface of the peel before placing the dough on it.
- Place your stretched dough onto your peel and begin saucing/topping your pizza.
- WORK FAST! Add your sauce and toppings quickly. If not, the moisture in your dough will cause it to stick to the peel and make it difficult to slide your pizza onto the stone.
- Do not let the dough sit on the peel for more than about 2 minutes to prevent it from sticking.
- Once the pizza is topped and ready to cook, position the peel to the back of the oven. Let the tip of the peel rest on the deck and raise the handle so that the whole peel is tilting forward. Jiggle the peel back and forth gently to allow the tip of the pizza to touch the deck.
- Gradually jiggle the peel out of the oven stretching the pizza out on the deck as you go.
- Once cooked, slide the peel under the pizza to remove from the oven.
TIPS
The aim is to use just enough flour and semolina to ensure the pizza doesn't stick on the peel.
If you use too much, the excess flour will burn on the stone, causing a bitter taste and a yellow color on the base of the pizza. This excess flour will also increase the amount of smoke and chance of a fire occurring in the oven after you have removed your pizza.
NOTE
The peel needs to remain cool and clean to prevent the dough from sticking. Do not sit the peel under the pizza oven, while waiting to load the pizza onto its surface.
HOW TO USE THE PAN

Ensure your pan is seasoned before use. See care section for details.
Always ensure to have deck in place when using the pizza pan.
For pan style pizza, the pizza should be prepared in the unheated pizza pan and then placed in a preheated oven.
Alternatively the pan can be preheated before adding food, e.g. vegetables, to achieve better charring results.
Tips for perfect toppings
- Remove buffalo mozzarella from brine and press gently on paper towel to drain.
- Non-cured meats and thicker vegetables should be pre-cooked before using as pizza topping.
- Excessive amounts of sauce or toppings can make the crust soggy.
- Increasing salt content in your dough can help with achieving leopard spotting.
- Extra sauce can be frozen in smaller portions until required.
Care & Cleaning
Before cleaning, ensure the oven and all accessories are cool, and then remove the power plug from the power outlet.
Cleaning the outer body and door
- Wipe the outer body with a soft, damp sponge. A non-abrasive liquid cleanser or mild spray solution may be used to avoid build-up of stains. Apply the cleanser to the sponge, not the oven surface, before cleaning.
- To clean the glass door, use a glass cleaner or mild detergent and a soft, damp sponge or soft plastic scouring pad. Do not use an abrasive cleanser or metal scouring pad as these will scratch the oven surface.
- Let all surfaces dry thoroughly prior to inserting the power plug into a power outlet and turning the oven on.
Do not immerse the body, power cord or power plug in water or any other liquid as this may cause electrocution.
Cleaning the Stone Deck
- In order to avoid damaging the stone deck, we highly recommend wiping the surface with a soft, damp sponge after each use.
- If the stone deck needs to be removed for cleaning outside of the oven, we recommend handling the stone deck with extreme care.
- The stone deck cannot be soaked or put in a dishwasher.
- Always reinsert the stone deck into the oven after cleaning and prior to inserting the power plug into a power outlet and turning the oven on.
NOTE
A natural patina will quickly develop on the surface of the stone deck with use. This is expected and will not affect the performance of your oven.
Cleaning the pizza peel
- Wash the pizza peel in warm soapy water with a soft sponge or soft plastic scouring pad. Rinse and dry thoroughly. Do not use abrasive cleansers, metal scouring pads or metal utensils to clean any of the accessories as they may damage the surfaces.
- Alternatively, the peel can also be placed in the dishwasher.
Seasoning the pizza pan
The pan provided with your pizza oven is made of carbon steel and requires special care. Please season the pan using the following instructions before first use and at regular intervals to maintain it's protective layer.

It is important to note that during the seasoning process the oven will be at a temperature above the flash point of the oil used. This might cause the oil to spontaneously flash or ignite. To minimize this risk do not exceed the amount of oil described in the instructions below and keep the door fully closed at all times during the process. If fire or flash is observed, do not be alarmed, keep the door closed and any flames will extinguish themselves quickly.
- Set the STYLE dial to 400°C and allow the oven to preheat.
- Wipe the pizza pan with a dry paper towel or cloth.
- Add no more than ½ teaspoon of lard, vegetable or flaxseed oil (not olive oil) to the paper towel and rub a thin layer of oil around the inside of the pan and handle bracket.
- Put the pizza pan onto the deck in the preheated oven (AT TEMPERATURE light will remain lit, and will cease flashing) for 10 minutes.
- Remove the pan carefully and place on a heat proof surface.
- Reapply no more than another ½ teaspoon of lard, vegetable or flaxseed oil (not olive oil) to the paper towel and rub a thin layer of oil around the outside side of the pan.
- Put the pan in a preheated 400°C pizza oven for a further 10 minutes.
- Repeat steps 3 to 7 for a second time.
Your pan is now ready for use. We recommend regular seasoning for best performance and to extend the life of your pan.
Cleaning the pizza pan
For regular cleaning, we recommend washing the pan by hand with warm water and mild soap, if necessary. Dry the pan thoroughly and season according to the seasoning guide.
TIP
If any rust develops, use a stainless steel or copper scouring pad and hot water to remove it, and then re-season the pan using the method above.
Never put the pizza pan in the dishwasher.
Storing the pizza oven
- Ensure the oven and all accessories are cool, clean and dry.
- Ensure the Stone Deck is inserted into the oven.
- Ensure the door is closed.
- Store the appliance in an upright position standing level on its support legs. Do not store the pan or anything else on top. The only exception is the pizza peel.
Troubleshooting
| POSSIBLE PROBLEM | EASY SOLUTION |
| Oven will not switch "ON" |
|
| The AT TEMPERATURE light is flashing |
|
| Steam is coming out of the oven door |
|
| The heating elements appear to be pulsing/ some elements appear off |
|
| There is a noise coming from the oven after it is turned off |
|
| Smoke is coming out of oven |
|
| Fire in the oven |
|
| Visible micro-cracking on pizza stone |
|
Breville Customer Service Centre
Australian Customers
Phone: 1300 139 798
Web: www.breville.com
New Zealand Customers
Phone: 0800 273 845
Web: www.breville.com
Breville, the Breville logo, Smart Oven, Element iQ and Master Every Moment are trademarks of Breville Pty. Ltd. A.B.N. 98 000 092 928. Copyright Breville Pty. Ltd. 2019.
Due to continued product improvement, the products illustrated/photographed in this booklet may vary slightly from the actual product.

Documents / Resources
References
Download manual
Here you can download full pdf version of manual, it may contain additional safety instructions, warranty information, FCC rules, etc.
Advertisement


Need help?
Do you have a question about the Smart Oven Pizzaiolo and is the answer not in the manual?
Questions and answers