Table of Contents
Advertisement
Available languages
Available languages
Breville Customer Service Center
US Customers
Mail:
Breville USA
19400 S. Western Ave
Torrance CA
90501-1119
Phone: Customer Service
1 (866) BREVILLE
1 (866) 273-8455
Email: Customer Service:
askus@brevilleusa.com
Breville is a registered trademark of Breville Pty. Ltd. A.B.N. 98 000 092 928.
Due to continued product improvement, the products illustrated/photographed
in this booklet may vary slightly from the actual product.
Canada Customers
Mail:
Phone: Customer Service
Email: Customer Service:
www.breville.com
Copyright Breville Pty. Ltd. 2011.
Model BOV450XL Issue - A11
Breville Canada
2555, Avenue de l'Aviation
Pointe-Claire (Montreal)
Quebec H9P 2Z2
1 (866) BREVILLE
1 (866) 273-8455
askus@breville.ca
Advertisement
Chapters
Table of Contents

Related Manuals for Breville the Mini Smart Oven BOV450XL


Summary of Contents for Breville the Mini Smart Oven BOV450XL
- Page 1 Breville is a registered trademark of Breville Pty. Ltd. A.B.N. 98 000 092 928. Copyright Breville Pty. Ltd. 2011. Due to continued product improvement, the products illustrated/photographed in this booklet may vary slightly from the actual product.
- Page 2 the Mini Smart Oven ™ Instruction Book - Livret d’instructions BOV450XL...
- Page 3 CONGRATULATIONS On the purchase of your new Breville Mini Smart Oven ™...
-
Page 4: Table Of Contents
CONTENTS Breville recommends safety fi rst Know your Breville Mini Smart Oven ™ Quick Start Guide Before fi rst use - Preparing the oven for use - A note on cooking times - A note on rack height positions - A note on STANDBY mode... -
Page 5: Breville Recommends Safety Fi Rst
BREVILLE RECOMMENDS SAFETY FIRST We at Breville are very safety conscious. We design and manufacture consumer products with the safety of you, our valued customer, foremost in mind. In addition, we ask that you exercise a degree of care when using any electrical appliance and adhere to the following precautions:... - Page 6 • Due to the high temperatures of the oven, • Do not use the oven for other than Breville does not recommend placing the intended use. oven in enclosed areas. Placing the oven • This appliance is for household use only.
- Page 7 INSTRUCTIONS • Consult a qualifi ed electrician if Your Breville appliance is fi tted with a short the grounding instructions are not power supply cord as a safety precaution completely understood, or if doubt exists...
- Page 8 KNOW your Breville Mini Smart Oven ™...
-
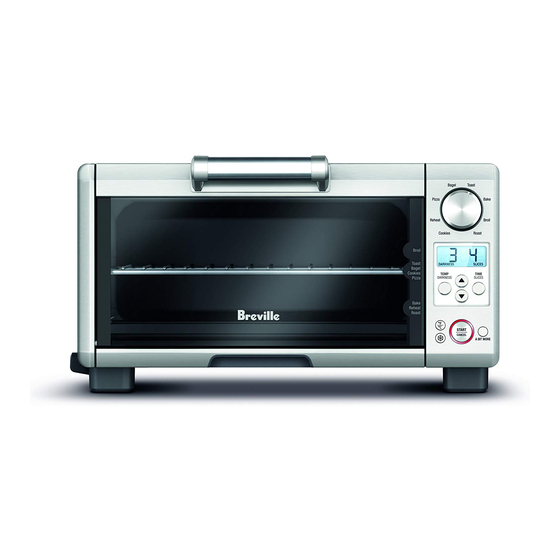
Page 9: Know Your Breville Mini Smart Oven
KNOW YOUR BREVILLE MINI SMART OVEN™ D E F 10” x 10” enamel baking pan Top rack height position: BROIL function. Door handle Middle rack height position: Ribbed plate warming tray TOAST, BAGEL, PIZZA and COOKIE functions. IMPORTANT Bottom rack height position: BAKE, ROAST, and REHEAT functions. -
Page 10: Optional Extra
A BIT MORE 10” x 10” Enamel Broiling Rack Part No: BOV650XL/88 Temperature conversion button The Breville enamel broil rack may be Frozen foods button inserted into Breville enamel baking pan. When assembled together, the broil rack is A Bit More™ button designed to drain grease and fats away from meats for healthier cooking. -
Page 11: Quick Start Guide
Quick Start Guide This Quick Start Guide is designed for fi rst time use. For safety and more information, refer to rest of the Instruction Booklet. PREPARING THE OVEN Press the START/CANCEL button to activate. The button surround will (A ONE-TIME PROCESS) illuminate and, the oven alert will sound In order to remove any protective substances and the LCD will illuminate orange. - Page 12 OPERATING YOUR BREVILLE MINI NOTE SMART OVEN™ The TEMP button also functions as The Breville Mini Smart Oven™ features the DARKNESS button on the TOAST Element IQ™ - a cooking technology that and BAGEL functions. regulates the heating elements to cook food more evenly and quickly.
- Page 13 QUICK START GUIDE BAKE FUNCTION: Bakes cakes, muffi ns, NOTE brownies and pastries evenly throughout. The cooking cycle can be stopped Also is ideal for cooking pre-packaged at any time by pressing the frozen meals including lasagna and pies. START/CANCEL button. This will Rack Position: Bottom cancel the cycle, the button surround Optional Settings:...
- Page 14 QUICK START GUIDE PIZZA FUNCTION: Melts and browns For instance, during the toasting phase, cheese and toppings, while crisping the A BIT MORE™ adds up to 30 seconds to pizza crust. For best performance use the the TOAST cycle, while during the ROAST nonstick pizza pan accessory, see page 9.
-
Page 15: Before Fi Rst Use
BEFORE FIRST USE of your Breville Mini Smart Oven ™... -
Page 16: Preparing The Oven For Use
NOTE Cookies Roast Due to the high temperatures of the oven, Breville does not recommend placing the oven in enclosed areas. Placing the oven in an enclosed area, such as a cabinet or wall recess may cause overheating of the appliance,... -
Page 17: A Note On Cooking Times
Press the START/CANCEL button A NOTE ON COOKING TIMES to activate this setting. The oven The Breville Mini Smart Oven™ features alert will sound, the button surround Element IQ™ - a unique cooking technology will illuminate red and the LCD will that regulates the heating elements for illuminate orange. -
Page 18: A Note On Rack Height Positions
BEFORE FIRST USE It is normal to notice the following occur • The cooking temperature can be during the cooking cycle: adjusted in 10°F increments, from 120°F to a maximum of 450°F (or in • It is normal that during the broil the Celsius mode, 5°C increments, from function, the bottom set of elements 50°C to a maximum 230°C). -
Page 19: A Note On Standby Mode
BEFORE FIRST USE A NOTE ON STANDBY MODE Bagel Toast When the oven is plugged into a power Pizza Bake outlet, the oven alert will sound twice and Reheat Broil the LCD screen will illuminate blue for 10 Cookies Roast minutes before entering STANDBY mode. - Page 20 BEFORE FIRST USE On the TOAST, BAGEL, BAKE and COOKIE functions, the FROZEN FAHRENHEIT FOODS button can be selected before or during the cycle. The setting can be de-selected by pressing the FROZEN FOODS button a second time. The frozen TEMP symbol is displayed on the LCD screen...
- Page 21 BEFORE FIRST USE If the cooking cycle has fi nished, A BIT On the PIZZA function, FROZEN MORE ™ acts as a start button which will FOODS is the default setting, and the frozen both start the cooking cycle and add time. symbol is displayed on the LCD screen.
- Page 23 OPERATING your Breville Mini Smart Oven ™...
-
Page 24: Operating Your Breville Mini Smart Oven
OPERATING YOUR BREVILLE MINI SMART OVEN™ TOAST FUNCTION FUNCTION DIAL Bagel Toast Elements Top and bottom heating elements cycle on Pizza Bake and off to regulate the correct temperature. ROTATE Rack Position Reheat Broil Middle rack height position. Cookies Roast Optional Settings FROZEN FOODS button. - Page 25 OPERATING YOUR BREVILLE MINI SMART OVEN™ Press the START/CANCEL button As a general guide: to activate this setting. The button DESIRED TOAST COLOR SETTING surround will illuminate red, the oven alert will sound and the LCD will Light color toast 1 or 2 illuminate orange.
-
Page 26: Bagel Function
OPERATING YOUR BREVILLE MINI SMART OVEN™ At the end of the toasting cycle, the oven BAGEL FUNCTION alert will sound three times, the START/CANCEL button surround will Elements no longer illuminate red and the LCD Top and bottom heating elements cycle on will be illuminated blue. - Page 27 OPERATING YOUR BREVILLE MINI SMART OVEN™ TEMP DARKNESS Press the down arrow to reduce the Close the oven door. browning setting, or press the up arrow to increase the browning setting. Turn the FUNCTION dial until the indicator reaches the BAGEL function.
- Page 28 OPERATING YOUR BREVILLE MINI SMART OVEN™ NOTE During the BAGEL function, Element IQ™ will automatically adjust the heating elements for TIME optimum results. It is normal to SLICES notice the bottom set of elements turn off while the top set is heating at full power.
-
Page 29: Bake Function
OPERATING YOUR BREVILLE MINI SMART OVEN™ BAKE FUNCTION NOTE For safety reasons the oven is Elements limited to a maximum of 10 minutes Top and bottom heating elements cycle on continuous toasting. Time that has and off to regulate the correct temperature. - Page 30 OPERATING YOUR BREVILLE MINI SMART OVEN™ FUNCTION DIAL NOTE Bagel Toast Your customized BAKE temperature and time settings will remain in Pizza Bake the memory of the oven until you change them or unplug the oven from ROTATE the power outlet. When the oven is...
- Page 31 OPERATING YOUR BREVILLE MINI SMART OVEN™ TEMP DARKNESS IMPORTANT At the end of the cooking cycle, the oven The outer surface of the oven, alert will sound three times, the including the oven door, is hot during START/CANCEL button surround will no longer illuminate red and the LCD and just after operation.
-
Page 32: Roast Function
OPERATING YOUR BREVILLE MINI SMART OVEN™ The preset ‘350°F’ is displayed as default ROAST FUNCTION roasting temperature on the LCD screen. Press the down or up arrow to adjust the Elements roasting temperature in 10°F increments, Top and bottom heating elements cycle on from 120°F to a maximum of 450°F (or in... - Page 33 Breville enamel The LCD screen will indicate a blinking broil rack accessory. When roasting, ‘PREHEATING’. Once the preheating the Breville enamel broil rack may be cycle has completed, the temperature inserted into Breville enamel baking alert will sound.
- Page 34 OPERATING YOUR BREVILLE MINI SMART OVEN™ NOTE A BIT MORE™ can be pushed when the oven is cold (i.e. not immediately after a cooking cycle) and the oven TEMP will commence cooking, however DARKNESS the ROAST function will not utilize the usual ‘preheating’...
-
Page 35: Broil Function
OPERATING YOUR BREVILLE MINI SMART OVEN™ Place food in the Breville baking pan BROIL FUNCTION or in an oven-proof dish, then place on the center of the wire rack so air fl ows Elements around the sides of the food. - Page 36 OPERATING YOUR BREVILLE MINI SMART OVEN™ The broiling temperature and time TYPE/CUT WEIGHT/ BROILING can be adjusted before or during the THICKNESS TIME broiling cycle. Pork The preset ‘HI’ is displayed as default Chops 1” (2.5cm) 15 mins broiling temperature on the LCD screen.
- Page 37 OPERATING YOUR BREVILLE MINI SMART OVEN™ If the broil cycle has fi nished and you would prefer your food to be broiled slightly more, push the A BIT MORE™ button for an additional 2 minutes. If the oven has not fi nished the cycle,...
-
Page 38: Pizza Function
OPERATING YOUR BREVILLE MINI SMART OVEN™ PIZZA FUNCTION NOTE If cooking a frozen pizza, ensure Elements to remove all packaging, including Top and bottom heating elements cycle on cardboard, plastic, paper, or other and off to regulate the correct temperature. - Page 39 OPERATING YOUR BREVILLE MINI SMART OVEN™ The pizza cooking temperature and time NOTE can be adjusted before or during the cooking cycle. Your customized PIZZA temperature and time settings will remain in The preset cooking temperature of 425°F is the memory of the oven until you displayed as the default on the LCD screen.
- Page 40 OPERATING YOUR BREVILLE MINI SMART OVEN™ After the PREHEATING alert has If the pizza cycle has fi nished, and you sounded, the timer will automatically would prefer your pizza to be cooked begin to count down in one minute slightly more, press the A BIT MORE™...
- Page 41 OPERATING YOUR BREVILLE MINI SMART OVEN™ The pizza cycle can be stopped at any NOTE time by pressing the START/CANCEL If cooking a fresh pizza, we button. This will cancel the cycle, the recommend using protective hot pads button surround illumination will go out or insulated oven mitts to remove and the LCD will illuminate blue.
-
Page 42: Cookie Function
OPERATING YOUR BREVILLE MINI SMART OVEN™ The baking temperature and time COOKIE FUNCTION can be adjusted before or during the baking cycle. Elements The preset baking temperature of Top and bottom heating elements cycle on 350˚F is displayed as the default on and off to regulate the correct temperature. - Page 43 At the end of the cooking cycle, the oven alert will sound three times, the START/CANCEL button will cease Place food on the Breville enamel baking to illuminate and the LCD will pan or in an oven-proof pan, then place on the center of the wire rack so air fl...
-
Page 44: Reheat Function
If the oven is cold, the best performance is achieved by Place food on the Breville enamel baking using the START/CANCEL button. pan or in an oven-proof dish, then place A BIT MORE™ is best utilized on the center of the wire rack so air fl... - Page 45 PREHEATING COMPLETE. TIME SLICES Place food on the Breville enamel baking pan or in an oven-proof pan, then place on the center of the wire rack so air fl ows around the back, as well as the front of the food.
- Page 46 OPERATING YOUR BREVILLE MINI SMART OVEN™ After the PREHEATING alert has IMPORTANT sounded, the timer will automatically begin to count down in one minute The outer surface of the oven, increments. The temperature and time including the oven door, is hot during can be adjusted during the reheating and after operation.
-
Page 47: Using The Plate Warming Tray
USING THE PLATE WARMING TRAY of your Breville Mini Smart Oven ™... - Page 48 The only exceptions is one layer of ceramic plates for warming. IMPORTANT The use of any accessory attachments not recommended by Breville may cause injuries. IMPORTANT The outer surface of the oven, including the oven door, is hot during and after operation.
-
Page 49: Care And Cleaning
CARE & CLEANING your Breville Mini Smart Oven ™... -
Page 50: Cleaning The Outer Body And Door
CARE & CLEANING YOUR BREVILLE MINI SMART OVEN™ Ensure the oven is turned OFF by pressing Cleaning the interior the START/CANCEL button on the control The walls on the inside of the oven panel. The oven is OFF when the button... -
Page 51: Cleaning The Wire Rack And
CARE & CLEANING YOUR BREVILLE MINI SMART OVEN™ Cleaning the wire rack and baking pan Wash all accessories in warm soapy water with a soft sponge or soft plastic scouring pad. Rinse and dry thoroughly. To extend the life of your accessories, we do not recommend that these be placed in the dishwasher. -
Page 53: Helpful Tips
HELPFUL TIPS for your Breville Mini Smart Oven ™... - Page 54 HELPFUL TIPS FOR YOUR BREVILLE MINI SMART OVEN™ • For questions regarding the use of oven safe and specialty bakeware in compact ovens, please contact the bakeware manufacturer directly. • Caution should be exercised when using pans and dishes constructed of materials other than metal.
-
Page 55: Troubleshooting
TROUBLESHOOTING... - Page 56 90 degrees for more even browning. The pizza crust does • Breville recommends using a dark colored, non-stick pizza pan when cooking a pizza. Light colored pans not crisp refl ect heat and may not effectively crisp the pizza crust.
- Page 57 The LCD screen will display ‘E01’ when there is a non-resettable issue with the appliance. Should this ‘E01’ occur, immediately remove the power cord from the wall outlet and call the Breville Customer Service Center (1-866-BREVILLE). The LCD screen Displays •...
-
Page 59: Recipes
RECIPES... - Page 60 RECIPES PITA CHIPS Function: TOAST Try the Pita Chips with the Roasted Darkness: 3 Red Pepper, Spinach and Broccoli Dip Slices: 4 on page 58. Yield: 32 Chips INGREDIENTS NOTE 4 whole wheat pita pockets ¼ cup olive oil Pita chips are a great snack on their 1 teaspoon salt own, with salsa or enjoyed as a garnish on your salad.
- Page 61 Remove the seeds and the stem. Flatten recipe can be found on page 55. each piece and place skin side up onto the Breville enamel baking pan. Set the wire rack in the top rack height position. Turn the FUNCTION dial to BROIL, set TEMPERATURE to HI and set the TIMER to 12 minutes.
- Page 62 CRISPING THE BACON In a single layer, line the bacon rashers on the bottom of the Breville roasting tray. Keep the FUNCTION dial on BAKE. Set the TEMPERATURE to 400˚F (205˚C) and the TIME for 8 minutes. Press the START/CANCEL button to activate.
- Page 63 Remove the ribs from the bowl and 1/3 cup plum sauce discard marinade. Place the ribs on the ½ cup hoisin sauce Breville broil tray with the baking pan ¼ cup low sodium soy sauce underneath. ¼ cup oyster sauce Set the wire rack at the bottom rack ¼...
- Page 64 6 ounces crimini mushrooms, sliced Place the fresh salmon fi llet on the ½ tablespoon fi nely chopped Breville enamel baking pan, lined with fresh rosemary foil. Roll the foil around the salmon. ½ tablespoon fi nely chopped fresh sage Spoon the glaze on top of the salmon.
- Page 65 20 minutes before Place the turkey breast roast onto the carving into it. This allows the roast to Breville broil rack with the baking tray relax and hold in its juices. underneath. Rub the exterior of the roast with 1 tablespoon olive oil.
-
Page 66: Pizza Dough
RECIPES PIZZA SUGGESTIONS PIZZA DOUGH There are no right or wrong pizza Yield: two 11-inch pizzas combinations. The best ingredients INGREDIENTS could be the leftovers found in your very own refrigerator. Here are some of our ¾ cup + 2 tablespoons warm water suggestions to wet your palate. - Page 67 RECIPES Tre-Funghi DESSERT PIZZAS Prepare dough as described on page 64. Banana Chocolate Cut the dough in half and stretch to fi t an Prepare dough as described on page 64. 11-inch pizza pan. Spread ¾ cup tomato Cut the dough in half and stretch to fi t an sauce, sautéed button, oyster and Portobello 11-inch pizza pan.
- Page 68 1-inch pieces 1 teaspoon grated lemon rind Arrange the wings in a single layer onto 2 tablespoon lemon juice the Breville broil rack with the baking pan underneath. INGREDIENTS FOR THE FILLING Set the wire rack at the bottom rack 2 ½...
- Page 69 RECIPES Shape into a disk, wrap in plastic Bake the Apple Galette until the wrap and chill for at least one hour. time has elapsed. Turn the heat down to 350˚F (175˚C) and bake for an STREUSEL CRUMBLE (OPTIONAL) additional 40 minutes or until the crust is golden.
- Page 70 6 tablespoons seedless raspberry jam PREPARE THE CRUST Toast the hazelnuts by placing them in a single layer on the Breville enamel baking pan. Set the wire rack at the bottom rack height position. Turn the FUNCTION dial to BAKE. Set the TEMPERATUE to 350˚F (175˚C) and the...
- Page 71 RECIPES In a separate bowl, beat the egg whites VANILLA CHEESECAKE until stiff peaks form. Gently fold in Function: BAKE one third the egg whites into the cream Temperature: 350˚F (175˚C) for crumb cheese to lighten the mixture. Add the crust;...
-
Page 73: One Year Limited Warranty
USA: 1-866-BREVILLE (1-866-273-8455) the original product. CANADA: 1-866-BREVILLE (1-866-273-8455) Please contact our Customer Service Center at www.Breville.com or call the toll free Email: number below for instructions on the repair USA: AskUs@BrevilleUSA.com and/or replacement of the appliance if a covered defect occurs within the one year CANADA: AskUs@Breville.ca... - Page 75 FÉLICITATIONS pour l’achat de votre nouveau Mini Smart Oven de Breville...
- Page 76 TABLE DES MATIÈRES Breville vous recommande la sécurité avant tout Faites la connaissance de votre Mini Smart Oven de Breville Guide de démarrage rapide Avant la première utilisation - Préparation initiale du four - Une note sur le temps de cuisson...
-
Page 77: Breville Vous Recommande La Sécurité Avant Tout
BREVILLE VOUS RECOMMANDE LA SÉCURITÉ AVANT TOUT Chez Breville, la sécurité occupe une place de choix. Nous concevons et fabriquons des produits destinés aux consommateurs sans jamais perdre de vue la sécurité de notre précieuse clientèle. De plus, nous vous demandons d’être très vigilant lorsque vous utilisez un appareil électrique et de respecter les mesures de sécurité... - Page 78 BREVILLE VOUS RECOMMANDE LA SÉCURITÉ AVANT TOUT • Le four est très chaud durant et • L’utilisation d’accessoires non fournis par immédiatement après l’usage. Ne laissez Breville peut causer des blessures. aucun cordon d’alimentation autre que • La fonction TOAST (Griller) doit être celui fourni avec four entrer en contact utilisée uniquement pour faire griller les...
- Page 79 BREVILLE VOUS RECOMMANDE LA SÉCURITÉ AVANT TOUT • Suivez attentivement les consignes l’usage de l’appareil et visitez d’entretien et de nettoyage décrites à la www.Breville.com ou appelez le page 122. Ne nettoyez pas l’appareil avec Service à la clientèle de Breville au des tampons à...
- Page 80 FAITES LA CONNAISSANCE de votre Mini Smart Oven de Breville...
-
Page 81: Faites La Connaissance De Votre Mini Smart Oven
FAITES LA CONNAISSANCE DE VOTRE MINI SMART OVEN DE BREVILLE D E F Plateau de cuisson en émail 10” x 10” Position inférieure de la grille: fonctions BAKE (Cuire), ROAST (Rôtir) Poignée de la porte et REHEAT (Réchauffer) Réchaud à nervures... - Page 82 Grilloir en émail de 10’’ x 10’’ (25cm x 25cm) IMPORTANT Pièce no BOV650XL/88 Le grilloir en émail de Breville s’insère Ne touchez pas aux surfaces chaudes dans le plateau de cuisson en émail de de l’appareil. Le boîtier, incluant la Breville.
-
Page 83: Guide De Démarrage Rapide
Guide de démarrage rapide Ce guide de démarrage rapide est conçu pour la première utilisation de l’appareil. Pour des informations additionnelles, veuillez consulter l’ensemble du livret d’instructions. PROCÉDURE D’AMORÇAGE CADRAN DE FONCTIONS (À PHASE UNIQUE) Bagel Toast Afi n d’éliminer les substances recouvrant les éléments chauffants, il est essentiel de faire Pizza Bake... - Page 84 Placez les aliments au centre de la grille, soit directement sur la grille ou dans le Insérez la grille à la position plateau de cuisson Breville (voir le Livret recommandée. Ces positions sont d’instructions à la page 102 pour les imprimées sur la droite de la porte du...
- Page 85 GUIDE DE DÉMARRAGE RAPIDE FONCTION BAKE (Cuire): Pour cuire NOTE uniformément les gâteaux, muffi ns, Le cycle de cuisson peut être brownies et pâtisseries. Cette fonction est interrompu en tout temps en idéale pour les mets cuisinés congelés, enfonçant le bouton START/CANCEL. incluant les lasagnes et les tartes.
- Page 86 GUIDE DE DÉMARRAGE RAPIDE FONCTION PIZZA: Pour fondre le ou immédiatement après que le cycle soit fromage, colorer la garniture à pizza et terminé. Durant le cycle de cuisson, elle garder la croûte croustillante. Pour de prolongera un peu le temps de cuisson, meilleurs résultats, utilisez la plaque à...
-
Page 87: Avant La Première Utilisation
AVANT LA PREMIÈRE UTILISATION de votre Mini Smart Oven de Breville... -
Page 88: Préparation Initiale Du Four
NOTE Cookies Roast Due à la température élevée du four, Breville ne recommande pas de placer le four dans un espace clos. Le fait de le placer dans un espace fermé comme une armoire ou le renfoncement d’un mur peut faire surchauffer Appuyez sur le bouton TIME. -
Page 89: Une Note Sur Le Temps
UNE NOTE SUR LE TEMPS pour activer le réglage. Le signal sonore DE CUISSON se fera entendre, le contour du bouton Le Mini Smart Oven de Breville est s’illuminera en rouge et l’écran ACL muni d’un Élément IQ - une technologie s’illuminera en orange. -
Page 90: Une Note Sur La Position
AVANT LA PREMIÈRE UTILISATION Il est normal que les phénomènes suivants TEMP TIME se produisent durant la cuisson: DARKNESS SLICES • Il est normal que, durant la cuisson à BROIL (Dorer), les éléments inférieurs s’éteignent pendant que les éléments supérieurs chauffent à pleine puissance. •... -
Page 91: Une Note Sur Le Mode Veille
AVANT LA PREMIÈRE UTILISATION UNE NOTE SUR LE MODE VEILLE (STANDBY) Bagel Toast Pizza Bake Quand le four est branché, le signal sonore se Reheat Broil fait entendre à deux reprises et l’écran ACL Cookies Roast s’illumine pendant 10 minutes avant d’entrer Broil en mode veille. - Page 92 AVANT LA PREMIÈRE UTILISATION Lorsque vous utilisez les fonctions TOAST, BAGEL, BAKE et COOKIES, le bouton FROZEN FOODS peut être sélectionné FAHRENHEIT avant ou durant le cycle de cuisson. Ce réglage peut être désactivé en enfonçant à nouveau le bouton FROZEN FOODS. Le symbole pour aliments congelés TEMP...
- Page 93 AVANT LA PREMIÈRE UTILISATION A BIT MORE (Un peu plus) vous permet Pour la fonction PIZZA, le réglage de prolonger de façon rapide et pratique le FROZEN FOODS est le réglage par défaut. cycle de cuisson. La fonction A BIT MORE Le symbole apparaîtra sur l’écran ACL.
- Page 94 AVANT LA PREMIÈRE UTILISATION NOTE Vous pouvez presser le bouton A BIT MORE lorsque le four est refroidi (c.-à-d. pas immédiatement après le cycle de cuisson) et le four commencera à chauffer; cependant, dans un tel cas, la phase de préchauffage ne sera pas activée pour les fonctions BAKE, ROAST, COOKIE et PIZZA.
- Page 95 FONCTIONNEMENT de votre Mini Smart Oven de Breville...
-
Page 96: Fonctionnement De Votre Mini Smart Oven
FONCTIONNEMENT DE VOTRE MINI SMART OVEN DE BREVILLE FONCTION TOAST (GRILLER) CADRAN DE FONCTIONS Bagel Toast Éléments chauffants Les éléments supérieurs et inférieurs Pizza Bake s’allument et s’éteignent par intermittence afi n de garder une température constante. Reheat Broil Position de la grille... - Page 97 FONCTIONNEMENT DE VOTRE MINI SMART OVEN DE BREVILLE Pour activer ce réglage, enfoncez le À titre indicatif: bouton START/CANCEL. Le contour COLORATION DÉSIRÉE RÉGLAGE s’illuminera en rouge, le signal sonore se fera entendre et l’écran ACL l’illuminera Très pâle en orange.
-
Page 98: Fonction Bagel
FONCTIONNEMENT DE VOTRE MINI SMART OVEN DE BREVILLE Si le cycle de grillage est termine, et que FONCTION BAGEL vous préférez votre rôtie un peu plus grillée, pressez le bouton A BIT MORE Éléments chauffants pour un grillage additionnel de Les éléments supérieurs et inférieurs... - Page 99 FONCTIONNEMENT DE VOTRE MINI SMART OVEN DE BREVILLE TEMP DARKNESS Fermez la porte du four. NOTE Tournez le cadran de FONCTIONS Les réglages de coloration jusqu’à la fonction BAGEL. Le chiffre de s’échelonnent de ‘1’ (très pâle) à gauche sur l’écran ACL indique le degré...
- Page 100 FONCTIONNEMENT DE VOTRE MINI SMART OVEN DE BREVILLE NOTE NOTE Le four mémorisera votre sélection Durant la fonction BAGEL, de coloration de BAGEL et le nombre l’Élément IQ ajuste automatiquement de tranches jusqu’à ce que vous la les éléments chauffants pour obtenir changiez ou que vous débranchiez le...
-
Page 101: Fonction Bake (Cuire)
FONCTIONNEMENT DE VOTRE MINI SMART OVEN DE BREVILLE La fonction BAKE (Cuire) permet de NOTE cuire les aliments uniformément de bord Par mesure de sécurité, la cuisson en bord. Cette fonction est idéale pour continuelle est limitée à un maximum cuire les gâteaux, muffi... - Page 102 TIME SLICES Déposez les aliments dans le plateau de cuisson en émail de Breville ou dans tout autre plat à cuisson à l’épreuve de la chaleur, et placez-le au centre de la grille afi n que l’air circule autour des aliments.
- Page 103 FONCTIONNEMENT DE VOTRE MINI SMART OVEN DE BREVILLE TEMP DARKNESS IMPORTANT Le boîtier du four, incluant la porte, est très chaud durant et immédiatement À la fi n du cycle de cuisson, le signal après l’usage. Utilisez toujours des sonore se fera entendre trois fois. Le poignées isolantes ou des gants de...
-
Page 104: Fonction Roast (Rôtir)
FONCTIONNEMENT DE VOTRE MINI SMART OVEN DE BREVILLE Le cycle de cuisson peut être interrompu CADRAN DE FONCTIONS en tout temps en pressant le bouton Bagel Toast START/CANCEL. Cela annulera le cycle, le contour du bouton ne sera plus illuminé... - Page 105 FONCTIONNEMENT DE VOTRE MINI SMART OVEN DE BREVILLE NOTE Nous vous recommandons de limiter le poids de la viande ou du poulet à 2 kg (4,5 lbs). Cependant, le poids maximal TIME peut varier selon le type, la coupe, la SLICES forme et la grosseur de la viande.
- Page 106 FONCTIONNEMENT DE VOTRE MINI SMART OVEN DE BREVILLE Déposez les aliments dans le plateau de cuisson en émail de Breville ou dans tout autre plat à cuisson à l’épreuve de la chaleur, et placez-le au centre de la grille afi n que l’air circule autour des aliments.
-
Page 107: Fonction Broil (Dorer)
Déposez les aliments dans le plateau de cuisson en émail de Breville ou dans un plat à l’épreuve de la chaleur, et placez- le au centre de la grille afi n de laisser... - Page 108 FONCTIONNEMENT DE VOTRE MINI SMART OVEN DE BREVILLE NOTE Les deux niveaux de température préréglés vous permettent de modifi er la vitesse de gratinage - la rapidité à laquelle le dessus des aliments brunit - en fonction du genre et de la quantité d’aliments à dorer et de vos goûts personnels.
- Page 109 FONCTIONNEMENT DE VOTRE MINI SMART OVEN DE BREVILLE TYPE/ POIDS/ TEMPS DE COUPE ÉPAISSEUR GRATINAGE Agneau Côtelettes 4 morceaux 15 mins TEMP Escalopes 8 morceaux 10-12 mins DARKNESS PRESS Saucisses Petites 8 morceaux 8 mins Grosses 6 morceaux 12 mins...
-
Page 110: Fonction Pizza
FONCTIONNEMENT DE VOTRE MINI SMART OVEN DE BREVILLE Le cycle pour dorer peut être FONCTION PIZZA interrompu en tout temps en pressant le bouton START/CANCEL. Cela Éléments chauffants annulera le cycle et le contour du Les éléments supérieurs et inférieurs bouton ne sera plus illuminé. - Page 111 Pressez les fl èches vers le haut ou le la pizza dans le four. bas pour ajuster la température de Breville recommande d’utiliser une cuisson par tranches de 10°F, de 120°F place à pizza antiadhésive foncée à un maximum de 450°F (ou en degrés pour cuire la pizza.
- Page 112 FONCTIONNEMENT DE VOTRE MINI SMART OVEN DE BREVILLE Après que le signal sonore de NOTE préchauffage (PREHEATING) se sera Le four mémorisera votre sélection de fait entendre, le compte à rebours température et de temps de cuisson débutera automatiquement par tranches de la pizza jusqu’à...
- Page 113 FONCTIONNEMENT DE VOTRE MINI SMART OVEN DE BREVILLE Si le cycle de pizza est terminé et que Une note sur les pierres à pizza vous préférez votre pizza un peu plus Quand vous utilisez une pierre à pizza, il est cuite, pressez le bouton A BIT MORE essentiel de la réchauffer au préalable (sans...
-
Page 114: Fonction Cookies (Biscuits)
FONCTIONNEMENT DE VOTRE MINI SMART OVEN DE BREVILLE La température et le temps de cuisson FONCTION COOKIES (BISCUITS) peuvent être ajustés avant ou durant le cycle de cuisson. Éléments chauffants La température de cuisson préréglée Les éléments supérieurs et inférieurs de 350˚F (175°c) est affi... - Page 115 Déposez les aliments sur le plateau NOTE en émail de Breville ou dans un plat à l’épreuve de la chaleur, et placez-le au Le four mémorisera votre sélection de centre de la grille, de façon à ce que l’air température et de temps de cuisson...
- Page 116 FONCTIONNEMENT DE VOTRE MINI SMART OVEN DE BREVILLE Après que le signal sonore de Si le cycle de biscuits est terminé, et que préchauffage (PREHEATING) se sera fait vous préférez vos biscuits un peu plus entendre, le compte à rebours débutera cuits, pressez le bouton A BIT MORE automatiquement par tranches d’une...
-
Page 117: Fonction Reheat (Réchauffer)
10°F, de 120°F à un maximum de 450°F Placez les aliments sur le plateau de (ou en degrés Celsius, par tranches de cuisson en émail de Breville ou dans un 5°C, de 50°C à un maximum de 230°C). plat à l’épreuve de la chaleur, puis placez le plateau au centre de la grille afi... - Page 118 Placez les aliments sur le plateau de Pressez les fl èches vers le haut ou le bas cuisson en email de Breville ou dans un pour ajuster le temps et la température plat a l’epreuve de la chaleur, puis placez de cuisson par tranches d’une minute,...
- Page 119 FONCTIONNEMENT DE VOTRE MINI SMART OVEN DE BREVILLE À la fi n du cycle de réchauffage, le Le cycle de réchauffage peut être signal sonore se fera entendre trois interrompu en tout temps en pressant fois, le bouton START/CANCEL le bouton START/CANCEL. Cela cessera d’être illuminé...
-
Page 121: Utilisation Du Réchaud
UTILISATION DU RÉCHAUD de votre Mini Smart Oven de Breville... - Page 122 La seule exception: des plats en céramique disposés en un étage pour être réchauffés. IMPORTANT L’utilisation d’accessoires non recommandés par Breville peut causer des blessures. IMPORTANT Le boîtier du four, incluant la porte, est très chauds durant et après usage.
- Page 123 ENTRETIEN & NETTOYAGE de votre Mini Smart Oven de Breville...
-
Page 124: Entretien Et Nettoyage
ENTRETIEN ET NETTOYAGE Éteignez le four en pressant le bouton IMPORTANT START/CANCEL. Le four est éteint que le contour du bouton n’est plus illuminé N’immergez pas le boîtier, le cordon en rouge et que l’écran ACL est illuminé d’alimentation ou la fi che dans l’eau en bleu. -
Page 125: Nettoyage Du Ramasse-Miettes
ENTRETIEN ET NETTOYAGE DE VOTRE MINI SMART OVEN DE BREVILLE Nettoyage du ramasse-miettes Rangement Après chaque utilisation, laissez le four Assurez-vous que le four est éteint en refroidir, retirez le ramasse-miettes et pressant le bouton START/CANCEL. jetez les miettes. Essuyez le plateau Le four est éteint quant le contour du... -
Page 127: Trucs Utiles
TRUCS UTILES pour votre Mini Smart Oven de Breville... - Page 128 • Due à la température élevée du four, Breville ne recommande pas de placer le four dans un espace clos. Le fait de le placer dans un espace fermé comme une armoire ou le renfoncement d’un mur peut faire surchauffer l’appareil, en...
-
Page 129: Guide De Dépannage
GUIDE DE DÉPANNAGE... - Page 130 ètent la chaleur et de ce fait, la croute pourrait ne pas être suffi samment croustillante. Les accessoires pour le four sont disponibles à breville.com • Pour une croute plus croustillante, la pizza peut être cuite directement sur la grille du four.
- Page 131 • L'écran ACL affi che 'E02' lorsque l'appareil ne peut être réinitialisé. Dans un tel cas, débranchez immédiatement 'E02' l’appareil et contactez le Service à la clientèle de Breville (1-866-BREVILLE). L'écran ACL affi che • L'écran ACL affi chera 'E03' si la température du four excède la limite maximale.
-
Page 133: Recettes
RECETTES... - Page 134 Retirer les graines et la queue. Aplatir paprika. Réserver. chaque morceaux et déposer sur le À l’aide de ciseaux, découper le contour plateau de cuisson en émail de Breville, d’un pain pita pour en faire deux le côté peau sur le dessus. rondelles. Badigeonner l’intérieur du Placer la grille à...
- Page 135 Transférer le mélange dans un plat à émail de Breville. cuisson de 4 tasses (1 litre) ou deux plats Laisser le cadran de FONCTON à BAKE de 2 tasses (500 ml).
- Page 136 Cuisson: 25 minutes marinade. Placer la viande sur le grilloir Portions: 1 carré de côtes levées placé sur le plateau de cuisson en émail de Breville. INGRÉDIENTS Placer la grille à la position inférieure. L tasse (80 ml) de sauce aux prunes Tourner le cadran de FONCTIONS à...
- Page 137 ½ c. à soupe (7.5 ml) de romarin frais haché Tapisser le plateau de cuisson en émail fi nement de Breville de papier aluminium et y ½ c. à soupe (7.5 ml) de sauge fraîche hachée déposer le fi let de saumon. Envelopper fi...
- Page 138 émail s’élever et de cuire l’intérieur du rôti. Il de Breville. Badigeonner le rôti d’une c. est également très important de laisser à soupe (15 ml) d’huile d’olive. Saler et le rôti reposer au moins 20 minutes...
- Page 139 RECETTES Margarita PÂTE À PIZZA Préparer la pâte selon la recette à la Portions: 2 pizzas de 11 po page 138. Couper la pâte en deux et l’étirer INGRÉDIENTS pour couvrir une plaque à pizza de 11 po. Napper avec ½ tasse de sauce tomate, ajouter ¾...
- Page 140 RECETTES Troppo Picante PIZZAS SUCRÉES Préparer la pâte selon la recette à la page 138. Banane et chocolat Couper la pâte en deux et l’étirer pour couvrir Préparer la pâte selon la recette à la page 138. une plaque à pizza de 11 po. Recouvrir de ¾ Couper la pâte en deux et l’étirer pour couvrir tasse de sauce tomate, 5 tranches de salami une plaque à...
- Page 141 INGRÉDIENTS POUR LA GARNITURE sur le grilloir placé sur le plateau de 2 ½ lb (1.1 kg) de pommes à cuire cuisson en émail de Breville. (environ 6 pommes) ½ tasse (120 ml) de sucre brun Placer la grille à la position inférieure.
- Page 142 RECETTES PRÉPARER LA PÂTE Brosser les côtés de la pâte avec la crème ou le lait et saupoudrer d’une c. à soupe Déposer la farine, le sucre et le beurre (30 ml) de sucre. dans le robot culinaire et pulser jusqu’à Placer la grille à...
- Page 143 PRÉPARER LA CROÛTE Faire griller les noisettes en les plaçant en une seule couche dans le plateau à cuisson en émail de Breville. Placer la grille à la position inférieure. Tourner le cadran de FONCTIONS à BAKE. Régler la TEMPÉRATURE à 350˚F (175˚C) et le TEMPS à...
- Page 144 RECETTES GARNITURE DE FROMAGE À LA CRÈME GÂTEAU AU FROMAGE À LA VANILLE Séparer les jaunes d’œufs des blancs. Fonction: BAKE À l’aide d’un robot culinaire ou d’un Température: 350˚F (175˚C) pour la batteur à main, battre d’abord le fromage croûte;...
-
Page 145: Garantie Limitée D'un An
HWI Breville® ou autorisée à aux achats faits par des détaillants être faite relativement au produit. ou des distributeurs, ou pour une utilisation commerciale. - Page 146 NOTES...
- Page 147 NOTES...
- Page 148 NOTES...
Need help?
Do you have a question about the the Mini Smart Oven BOV450XL and is the answer not in the manual?
Questions and answers