Advertisement
Quick Links
Advertisement

Related Manuals for TEMPUR FORM


Summary of Contents for TEMPUR FORM
- Page 1 TEMPUR ARC™ Bed range AssEMBly gUidE...
- Page 2 TEMPUR ARC™ Outer frames assembly guide Product exceptions: luxury headboard TEMPUR ARC™ inner frame(s) assembly guide TEMPUR ARC™ static slatted inner frame(s) assembly guide TEMPUR ARC™ static disc inner frame(s) assembly guide TEMPUR ARC™ Adjustable slatted inner frame(s) assembly guide...
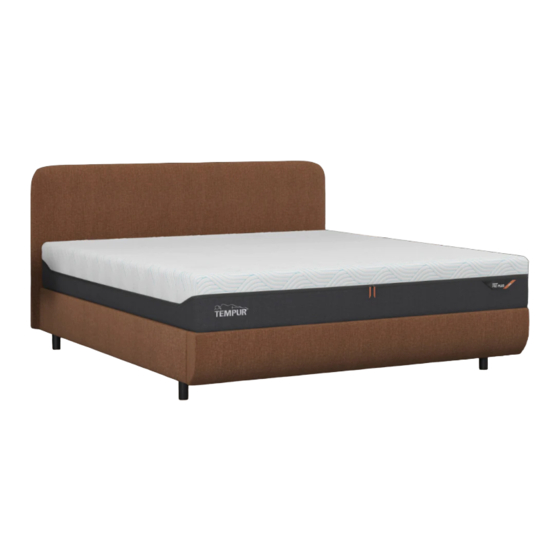
- Page 3 Welcome to TEMPUR ® Thank you for choosing a TEMPUR product. ®...
- Page 4 TEMPUR ARC™ Bed range Outer frames assembly guide...
- Page 5 Welcome! Here are TEMPUR ARC™ beds, outer frames with headboards. Regardless of your choice of headboard, bed size or bed type, the assembly of the outer frames is the same in all cases. TEMPUR FORM TEMPUR QUilTEd ® ® TEMPUR...
- Page 6 CAUTiON The assembly instructions must be followed closely to install the bed system successfully, safely, and to minimize the risk of personal injuries and damage to the product. Assemble the product with a minimum of two persons. Open the packaging carefully, so as not to damage the product and its parts. dispose of the packaging safely and as sustainably as possible in your local area.
- Page 7 Component list Check all components. All the means and tools required for product assembly come with the product: 1 x headboard 2 x side panels 1 x foot-end panel 4 x cones; 4 x leg details; 4 x felt pads...
- Page 8 Products exceptions TEMPUR lUXURy headboard extra component ® in case you have a TEMPUR lUXURy headboard, there is an additional component, ® a headboard extra panel. TEMPUR LUXURY will be standing on the floor. The additional panel is attached on ®...
- Page 9 Assembly steps 1. Connecting cones with legs Connect cones with leg details. screw legs into cones. Make sure that these are fixed firmly. 2. Follow icons on the corner connectors Follow the head and feet graphic icons on the corner connectors. you need to connect the corners with matching icons on them, feet with feet and head with head.
- Page 10 3. Organizing the bed parts Lay all outer frame parts on the floor, connectors facing upside.
- Page 11 4. Connecting one side panel with headboard Place one side panel into the headboard corner connector. Fix the panel by placing one leg into the corner connector. Push the leg, no need to twist the legs. When the bed frame will be lifted into its upright position afterwards, these will be fixed in firmly.
- Page 12 6. Turning bed to horizontal position One person is standing on one side of the bed frame by the head-end and another one the opposite side. Hold with one hand the headboard and with other hand the side panel, follow the arrows on the drawing for hand positions.
- Page 13 8. Fixing the foot-end with legs One person is by one foot-end corner and another one in the opposite corner, shown with arrows on the drawing. Fix the foot-end panel by placing legs in each corner connector and push them. No need to twist, the weight of the construction of the bed will fix the legs to the end position.
- Page 14 TEMPUR ARC™ static slatted static slatted inner frame(s) assembly guide...
- Page 15 CAUTiON The assembly instructions must be followed closely to install the bed system successfully, safely, and to minimize the risk of personal injuries and damage to the product. Assemble the product with a minimum of two persons. Open the packaging carefully, so as not to damage the product and its parts. dispose of the packaging safely and as sustainably as possible in your local area.
- Page 16 Component(s) you have 1 inner frame if your bed size is 90x200; 100x200; 140x200 cm. you have 2 inner frames in case your bed size is 150x200; 160x200; 180x200 cm. Follow the direction of the frame, you have thin stripes at the head-end on the slats. Head-end Foot-end...
- Page 17 Removing transport holders Remove 4 pieces of white plastic holders at the head- and foot-end.
- Page 18 CAUTiON lift and carry the frame with two people by holding it from the bottom support frames. WARNiNg While mounting the frame(s), be careful your fingers are not trapped between the outer and inner frame. CAUTiON Be aware not to carry the frame by holding it only from the middle of the slats, these may come off or be damaged.
- Page 19 single static slatted inner frame placement lift the frame horizontally with two persons, both holding the frame from the longer opposite sides, from the bottom support frame. lift the frame head-end onto the headboard metal support angle. As the frame head-end is placed, it is not so heavy anymore and you can place your hands on the top of the frame now, onto the slats.
- Page 20 double static slatted inner frames placement Take one frame with two people and turn it sideways. One person lifts the frame from the head-end and the other one from the foot-end. Hold the frame from its longer side support frame. Place the frame by sideways (inner side facing downwards) inside the outer frame.
- Page 21 Add another frame the same way.
- Page 22 Mattress placement Place the mattress in position with two people. Follow the TEMPUR brand, ® which should be placed in the front left corner of the bed.
- Page 23 TEMPUR ARC™ static disc static disc inner frame(s) assembly guide...
- Page 24 CAUTiON The assembly instructions must be followed closely to install the bed system successfully, safely, and to minimize the risk of personal injuries and damage to the product. Assemble the product with a minimum of two persons. Open the packaging carefully, so as not to damage the product and its parts. dispose of the packaging safely and as sustainably as possible in your local area.
- Page 25 Component(s) you have 1 inner frame if your bed size is 90x200 cm; 90x210 cm; 100x200 cm; 100x210 cm; 140x200 cm or 140x210 cm. you have 2 inner frames in case your bed size is 150x200 cm; 150x210 cm; 160x200 cm; 160x210 cm;...
- Page 26 Removing transport holders Remove 4 pieces of white plastic holders at the head- and foot-end.
- Page 27 CAUTiON lift and carry the frame with two people by holding it from the bottom support frames. WARNiNg While mounting the frame(s), be careful your fingers are not trapped between the outer and inner frame. CAUTiON Be aware not to carry the frame only holding it from the middle of the slats or discs, these may come off or be damaged.
- Page 28 single static disc inner frame placement lift the frame horizontally with two persons, both holding the frame from the longer opposite sides, from the bottom support frame. lift the frame head-end onto the headboard metal support angle. As the frame head-end is placed, it is not so heavy anymore and you can place your hands on the top of the frame now, between the discs and onto the slats.
- Page 29 double static disc inner frames placement Take one frame with two people and turn it sideways. One person lifts the frame from the head-end and the other from the foot-end. Hold the frame from the longer side support frame. Place the frame sideways (inner side facing downwards) inside the outer frame.
- Page 30 Add another frame the same way.
- Page 31 Mattress placement Place the mattress in position with two people. Follow the TEMPUR brand, ® which should be placed in the front left corner of the bed.
- Page 32 TEMPUR ARC™ Adjustable slatted Adjustable slatted inner frame(s) assembly guide...
- Page 33 CAUTiON The assembly instructions must be followed closely to install the bed system successfully, safely, and to minimize the risk of personal injuries and damage to the product. Assemble the product with a minimum of two persons. Open the packaging carefully, so as not to damage the product and its parts. dispose of the packaging safely and as sustainably as possible in your local area.
- Page 34 Components Follow the direction of the frame, you have thin stripes at the head-end on the slats. you have 1 inner frame you have 2 inner frames if your bed size is in case your bed size is 90x200; 100x200; 140x200 cm. 150x200;...
- Page 35 Removing transport construction bandage Remove the construction bandage from both sides of the frame by cutting. Remove the fastening tie from the cable.
- Page 36 Entry motor Connect the mains cable end into the motor mains. lead the cable around the middle relief. By using the relief, you avoid the mains cable plug being pulled out of the motor and a potential malfunction.
- Page 37 Mattress bar installation The mattress bar needs to be attached on the support frame, with the second bottom slat from the foot-end. Remove first upper slat by pulling it out. Firstly, pull out the slat at one end and then at the other end.
- Page 38 CAUTiON lift and carry the frame with two people by holding it from the bottom support frames. WARNiNg While mounting the frame(s), be careful your fingers are not trapped between the outer and inner frame. CAUTiON Be aware not to carry the frame by holding it only from the middle of the slats, these may come off or be damaged.
- Page 39 single adjustable inner frame placement Both persons should hold onto the frame bottom longer sides, from the non-moving part. lift the frame horizontally. Place the head-end of the frame onto the bed base head-end corners. Once this part is in place, one person can move towards the frame foot-end and hold the frame from the mattress bar.
- Page 40 double adjustable inner frames placement Installing first frame: Both persons should hold the frame from its longer opposite sides. Hold from the bottom non-moving part of the frame and lift the frame horizontally. One person stands by the outer bed frame and the other steps inside the bed base. Place the frame head-end onto the corners and the headboard metal angle.
- Page 41 Installing second frame: lift the frame sideways. The longer side, which will be inner side in the bed base, needs to be facing downwards. Hold from opposite frame ends from non-moving part of the frame. The person standing on the head-end side steps into the bed base. Place the inner frame head-end onto the headboard metal angle, and the other end onto the bed foot-end.
- Page 42 Pairing one motor with one remote 1. Plug the motor cable into the power socket. 2. The motor light will start to blink at a steady pace and now you have 3 minutes for pairing. 3. Press and hold down the top two remote buttons for pairing and wait until you see one long light flash - this is the signal for successful pairing.
- Page 43 Pairing two motors with one remote 1. Plug cabels of motors into power sockets. 2. lights of motors start blinking at a steady pace and now you have 3 minutes for pairing. 3. Press and hold down the top two remote buttons for pairing and wait until you see one long light flash on the motor –...
- Page 44 Entry remote functions Underfloor light on/off Backrest up Backrest down Footrest up Footrest down Backrest + Backrest + Footrest up Footrest down...
- Page 45 Mattress placement Place the mattress in position with two people. Follow the TEMPUR brand, ® which should be placed in the front left corner of the bed.
-
Page 46: Emergency Lowering
Emergency lowering Emergency lowering is meant for lowering the bed if a power failure occurs and the bed needs to move into a horizontal position. 1. disconnect the motor from the mains. 2. Remove the slats in the middle of the motor foot and head end side. Remove the slats from the frame by pulling them out. - Page 47 3. Take the hex key on the side of the motor, use something you have at home such as a pen to push the key out. do not use an electric screwdriver for lowering, use the hex key enclosed on the motor.
- Page 48 TEMPUR ARC™ Adjustable disc Adjustable disc inner frame(s) assembly guide...
- Page 49 CAUTiON The assembly instructions must be followed closely to install the bed system successfully, safely, and to minimize the risk of personal injuries and damage to the product. Assemble the product with a minimum of two persons. Open the packaging carefully, so as not to damage the product and its parts. dispose of the packaging safely and as sustainably as possible in your local area.
- Page 50 Components Follow the direction of the frame, you have light gray discs on the head-end side of the frame. you have 1 inner frame if your you have 2 inner frames in case your bed size is bed size is 90x200 cm; 90x210 150x200 cm;...
- Page 51 Removing transport construction bandage Remove the construction bandage from both sides of the frame by cutting. Remove the fastening tie from the cable.
- Page 52 Premium motor Connect the correct plug end into the motor mains and insert the other end into the adapter. insert the other plug into the adapter. lead the cable around the middle relief. By using the relief, you avoid the mains cable plug being pulled out of the motor and a potential malfunction.
- Page 53 Mattress bar installation The mattress bar needs to be attached on the support frame, under slat units, at the foot-end side. Remove first slat unit with discs by pulling it out. Firstly, pull out slat unit one end and then the other end. Place and pull the mattress stopper to its position on the support frame.
- Page 54 CAUTiON lift and carry the frame with two people by holding it from the bottom support frames. WARNiNg While mounting the frame(s), be careful your fingers are not trapped between the outer and inner frame. CAUTiON Be aware not to carry the frame only holding it from the middle of the slats or discs, these may come off or be damaged.
- Page 55 single adjustable inner frame placement Both persons should hold the frame from the bottom longer sides, attached to the non-moving part. lift the frame horizontally. Place the head-end of the frame onto the bed base head-end corners. Once this part is in place, one person can move towards the frame foot-end and hold the frame from the mattress bar.
- Page 56 double adjustable inner frames placement Installing first frame: Both persons should hold the frame from its longer opposite sides. Hold from the bottom non-moving part of the frame and lift the frame horizontally. One person stands by the bed outer frame and the other steps inside the bed base. Place the frame head-end onto the corners and headboard metal angle.
- Page 57 Installing second frame: lift the frame sideways. The longer side, which will be inner side in the bed base, needs to be facing downwards. Hold from opposite frame ends from non-moving part of the frame. The person standing on the head-end side steps into the bed base. Place the inner frame head-end onto the headboard metal angle, and the other end onto the bed foot-end.
- Page 58 Pairing one motor with one remote 1. Plug the motor cable into the power socket. 2. The motor light will start to blink at a steady pace and now you have 3 minutes for pairing. 3. Press and hold down the top two remote buttons for pairing and wait until you see one long light flash - this is the signal for successful pairing.
- Page 59 Pairing two motors with one remote 1. Plug cabels of motors into power sockets. 2. lights of motors start blinking at a steady pace and now you have 3 minutes for pairing. 3. Press and hold down the top two remote buttons for pairing and wait until you see one long light flash on the motor –...
- Page 60 Premium remote functions Underfloor light on/off Backrest up Backrest down Footrest up Footrest down Zero Gravity position Memory position To use the Zero Gravity To save Memory position, function, just push the press the remote memory button once and it moves button down for 10 seconds.
- Page 61 Mattress placement Place the mattress in position with two people. Follow the TEMPUR brand, ® which should be placed in the front left corner of the bed.
- Page 62 Emergency lowering Emergency lowering is meant for lowering the bed if a power failure occurs and the bed needs to move into a horizontal position. 1. disconnect the motor from the mains. 2. Remove the slats in the middle of the motor foot and head end side. Remove the slats from the frame by pulling them out.
- Page 63 3. Take the hex key on the side of the motor, use something you have at home such as a pen to push the key out. do not use an electric screwdriver for lowering, use the hex key enclosed on the motor. 4.
Need help?
Do you have a question about the FORM and is the answer not in the manual?
Questions and answers