Advertisement
Quick Links
Advertisement

Related Manuals for Dynasty Fireplaces Melody Series


Summary of Contents for Dynasty Fireplaces Melody Series
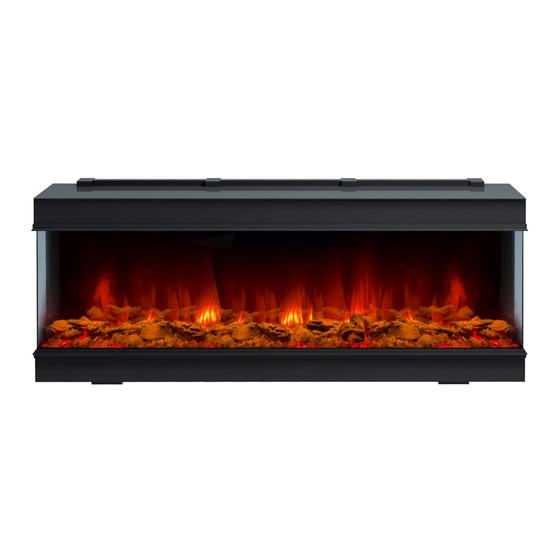
- Page 1 DYNASTY FIREPLACES Installation Guide for Dynasty Fireplaces Melody Series (DY-BTS)
- Page 2 NEVER plug this heater into an outlet that is old, cracked, or has any loose wires or connections. Plugging this heater into a faulty outlet could result in electric arcing within the outlet that could cause the outlet to overheat or catch fire ©2022 Dynasty Fireplaces...
- Page 3 Melody Series Installation Guide STEP 1 Determine the installation configuration of the fireplace Single-sided (front of fireplace open) Double-sided (front, and left or right of fireplace open) Three-sided (front, left, and right of fireplace open)
- Page 4 Melody Series Installation Guide STEP 1.1 - Framing for single-sided installation For a single-sided installation, the left and right sides of the opening can be enclosed Framing Dimensions Model Depth DY-BTS35 33 ½ in. 29 ½ in. 12 ½ in.
- Page 5 Melody Series Installation Guide STEP 1.2 - Framing for two-sided installation For a two-sided installation, the left or right sides of the opening can be enclosed. Attach the edging strips to the exposed side only. Framing Dimensions Model DY-BTS35 33 ½ in.
- Page 6 Melody Series Installation Guide STEP 1.3 - Framing for three-sided installation Create framing and opening according to the dimensions of your fireplace. Ensure to attach the edging strips to the left and right side of the fireplace Framing Dimensions Model DY-BTS35 33 ½...
- Page 7 Melody Series Installation Guide STEP 2 FOR ALL INSTALLATION METHODS: Prior to placing the fireplace into the opening, ensure the two brackets on the top and bottom of the fireplace are opened. Secure the fireplace onto the framing studs with the ST4*40...
- Page 8 Melody Series Installation Guide STEP 3.1 - Finishing for single-sided installation Apply finishing material around the fireplace viewing area, up against the edging strips NOTE: The metal area above and below the viewing area of the fireplace can be finished over with the finishing of...
- Page 9 Melody Series Installation Guide STEP 3.2 - Finishing for two-sided installation Apply finishing material around the fireplace viewing area, up against the edging strips NOTE: The metal area above and below the viewing area of the fireplace can be finished over with the finishing of...
- Page 10 Melody Series Installation Guide STEP 3.3 - Finishing for three-sided installation Apply finishing material around the fireplace viewing area, up against the edging strips NOTE: The metal area above and below the viewing area of the fireplace can be finished over with the finishing of...
- Page 11 SUPPORT For more product information, maintenance guide, and contact information, visit: support.dynastyfireplaces.com Contact us: support@dynastyfireplaces.com ©2022 Dynasty Fireplaces...
- Page 12 THANK WWW.DYNASTYFIREPLACES.COM...
Need help?
Do you have a question about the Melody Series and is the answer not in the manual?
Questions and answers