Advertisement
Quick Links
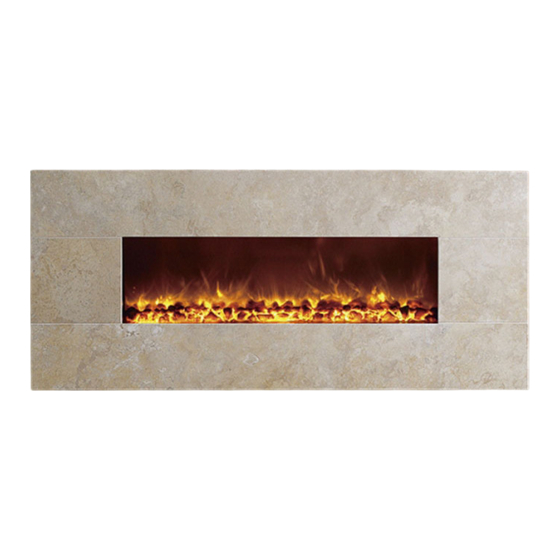
Linear Wall Mount Electric Fireplace
Packing Check List
Package
1 x Electric Appliance with glass face or stone frame
1 x Remote Control Handset
2 x AAA Batteries
1 x Instructions Booklet
1 x Wall Mounting Plate (2 x Wall Mounting Plates on BG-240)
INSTRUCTION BOOKLET MUST BE LEFT WITH THE
USER
DYNASTY FIREPLACES
UNIT 10 — 3071 NO.5 ROAD
RICHMOND, BC V6X 2T4
CANADA
TEL.: (604) 821-1009 / TOLL FREE: 1-877-521-1009
FAX: (604) 821-1019
OWNERS MANUAL
Advertisement

Summary of Contents for Dynasty Fireplaces BG-58/with Stone Frame
- Page 1 1 x Instructions Booklet 1 x Wall Mounting Plate (2 x Wall Mounting Plates on BG-240) INSTRUCTION BOOKLET MUST BE LEFT WITH THE USER DYNASTY FIREPLACES UNIT 10 — 3071 NO.5 ROAD RICHMOND, BC V6X 2T4 CANADA TEL.: (604) 821-1009 / TOLL FREE: 1-877-521-1009...
-
Page 2: Installation Instructions
Wall-Mount Electric Fireplace INSTALLATION INSTRUCTIONS This fireplace unit must be installed by a qualified, competent installer. A. Location The fireplace unit must not be in contact with any combustible materials. The heater, which is located at the base of the appliance, must kept clear of obstruction and must be a minimum of 15 inches away from any combustible material. - Page 3 B. Installation IT IS IMPORTANT TO READ THROUGH THE INSTALLATION INSTRUCTIONS BEFORE COMMENCING THE INSTALLATION. Select the position of the fireplace on the wall to which it is to be mounted. Draw a level horizontal line on the wall at the required height.
- Page 4 this is not so additional fixings will be required, consult a qualified engineer. If the fireplace unit is to be installed on a studded wall, the fixing screws must be located through any of the fixing holes in the fixing plate where they are inserted directly into the studding.
- Page 6 Electrical Work THIS APPLIANCE MUST BE GROUNDED 1. A standard electrical power plug must be sited close to the fireplace. Ensure it is in reach of fireplace power cord. Always ensure that it is possible to remove the fireplace at a later date, if required. DO NOT INSTALL THE FIREPLACE WHERE THE HEATER IS DIRECTLY ABOVE THE PLUG SOCKET.
- Page 7 Fixing The Glass Face or Stone Frame 1. On each side of the fire box there are two locating studs. (Figure 5). 2. On the back of the glass face or stone frame there are two brackets to hook over the studs. 3.
-
Page 8: Operating Instructions
Wall-Mount Electric Fireplace OPERATING INSTRUCTIONS Please read these instructions carefully before attempting to use the appliance and retain for future use. When the fireplace unit is in operation certain areas of the fireplace will get hot. Caution must be taken to avoid being burned. The fireplace must not be switched on if volatile vapours are present in the room Children must be supervised around the fireplace unit. - Page 9 Control Panel on Fire Box The control panel is located on the right hand side of the fire box (Figure 7). Power Switch B On/Off Switch C Flame Effect Dimmer Switch D Heater Low -750 w / 2500 BTU Heater High – 1500 w / 5000 BTU (For D &...
- Page 10 Infrared Emission Window On/Off Switch Flame Effect Dimmer ~ to operate press once to commence dimming cycle. Press the button again to stop cycle when the desired effect is obtained. When press once, the flame will continually dim then brighten until press again.
-
Page 11: Technical Specification
Model Dimensions Weight W37½” x H28” x D5½” BG-58/with Glass Face 68 lbs W37½” x H28” x D5½” BG-58/with Stone Frame 72 lbs W58” x H25” x D5½” 95 lbs BG-100/with Glass Face W54¼” x H28¼” x D6” 105 lbs BG-100/with Stone Frame W94”... - Page 12 Wall-Mount Electric Fireplace MAINTENANCE and TROUBLE SHOOTING GUIDE To Change A Light Bulb Light bulbs need to be replaced when you notice a dark section of the flame or when clarity and detail of the coal effect disappears. Remove the locking catch on the side of the brackets and then remove the face or frame.
- Page 13 Cleaning the Fireplace Switch off the power to the fireplace and allow it to cool before cleaning. Use a soft damp (not wet) cloth. Household Glass Cleaner can be used on the Fire Glass. Trouble Shooting Guide If fireplace is making noise: 1.
- Page 14 Aluminum Strips...
-
Page 15: Warranty
WARRANTY In the unlikely event of a problem occurring due to a manufacturing fault within 24 months from the date of purchase of the appliance it will be repaired or replaced free of charge. This warranty does not cover consumable items such as the bulbs and fuses which have a limited lifespan.


Need help?
Do you have a question about the BG-58/with Stone Frame and is the answer not in the manual?
Questions and answers