Table of Contents
Advertisement
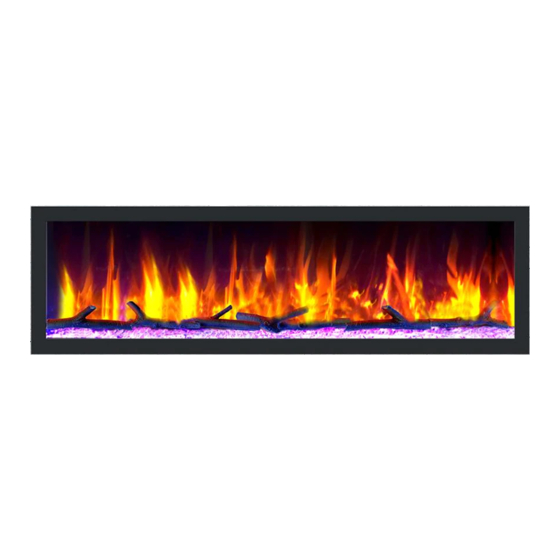
DYNASTY FIREPLACES
Cascade Series
Linear smart electric fireplace • Cheminée électrique linéaire intelligente
Installation Instructions & Operating Manual
Manuel d'Installation & d'Utilisation
DY-BTX42 | DY-BTX52 | DY-BTX64 | DY-BTX74 | DY-BTX82 | DY-BTX100
READ CAREFULLY BEFORE ATTEMPTING TO ASSEMBLE, INSTALL,
OPERATE, OR MAINTAIN THIS PRODUCT.
PROTECT YOURSELF AND OTHERS BY OBSERVING ALL SAFETY
INFORMATION. FAILURE TO COMPLY WITH INSTRUCTIONS COULD
RESULT IN PERSONAL INJURY AND/OR PROPERTY DAMAGE.
LIRE ATTENTIVEMENT AVANT D'ESSAYER D'ASSEMBLER, D'INSTALLER,
D'UTILISER, OU D'ENTRETENIR CE PRODUIT.
PROTÉGEZ-VOUS ET VOTRE ENTOURAGE EN RESPECTANT LES
CONSIGNES DE SÉCURITÉ. LE NON-RESPECT DE CES CONSIGNES
POURRAIT CAUSER DES BLESSURES CORPORELLES ET / OU DES
DOMMAGES MATÉRIELS.
PHONE: +1 877-521-1009 | support@dynastyfireplaces.com | dynastyfireplaces.com
Models / Modèles
10-3071 No. 5 Road, Richmond, BC V6X 2T4 Canada
WARNING: To reduce risk of fire, electrical
shock, or personal injury, read and
understand all instructions, including safety
information before plugging in and
operating.
AVERTISSEMENT: Pour réduire le risque
d'incendie, de décharge électrique, ou de
blessures corporelles, lisez et assurez-vous
de comprendre toutes les instructions, y
compris les consignes de sécurité, avant de
brancher et d'utiliser cet appareil.
Advertisement
Table of Contents

Related Manuals for Dynasty Fireplaces Cascade Series


Summary of Contents for Dynasty Fireplaces Cascade Series
- Page 1 DYNASTY FIREPLACES Cascade Series Linear smart electric fireplace • Cheminée électrique linéaire intelligente Installation Instructions & Operating Manual Manuel d’Installation & d’Utilisation Models / Modèles DY-BTX42 | DY-BTX52 | DY-BTX64 | DY-BTX74 | DY-BTX82 | DY-BTX100 READ CAREFULLY BEFORE ATTEMPTING TO ASSEMBLE, INSTALL, WARNING: To reduce risk of fire, electrical OPERATE, OR MAINTAIN THIS PRODUCT.
-
Page 2: Safety Information
SAFETY INFORMATION • Read all instructions before using this heater! • This heater is hot when in use. To avoid burns, DO NOT let bare skin touch hot surfaces. If provided, use handles when moving this heater. Keep combustible materials, such as furniture, pillows, bedding, papers, clothes, and curtains at least 3 feet (0.9m) from the front of the heater and keep them away from the sides and rear. - Page 3 SAFETY INFORMATION • WARNING: REDUCE THE RISK OF FIRE OR ELECTRIC SHOCK---DO NOT USE THIS HEATER WITH ANY SOLID-STATE SPEED CONTROL DEVICES. • This product is not intended to be a primary heat source. It is for supplemental heat only. •...
-
Page 4: General Specifications
GENERAL SPECIFICATIONS ELECTRICAL SPECIFICATIONS (all models) FLAME ONLY OPERATION 120V AC, 60 Hz DY-BTX42 DY-BTX52 DY-BTX64 INPUT VOLTAGE 25 W 32 W 34 W 72", 2.0m CABLE LENGTH MAX. POWER DY-BTX74 DY-BTX82 DY-BTX100 1500W CONSUMPTION 41 W 46 W 51 W 1500W Nominal WiFi OPERATION HEAT OUTPUT... -
Page 5: Package Contents
PACKAGE CONTENTS PLEASE REMOVE ACCESSORIES AND MANUAL BEFORE DISCARDING PACKAGING For warranty, parts, or product support, please visit our site at: support.dynastyfireplaces.com Contact us at: support@dynastyfireplaces.com INSTALLATION LOCATING YOUR ELECTRIC FIREPLACE Your new electric fireplace may be installed virtually anywhere in your home. However, when choosing a location, ensure that the general instructions are followed. -
Page 6: Framing & Installation
WARNING! Keep drapery and other furnishings at least 3ft /0.9m from the front of the electric fireplace. FRAMING & INSTALLATION Note: Ensure that you leave adequate room to remove and replace the front screen or optional front. Framing Dimensions Model Depth 495 mm 984 mm... - Page 7 Framing Procedure 1. Build frame according to framing dimensions on previous page and ensure power source is available 2. Remove front glass and trim piece, and set aside (refer to page 8 for instructions) 3. It is recommended to install the fireplace after finishing the wall to ensure the side brackets sits flush with the wall finishing Top View 4.
- Page 8 PLACING MEDIA ON FLAME BED Removing Front Glass 1. Locate the heater louver in the middle of the fireplace underneath the trim. Remove the heater louver by removing the two screws holding it in place, then remove front trim piece 2.
- Page 9 3. For crystal effect: Carefully spread the small clear crystal stones across the fuel bed. Then evenly arrange the larger crystal stones starting along the inset window ledge at the front of the firebox. For log effect: Carefully spread the small clear and semi-painted crystal stones across the fuel bed. Arrange the logs and place the small semi-painted and clear crystal stones in between the log layout.
-
Page 10: Serviceable Parts List
FIREPLACE REPAIR GUIDES For full detailed instructions and step-by-step guides on how to repair and service the fireplace, including repair and replacement of parts such as LED lights, motor, heater, etc, please visit our support website at: support.dynastyfireplace.com SERVICEABLE PARTS LIST ITEM DESCRIPTION PART NUMBER*... -
Page 11: Operation
OPERATION This appliance can be operated by remote control and onboard buttons, however onboard buttons have limited functions. A beep should be heard when the power is first applied. 1. ONBOARD BUTTONS The onboard buttons are located under the trim on the top left. Heater Indicator WiFi Indicator Heater... -
Page 12: Remote Control
3. REMOTE CONTROL In order to protect the product from becoming too hot, there is a 10s delay when turning on the heater; also, there is a 10s delay when turning off the heater fan. l Make sure the batteries are installed properly in the remote control. l The effective range of the remote control is up to 4 meters or 13 feet. - Page 13 OPERATION ALWAYS turn the heater OFF and unplug the power cord from the outlet before cleaning, performing maintenance, or moving this fireplace. Failure to do so could result in electric shock, fire, or personal injury. Cleaning NEVER immerse in water or spray with water. Doing so could result in electric shock, fire, or personal injury.
-
Page 14: Maintenance
Store heater in a clean dry place when not in use. Replacement parts: l Use only replacement parts supplied by Dynasty Fireplaces. Use of any other parts, or modifying the fireplace in any way, will void all warranties. l If you’ve made a purchase through one of our retailers, contact them to order parts, or contact support@dynastyfireplace.com... - Page 15 Dynasty Fireplaces’ obligation under the warranty is to replace or repair defective parts at our discretion. Any expenses or damage resulting from the installation, removal, or transportation of the product will be the responsibility of the owner and are not covered by this warranty.
Need help?
Do you have a question about the Cascade Series and is the answer not in the manual?
Questions and answers