Harmar Mobility HELIX CSL500 Installation & Service Manual
Curved stair lift
Hide thumbs
Also See for HELIX CSL500:
- Owner's manual and warranty information (8 pages) ,
- Installation & service manual (20 pages)

Related Manuals for Harmar Mobility HELIX CSL500


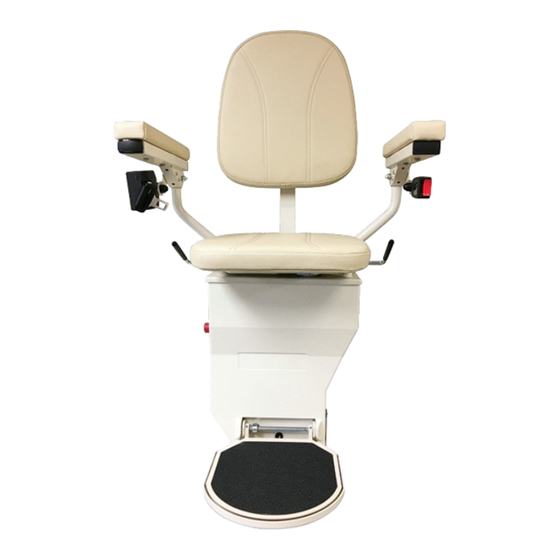
Summary of Contents for Harmar Mobility HELIX CSL500
- Page 1 HELIX CURVED STAIR LIFT INSTALLATION & SERVICE MANUAL 24SEP2021 | 630-00063-01 REV D...
-
Page 3: Table Of Contents
HELIX CURVED STAIR LIFT TABLE OF CONTENTS TABLE OF CONTENTS SAFETY ..................4 Safety Definitions ............4 Special Cautions ............4 INTRODUCTION ..............5 Device Name: Helix ..........5 Read and Understand ..........5 Warranty ..............5 Technical Specifications ..........5 Code Statement ............ -
Page 4: Safety
HELIX CURVED STAIR LIFT: SECTION 1 SAFETY SECTION 1 SAFETY SAFETY DEFINITIONS SPECIAL CAUTIONS This safety alert symbol appears with Pay attention to the following Special safety statements. It means attention, Cautions while operating your stair lift. become alert, your safety and the •... -
Page 5: Introduction
HELIX CURVED STAIR LIFT: SECTION 2 INTRODUCTION SECTION 2 INTRODUCTION DEVICE NAME: HELIX COMMERCIAL 4 INCLINED STAIRWAY CHAIRLIFTS Indications of Use: The intended use of the Helix is the transfer of patients or mobility impaired persons Section 4 applies to inclined stairway chairlifts up and down levels of a residence or commercial installed in locations other than in or at a private building. -
Page 6: Preparation
HELIX CURVED STAIR LIFT: SECTION 3 PREPARATION SECTION 3 PREPARATION INCLUDED PARTS Installations may vary to some degree, but below are the basic tools to have on hand for a Helix curved stair lift installation. Before beginning installation, inspect and check that the box contents are complete and undamaged. -
Page 7: Installation
HELIX CURVED STAIR LIFT: SECTION 3 INSTALLATION SECTION 3 INSTALLATION The standard installation will require two installers and should take approximately three hours to complete. The time will vary depending on the complexity of the lift ordered and custom designs. Review installation drawing. - Page 8 HELIX CURVED STAIR LIFT: SECTION 3 INSTALLATION Place the rail in the correct position, beginning Check both ends of the rail and wipe clean. You with the first section downstairs. Unwrap the may need to clean the ends with Emery paper rail, checking the stamp located on each rail for and add a small amount of grease to help slide order of placement on stairs.
-
Page 9: Battery Installation
HELIX CURVED STAIR LIFT: SECTION 3 INSTALLATION BATTERY INSTALLATION Install the battery. Open the front of the chassis by removing the screws on shroud. See Figure 3-12. Figure 3-10 Connect parts at the joint with the supplied bolts. Carefully tighten as you assemble the rail. DO NOT overtighten. -
Page 10: Chassis Installation
HELIX CURVED STAIR LIFT: SECTION 3 INSTALLATION CHASSIS INSTALLATION NOTICE Ensure that the charging strips are oriented on TEST RUN. Prior to bolting down the supports, the top of the bottom rail. See Figure 3-16. install the chassis and run it on the rail to check all clearances. -
Page 11: Seat Installation
HELIX CURVED STAIR LIFT: SECTION 3 INSTALLATION Install the set screw, that holds the seat from coming up, in collar where the wires for the hand control comes through. See Figure 3-22. Figure 3-19 SEAT INSTALLATION NOTICE Figure 3-22 Do not lay chair on its back. Connect the seat rocker switch wires. -
Page 12: Mid-Charging Station Installation
HELIX CURVED STAIR LIFT: SECTION 3 INSTALLATION MID-CHARGING STATION INSTALLATION Locate the chassis to where the mid-station park should be on the rail. See Figure 3-24. Figure 3-28 Figure 3-24 Drill the size 3/8" hole in the rack to pull the wire out. -
Page 13: Supports
HELIX CURVED STAIR LIFT: SECTION 3 INSTALLATION SUPPORTS CHARGING STATION INDOOR UNITS Install the charging station on the rail. See Figure 3-32. Re-check angles, then, using the appropriate hardware, attach the supports to the stairs, starting at a corner. Firmly set the supports to the rail with set screw. -
Page 14: Alignment
HELIX CURVED STAIR LIFT: SECTION 3 INSTALLATION ALIGNMENT Align charging stations. Pay attention to the charging contacts, where the drive unit meets the station. They should apply pressure to the charging strips on the chassis. Adjust as needed. The spring loaded contacts should compress about 1/4". -
Page 15: Final Limit
HELIX CURVED STAIR LIFT: SECTION 3 INSTALLATION FINAL LIMIT WARNING Install hard final limit on the gear rack at both If the unit fires due to a runaway situation contact ends of the rail. Rail end caps and support caps Harmar tech services to evaluate. -
Page 16: Wireless Remote Reprogramming
HELIX CURVED STAIR LIFT: SECTION 3 INSTALLATION WIRELESS REMOTE REPROGRAMMING The wireless controllers are shipped pre- programmed for the seat. Green light indicates up or down Power light Note: The remote board will beep once and the chassis board will beep once. If the remotes need to be re-programmed or you have a replacement remote, do the following: On the wireless control board, press and hold... -
Page 17: Operational Check
HELIX CURVED STAIR LIFT: SECTION 3 INSTALLATION OPERATIONAL CHECK Seat position, level at top and bottom. If it is not level or customer would like the chair to have a slight uphill tilt, adjust with the leveling joint. Before putting the lift into operation for the user, •... -
Page 18: Troubleshooting
HELIX CURVED STAIR LIFT: SECTION 4 TROUBLESHOOTING SECTION 4 TROUBLESHOOTING CONTROLS 1. Emergency stop (optional) 2. Key lock (optional) 3. Power switch 4. Status light Red: Major fault Yellow: Obstruction Green: Ready 5. Power light 6. Charging light 7. Diagnostic port If the lift does not operate, diagnose the problem by observing the LED status light on the lift and listening to the beeps emitted. -
Page 19: Maintenance
HELIX CURVED STAIR LIFT: SECTION 5 MAINTENANCE SECTION 5 MAINTENANCE To clean the rail, use a moistened cloth, if necessary. SAFETY SWITCHES The seat can be wiped gently, using a soft cloth and ENSURE SWITCHES ARE WORKING BY a mild detergent. ACTIVATING EACH CONDITION For many years of enjoyable use, we recommend that the mechanical and electrical safety equipment... -
Page 20: Annual Checklist
HELIX CURVED STAIR LIFT: SECTION 5 MAINTENANCE CHASSIS STOP Up Primary Up Final Down Primary Down Final Test Remotes (up and down buttons) CHARGING STATION CONTACTS Top (voltage reading between 27 and 29 volt) ... - Page 21 NOTES HELIX: Install Manual 24SEP2021 | 630-00063-01 REV D...
- Page 22 NOTES HELIX: Install Manual 24SEP2021 | 630-00063-01 REV D...
- Page 23 NOTES HELIX: Install Manual 24SEP2021 | 630-00063-01 REV D...
- Page 24 1500 Independence Blvd, Suite 220 Sarasota, FL 34234 800.833.0478 harmar.com...
Need help?
Do you have a question about the HELIX CSL500 and is the answer not in the manual?
Questions and answers
Helix stairlift stops midway going down and makes loud noise