Table of Contents
Advertisement
Quick Links
Advertisement
Table of Contents

Related Manuals for TrueNAS Mini R


Summary of Contents for TrueNAS Mini R
- Page 1 TrueNAS Mini R Basic Setup Guide ® Version 1.0...
-
Page 2: Table Of Contents
� � � � � � � � � � � � � � � � � � � � � � � � � � � � � � � � � � � � � � � � � � � � � � � � � � � � � � � � � � � � � � � � � � � � � � � � � � � � � � � � � � � � � � � � � � � � � � � � � � � � � � � � � 3�3 Install the Mini R in the Rack ... -
Page 3: Introduction
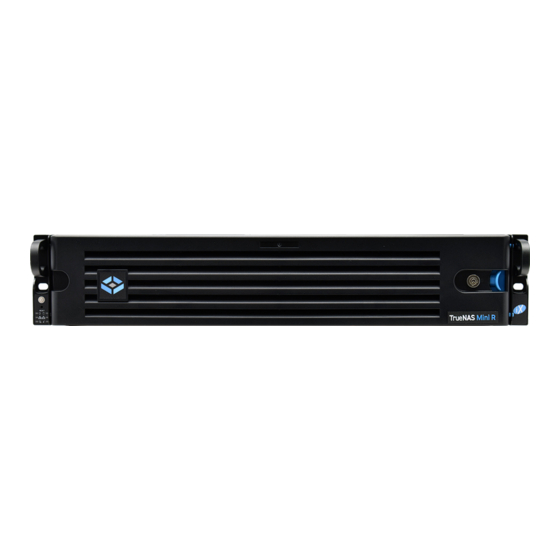
1 Introduction The TrueNAS Mini R is a 2U Storage Array that has twelve (12) hot-swappable 3�5” drive bays and the option to choose between rack or desktop mounting� Your system comes with the TrueNAS operating system preloaded� Review the safety considerations and requirements before handling the Mini R or installing it into a rack�... -
Page 4: Mini R Components
2 Mini R Components TrueNAS units are carefully packed and shipped with trusted carriers to arrive in perfect condition� If there is any shipping damage or missing parts, please take photos and contact iXsystems support immediately at support@ixsystems�com, 1-855-GREP4-iX (1-855-473-7449), or 1-408-943-4100�... -
Page 5: 2�1 Front Indicators
2.1 Front Indicators The Mini R has front panel buttons for power and system reset� It also has indicator lights for power, boot media activity, network interface activity, and system information� Light Color and Indication Green (Solid): System ready Green (Flashing): Boot media working... -
Page 6: Rack The Mini R
3 Rack the Mini R The Mini R requires an EIA-310 compliant rack� The front and rear vertical rack posts must be 19⅛” - 36⅞ ” apart� The Mini R comes with a standard rail kit and an optional extended rail kit, depending on your purchase�... - Page 7 Team-lift the system and align the chassis rails with the rack rails� Slide the ends of the chassis rails into the rack rails and push the Mini R forward until the safety catches lock� Press the catch releases down and keep sliding the system forward until it is flush with the front of the rack.
-
Page 8: Install Rubber Feet
4 Install Rubber Feet The Mini R comes with 1¼” adhesive rubber feet for mounting the system on a desktop instead of in a rack� The diagram below shows the optimal foot placement on the bottom of the Mini R�... -
Page 9: Install Hard Drives
5 Install Hard Drives The Mini R supports iXsystems-qualified hard drives up to 18 TB. The Mini R also requires hard drives designed for Network Attached Storage (NAS)� These drives run cooler and quieter than desktop drives� Please see the Drive Compatability List available at https://www�truenas�com/truenas-mini/�... -
Page 10: 5�3 Place Drives In Trays
5.4 3.5” to 2.5” SSD Adapters Users can convert Mini R 3�5” HDD trays into 2�5” SSD trays with adapters� Attach an SSD to the adapter using two of the SSD screws that came with the adapter� Ensure the SSD connecter faces outside the adapter�... -
Page 11: 5�5 Installing Drive Trays
5.5 Installing Drive Trays Gently insert a tray into a drive bay until it stops� Close the locking arm until it locks� Repeat for all hard drives, then load trays with fillers into the remaining empty bays. For extra security, you can lock the drive tray into the system� The tray button is unlocked when the inner slot is horizontal and locked when the slot is vertical. -
Page 12: Attach The Bezel (Optional)
6 Attach the Bezel (Optional) Slide the left side of the bezel into the attachment points on the left ear, then push the right side of the bezel into the right ear latch until it locks� You can lock the bezel for added security� To do so, insert a key in the lock and turn it ninety degrees clockwise� Support: 855-473-7449 or 1-408-943-4100 Page 10 Email: support@ixsystems.com... -
Page 13: Connect Network And Power Cables
7.1 Powering on the TrueNAS Mini The Power and Reset buttons control the power state of the TrueNAS Mini� These buttons behave in the same manner as standard PC power and reset buttons. When the system is off, pressing the power button turns the system on. -
Page 14: Console Setup
You can connect a VGA monitor and USB keyboard for console access, but they are not required� If a monitor and keyboard are attached, you can see the Console Setup Menu� For more details about the Console options, see https://www�truenas�com/docs/core/gettingstarted/consolesetupmenu/� If you want remote out-of-band management (OOBM) via IPMI, connect a network cable to the IPMI port� See section “2�2 Rear Components and Ports”... -
Page 15: Truenas Web Interface
After downloading your desired version, you must use image utility like belenaEtcher or rufus to flash the ISO file to a USB drive. Plug the flashed USB drive into a USB port on your Mini R and select it from from the boot menu during system startup�... -
Page 16: Additional Resources
TrueNAS web interface or go directly to: https://www�truenas�com/docs/ Additional hardware guides and articles are in the Documentation Hub’s Hardware section: https://www�truenas�com/docs/hardware/ The TrueNAS Community forums provide opportunities to interact with other TrueNAS users and discuss their con- figurations: https://www�truenas�com/community/ 11 Contacting iXsystems...
Need help?
Do you have a question about the Mini R and is the answer not in the manual?
Questions and answers