TrueNAS M Series Basic Setup Manual
Hide thumbs
Also See for M Series:
- Basic setup manual (16 pages) ,
- Setup manual (16 pages) ,
- Basic setup manual (8 pages)
Table of Contents
Advertisement
Quick Links
Advertisement
Table of Contents

Related Manuals for TrueNAS M Series


Summary of Contents for TrueNAS M Series
- Page 1 TrueNAS M-Series Basic Setup Guide ® 3rd Generation Version 3.4...
-
Page 2: Table Of Contents
� � � � � � � � � � � � � � � � � � � � � � � � � � � � � � � � � � � � � � � � � � � � � � � � � � � � � � � � � � � � � � � � � � � � � � � � � � � � � � � � � � � � � � � � � � � � � � � � � � � � � � � � � � � � � � � � 10�1 Connect to the TrueNAS CORE Enterprise WebUI ... -
Page 3: Introduction
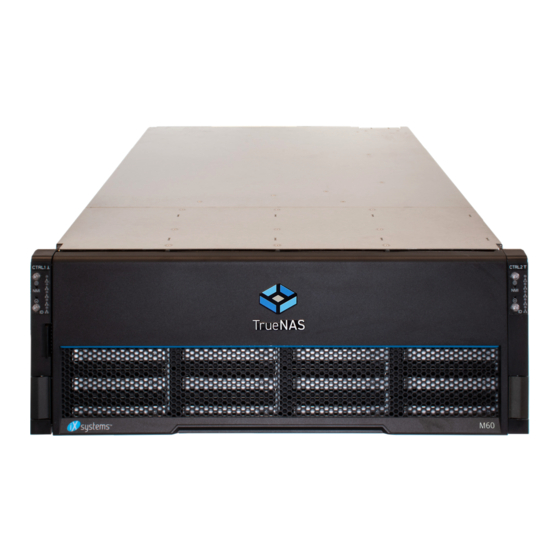
TrueNAS controllers� Note The 3rd Generation TrueNAS M-Series systems have a unified chassis design that allows customers to upgrade them with more powerful controllers. Customers can upgrade an M30 to an M40, an M40 to an M50, or an M50 to an M60�... -
Page 4: Series Components
2 M-Series Components TrueNAS units are carefully packed and shipped with trusted carriers to arrive in perfect condition� If there is any shipping damage or missing parts, please take photos and contact iXsystems support immediately at support@ixsystems�com, 1-855-GREP4-iX (1-855-473-7449), or 1-408-943-4100�... -
Page 5: 2�2 Front Indicators
The front ears have power, locate ID, fault, and network activity indicators. The fault indicator is on during the initial power-on self-test (POST) and turns off during normal operation. It turns on if the TrueNAS software issues an alert. Light / Button... - Page 6 2.4 M-Series Expansion Slots Expansion slots on the M-Series are reserved for specific cards or internal use: Slot A Slot B Slot C Slot D Slot E Slot F Internal NIC or FC Secondary NIC Internal External SAS 4x NVME Riser, NIC2, or FC NIC1 External SAS1 NIC2 or FC...
-
Page 7: Rack The M-Series
3 Rack the M-Series The M-Series requires 4U of space in an EIA-310 compliant rack that is 27” (686mm) deep, frame to frame. The vertical rack posts must be between 26” (660�4mm) and 36” (914�4mm) apart to install the rails properly� 3.1 Install Chassis Rails Extend the inner rack rail until it locks in place (1)�... -
Page 8: 3�2 Install Rack Rails
3.2 Install Rack Rails The rack rails install in the center of the bottom 2U of the total 4U of reserved rack space� Unlock and retract the inner rack rail before installing it in the rack� Rotate the release lever on the back of the inner rail as shown on the arrow label, then push the inner rail towards the back of the assembly until it stops. - Page 9 3.3 Mount the System in the Rack Warning The M-Series requires two people to safely lift in and out of a rack� Do not install drives until after you mount the M-Series in the rack� Remove all drives before taking the M-Series out of the rack� Extend both inner rack rails out from the rack until they lock.
-
Page 10: Install Drives
4 Install Drives TrueNAS systems only support qualified HDDs and SSDs. Contact the Sales Team for more drives or replacements. Adding unqualified drives to the system voids the warranty. Call Support if drives are improperly installed in trays. Place a tray on a flat surface. Mount a hard drive by aligning the drive connectors to the rear of the tray and pushing the drive screw holes into the drive tray pegs�... -
Page 11: Install Bezel (Optional)
5 Install Bezel (Optional) Slide the right side of the bezel into the attachment points on the right ear, then push the left side of the bezel into the left ear latch until it locks� To remove the bezel, push the left ear release tab away from the bezel, then swing the bezel out. Support: 855-473-7449 or 1-408-943-4100 Page 9 Email: support@ixsystems.com... -
Page 12: Storage Expansion
6 Storage Expansion Note The M30 does not support storage expansion� 6.1 Connect SAS Cables Line the SAS3 cable connector up with the SAS port on the back of the system� Ensure the blue tab on the SAS cable is facing toward the right� Gently push the connector into the port until it clicks� Support: 855-473-7449 or 1-408-943-4100 Page 10 Email: support@ixsystems.com... -
Page 13: 6�2 Connect Expansion Shelves
first port on the first expansion shelf controller. High Availability (HA) systems require another cable from the first port on the second TrueNAS controller to the first port on the second expansion shelf controller. We do not recommend other cabling configurations. Contact iX Support if you need other cabling methods. -
Page 14: Connect Network Cables
7 Connect Network Cables Connect network cables from the local switch or management network to the IPMI ethernet, ixl0, and ixl1 ports on each TrueNAS Controller� See section “2�3 Rear Components and Ports” on page 3 for port locations� iXsystems preconfigures network ports to customer specifications before shipping. -
Page 15: 7�2 Ethernet Nic Network Setup
7.2 Ethernet NIC Network Setup If you ordered four-port ethernet NICs with your M-Series, you can set them up now for networking. Insert ethernet cables into each port on the NIC, then connect each cable to your network switch. Support: 855-473-7449 or 1-408-943-4100 Page 13 Email: support@ixsystems.com... -
Page 16: Connect Monitor And Keyboard
8 Connect Monitor and Keyboard We recommend connecting a monitor and keyboard for the first boot so you can configure the system and view the initial TrueNAS web interface IP address� Connect a keyboard and monitor to the bottom controller (Controller 1)� See section “2�3 Rear Components and... -
Page 17: Boot The System
After plugging the power cables into outlets, the M-Series powers on and boots into TrueNAS. When booted, the system console displays the TrueNAS web UI IP address. The IP address is either preconfigured according to customer guidelines or automatically generated with DHCP� Example: The web user interface is at: http://192.168.100.231... -
Page 18: Additional Resources
11 Additional Resources The TrueNAS Documentation Hub has complete software configuration and usage instructions� Click Guide in the TrueNAS web interface or go directly to: https://www�truenas�com/docs Additional hardware guides and articles are in the Documentation Hub’s Hardware section: https://www�truenas�com/docs/hardware The TrueNAS Community forums provide opportunities to interact with other TrueNAS users and discuss their configurations:... - Page 19 Notes Support: 855-473-7449 or 1-408-943-4100 Page 17 Email: support@ixsystems.com...
- Page 20 Notes Support: 855-473-7449 or 1-408-943-4100 Page 18 Email: support@ixsystems.com...
Need help?
Do you have a question about the M Series and is the answer not in the manual?
Questions and answers