
Related Manuals for Car Solutions QVI-LVTX-1CH-V6.1


Summary of Contents for Car Solutions QVI-LVTX-1CH-V6.1
- Page 1 Last updated : 2012.03.29 Car Video Interface for Mercedes-Benz C-Class (W204) 2012 and New E-Class 2012 User Manual www.car-solutions.com support@car-solutions.com...
-
Page 2: Table Of Contents
Contents 1. Before installation 1.1 Main specification 1.2 Features 1.3 System diagram 1.4 Components 1.5 Exterior 2. Setup 2.1 DIP switch 2.2 Remote control 2.3.1 OSD (on screen display) 2.3.2 OSD (on screen display) 2.4 Factory mode 2.5 Parking Guide line setting 2.6 Touch Calibration 2.7.1 Remote controller button 2.7.2 Remote controller button... -
Page 3: Main Specification
1.1 Main specification 1. Compatibility 2012Y Mercedez-Benz C-class 6.5/ 7 inch , New E-class 5.8 / 6.5 / 7 inch 2. Product composition Multimedia Interface (made for specific models) * 1ea Sub-board (made for specific models) * 1ea 3. MULTIMEDIA INTERFACE input spec. 3 * A/V (NTST&PAL) input 1 * CVBS (rear camera) input. -
Page 4: Features
1.2 Features - More convenience to install with plug & play (LVDS cable offered) - Possible to move the displayed position of DVD, Navigation. - Improved Display Screen (convenience-oriented Interfaces for users) - Offered Remote controller for OSD settings. - Add a safe function (show the main screen while driving) www.car-solutions.com... -
Page 5: System Diagram
1.3 System diagram Switch for source toggle OSD Keypad OEM Navi Button (Can Interface) NAVIGATION Input (Analog RGB) DISPLAY Car Installation A/V 1 OEM LCD VIDEO MUX A/V 2 VIDEO CIRCUIT A/V 3 CVBS (Rear camera) Car Screen Input POWER A/V OUT (CAR MAIN BOARD) CIRCUIT... -
Page 6: Components
1.4 Components LVDS cable * 1ea (HLVDSC0018) TOUCH OUT cable * 1ea (HTOUCH0004) IR cable * 1ea REMOTE CONTROL * 1ea (HIRCAB0002) SUB BOARD* 1ea (REMOTE0001) MODE cable * 1ea (HARETC0001) RGB cable * 1ea (HNAVIC0004) TOUCH IN cable * 1ea (HTOUCH0007) POWER cable (24P) * 1ea LCD cable * 1ea... -
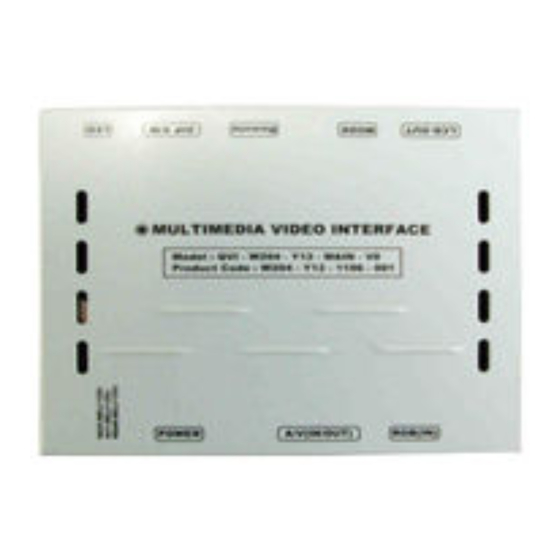
Page 7: Exterior
1.5 Exterior - SUB BOARD ⑤ ⑥ ⑦ Dimension (75*47*20) ⑪ ⑫ Horizontal length 125mm Vertical length 105mm Height 21mm ① LED ② POWER ③ R-CAM ④ AV(IN/OUT) ⑤ DIP Switch ⑥ TOUCH OUT TO NAVI ⑧ ⑨ ⑩ ⑦ LVDS OUT ⑧... -
Page 8: Dip Switch
2.1 DIP switch ※ ON : DOWN / OFF : UP Function Dip S/W Selection ON : Skipping RGB Mode RGB INPUT MUTE OFF : RGB Display ※ DIP S/W usage example ON : Skipping A/V 1 - Input Mode : A/V3, Navigation (RGB) A/V 1 MUTE OFF : A/V1 Display - When original Navigation is not installed... -
Page 9: Remote Control
2.2 Remote control Function POWER & PIP Unavailable MENU Activating OSD menu Making a selection, changing image display ▲ Moving upward ▼ Moving downward Moving leftward ◀ (If you press this button 5 seconds long, you can get access to the factory mode.) Moving rightward ▶... -
Page 10: Osd (On Screen Display)
2.3.1 OSD (on screen display) Analog RGB Mode IMAGE COLOR UTIL * BRIGHTNESS * RED : Adjusting red * FACTORY RESET : * LANGUAGE : Choosing interface language while Resetting all the data about * CONTRAST * GREEN : Adjusting green changing mode between the relevant mode that A/V and DVD... -
Page 11: Osd (On Screen Display)
2.3.2 OSD (on screen display) Video mode IMAGE UTIL * BRIGHTNESS * LANGUAGE : Choosing interface * FACTORY RESET : Resetting all language while changing mode the data about the relevant mode * CONTRAST between A/V and DVD that applicable to navigation, DVD mode respectively. -
Page 12: Factory Mode
2.4 Factory mode FACTORY mode – Press ◀ button 5 seconds long on the remote controller. IMAGE PARK UTIL Adjusting the position of * PARK ENABLE : Setup of rear view * CALIBRATION : Touch calibration * IR navigation parking guide line MEMORY : To register value of * H-POSITION * PARK SETUP : Control over position... -
Page 13: Parking Guide Line Setting
2.5 Parking guide line setting FACTORY mode – Press ◀ button 5 seconds long on the remote controller. PARK PARK - ENABLE PARK - ENABLE * PARK ENABLE : Selecting whether to A. If you set ‘PARK ENABLE’ as “ A. -
Page 14: Touch Calibration
2.6 Touch calibration >>> ① First of all, press ◀ button on remote controller 2 ③ Then you can see “touch calibration” on seconds long. Then you can access to the FACTORY mode. screen about 2 seconds long as shown above. After the word “touch calibration”... - Page 15 2.7.1 Remote controller button Registering value of remote controller buttons? When you want to control DVD and DTV via touch screen (using OSD menu) with other models besides already registered option-SANYO and NECVOX, you can register value of DVD and DTV’ s remote controller which you have. Then you can control DVD and DTV via touch screen.
-
Page 16: Remote Controller Button
2.7.2 Remote controller button >>> Instruction> continued… ③ After register, select “INPUT” in OSD menu and c. The values that you registered will appear as green press “OK”. Then you can see confirmation window as text in the marked area on pressing the button. And the shown above. -
Page 17: Dvd, Dtv Model Selection
2.8 DVD, DTV model selection DVD TYPE DTV TYPE UTIL – DVD/DTV TYPE If DVD/DTV type that you want to use is not NECVOX or SANYO, you have to register values of the remote controller that you want to use in the “IR MEMORY” section and set the “DVD TYPE”/”DTV TYPE” to “USER”. Unless you do this process after saving the data, you can NOT control DVD/DTV via touch screen. -
Page 18: Switching Mode Via Can Wire
2.9 Switching mode via CAN wire After wiring CAN of the car with offered CAN cable, you can switch A/V mode by the Factory button as below. W204 7”, 5”(C-Class), W212 5.8”, 7” (E-Class) : Switching Mode by Return Button of jog shuttle as shown left. ※... -
Page 19: Troubleshooting
3. Troubleshooting Q. I can not switch A/V sources A. Check IR or Ground cable connection. Check LED lamps in the interface, if it is not on, check power cable. Q. All I got on the screen is black. A. Check second LED lamp of the interface is on, if not, check A/V sources connected are working well. (Second lamp indicates AV sources connected works well.) Check interface connection has been done well.
Need help?
Do you have a question about the QVI-LVTX-1CH-V6.1 and is the answer not in the manual?
Questions and answers