Table of Contents
Advertisement
Available languages
Available languages
Advertisement
Table of Contents

Related Manuals for Insignia NS-SPST2B


Summary of Contents for Insignia NS-SPST2B
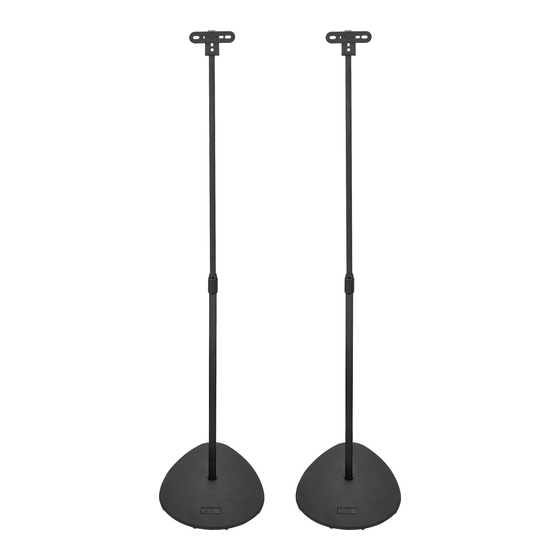
- Page 1 ASSEMBLY GUIDE GUÍA DE MONTAJE Satellite Speaker Stands Bases para altavoces satélite NS-SPST2B Before using your new product, please read these instructions to prevent any damage. Antes de usar su producto nuevo, lea este instructivo para evitar cualquier daño.
-
Page 2: Table Of Contents
ENGLISH Contents Introduction ............2 IMPORTANT SAFETY INSTRUCTIONS . -
Page 3: Introduction
Bases para altavoces satélite ENGLISH Introduction Congratulations on your purchase of a high-quality Insignia product. Your NS-SPST2B speaker stands are designed for reliable and trouble-free performance. IMPORTANT SAFETY INSTRUCTIONS SAVE THESE INSTRUCTIONS CAUTION: Avoid potential personal injuries and property damage! •... -
Page 4: Features
NS-SPST2B Features • 28 – 38 in. (71.1 – 96.5 cm) of height adjustment place your speakers where you want them • Wide-ranging capability supports most popular speaker brands weighing up to 4 lbs. (1.8 kg) • Integrated cable management system conceals and organizes your cables •... -
Page 5: Parts
Bases para altavoces satélite Parts 01 Bottom pole (2) 09 Dual bracket (2) 05 Adjusting nut 03 Base (2) 02 Top pole (2) 07 Top plate (2) 10 L bracket (2) 04 Base pad (20) 08 Double stick speaker pad (2) Hardware Hardware Hardware... -
Page 6: Installation Instructions
NS-SPST2B Installation instructions STEP 1 - Installing the base pads You’ll need 03 Base (2) 04 Base pad (20) 1 Carefully place the base (03) top-down on a cushioned, clean surface to protect it from scratches or damage. 2 Clean the 10 pad locations with denatured or isopropyl alcohol so that the base pads (04) will bond securely. - Page 7 Bases para altavoces satélite STEP 2 - Attaching the pole to the base and adjusting the height You’ll need 03 Base (2) 01 Bottom pole (2) 02 Top pole (2) 1 Carefully screw the bottom pole (01) clockwise into the base (03). Make sure that you screw the pole fully into the base to ensure stability.
- Page 8 NS-SPST2B 2 Insert the top pole (02) into the bottom pole (01), lift it up or down to adjust to the height you want, then tighten the locking collar by turning it clockwise only until the top pole doesn’t slip down.
- Page 9 Bases para altavoces satélite 3 Adjust the top pole (02) so that the curved section is over the long section of the base (01), then fully tighten the locking collar by turning it clockwise. 4 Repeat for the second speaker stand. www.insigniaproducts.com...
- Page 10 NS-SPST2B Option 1: STEP 3 - Attaching rear-mount speakers with threaded screw inserts You’ll need (13) M4 x 7 mm screw (2) (11) M5 × (14) M4 x 10 mm screw (2) 15 mm screw (2) (12) M4 10 L bracket (2) M5 ×...
- Page 11 Bases para altavoces satélite 2 For speakers with a single hole in the back - Attach the speaker to the stand using an M4 washer (12) and an M4 x 7 mm screw (13), an M4 x 10 mm screw (14), or an M5 x 12 mm screw (15) or 1/4-20 x 1/2 in.
- Page 12 NS-SPST2B Option 2: STEP 3 - Attaching rear-mount speakers with key-hole slots You’ll need 05 Adjusting nut (2) (06) 1/4-20 × 12 mm (11) M5 × 15 mm screw (2) 10 L bracket (2) screw (2) 1 Attach the L Bracket (10) to the top pole (02) with an M5 x 15 mm screw (11), with the speaker wire slot arranged as shown.
- Page 13 Bases para altavoces satélite 2 Attach the (06) 1/4-20 × 12 mm screw to the L bracket (10) with an adjusting nut (05). Tighten securely. 3 Attach the speakers to the stands by sliding the slots on the backs of the speakers over the (06) 1/4-20 ×...
- Page 14 NS-SPST2B Option 3: STEP 3 - Attaching bottom-mount speakers You’ll need (11) M5 × 15 mm screw (2) 07 Top plate (2) (13) M4 x 7 mm screw (2) M5 × 12 mm screw (4) (12) M4 washer (2) 08 Double stick speaker pad (2) (16) 1/4-20 ×...
- Page 15 Bases para altavoces satélite 2 Use M5 x 12 mm screws (15) or 1/4-20 x 1/2 in. screws (16). Tighten securely, then skip to STEP 4 - Routing the speaker cables on page 17. Option B - Use an M4 washer (12) and an M4 x 7 mm screw (13). Tighten securely, then skip to STEP 4 - Routing the speaker cables.
- Page 16 NS-SPST2B Option C - Attach the double-stick speaker pads (08) to the top plates (07) by removing the paper covering the adhesive surface on the bottom of the pads and pressing them firmly onto the top plates. When the pads are firmly...
- Page 17 Bases para altavoces satélite STEP 4 - Routing the speaker cables You’ll need (17) Hook ‘n loop strap (10) Option A - Route the speaker cables by passing the wires into the speaker wire slot at the top of the top pole, then down the pole assembly and out the hole in the bottom pole and under the base.
-
Page 18: Specifications
NS-SPST2B Option B - Run the wires on the outside of the poles and attach them to the poles using the hook ‘n loop straps (17) as necessary. Specifications Dimensions (H × W × D) 9.06 × 10.38 x 28 to 38 in. (23.01 × 26.36 x 71.12 to 96.5 cm) -
Page 19: One-Year Limited Warranty
Product is determined to be defective by an authorized Insignia repair center or store personnel, Insignia will (at its sole option): (1) repair the Product with new or rebuilt parts; or (2) replace the Product at no charge with new or rebuilt comparable products or parts. - Page 20 • Damage due to incorrect operation or maintenance • Connection to an incorrect voltage or power supply • Attempted repair by any person not authorized by Insignia to service the Product • Products sold “as is” or “with all faults”...
-
Page 21: Español
Bases para altavoces satélite ESPAÑOL Introducción Felicitaciones por comprar un producto de alta calidad de Insignia. Las bases de altavoz NS-SPST2B están diseñados para ofrecer un rendimiento fiable y sin problemas. INSTRUCCIONES IMPORTANTES DE SEGURIDAD CONSERVE ESTAS INSTRUCCIONES CUIDADO: ¡Evite posibles lesiones personales o daños materiales! •... -
Page 22: Características
NS-SPST2B Características • Ajuste de altura de 71.1 a 96.5 cm (28 a 38 pulg.) para colocar los altavoces donde desee • Amplia capacidad compatible con las marcas de altavoces más populares, con un peso de hasta 1.8 kg (4 lb) •... -
Page 23: Elementos
Bases para altavoces satélite Elementos 01 Tubo inferior (2) 09 Soporte doble (2) 05 Tuerca de ajuste (2) 03 Base (2) 02 Tubo superior (2) 07 Placa superior (2) 10 Soporte en L (2) 04 Almohadilla de la base (20) 08 Almohadilla de doble cara para el altavoz (2) Accesorios... -
Page 24: Instrucciones De Instalación
NS-SPST2B Instrucciones de instalación PASO 1 - Instalación de las almohadillas de la base Necesitará 04 Almohadilla 03 Base (2) de la base (20) 1 Coloque con cuidado la base (03) con la parte superior hacia abajo sobre una superficie acolchada y limpia para protegerla de rayones o daños. - Page 25 Bases para altavoces satélite PASO 2 - Fijación del tubo de la base y ajuste de la altura Necesitará 03 Base (2) 01 Tubo inferior (2) 02 Tubo superior (2) 1 Enrosque con cuidado el tubo inferior (01) en el sentido de las agujas del reloj en la base (03).
- Page 26 NS-SPST2B 2 Inserte el tubo superior (02) en el tubo inferior (01), levántelo o bájelo para ajustarlo a la altura que desee y, a continuación, apriete el collar de bloqueo girándolo sólo en el sentido de las agujas del reloj hasta que el tubo superior no se deslice hacia abajo.
- Page 27 Bases para altavoces satélite 3 Ajuste el tubo superior (02) de modo que la sección curva quede sobre la sección larga de la base (01) y, a continuación, apriete completamente el collarín de bloqueo girándolo en el sentido de las agujas del reloj. 4 Repita la operación para la segunda base del altavoz.
- Page 28 NS-SPST2B Opción 1: PASO 3 - Fijación de altavoces posteriores con insertos roscados Necesitará (13) Tornillo M4 de 7 mm (2) (11) Tornillos M5 × (14) Tornillo M4 de 10 mm (2) de 15 mm (2) (12) 0 Soporte en L (2)
- Page 29 Bases para altavoces satélite 2 Para altavoces con un solo agujero en la parte posterior - Fije el altavoz a la base utilizando una arandela M4 (12) y un tornillo M4 x 7 mm (13), un tornillo M4 x 10 mm (14), o un tornillo M5 x 12 mm (15) o un tornillo 1/4-20 x 1/2 in (16) sin arandela.
- Page 30 NS-SPST2B Opción 2: PASO 3 - Fijación de altavoces de montaje posterior con ranuras de bocallave Necesitará (06) Tornillo 1/4-20 × (11) Tornillo M5 05 Tuerca de ajuste 10 Soporte en L (2) 12 mm (2) de 15 mm (2) 1 Fije el soporte en L (10) al tubo superior (02) con un tornillo M5 x 15 mm (11), con la ranura para el cable del altavoz dispuesta como se muestra.
- Page 31 Bases para altavoces satélite 2 Fije el tornillo (06) 1/4-20 × 12 mm al soporte en L (10) con una tuerca de ajuste (05). Apriete bien. 3 Fije los altavoces a las bases deslizando las ranuras de la parte posterior de los altavoces sobre los tornillos de 1/4-20 ×...
- Page 32 NS-SPST2B Opción 3: PASO 3 - Fijación de los altavoces de montaje inferior Necesitará (11) Tornillo M5 de 15 mm (2) 07 Placa superior (2) (13) Tornillo M4 de 7 mm (2) Tornillo M5 de 12 mm (4) (12) Arandela M4...
- Page 33 Bases para altavoces satélite 2 Utilice tornillos M5 de 12 mm (15) o tornillos 1/4-20 x 1/2 pulg. (16). Apriete bien y pase a STEP 4 - Routing the speaker cables en la página 17. Opción B - Utilice una arandela M4 (12) y un tornillo M4 x 7 mm (13). Apriete bien y pase a STEP 4 - Routing the speaker cables.
- Page 34 NS-SPST2B Opción C - Fije las almohadillas de altavoz de doble cara (08) a las placas superiores (07) retirando el papel que cubre la superficie adhesiva de la parte inferior de las almohadillas y presionándolas firmemente sobre las placas superiores. Cuando las almohadillas estén firmemente adheridas a las placas...
- Page 35 Bases para altavoces satélite STEP 4 - Distribución de los cables de los altavoces Necesitará (17) Cinta autoadherente (10) Opción A - Pase los cables de los altavoces por la ranura para cables de los altavoces en la parte superior del tubo superior, luego por el conjunto de tubos y por el agujero del tubo inferior y por debajo de la base.
-
Page 36: Especificaciones
NS-SPST2B Opción B - Pase los cables por el exterior de los tubos y fíjelos a los tubos utilizando las cintas autoadherentes (17) según sea necesario. Especificaciones Dimensiones 23.01 × 26.36 x 71.12 a 96.5 cm (9.06 × 10.38 x 28 (Alto ×... -
Page 37: Garantía Limitada De Un Año
Los Productos y repuestos reemplazados bajo esta garantía se volverán propiedad de Insignia y no se le regresarán a usted. Si se requiere la reparación de Productos o partes después de que se vence el Período de garantía, usted deberá... - Page 38 • Daño debido al uso o mantenimiento inapropiado • Conexión a una fuente de voltaje o de alimentación incorrecta • Intento de reparación por cualquier persona que no sea autorizada por Insignia para reparar el Producto • Productos vendidos “tal cual” (en el estado en que se encuentran) o “con todas sus fallas”...
- Page 39 ©2023 Best Buy. All rights reserved. www.insigniaproducts.com 1-877-467-4289 (EE.UU. y Canadá) INSIGNIA es una marca comercial de Best Buy y sus compañías asociadas. Distribuido por Best Buy Purchasing, LLC 7601 Penn Ave South, Richfield, MN 55423 U.S.A. ©2023 Best Buy. Todos los derechos reservados.
Need help?
Do you have a question about the NS-SPST2B and is the answer not in the manual?
Questions and answers