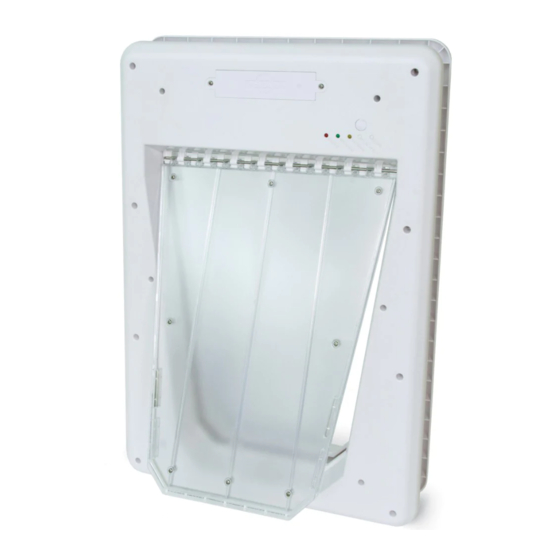
Petsafe SmartDoor Get Started
Hide thumbs
Also See for SmartDoor:
- Operating manual (128 pages) ,
- Manual (56 pages) ,
- Installation manual (12 pages)
Table of Contents
Advertisement
Quick Links
Advertisement
Table of Contents

Subscribe to Our Youtube Channel
Related Manuals for Petsafe SmartDoor


Summary of Contents for Petsafe SmartDoor
- Page 1 Get Started! See our installation video...
-
Page 2: Setup At A Glance
5. Install the SmartDoor in your home — see page 8. ™ Once you have completed the steps in this guide, remember to take the time to train your pet to use the SmartDoor . The ™ included training guide will walk you through our recommended training procedure step by step. -
Page 3: What You Have
What you need To connect the pet door to Wi-Fi and get set up in the app, you will need: • Wireless router (2.4 GHz) • Four alkaline batteries: C cell for the medium SmartDoor ™ , D cell for the large SmartDoor ™... - Page 4 Get to know your new pet door Although you will control most of the pet door functionality through the My PetSafe app, there are a few buttons and indicator ® lights on the pet door that are important to understand.
- Page 5 Lock Unlock Indicator Light color Meaning Yellow, slow blinking The SmartDoor ™ is powered on but not yet connected to the app, Wi-Fi, or the internet. Yellow, solid The SmartDoor ™ is connected to the app, but not Wi-Fi or the internet.
- Page 6 Locate the battery door on the top edge of the interior frame. Remove the battery door by pressing down and sliding it in the direction of the arrow. Insert four alkaline batteries (C cell for the medium SmartDoor , D cell for the large SmartDoor ™ ™ Replace the battery door.
-
Page 7: Download And Set Up The App
Download the My PetSafe ® app from your phone’s app store. Continuing in the app, add each pet to the SmartDoor ™ scanning their Pet Door Key. During the pairing process, move Open the app and follow the on-screen prompts to: the Pet Door Key a little to activate the motion sensor. -
Page 8: Plan Your Installation
You can purchase PetSafe accessories at petsafe.com or by contacting our Customer Care team. ® To install the SmartDoor ™... - Page 9 Install the SmartDoor in a door ™ Before installing the SmartDoor , make sure you have paired each of your pets to the SmartDoor in the My PetSafe app. It is ™ ™ ® best to resolve any pairing issues before installing the pet door in your home.
- Page 10 Mark the pet door location Measure your pet’s shoulder height when standing. If you have Draw a vertical line where you want the center of the pet more than one pet, measure the tallest one. Make a note of door to be. If your door has inset panels, consider how best this measurement.
- Page 11 Check for metal in your door It is important to check for metal in your door before installing the pet door. If not planned for, metallic materials in your door can interfere with the sensor in the SmartDoor ™ , affecting performance. To check for metal: Drill a 5/16-inch (8 mm) hole at the center of where you expect the pet door opening to be.
- Page 12 Position the cutting template Non-metal door Metal door Cut out the appropriate cutting template, based on what you Check the position of the cutting template and adjust it found when you drilled the test hole in your door. If your door: as needed: •...
- Page 13 Non-metal door Metal door Non-metal door Metal door Once you are satisfied with the placement of the template, use Make sure the cutting line is clearly marked on the door. a pencil to trace the outside of the cutting template. Make sure Remove the cutting template and excess tape from the door.
-
Page 14: Cut The Opening
Cut the opening Non-metal door Metal door If desired, remove your door from its hinges and place it on a Drill 1/2-inch (12 mm) holes through the door, just inside raised, level surface, such as two sawhorses. The interior side of the corners of the cutting line. - Page 15 Non-metal door Metal door Using a jigsaw, cut between the holes you just drilled, along the If you removed your door from its hinges, rehang it now. cutting line. Make sure your jigsaw blade is appropriate for the Now that you have cut the opening for the pet door, you are door material you are cutting through (wood, PVC, metal, etc.) ready to install it.
- Page 16 Install the pet door in a non-metal door Insert the interior frame into the opening on the interior side of Place the exterior frame on the exterior side of the door, fitting the door. it over the tunnel of the interior frame. Make sure the interior frame is level in the opening.
- Page 17 Remove the interior and exterior frames. Place the interior and exterior frames back in the opening. Make sure both frames are level. Drill 5/16-inch (8 mm) holes through the door at the marked locations. Hold the drill steady, straight and level. Holding both frames in place, insert screws through the holes in the exterior frame, through the holes in the door, and into the holes on the back of the exterior frame.
- Page 18 Install the pet door in a metal door Place the spacer at the bottom of the cut opening, in Insert the interior frame into the opening on the interior side of the middle. the door, on top of the spacer. Make sure the interior frame is horizontally centered and level in the opening.
- Page 19 Make sure the exterior and the metal in your door by reinstalling the pet door with frame is level. a larger cutout opening and SmartDoor Connected Pet ™ Door Installation Adaptors (sold separately). Step-by-step...
- Page 20 Now that your pet door is installed, it is time to train your pet to use it! See the training guide provided with your SmartDoor ™ for step-by-step instructions. With a little patience and a lot of praise, both you and your pet will soon be enjoying the security and freedom provided by your new pet door.
- Page 21 Grab some treats — it’s time to train!
-
Page 24: We're Here To Help
SmartDoor ™ Connected Pet Door We’re here to help! For questions or additional tips: +1 (800) 732-2677 support.petsafe.com 1-Year Warranty | ©2022 Radio Systems Corporation | Models: PPA00-17254, PPA00-17255 | L400-2542 For important safety instructions, please see the customer care guide.
Need help?
Do you have a question about the SmartDoor and is the answer not in the manual?
Questions and answers