Advertisement
Advertisement

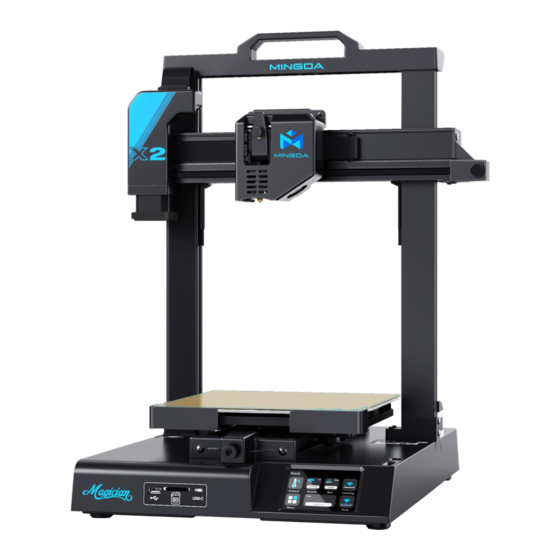
Summary of Contents for Mingda Magician X2
- Page 1 Magician X2 Instructions for quick assembly V1.1...
-
Page 2: Table Of Contents
CONTENTS Accessories ----------------------------------------------------------- 01 Assemble ------------------------------------------------------------ 02 Auto-leveling ------------------------------------------------------- 06 Preheat --------------------------------------------------------------- 07 Insert the Filament ----------------------------------------------- 08 Printing ----------------------------------------------------------------- 09 ------------------------------------------------------- 10 Z-offset adjust Software Instructions ----------------------------------------------- 11... -
Page 3: Accessories
Accessories Extruder Gantry The Main Chassis Toolkit Filament User manual Nozzle Filament holder SD card Wrench Power cable Allen wrench Teflon tube M4*20 (4pcs) M3*8 (2pcs) M4*10 (2pcs) M5*25 (2pcs) -
Page 4: Assemble
Assemble Step 1 Install the gantry M5*25 (2pcs) Note: The power supply has been adjusted according to the local voltage. If you need to adjust the voltage, please follow the picture to operate it. Note: To avoid bending the lead screw and effect the printing model, don't touch or twist the lead screw when take out the gantry from the package. - Page 5 Step 2 Install the fixing plate screw M4*20(4pcs) Step 3 Install the Filament Holder The filament holder can be installed left and right...
- Page 6 Step 4 Connect Cable M3*8(2pcs) Hotbed cable Z Motor 1 cable Z Motor 2 cable Arranging Wire Note: If you find there is a little shaking on extruder,bed or X-axis, don't worry, this is caused by long-term transportation. Please refer to the adjustment video link in the SD card to adjust, it is helpful.
- Page 7 Step 5 Install the Extruder M4*10(2pcs) 1.Push the extruder parallel into the 2.Use M4*10 screws to fix the 3.Connect the ribbon cable to the support, make sure the screw holes extruder on the support. port on the right side of the on the top of the extruder are extruder.
-
Page 8: Auto-Leveling
Auto-leveling Plug in the cable and turn on the Click “Leveling” on main interface The printer will start auto-leveling after power preheat. Nota: le informazioni sull'interfaccia utente sono solo per riferimento, l'interfaccia utente effettiva potrebbe essere diversa. -
Page 9: Preheat
Preheat Click “preheat” on the main According to your filament, select interface appropriate settings Nota: le informazioni sull'interfaccia utente sono solo per riferimento, l'interfaccia utente effettiva potrebbe essere diversa. -
Page 10: Insert The Filament
Insert the filament In order to feed filament smoothly, Click “load” to feed the Insert SD card Please keep the end of the filament filament until the filament is at 90°. out of nozzle. Nota: le informazioni sull'interfaccia utente sono solo per riferimento, l'interfaccia utente effettiva potrebbe essere diversa. -
Page 11: Printing
Printing Select a gcode file to print Nota: le informazioni sull'interfaccia utente sono solo per riferimento, l'interfaccia utente effettiva potrebbe essere diversa. -
Page 12: Z-Offset Adjust
Z-offset adjust When you start your first printing,adjust the Babystep value according to the adhesion of the filament and the glass platform. Click “Save” to save your setting, and you don’t need to adjust the value again next time. [Note: Z-off set use for the first layer only] If the distance between the nozzle Keep the distance between the If the distance between the nozzle... -
Page 13: Software Instructions
Software Instructions Magician X2 works with a variety of slicing software, such as Cura, Simplify 3D, Repetier-Host, and more. We will introduce CURA_xx.xx in detail, and you will learn how to set the slicing parameters, which will help you become more familiar with the slicing software and print your first model successfully. - Page 14 Click Add printer Choose Custom[Custom FFF printer ], insert Printer name for example Magician X2,and Click Add Insert print size, X230 Y230 Z260, select Heated bed Click Extruder 1, nozzle size 0.4mm, Compatible material diameter 1.75mm, Click next...
- Page 15 Step 2 Import Configuration file Click Preferences, Configure Cura… Click Profiles, Import Choose PLA+.curaprofile in SD card...
- Page 16 After Import the profile, you will see it below, On the right side you can see PLA+ active choose PLA+, and click Activate Step 3 Slicing Click here, you can check all the parameter, when you move mouse Click load button you can load a stl file, you can move, on it will show the explanation to help you under more clearly rotate, and Zoom the model.
- Page 17 After slice completed, you can see the time and weight of We suggest you click PREVIEW to check, you can choose material that the printing will take; line Type and Drag the slider on the right side to see the printing process clearly.
- Page 18 For detailed warranty policy, please visit http://www.3dmingda.cc/single/request_after_sales_service.html For support ,please visit our Youtube Channel https://www.youtube.com/channel/UC6PO64H7CfQtBy4H-fSRM4A?view_as=subscriber Or you can visit our Facebook group at https://www.facebook.com/groups/1018823731846578 Shenzhen MINGDA Technology Co.,LTD Email: info@3dmingda.com www.3dmingda.cc Support request Youtube Channel Facebook Page Official website...


Need help?
Do you have a question about the Magician X2 and is the answer not in the manual?
Questions and answers